Beginner’s guide · Make & create
Lay the wool in thin crossing layers,
then let water, soap and motion do the joining.
Wet felting mats loose wool fibres with moisture, soap and controlled agitation. Start with one flat colour-and-shrinkage sample.
Quick answer
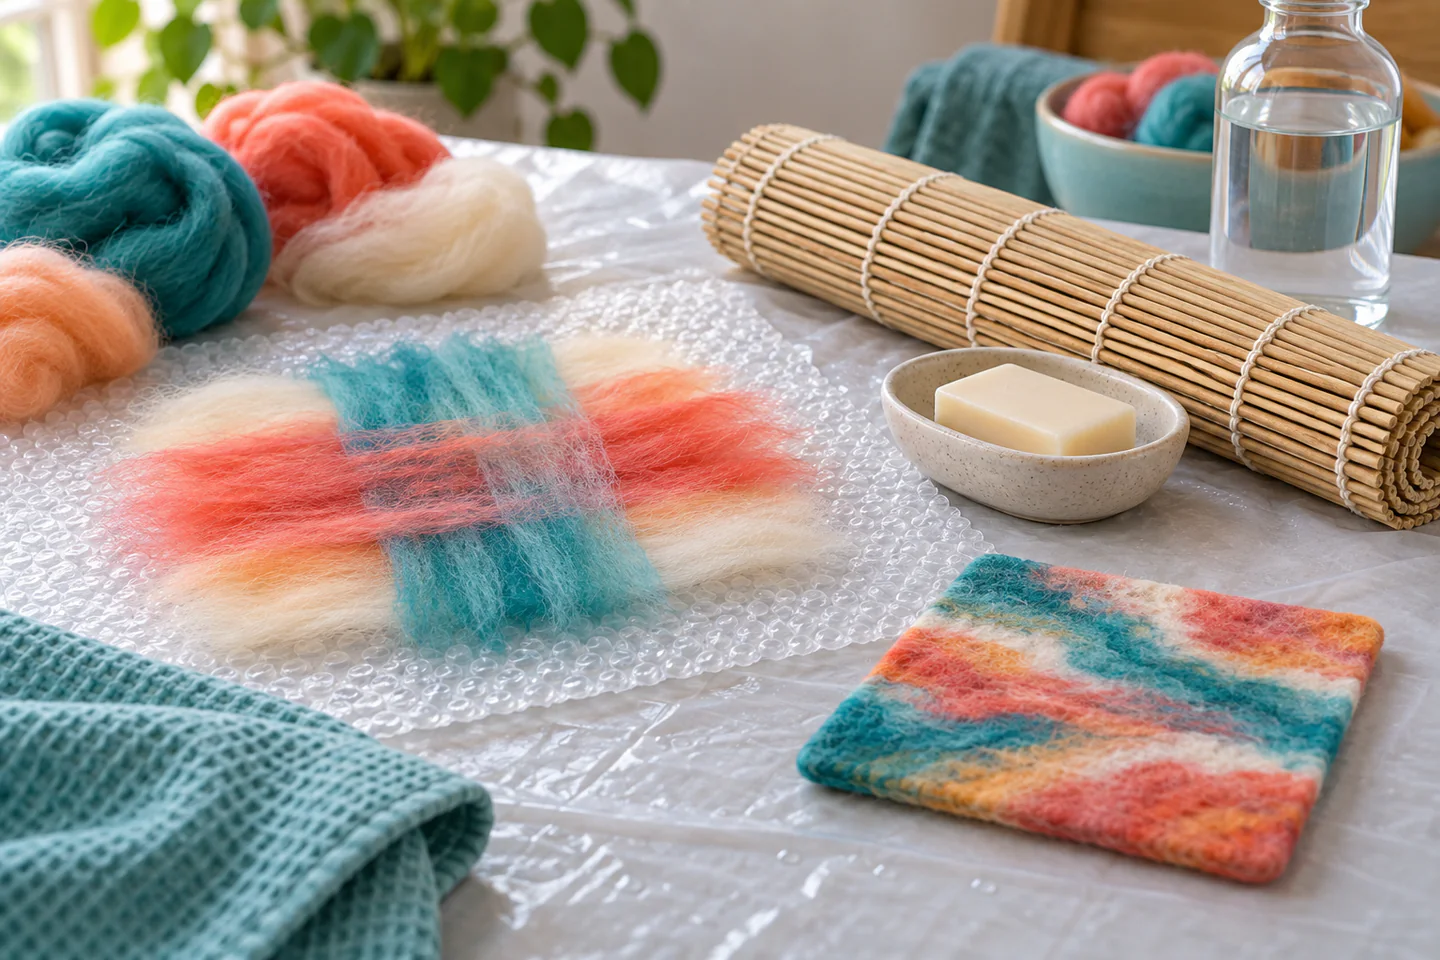
Complete one a two-colour flat felt square before expanding the setup
Weigh enough wool for a postcard-sized test and lay several thin perpendicular layers on a textured mat. Wet evenly with a mild labelled soap solution, cover and press out air without displacing fibres, rub gently until the surface holds, then roll from several directions. Rinse, reshape, measure shrinkage and dry flat before evaluating density.
- 01
Wet felting relies on suitable animal fibres whose scales migrate and lock under moisture, soap and movement. For a first wet felting attempt, keep the materials, measurements and sequence written beside the work. Photograph or measure the result before correcting it, because a visible record separates a technique problem from a material or setup problem.
- 02
Several thin crossing layers produce more even cloth than one thick opaque layer. For a first wet felting attempt, keep the materials, measurements and sequence written beside the work. Photograph or measure the result before correcting it, because a visible record separates a technique problem from a material or setup problem.
- 03
Fibre should be wetted through without floating away or forming dry islands. For a first wet felting attempt, keep the materials, measurements and sequence written beside the work. Photograph or measure the result before correcting it, because a visible record separates a technique problem from a material or setup problem.
- 04
Shrinkage is part of fulling and must be measured before planning a fitted object. For a first wet felting attempt, keep the materials, measurements and sequence written beside the work. Photograph or measure the result before correcting it, because a visible record separates a technique problem from a material or setup problem.
What to expect
What wet felting is really like at the start
The useful beginner controls are setup, repeatable movement and a finished sample. Laying even fibre weight and knowing when felt is fully fulled is the main skill to observe before adding scale or decoration.
Layout
Thick edges and thin centres remain visible after fulling. For a first wet felting attempt, keep the materials, measurements and sequence written beside the work. Photograph or measure the result before correcting it, because a visible record separates a technique problem from a material or setup problem.
Water
Too much force or flow moves the design before fibres begin to hold. For a first wet felting attempt, keep the materials, measurements and sequence written beside the work. Photograph or measure the result before correcting it, because a visible record separates a technique problem from a material or setup problem.
Soap
More soap is not automatically faster and creates extra skin and rinse exposure. For a first wet felting attempt, keep the materials, measurements and sequence written beside the work. Photograph or measure the result before correcting it, because a visible record separates a technique problem from a material or setup problem.
Fulling
A surface skin can form before the interior becomes a stable fabric. For a first wet felting attempt, keep the materials, measurements and sequence written beside the work. Photograph or measure the result before correcting it, because a visible record separates a technique problem from a material or setup problem.
Core method
The core wet felting method
Weigh and divide fibre
Split the total into equal thin layers and reserve a small amount for edge correction. For a first wet felting attempt, keep the materials, measurements and sequence written beside the work. Photograph or measure the result before correcting it, because a visible record separates a technique problem from a material or setup problem.
Lay at right angles
Shingle wisps evenly, extend every layer to the planned boundary and inspect against light. For a first wet felting attempt, keep the materials, measurements and sequence written beside the work. Photograph or measure the result before correcting it, because a visible record separates a technique problem from a material or setup problem.
Wet and establish the skin
Apply controlled soapy water, cover and press before beginning gentle rubbing. For a first wet felting attempt, keep the materials, measurements and sequence written beside the work. Photograph or measure the result before correcting it, because a visible record separates a technique problem from a material or setup problem.
Roll, rinse and measure
Change direction regularly, stop when the cloth is stable, rinse by label guidance and record shrinkage. For a first wet felting attempt, keep the materials, measurements and sequence written beside the work. Photograph or measure the result before correcting it, because a visible record separates a technique problem from a material or setup problem.
Useful products
Products with a clear job in the route
These two products cover distinct jobs in the beginner route; they are not a requirement to buy a bundle. Use materials already owned when they meet the same specification, and confirm every live listing before ordering.
ULTNICE Natural White Wool Roving Fibre, 200 g
A pale consistent fibre makes layout direction and migration easier to inspect.
Unigloves Pearl Nitrile Examination Gloves
Correctly fitted nitrile allows more control than oversized kit gloves.
First project
Make a two-colour flat felt square
Keep the project small enough to finish, inspect and repeat. The first result is evidence about material compatibility, sequence and control rather than a performance test.
- 01
Prepare the workspace and materials
Split the total into equal thin layers and reserve a small amount for edge correction. For a first wet felting attempt, keep the materials, measurements and sequence written beside the work. Photograph or measure the result before correcting it, because a visible record separates a technique problem from a material or setup problem.
- 02
Make the first controlled pass
Shingle wisps evenly, extend every layer to the planned boundary and inspect against light. For a first wet felting attempt, keep the materials, measurements and sequence written beside the work. Photograph or measure the result before correcting it, because a visible record separates a technique problem from a material or setup problem.
- 03
Check the central technique
Apply controlled soapy water, cover and press before beginning gentle rubbing. For a first wet felting attempt, keep the materials, measurements and sequence written beside the work. Photograph or measure the result before correcting it, because a visible record separates a technique problem from a material or setup problem.
- 04
Complete the structure
Change direction regularly, stop when the cloth is stable, rinse by label guidance and record shrinkage. For a first wet felting attempt, keep the materials, measurements and sequence written beside the work. Photograph or measure the result before correcting it, because a visible record separates a technique problem from a material or setup problem.
- 05
Finish, measure and record
Let the work settle or dry by the relevant material instructions, then measure, photograph and label the result. Record the one change that would make the next wet felting attempt more controlled. For a first wet felting attempt, keep the materials, measurements and sequence written beside the work. Photograph or measure the result before correcting it, because a visible record separates a technique problem from a material or setup problem.
What can wait
What can wait until the first result
Delay anything that adds cost, risk or another variable before the basic workflow has produced something you can review.
- 01
Slippers or hats
Three-dimensional fit requires a resist and shrinkage calculation. For a first wet felting attempt, keep the materials, measurements and sequence written beside the work. Photograph or measure the result before correcting it, because a visible record separates a technique problem from a material or setup problem.
- 02
Very fine pictorial detail
The design can migrate while basic layout is still uneven. For a first wet felting attempt, keep the materials, measurements and sequence written beside the work. Photograph or measure the result before correcting it, because a visible record separates a technique problem from a material or setup problem.
- 03
Unknown detergent
Use a mild labelled product and protect skin. For a first wet felting attempt, keep the materials, measurements and sequence written beside the work. Photograph or measure the result before correcting it, because a visible record separates a technique problem from a material or setup problem.
- 04
Large rug
Weight, drainage and fulling effort increase rapidly. For a first wet felting attempt, keep the materials, measurements and sequence written beside the work. Photograph or measure the result before correcting it, because a visible record separates a technique problem from a material or setup problem.
Upgrade path
Add the capability you can now name
Each stage should remove a demonstrated limitation rather than make the setup look more advanced.
Flat sample
Use owned tools where possibleOne small sample and written notes
Learn the central movement and material behaviour.Resist pouch
About £20–£80A repeatable complete starter setup
Repeat the result with cleaner finish and fewer corrections.Fitted hat or slippers
About £50–£180A selected tool or structured class
Add one technique, size or design capability.Large sculptural textile
Cost varies widelyA documented specialist workflow
Develop original work with provenance, testing and appropriate safety.Safety & care
Safety, care and respectful practice in wet felting
The practical risks are manageable when tools, materials and cultural claims remain specific and proportionate.
- Protect floors from slippery soapy water and wipe spills immediately. For a first wet felting attempt, keep the materials, measurements and sequence written beside the work. Photograph or measure the result before correcting it, because a visible record separates a technique problem from a material or setup problem.
- Wear suitable gloves if soap or wet wool irritates the skin. For a first wet felting attempt, keep the materials, measurements and sequence written beside the work. Photograph or measure the result before correcting it, because a visible record separates a technique problem from a material or setup problem.
- Use comfortably warm rather than scalding water. For a first wet felting attempt, keep the materials, measurements and sequence written beside the work. Photograph or measure the result before correcting it, because a visible record separates a technique problem from a material or setup problem.
- Lift wet rolls safely and vary posture during repeated rolling. For a first wet felting attempt, keep the materials, measurements and sequence written beside the work. Photograph or measure the result before correcting it, because a visible record separates a technique problem from a material or setup problem.
- Keep all dye, soap and craft containers separate from food use. For a first wet felting attempt, keep the materials, measurements and sequence written beside the work. Photograph or measure the result before correcting it, because a visible record separates a technique problem from a material or setup problem.
Outside help
When outside help earns its place
A guided session is useful when equipment setup, live hand correction, heat, sharp tools or a specialist press blocks safe progress. A clear source is enough for the smallest wet felting sample.
Choose one coherent lesson that covers preparation, the central wet felting technique, finishing and common mistakes.
Ask which tools and materials are included, whether the project can be finished in the session and what safety induction is provided.
Representative UK learning and access routes checked 20 September 2026; local prices, equipment and tutor support vary.
Sources
Where the guidance came from
Authoritative and specialist guidance supports the method, terminology and safety boundaries; community discussion contributes recurring beginner problems rather than unsupported claims.
-
01
Victoria and Albert Museum · Textiles
Museum material and historical context for textile construction.
Open source -
02
Heritage Crafts · Craft inventory
Current UK craft-status and practitioner context.
Open source -
03
Guild of Weavers, Spinners and Dyers
UK guild learning, terminology and local-group routes.
Open source -
04
Textile Research Centre · Encyclopaedia
Specialist textile structures and historical terminology.
Open source -
05
The Textile Society
Textile research, conservation and maker context.
Open source -
06
Reddit · r/weaving
Recurring practitioner evidence on tension, tools and finishing.
Open source -
07
Amazon UK · Natural White Wool Roving Fibre, 200 g
Exact Amazon UK catalogue page or ISBN used for the recommendation; confirm current price, seller, specification and availability.
Open source -
08
Amazon UK · Pearl Nitrile Examination Gloves
Exact Amazon UK catalogue page or ISBN used for the recommendation; confirm current price, seller, specification and availability.
Open source
Guide information and links checked 20 September 2026.