Beginner’s guide · Make & create
Build colour
one canvas square at a time.
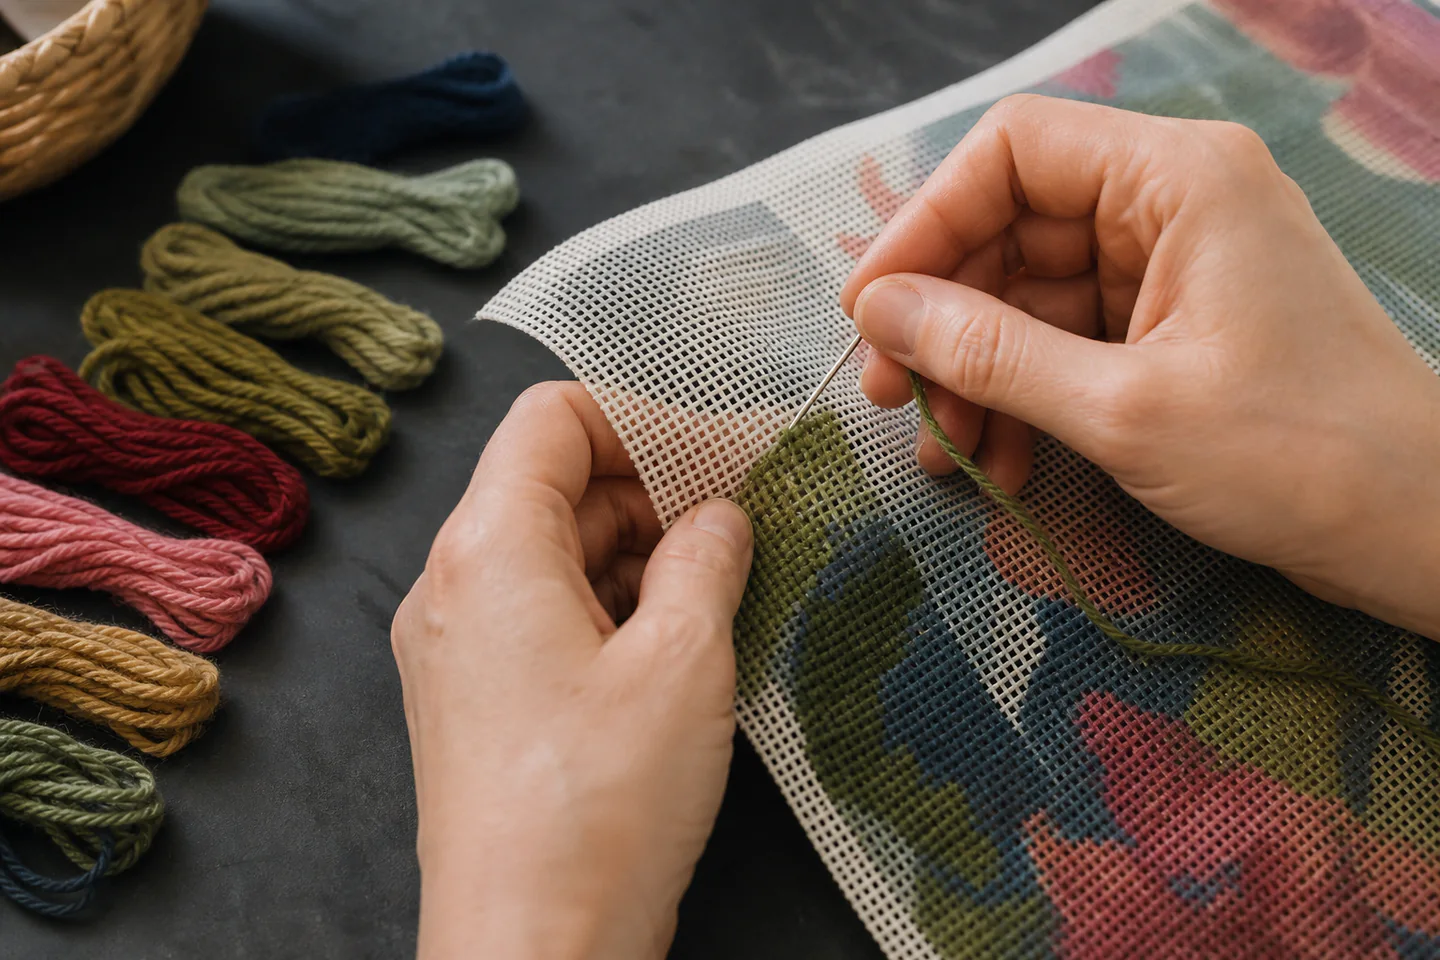
Start with a printed open-mesh canvas, tapestry wool and one simple tent stitch. The canvas controls placement; your job is to learn even coverage and comfortable tension.
Quick answer
Start with a complete printed canvas
Choose a small needlepoint or tapestry kit with a clearly printed design, all yarns and a blunt needle. Work basketweave or continental tent stitch consistently across a modest area before experimenting with decorative stitches.
- 01
Match the needle and yarn to the mesh size rather than forcing thick yarn through a fine canvas. Note the material, setting or measurement used so the result can be repeated or changed for a reason.
- 02
Bring the needle straight through each hole so the yarn does not split or abrade the canvas. Note the material, setting or measurement used so the result can be repeated or changed for a reason.
- 03
Leave the yarn comfortably firm, not tight enough to distort the rectangular mesh. Note the material, setting or measurement used so the result can be repeated or changed for a reason.
- 04
Turn or secure loose tails on the back without making knots that create hard lumps. Note the material, setting or measurement used so the result can be repeated or changed for a reason.
- 05
Work in good light and stop when hand tension becomes less consistent. Note the material, setting or measurement used so the result can be repeated or changed for a reason.
What to expect
The picture is printed; the finish is still learned
Needlepoint is easy to begin because placement is visible, but an even, durable surface comes from repetition rather than speed.
Coverage
The canvas should disappear without the wool becoming crowded. A small test shows whether the supplied strand count suits the mesh. For needlepoint, check this deliberately while the work is still easy to alter; correcting it after the next stage usually costs more time or materials.
Tension
Every stitch should sit flat with similar firmness. Pulling hard narrows the canvas and complicates blocking later. For needlepoint, check this deliberately while the work is still easy to alter; correcting it after the next stage usually costs more time or materials.
Direction
Consistent stitch direction reflects light evenly. Changing direction accidentally creates visible patches even in one colour. For needlepoint, check this deliberately while the work is still easy to alter; correcting it after the next stage usually costs more time or materials.
Finishing
A completed canvas normally needs blocking and a planned use such as a cushion panel, ornament or framed piece. For needlepoint, check this deliberately while the work is still easy to alter; correcting it after the next stage usually costs more time or materials.
Core method
Read the mesh before following the picture
Identify the canvas
Count mesh openings over an inch if the kit does not state the size, then use the supplied tapestry needle and yarn as the baseline. For needlepoint, check this deliberately while the work is still easy to alter; correcting it after the next stage usually costs more time or materials.
Learn one tent stitch
Practise continental or basketweave on a background corner. Both cover one mesh intersection at a time but travel differently on the back. For needlepoint, check this deliberately while the work is still easy to alter; correcting it after the next stage usually costs more time or materials.
Plan colour areas
Start with a mid-sized shape rather than the tiniest detail or the whole background. Work a manageable strand and avoid carrying it across open areas. For needlepoint, check this deliberately while the work is still easy to alter; correcting it after the next stage usually costs more time or materials.
Protect the work
Keep clean hands, roll rather than fold unfinished canvas and store needles securely in a magnetic minder or case. For needlepoint, check this deliberately while the work is still easy to alter; correcting it after the next stage usually costs more time or materials.
Useful products
Products with a clear job in the setup
A complete design is the least confusing first purchase. These are genuine needlepoint or tapestry items, not ordinary surface-embroidery kits.
Trimits Half Stitch Tapestry Kit – Hedgehog on 6 Count Printed Canvas
The coarse printed canvas makes placement obvious and keeps the first project finite.
Wool and the Gang Botanical Needlepoint Kit
It shows what a polished kit can look like without requiring separate canvas and yarn choices.
DMC Poppy Field Tapestry and Needlepoint Kit by Jo Aston
The design gives more colour changes while keeping the technique recognisably beginner friendly.
First project
Complete one palm-sized area cleanly
Treat the first kit as a tension sample that also becomes a finished object.
- 01
Sort the yarn
Match every supplied colour to the chart or printed key before stitching and keep cut lengths together. For needlepoint, check this deliberately while the work is still easy to alter; correcting it after the next stage usually costs more time or materials.
- 02
Thread without knots
Cut a comfortable length, use the blunt tapestry needle and leave a short tail to catch beneath later stitches. For needlepoint, check this deliberately while the work is still easy to alter; correcting it after the next stage usually costs more time or materials.
- 03
Work a defined shape
Follow one stitch direction across a mid-sized colour area, checking the front and back every few rows. For needlepoint, check this deliberately while the work is still easy to alter; correcting it after the next stage usually costs more time or materials.
- 04
Correct early
Unpick a wrong colour or crossed direction while only a few stitches are affected; do not bury the problem under later rows. For needlepoint, check this deliberately while the work is still easy to alter; correcting it after the next stage usually costs more time or materials.
- 05
Block and finish
Follow the kit instructions for gentle blocking, then mount or make up the canvas only when it is square and dry. For needlepoint, check this deliberately while the work is still easy to alter; correcting it after the next stage usually costs more time or materials.
What can wait
What can wait until the first result
The first result needs a matched canvas and yarn, not a studio of specialist frames and finishing equipment.
- 01
Large floor frame
A small canvas can be held carefully or used with compact stretcher bars. Buy support only if hand strain or distortion keeps recurring. For needlepoint, check this deliberately while the work is still easy to alter; correcting it after the next stage usually costs more time or materials.
- 02
Decorative stitch encyclopaedia
Texture is rewarding later, but one consistent tent stitch teaches coverage and tension more clearly. For needlepoint, check this deliberately while the work is still easy to alter; correcting it after the next stage usually costs more time or materials.
- 03
Loose designer canvas
A painted canvas often excludes threads and finishing, so it creates several expensive decisions before any stitching begins. For needlepoint, check this deliberately while the work is still easy to alter; correcting it after the next stage usually costs more time or materials.
Upgrade path
Upgrade the repeated limitation
Spend after the first canvas reveals whether comfort, design choice or finishing is the actual limit.
Try it
£18–£45Printed kit, tapestry needle and supplied wool
Everything matches, so attention stays on stitch placement and tension.Improve comfort
£10–£35 extraStretcher bars, needle minder and better task light
Longer sessions become easier and the canvas stays squarer.Choose materials
£35–£100+Separate canvas, chart or painted design and selected fibres
Colour, texture and scale become deliberate rather than kit-defined.Finish professionally
VariableBlocking and specialist cushion or framing service
A carefully stitched canvas becomes a durable display or usable object.Safety & care
Protect hands, eyes and the canvas
Needlepoint is low risk, but long sessions and poor storage cause avoidable strain and damage.
- Use a blunt tapestry needle suited to the mesh and store it in a closed case when not in use. Follow the current instructions supplied with the exact material or tool.
- Take regular hand, shoulder and focus breaks; persistent pain is not part of learning the craft. Follow the current instructions supplied with the exact material or tool.
- Keep food, drinks, pets and dirty hands away from light canvas and wool. Follow the current instructions supplied with the exact material or tool.
- Follow fibre-care instructions and test any cleaning method on spare materials rather than soaking a finished canvas. Follow the current instructions supplied with the exact material or tool.
Outside help
When outside help earns its place
A full beginner video is enough for tent stitch. A class is most useful when blocking, decorative stitches or finishing keep creating uncertainty.
Use one complete lesson that includes preparation, the working method, troubleshooting and finishing. Avoid combining measurements from several creators on the first attempt.
Ask whether materials, safe tool use, individual correction and a finished take-home result are included before booking.
Representative UK learning options checked 29 August 2026; local prices, access, materials and tutor support vary.
Sources
Where the guidance came from
The method is grounded in specialist and manufacturer guidance, then checked against recurring beginner problems and the exact products linked here.
-
01
Royal School of Needlework · Stitch Bank
Technique reference for stitch construction and consistent handling.
Open source -
02
DMC · Tapestry and needlepoint
Manufacturer overview of tapestry materials and technique.
Open source -
03
Needlepoint Now · Basics
Specialist context for canvas work, stitching and finishing.
Open source -
04
Victoria and Albert Museum · Embroidery
Museum context for canvas and stitched textile traditions.
Open source -
05
The Embroiderers’ Guild
UK textile organisation used for learning and practice context.
Open source -
06
Amazon UK · Half Stitch Tapestry Kit – Hedgehog on 6 Count Printed Canvas
Exact product catalogue page or ISBN used for the recommendation; current price, seller, specification and availability should be confirmed.
Open source -
07
Amazon UK · Botanical Needlepoint Kit
Exact product catalogue page or ISBN used for the recommendation; current price, seller, specification and availability should be confirmed.
Open source -
08
Amazon UK · Poppy Field Tapestry and Needlepoint Kit by Jo Aston
Exact product catalogue page or ISBN used for the recommendation; current price, seller, specification and availability should be confirmed.
Open source
Guide information and links checked 29 August 2026.