Beginner’s guide · Make & build
Prove the board first,
add one circuit at a time.
ESP32 boards offer Wi-Fi, Bluetooth and many pins, but they are less guided than educational boards. Start with a known kit, USB serial test and one LED.
Quick answer
Identify the exact board before copying any pin diagram
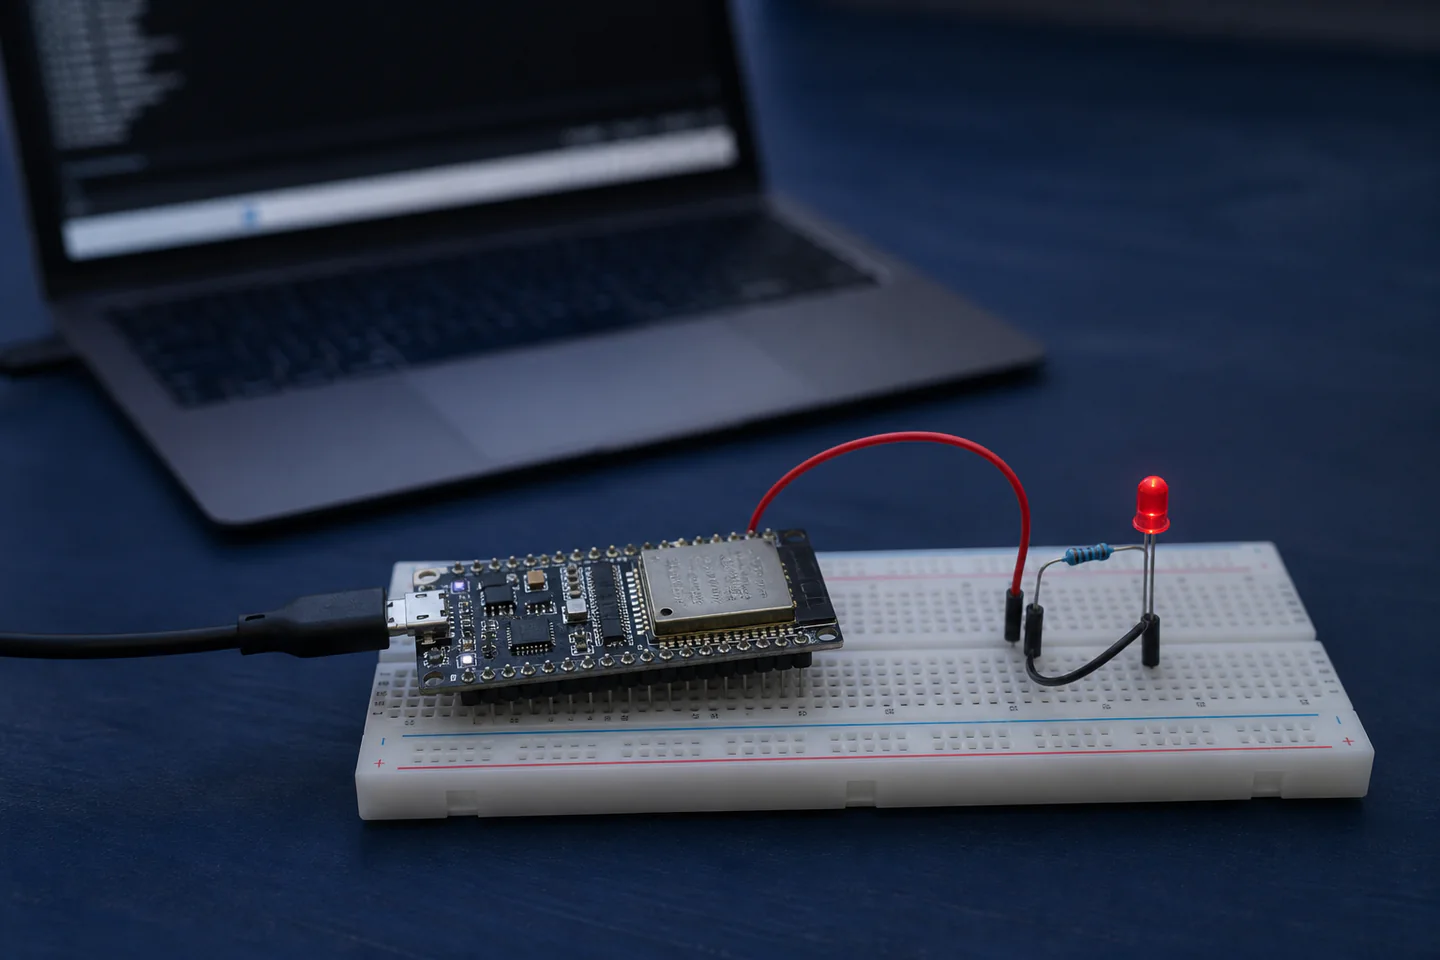
Choose one documented ESP32 development-board kit, install the supported Arduino IDE or vendor toolchain and select the exact board profile and port. Upload a serial hello-world or blink example with no external circuit, then save that known working state. On an unpowered breadboard, add one LED with a correctly calculated resistor to a safe general-purpose pin and ground. Reconnect, upload and verify the pin state before adding a sensor.
- 01
Choose one documented ESP32 development kit and data USB cable for the first result and resist substituting several unfamiliar materials at once. Record what you used on the first attempt so the result can be repeated or changed for a reason.
- 02
Make exact board identity, pin map and one-change testing visible with a small test before committing the full project. Record what you used on the first attempt so the result can be repeated or changed for a reason.
- 03
Change one variable between attempts and keep the preparation otherwise consistent. Record what you used on the first attempt so the result can be repeated or changed for a reason.
- 04
Inspect the work at each reversible stage instead of waiting until a labelled low-voltage breadboard circuit. Record what you used on the first attempt so the result can be repeated or changed for a reason.
- 05
Finish one modest result and note the actual time, material use and recurring difficulty. Record what you used on the first attempt so the result can be repeated or changed for a reason.
What to expect
ESP32 is a family, not one interchangeable board
Different modules, USB chips, pin labels and power arrangements mean a tutorial can be correct yet unsuitable for the board on the desk.
Identity
Read the module and development-board markings and use that board’s pinout. In esp32 projects, this is worth checking deliberately rather than trying to correct it after the next stage.
Drivers
The USB-to-serial chip and cable determine whether a port appears. In esp32 projects, this is worth checking deliberately rather than trying to correct it after the next stage.
Voltage
GPIO is generally 3.3 V logic and is not 5 V tolerant by default. In esp32 projects, this is worth checking deliberately rather than trying to correct it after the next stage.
Boot
Some boards require a boot-button sequence or specific pin states during upload. In esp32 projects, this is worth checking deliberately rather than trying to correct it after the next stage.
Network
Wi-Fi projects introduce credentials, updates and devices that remain reachable after the novelty ends. In esp32 projects, this is worth checking deliberately rather than trying to correct it after the next stage.
Core method
Establish a known working board before wiring
Record the exact hardware
Photograph markings, download the board pinout and note the USB connector and serial chip. In esp32 projects, this is worth checking deliberately rather than trying to correct it after the next stage.
Upload a minimal example
Use the supported board package, correct port and a data cable with no external components. In esp32 projects, this is worth checking deliberately rather than trying to correct it after the next stage.
Build one unpowered circuit
Place one LED and resistor on the breadboard, trace every node and check ground. In esp32 projects, this is worth checking deliberately rather than trying to correct it after the next stage.
Add sensors incrementally
Use documented voltage-compatible modules and preserve each working program before the next change. In esp32 projects, this is worth checking deliberately rather than trying to correct it after the next stage.
Useful products
Products with a clear job in the setup
The USB-C super starter kit is the broad board-and-components route. The 35-component kit is an alternative, while Freenove’s ESP32-CAM set is a later camera-specific project. Buy one core kit.
Generic ESP-32 Super Starter Kit with USB-C Board
A board, resistors, LEDs and breadboard support the essential staged tests.
Generic ESP32 Starter Kit with 35+ Components
The component range can support multiple projects without unrelated purchases.
Freenove Freenove ESP32-CAM Basic Starter Kit
A documented kit reduces the integration burden of camera pin use.
First project
Blink one external LED and print its state
This proves upload, serial output, ground, a safe GPIO and one current-limited component without hiding errors in a larger project.
- 01
Identify board and cable
Record model markings and confirm the cable carries data. In esp32 projects, this is worth checking deliberately rather than trying to correct it after the next stage.
- 02
Upload serial output
Run a minimal example and view the correct baud rate. In esp32 projects, this is worth checking deliberately rather than trying to correct it after the next stage.
- 03
Disconnect all power
Build an LED-and-resistor circuit from the exact board pin map. In esp32 projects, this is worth checking deliberately rather than trying to correct it after the next stage.
- 04
Trace the breadboard
Check rail continuity, polarity, resistor and shared ground. In esp32 projects, this is worth checking deliberately rather than trying to correct it after the next stage.
- 05
Upload the blink program
Use a conservative interval and print each state to serial. In esp32 projects, this is worth checking deliberately rather than trying to correct it after the next stage.
- 06
Save the known version
Photograph wiring, label the pin and archive the working code before adding a sensor. In esp32 projects, this is worth checking deliberately rather than trying to correct it after the next stage.
What can wait
What can wait until the first result
Cloud dashboards and camera streaming add security and networking before basic electrical debugging is reliable.
- 01
Mains relay project
Do not expose mains voltage in a beginner breadboard build. In esp32 projects, this is worth checking deliberately rather than trying to correct it after the next stage.
- 02
Lithium battery design
Charging, protection and enclosure need a verified engineered system. In esp32 projects, this is worth checking deliberately rather than trying to correct it after the next stage.
- 03
Cloud-connected camera
Credentials, privacy and patching become part of the hobby. In esp32 projects, this is worth checking deliberately rather than trying to correct it after the next stage.
- 04
Large sensor bundle wiring
Multiple unknown modules make faults difficult to isolate. In esp32 projects, this is worth checking deliberately rather than trying to correct it after the next stage.
- 05
Permanent soldered board
Keep the first circuits reversible until the pin plan is proven. In esp32 projects, this is worth checking deliberately rather than trying to correct it after the next stage.
Upgrade path
Upgrade the repeated limitation
Add connectivity only when the local device is already safe and understandable.
Board-only test
About £10–£25ESP32 board and data cable
Prove toolchain and serial.Breadboard project
About £20–£55Starter kit and documented circuit
Learn safe GPIO.Local sensor device
About £35–£100Known sensor and enclosure
Collect useful local data.Maintained network device
About £80–£300+Security plan, power supply and updates
Operate responsibly over time.Safety & care
Respect 3.3 V logic, current limits and network security
An inexpensive board can still be destroyed by incorrect voltage or become an unmanaged network endpoint.
- Disconnect every power source before changing breadboard wiring. Follow the current instructions supplied with the exact material, tool or living specimen.
- Never place mains voltage on a breadboard or route it through an exposed hobby relay. Follow the current instructions supplied with the exact material, tool or living specimen.
- Check GPIO voltage, current and boot restrictions in Espressif and board-specific documentation. Follow the current instructions supplied with the exact material, tool or living specimen.
- Use protected approved power supplies and stop immediately if a component heats, smells or discolours. Follow the current instructions supplied with the exact material, tool or living specimen.
- Keep Wi-Fi credentials out of shared code and maintain or disconnect deployed network projects. Follow the current instructions supplied with the exact material, tool or living specimen.
Outside help
When outside help earns its place
A complete beginner tutorial is enough for the first controlled attempt. A class becomes useful when circuit design, soldering or secure network deployment becomes the obstacle.
Follow one method using one documented ESP32 development kit and data USB cable, including preparation and finishing rather than only the photogenic middle stage.
Check whether materials, troubleshooting, a labelled low-voltage breadboard circuit and a finished take-home result are included.
Representative UK learning options checked 28 August 2026; local prices, access, materials and tutor support vary.
Sources
Where the guidance came from
The method is grounded in specialist and public guidance, then checked against recurring beginner questions and the exact products linked here.
-
01
BBC micro:bit · get started
Primary beginner setup and projects.
Open source -
02
Microsoft MakeCode for micro:bit
Official block and text programming environment.
Open source -
03
Espressif · ESP32 documentation
Primary ESP32 hardware and software documentation.
Open source -
04
Arduino · electronics foundations
Beginner circuit and component learning.
Open source -
05
Reddit · r/esp32
Community evidence on boards, drivers, power and project problems.
Open source -
06
Amazon UK · ESP-32 Super Starter Kit with USB-C Board
Exact product catalogue page or ISBN used for the recommendation; current price, seller, specification and availability should be confirmed.
Open source -
07
Amazon UK · ESP32 Starter Kit with 35+ Components
Exact product catalogue page or ISBN used for the recommendation; current price, seller, specification and availability should be confirmed.
Open source -
08
Amazon UK · Freenove ESP32-CAM Basic Starter Kit
Exact product catalogue page or ISBN used for the recommendation; current price, seller, specification and availability should be confirmed.
Open source
Guide information and links checked 28 August 2026.