Beginner’s guide · Make & create
Read one square,
tie one clean knot.
A printed cushion kit keeps the canvas, yarn lengths and chart together. Learn the latch motion and edge finishing before designing a full rug.
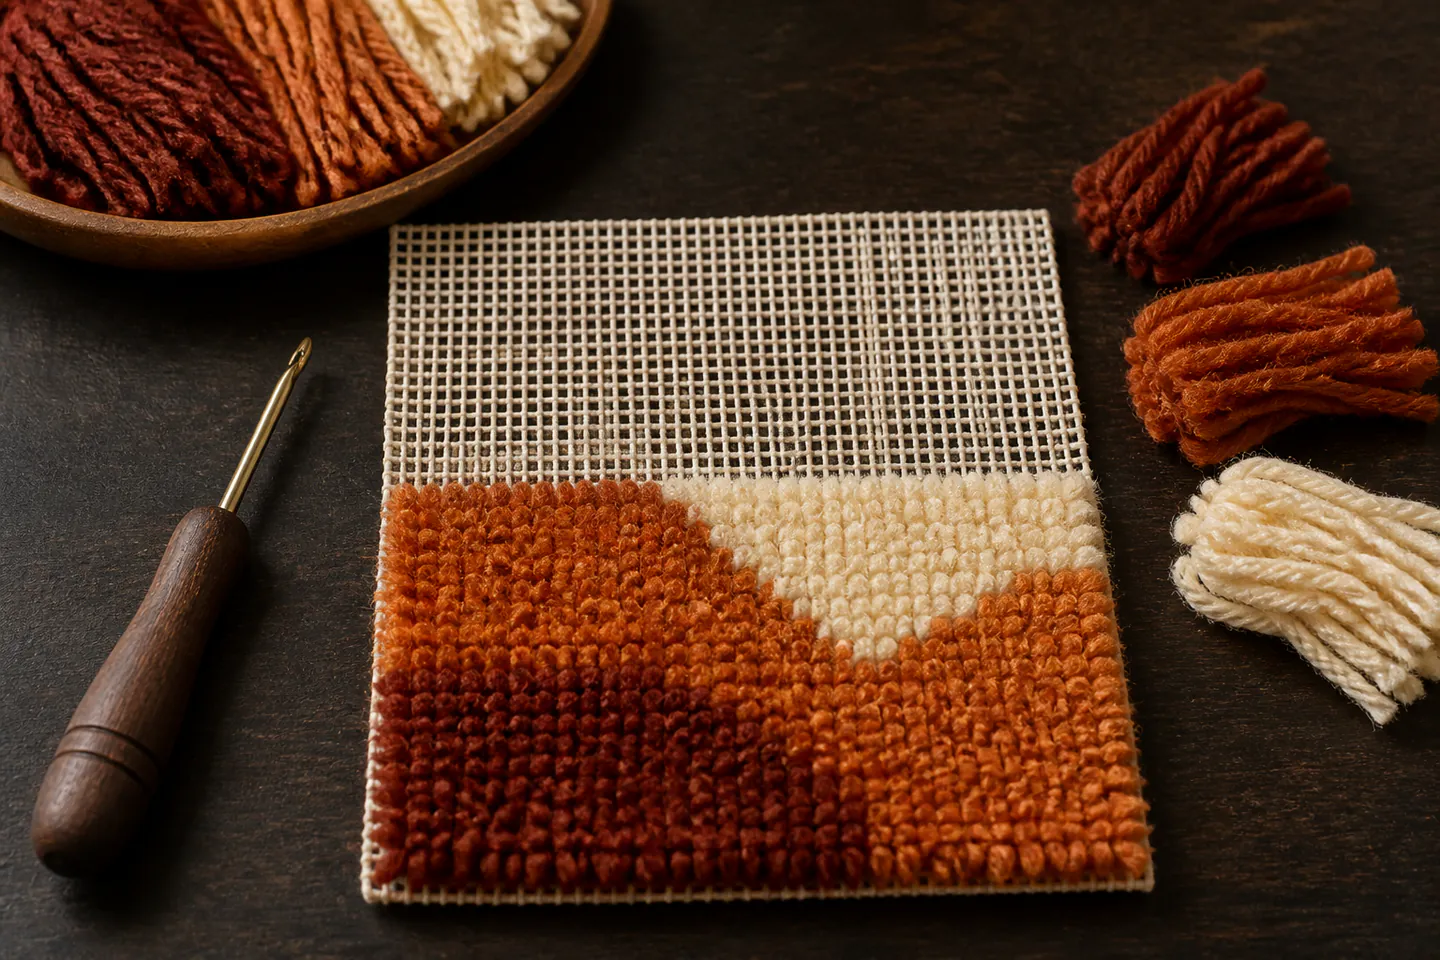
Quick answer
Choose a small printed kit with pre-cut yarn
Sort the supplied yarn in good light, compare every colour with the chart and practise ten knots in a low-stakes corner. Insert the open latch under one canvas bar, place the folded yarn below the latch, catch both ends and pull them through the loop. Work one complete row at a time, mark the chart after each row and leave the canvas margin untouched for finishing.
- 01
A complete kit removes the first calculations for canvas mesh, yarn length and colour quantity.
- 02
Every knot goes around a canvas bar rather than through the centre of a square.
- 03
Work in a repeatable direction and mark the chart so an interruption does not shift the pattern.
- 04
Tighten enough to seat the knot without bending the mesh or shortening one side of the yarn.
- 05
Plan whether the result is a wall panel, cushion or rug before trimming the canvas edge.
What to expect
The knot is easy; the grid requires attention
Latch hooking becomes rhythmic quickly. Colour sorting, row tracking and finishing determine whether the finished object looks complete rather than simply filled.
Chart
One printed square corresponds to one canvas position. A highlighter or removable ruler helps prevent skipped or repeated rows.
Yarn
Similar shades can be difficult to identify under warm light. Keep labels and compare against the key before mixing bundles.
Canvas
The plastic or textile grid can feel stiff and its cut edges can catch sleeves. Do not trim away the finishing margin.
Coverage
Consistent yarn length and one knot per specified bar produce an even pile; sparse spots usually indicate missed positions.
Finishing
A cushion needs backing and an opening; a wall piece needs a stable edge; a floor rug needs more durable construction and anti-slip consideration.
Core method
Build a reliable row-by-row workflow
Prepare the kit
Inventory colours, tool, canvas, chart and finishing instructions before starting. Photograph labels and separate close shades into shallow trays or labelled bags.
Practise the knot
Fold one strand evenly, slide the hook under the correct canvas bar until the latch clears it, place both ends in the hook and draw them through the folded loop.
Track the pattern
Choose a corner and row direction, complete one row and mark it only after counting the knots. Check the front every few rows for gaps and colour shifts.
Preserve the edge
Stop at the printed boundary, keep the blank canvas margin and follow the kit’s binding or backing method. Trim pile only after all knots and edges are secure.
Useful products
Products with a clear job in the setup
Each linked item is a self-contained cushion-front route in a different design. Select one manageable pattern; buying several kits does not add a useful beginner capability.
Generic Blue and White 43 cm Latch Hook Cushion Kit
Large colour blocks and a complete kit reduce material and yarn-length decisions.
Xqzbmt Hummingbird 43 cm Latch Hook Cushion Kit
It practises chart tracking and shade separation without changing the basic knot.
KTCINA Butterfly 43 cm Latch Hook Cushion Kit
The repeated standard canvas format lets a beginner choose imagery without changing technique.
First project
Complete a ten-by-ten practice block
A small block establishes the knot, row direction and colour tracking before hours are committed to the design.
- 01
Sort and label
Place every yarn shade beside its chart symbol and keep the original labels.
- 02
Choose the starting edge
Follow the kit orientation and preserve all blank finishing margin.
- 03
Tie ten practice knots
Use the same canvas direction and check that both yarn ends finish at a similar length.
- 04
Complete one row
Work left to right or right to left without changing direction halfway through.
- 05
Mark and inspect
Cross off the finished row, turn the canvas and look for empty or misplaced positions.
- 06
Repeat in short sessions
Stop at a row boundary and store yarn separately so the next session restarts cleanly.
What can wait
What can wait until the first result
The first kit already contains hundreds or thousands of identical decisions. Custom pattern software and loose yarn can wait.
- 01
Full floor rug
It demands more durable canvas, edge treatment, backing and slip control than a cushion kit.
- 02
Unprinted blank canvas
It adds pattern transfer and yarn-quantity calculations before the knot is routine.
- 03
Cutting your own yarn
Pre-cut strands remove a major consistency variable from the first project.
- 04
Large shade palette
Similar colours increase sorting and chart errors without changing the knot.
- 05
Electric trimming tools
A small decorative panel can be levelled with careful scissors after finishing.
Upgrade path
Upgrade the repeated limitation
Move beyond kits when chart tracking and edge finishing—not the basic knot—feel routine.
Practice block
Included in kitPrinted canvas + pre-cut yarn
Learn the latch motion.Cushion front
About £12–£45Complete small kit
Track rows and finish a square edge.Original wall panel
About £35–£100Blank canvas, chart and measured yarn
Design colour and calculate quantity.Functional rug
About £90–£300+Durable canvas, wool and backing
Build for wear, cleaning and floor safety.Safety & care
Decide whether the result is decorative or functional
A kit can look like a rug without being designed for foot traffic. Canvas, fibre, edge finish and backing define actual use.
- Keep the hook capped or stored when not in use and work away from the supporting hand.
- Cover rough canvas edges during long sessions if they scratch skin or catch clothing.
- Use good light and take hand, neck and eye breaks during repetitive row work.
- Keep short yarn pieces away from babies and pets and clean loose fibres promptly.
- Add suitable backing and anti-slip treatment before any piece is placed on a floor, and inspect it for lifted edges.
Outside help
When outside help earns its place
A clear video and the kit chart are enough for the first knots. A workshop helps with original charts, calculating yarn and finishing cushions or durable rugs.
Pause at the close-up knot sequence and match canvas orientation.
Check whether the session covers design and edge finishing rather than only filling canvas.
Representative UK learning options checked 28 August 2026; local prices, access, materials and tutor support vary.
Sources
Where the guidance came from
Specialist tutorials define the knot and finishing margin; kit makers and experienced communities add practical evidence about colour sorting, missed rows and intended use.
-
01
8bit Craft · latch hook guide
Materials, knot sequence, yarn length and finishing.
Open source -
02
Hobbycraft · latch hook for beginners
Close-up beginner tool and knot demonstration.
Open source -
03
Herrschners · learn to latch hook
Kit, canvas and pattern guidance from a long-running craft supplier.
Open source -
04
Michigan State University · latch-hook guidelines
Structured selection and technique guidance.
Open source -
05
Reddit · r/latchhook
Community evidence on kits, chart tracking, yarn quantity and finishing.
Open source -
06
Amazon UK · Blue and White 43 cm Latch Hook Cushion Kit
Exact product catalogue page or ISBN used for the recommendation; current price, seller, specification and availability should be confirmed.
Open source -
07
Amazon UK · Hummingbird 43 cm Latch Hook Cushion Kit
Exact product catalogue page or ISBN used for the recommendation; current price, seller, specification and availability should be confirmed.
Open source -
08
Amazon UK · Butterfly 43 cm Latch Hook Cushion Kit
Exact product catalogue page or ISBN used for the recommendation; current price, seller, specification and availability should be confirmed.
Open source
Guide information and links checked 28 August 2026.