Beginner’s guide · Make & create
Cut the fit
then shape the depth.
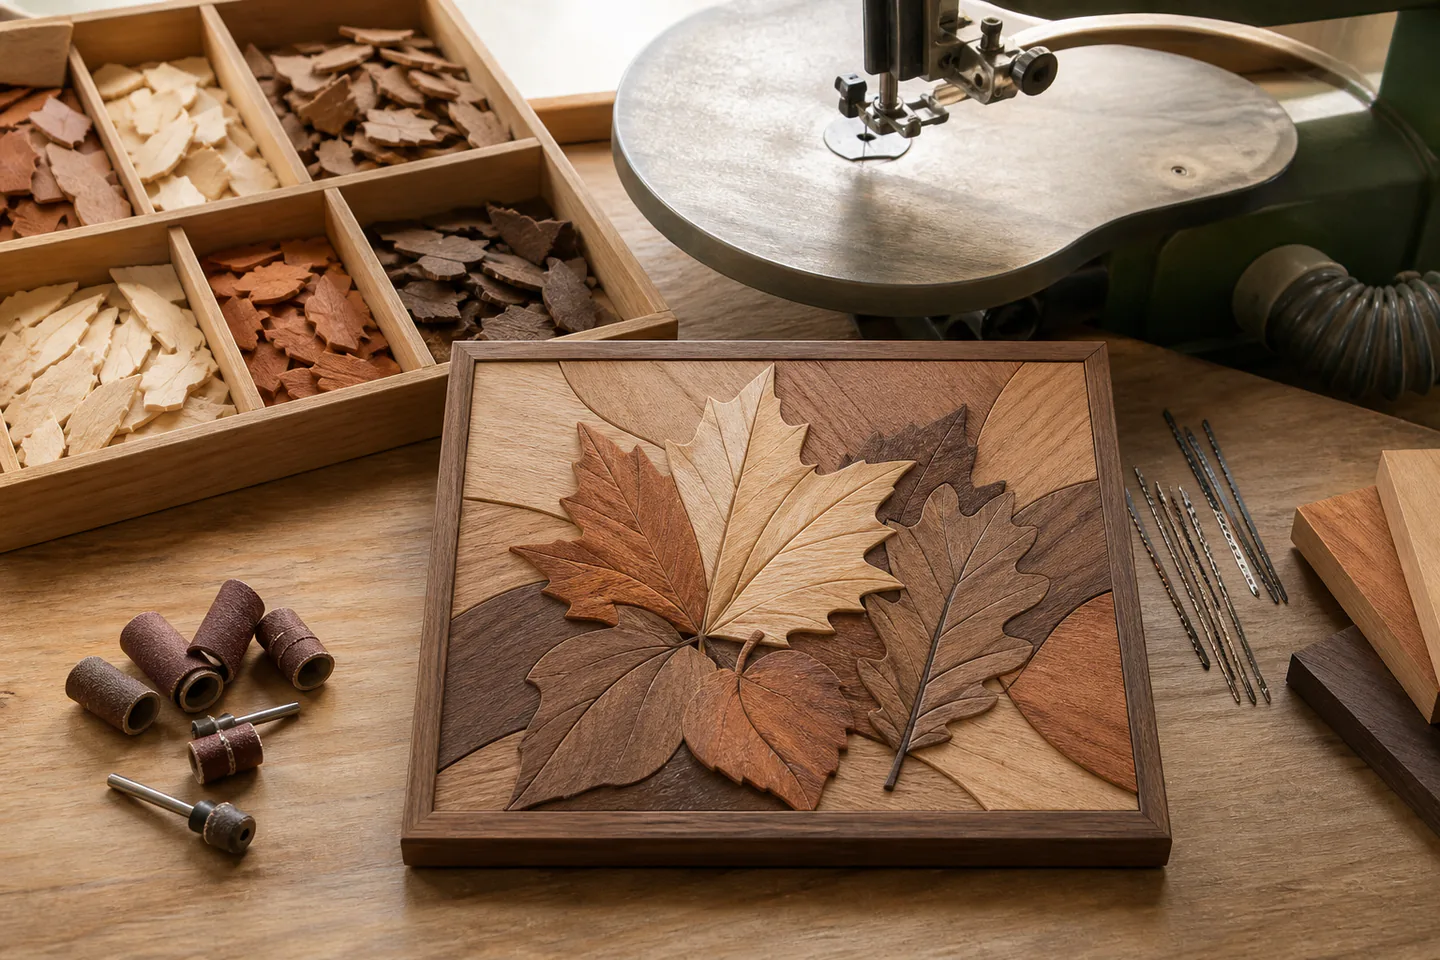
Intarsia woodworking builds a picture from individually cut solid-wood pieces whose grain, fit, rounding and relative height create the image.
Quick answer
Build one small, controlled result first
Choose a beginner pattern with fewer than fifteen broad pieces and two or three contrasting woods. Mark grain direction, cut just outside each line, fit neighbouring pieces before shaping and glue the complete set to a stable backer.
- 01
Number every pattern piece, mark grain direction and colour group, then prepare flat timber of consistent thickness and a complete backing outline. Keep the first attempt narrow enough that preparation, the main action and the result can all be reviewed together.
- 02
Use the correct blade and feed rate, preserving the pattern line while testing neighbouring pieces as a group rather than in isolation. Keep the first attempt narrow enough that preparation, the main action and the result can all be reviewed together.
- 03
Close gaps before rounding surfaces; inspect the silhouette, grain flow, relative height and shadow under raking light. Keep the first attempt narrow enough that preparation, the main action and the result can all be reviewed together.
- 04
Collect labelled pieces in project trays, vacuum extraction safely and record blade, species and shaping sequence for the next pattern. Keep the first attempt narrow enough that preparation, the main action and the result can all be reviewed together.
What to expect
Accuracy comes from the sequence, not the size of the toolkit
Preparation, one controlled variable and an honest inspection matter more than collecting specialist equipment.
The first attempt
A simple whale, leaf or flower with broad curves teaches fit and shaping without fragile internal points. For intarsia woodworking, note what actually happened rather than relying on memory; that turns the next attempt into a controlled change instead of another guess.
The control point
Use the correct blade and feed rate, preserving the pattern line while testing neighbouring pieces as a group rather than in isolation. For intarsia woodworking, note what actually happened rather than relying on memory; that turns the next attempt into a controlled change instead of another guess.
The useful signal
Close gaps before rounding surfaces; inspect the silhouette, grain flow, relative height and shadow under raking light. For intarsia woodworking, note what actually happened rather than relying on memory; that turns the next attempt into a controlled change instead of another guess.
The common trap
Aggressive sanding can hide a poor cut temporarily while widening joints and changing the intended outline. For intarsia woodworking, note what actually happened rather than relying on memory; that turns the next attempt into a controlled change instead of another guess.
Core method
Prepare, make, inspect and reset
Prepare deliberately
Number every pattern piece, mark grain direction and colour group, then prepare flat timber of consistent thickness and a complete backing outline. For intarsia woodworking, note what actually happened rather than relying on memory; that turns the next attempt into a controlled change instead of another guess.
Control the central variable
Use the correct blade and feed rate, preserving the pattern line while testing neighbouring pieces as a group rather than in isolation. For intarsia woodworking, note what actually happened rather than relying on memory; that turns the next attempt into a controlled change instead of another guess.
Read the result
Close gaps before rounding surfaces; inspect the silhouette, grain flow, relative height and shadow under raking light. For intarsia woodworking, note what actually happened rather than relying on memory; that turns the next attempt into a controlled change instead of another guess.
Reset before repeating
Collect labelled pieces in project trays, vacuum extraction safely and record blade, species and shaping sequence for the next pattern. For intarsia woodworking, note what actually happened rather than relying on memory; that turns the next attempt into a controlled change instead of another guess.
Useful products
Products with a clear job in the setup
The scroll saw is the central powered tool. Eye protection and a progressive workbook support controlled practice before a multi-piece project.
Sealey SM1302 Variable Speed Scroll Saw
Variable speed and a stable table support small intarsia shapes.
3M SecureFit 200 Safety Glasses
Comfortable glasses are easier to keep on for every cut and cleanup.
John A. Nelson Scroll Saw Workbook, 3rd Edition
Exercises expose blade control and cornering without sacrificing expensive timber.
First project
Build a simple contrasting-wood picture
Prioritise clean fit and readable grain before adding dramatic relief or many species.
- 01
Set up
Number every pattern piece, mark grain direction and colour group, then prepare flat timber of consistent thickness and a complete backing outline. For intarsia woodworking, note what actually happened rather than relying on memory; that turns the next attempt into a controlled change instead of another guess.
- 02
Begin the first attempt
A simple whale, leaf or flower with broad curves teaches fit and shaping without fragile internal points. For intarsia woodworking, note what actually happened rather than relying on memory; that turns the next attempt into a controlled change instead of another guess.
- 03
Hold one variable steady
Use the correct blade and feed rate, preserving the pattern line while testing neighbouring pieces as a group rather than in isolation. For intarsia woodworking, note what actually happened rather than relying on memory; that turns the next attempt into a controlled change instead of another guess.
- 04
Inspect the result
Close gaps before rounding surfaces; inspect the silhouette, grain flow, relative height and shadow under raking light. For intarsia woodworking, note what actually happened rather than relying on memory; that turns the next attempt into a controlled change instead of another guess.
- 05
Reset and record
Collect labelled pieces in project trays, vacuum extraction safely and record blade, species and shaping sequence for the next pattern. For intarsia woodworking, note what actually happened rather than relying on memory; that turns the next attempt into a controlled change instead of another guess.
What can wait
What can wait until the first result
Delay equipment that solves no repeated problem in the first small project.
- 01
A large first setup
Scale multiplies Aggressive sanding can hide a poor cut temporarily while widening joints and changing the intended outline. before the basic routine is known. For intarsia woodworking, note what actually happened rather than relying on memory; that turns the next attempt into a controlled change instead of another guess.
- 02
Premium specialist equipment
It should solve a limitation you can describe after several intarsia woodworking sessions. For intarsia woodworking, note what actually happened rather than relying on memory; that turns the next attempt into a controlled change instead of another guess.
- 03
Several methods at once
Changing materials and technique together makes the cause of a result hard to see. For intarsia woodworking, note what actually happened rather than relying on memory; that turns the next attempt into a controlled change instead of another guess.
- 04
Buying for a future version
Finish and review the small route before equipping an imagined advanced practice. For intarsia woodworking, note what actually happened rather than relying on memory; that turns the next attempt into a controlled change instead of another guess.
Upgrade path
Upgrade the repeated limitation
Add capacity only after the basic process is repeatable.
Try it
About £180–£450 with a scroll sawScroll-saw practice exercises
Complete one meaningful result and learn the whole sequence.Repeat it
About £180–£450 with a scroll sawSimple pattern and three woods
Reduce setup friction and compare several attempts.Improve the bottleneck
£100–£400Drum sanding and repeatable shaping jigs
Address Aggressive sanding can hide a poor cut temporarily while widening joints and changing the intended outline. with a targeted change.Go deeper
VariableOriginal patterns, larger relief and refined finishing
Add scale, precision or public participation with evidence from practice.Safety & care
Control blades, dust and exotic timber exposure
The detail is small, but powered cutting and fine sanding still require full workshop controls.
- Use the saw guard, hold-down and extraction as instructed and disconnect power for blade changes. Follow current manufacturer, food-safety, access, wildlife or local guidance wherever it applies.
- Keep fingers clear of the blade path and use a support or jig for very small pieces. Follow current manufacturer, food-safety, access, wildlife or local guidance wherever it applies.
- Control wood dust at source and avoid species that trigger sensitivity or have uncertain treatment. Follow current manufacturer, food-safety, access, wildlife or local guidance wherever it applies.
- Wear suitable eye and hearing protection for the selected machinery. Follow current manufacturer, food-safety, access, wildlife or local guidance wherever it applies.
- Store oily finishing cloths according to product fire-safety instructions. Follow current manufacturer, food-safety, access, wildlife or local guidance wherever it applies.
Outside help
When outside help earns its place
A scroll-saw or intarsia class helps with blade selection, grain planning and shaping before investing in sanders and specialist drums.
Use one complete lesson that covers preparation, the central technique, common mistakes and finishing. For a first intarsia woodworking attempt, one coherent method is easier to diagnose than fragments collected from several creators.
Outside help earns its place when safe setup, access, identification or live correction removes a real obstacle. Ask what equipment, materials, access and follow-up support are included before booking.
Representative UK learning options checked 31 August 2026; local prices, access, materials and tutor support vary.
Sources
Where the guidance came from
The method is grounded in specialist, manufacturer and public guidance, then checked against recurring beginner problems and the exact products linked here.
-
01
Intarsia.com · Beginner intarsia
Beginner project sequence, tools and materials.
Open source -
02
Intarsia Studio · Beginner guide
Pattern, wood selection, cutting and shaping overview.
Open source -
03
Health and Safety Executive · Woodworking
UK workshop, dust, machinery and control guidance.
Open source -
04
Heritage Crafts · Craft directory
UK craft context, practitioners and training routes.
Open source -
05
Reddit · r/Scrollsaw
Community evidence on blades, first patterns, sanding and fit.
Open source -
06
Amazon UK · SM1302 Variable Speed Scroll Saw
Exact Amazon UK product page or ISBN used for the recommendation; current price, seller, specification and availability should be confirmed.
Open source -
07
Amazon UK · SecureFit 200 Safety Glasses
Exact Amazon UK product page or ISBN used for the recommendation; current price, seller, specification and availability should be confirmed.
Open source -
08
Amazon UK · Scroll Saw Workbook, 3rd Edition
Exact Amazon UK product page or ISBN used for the recommendation; current price, seller, specification and availability should be confirmed.
Open source
Guide information and links checked 31 August 2026.