Beginner’s guide · Make & create
Draw with heat,
not pressure.
Begin with one small piece of known, untreated wood and a simple line design. Pyrography becomes much easier when temperature, pace and ventilation are treated as part of every mark.
Quick answer
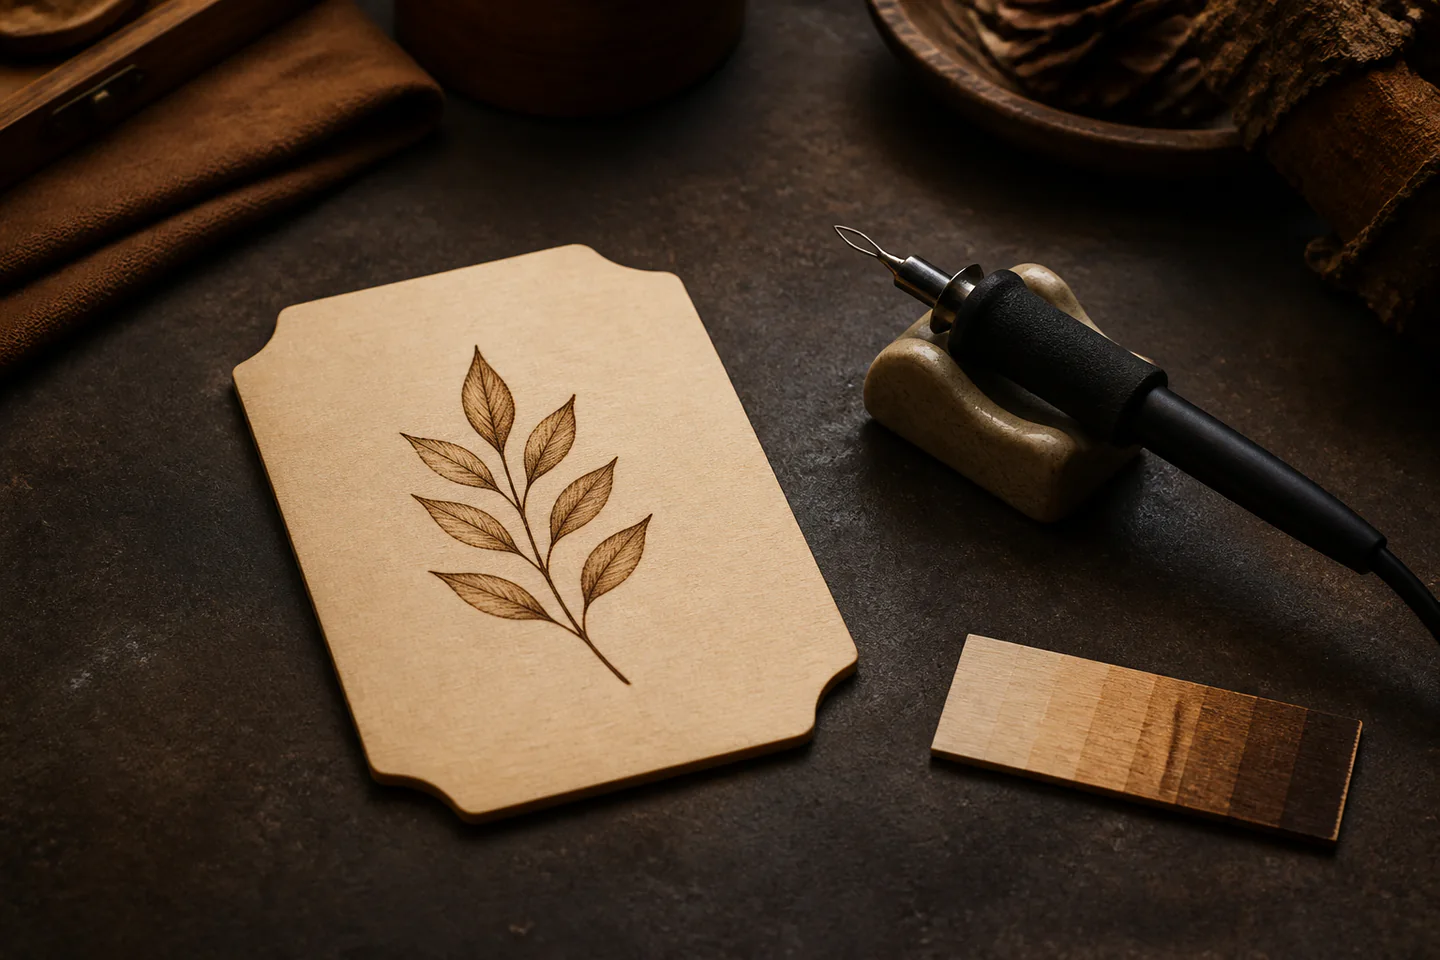
Burn one simple leaf on a small piece of known wood
Transfer a bold leaf or geometric motif to a sanded piece of untreated basswood. Test the burner on an offcut, begin at the lowest temperature that makes a consistent pale line, then pull the point towards you slowly without pressing it into the grain. Build darker value with repeated light passes rather than one scorching pass. Stop whenever smoke or harsh odour increases, place the hot tool in its proper stand and let it cool fully before changing tips or leaving the workspace.
- 01
Use only clean, dry, untreated wood whose species and finish are known. Painted, glued, pressure-treated, reclaimed or mystery wood can release hazardous fumes.
- 02
Heat makes the mark. Extra pressure catches the grain, bends tips and creates uneven dark spots.
- 03
Different wood, tips and room conditions need different settings, so every session begins with an offcut test strip.
- 04
A hot pen remains a burn and fire risk even when it no longer glows. Keep its cable clear and use a stable purpose-made rest.
- 05
Pyrography creates smoke and fine char. Follow the tool and material guidance for local extraction, ventilation and respiratory control.
What to expect
The slow-looking mark is a balance of heat and movement
A beginner usually blames drawing ability when the real variable is heat. Pale skips mean the setting, pace or grain direction needs attention; glossy black craters mean the point stayed too hot or too long.
Wood
Fine, even-grained basswood is forgiving. Strong grain and resin pockets can change a line suddenly and demand slower testing.
Temperature
Work low enough to avoid unnecessary smoke, then darken gradually. More heat is not automatically more control.
Movement
Pulling the point often feels steadier than pushing it. Rotate the work rather than twisting the wrist into an unsafe angle.
Tone
Dots, short hatching and repeated pale layers create controllable shading. One heavy pass is difficult to undo.
Corrections
Light sanding can soften a shallow pale error, but deep burns remain. Design around small marks instead of grinding the surface aggressively.
Finish
A finished decorative panel can stay bare or receive a compatible finish after all char is removed and the maker’s cure guidance is understood.
Core method
Build a test strip before the finished line
Choose material by evidence
Buy a labelled pyrography blank or untreated basswood from a traceable supplier. Do not assume a pallet, chopping board, plywood offcut or old shelf is safe: glues, preservatives, coatings and contamination may not be visible. Sand outdoors or with suitable dust control before the burner is hot, then remove dust from the bench.
Prepare the heat zone
Use a non-combustible work surface, the correct stand and the ventilation or extraction specified for the tool and material. Tie back hair, remove loose sleeves, route the cable where it cannot snag and keep children, pets, solvents and paper clutter away. Read the manual before fitting or changing any point.
Calibrate on an offcut
Draw several short lines across and with the grain. Begin low, let the tool reach a stable temperature and change only one variable at a time: heat, pace or tip angle. Label the useful tests in pencil. A repeatable medium line matters more than the darkest possible mark.
Transfer and burn in layers
Transfer only the main shapes using light graphite or transfer paper. Burn the longest easy contours first, rotating the wood so the pen can be pulled comfortably. Add shadow with dots or hatch marks, pausing between passes so the wood and hand do not overheat. Finish by checking the design from a distance, then switch off, unplug and cool in the stand.
Useful products
Products with a clear job in the setup
The Dremel Versatip is a widely available multipurpose gas tool that can make a first controlled burn, but its open-flame fuel system demands extra care and it is less refined than a dedicated temperature-controlled wire-tip machine. The workbook teaches progressive exercises and the basswood pieces provide a known practice surface. These products have separate jobs rather than forming a compulsory bundle.
Dremel Versatip 2000-6 Butane Soldering and Pyrography Tool
It is easy to obtain and useful for deciding whether the physical process is enjoyable before buying a specialist wire-tip station.
Sue Walters Pyrography Workbook: A Complete Guide to the Art of Woodburning
Sue Walters is an established pyrography teacher and the exercises make temperature and texture practice purposeful.
Walnut Hollow Unfinished Basswood Carving and Craft Blocks
A known soft hardwood shows pale-to-dark value clearly and is easier to control than resinous or strongly grained timber.
First project
Burn a five-value leaf study
One motif can test line, dots, hatching and layered tone without asking for an ambitious portrait.
- 01
Make a value key
On an offcut, burn five small boxes from barely visible to dark using repeated passes.
- 02
Transfer the outline
Keep the drawing large, simple and light so graphite does not compete with the burn.
- 03
Pull the contour
Rotate the panel and make short controlled strokes towards the body.
- 04
Add the mid-tones
Use spaced hatching or dots, building slowly from the value key.
- 05
Reserve the darkest marks
Use deep accents only where veins meet or the leaf turns away from the light.
- 06
Cool and inspect
Unplug or extinguish correctly, leave the tool in its stand and review only after the panel has cooled.
What can wait
What can wait until the first result
Decorative options grow quickly, but the first useful upgrade is control rather than more shaped tips.
- 01
A large tip collection
A universal or writing point already teaches heat, direction and tone; unfamiliar tips add variables.
- 02
Mystery wooden objects
Boxes and kitchenware may contain glue, finish or unsuitable timber even when they look unfinished.
- 03
Colour and varnish
Learn how the raw wood takes heat before adding products whose compatibility and cure must be checked.
- 04
A laser-printed transfer system
A light graphite transfer is enough for one bold motif and avoids extra chemistry.
- 05
A professional wire-tip machine
It is a meaningful upgrade after fixed-tip recovery time and heat control repeatedly limit the work.
Upgrade path
Upgrade the repeated limitation
Spend when the same technical limit appears in several finished practice panels.
First marks
About £35–£75Entry burner + known basswood + reference
Learn pace, heat and grain direction.Controlled shading
About £90–£180Temperature-controlled solid-point machine
Recover heat more consistently and change tone deliberately.Fine sustained work
About £180–£350Specialist wire-tip machine and selected pens
Gain faster response and lighter handpieces.Studio workflow
About £350–£900+Local extraction, dedicated bench and dust control
Support longer sessions and safer preparation.Safety & care
Treat heat, smoke and unknown wood as real hazards
A pretty wooden blank does not prove it is safe to burn. The practical rule is known untreated material, controlled heat, effective ventilation and a tool that is never left hot and unattended.
- Never burn painted, varnished, pressure-treated, glued, reclaimed or unidentified wood; obtain reliable material information first.
- Use the burner only with the ventilation, extraction, clearances and protective equipment in its current manual and the wood supplier’s guidance.
- Keep the hot point in a stable non-combustible stand, route cables safely and let points cool fully before changing or storing them.
- Do not eat, drink or touch the face in the work area; control sanding dust separately and clean settled residue without spreading it.
- Gas tools require correct fuel handling, leak checks and flame precautions. A dedicated electric wire-tip tool removes the fuel cylinder but not the burn, fire or fume risk.
Outside help
When outside help earns its place
A book and manufacturer demonstrations are enough for the five-value leaf. A practical workshop becomes useful when a tutor can compare fixed-point and wire-tip machines, show extraction and diagnose scorched or skipping lines.
Look for heat calibration, known timber, extraction and full cool-down practice.
Ask which burner, wood, ventilation and take-home materials are included.
Representative UK learning options checked 17 August 2026; local prices, access, materials and tutor support vary.
Sources
Where the guidance came from
Tool manuals and workplace guidance define heat, smoke and dust controls; specialist makers and experienced practitioners add realistic information about wood choice, heat response and upgrading.
-
01
Dremel UK · Versatip
Manufacturer specifications, accessories and operating context.
Open source -
02
HSE · Wood dust
UK guidance on wood dust exposure and control.
Open source -
03
Peter Child · Artist’s Pyrography Machine
Specialist wire-tip machine design and upgrade context.
Open source -
04
Sue Walters Pyrography
Experienced artist and teacher resources on tools and technique.
Open source -
05
Reddit · r/Pyrography
Community discussion of timber, burners, temperature and recurring beginner problems.
Open source -
06
Amazon UK · Versatip 2000-6 Butane Soldering and Pyrography Tool
Exact product catalogue page or ISBN used for the recommendation; current price, seller and availability should be confirmed.
Open source -
07
Amazon UK · Pyrography Workbook: A Complete Guide to the Art of Woodburning
Exact product catalogue page or ISBN used for the recommendation; current price, seller and availability should be confirmed.
Open source -
08
Amazon UK · Unfinished Basswood Carving and Craft Blocks
Exact product catalogue page or ISBN used for the recommendation; current price, seller and availability should be confirmed.
Open source
Guide information and links checked 17 August 2026.