Beginner's guide · Make & build
Build the chassis.
Learn every adjustment.
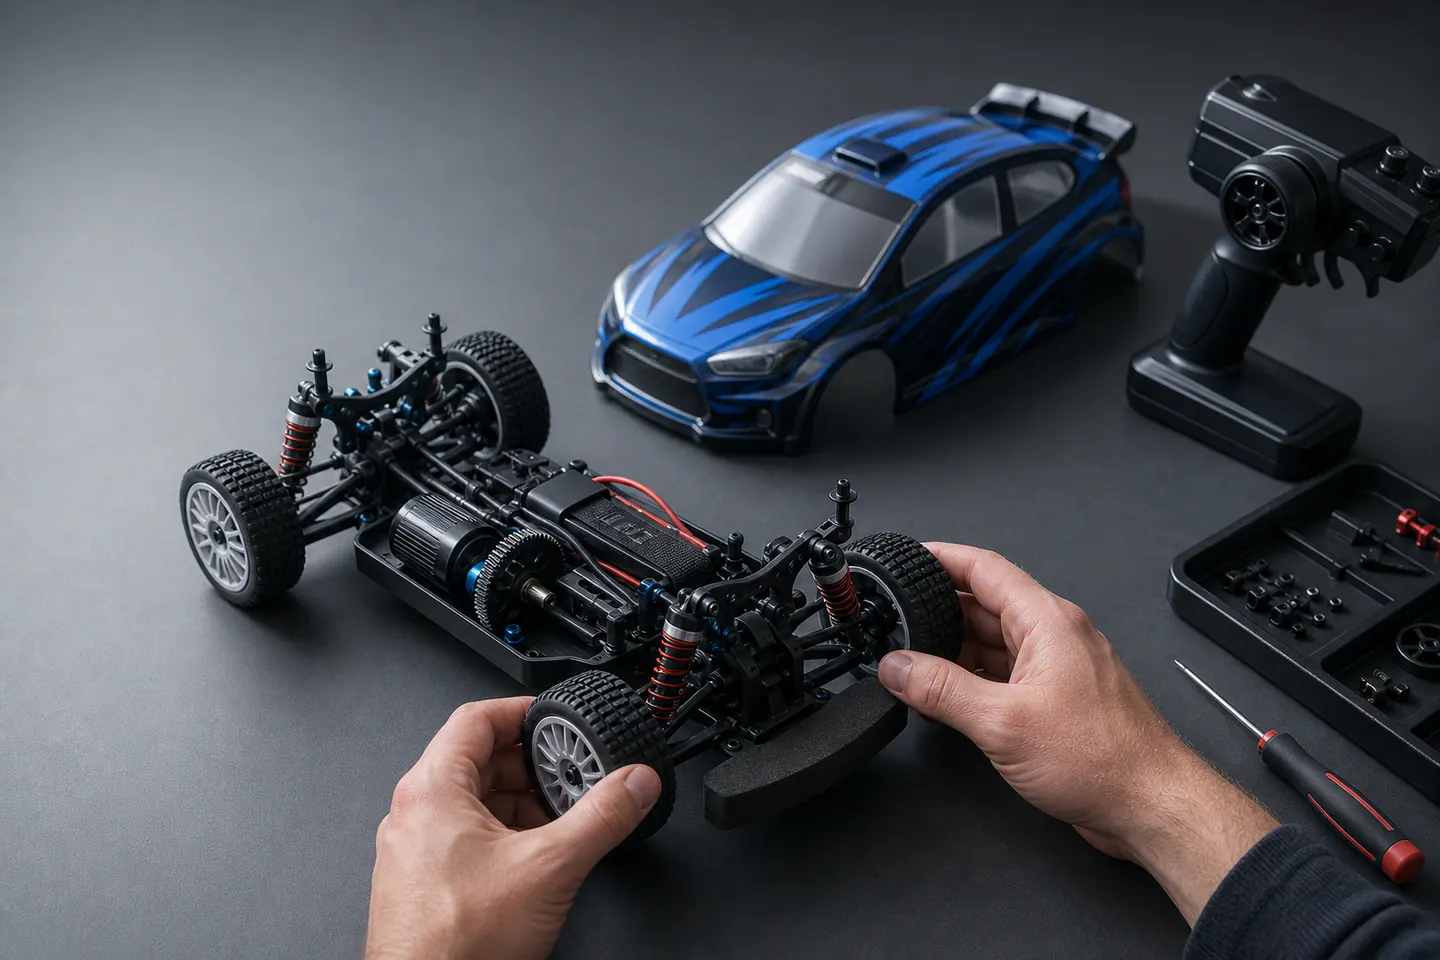
A 1:10 Tamiya TT-02 kit makes the mechanisms visible: gears, steering, suspension, motor, radio gear and painted shell. Budget for the complete running system, use the correct tools and treat battery charging as part of the build.
Quick answer
Build the chassis.
Choose a mainstream 1:10 kit with an available manual and parts support, then price the kit, radio system, steering servo, battery, charger, body paint and tools as one project before ordering. Build in manual order, sort screws by measured size, keep gears clean, charge only with the correct charger and perform steering, failsafe and range checks before the wheels touch the ground.
- 01
A kit box may include the chassis, body, motor and speed controller while omitting the transmitter, receiver, steering servo, battery, charger and paint. Read the exact contents rather than a general TT-02 parts list.
- 02
Tamiya cross-head screws are often best served by correctly fitting JIS-style drivers. A loose Phillips driver can damage heads before the chassis is complete.
- 03
Plastic kit bushes work, but ball bearings are a sensible build-time upgrade when the exact TT-02 set is confirmed. Faster motors are not the first useful upgrade.
- 04
NiMH is a straightforward starter battery chemistry. LiPo can improve performance but adds charger settings, storage voltage, damage inspection and fire precautions.
What to expect
What the first attempts really involve
Kit building is slower than ready-to-run ownership but makes later maintenance understandable. The honest first cost is the whole running system, not the attractive chassis-box price.
Completeness
The same chassis can be sold in packages with different electronics and bodies. Record every included part and every required extra from the exact product and manual.
Fasteners
Several screws can differ by only a few millimetres. Using a long screw in a shallow location can bind gears or damage plastic.
Gears
Grease belongs only where the manual specifies. Hair, grit and excessive grease turn an enclosed drivetrain into a grinding paste.
Body shell
Clear polycarbonate bodies are painted on the inside with compatible paint. Ordinary spray paint may flake or attack the material.
Setup
A mechanically complete car still needs neutral steering, correct direction, throttle calibration, failsafe and a safe range check.
Fundamentals
Build the first attempt on reliable fundamentals
Price the running car, not the kit box
Create a checklist for chassis kit, motor, speed controller, steering servo, transmitter, receiver, compatible battery, correct charger, body paint, tyres, bearings and tools. Cross out items only when the exact listing confirms them. A starter bundle can reduce compatibility work, but its current contents still need comparing with the kit manual.
Build from trays and measurements
Use shallow labelled trays for each manual bag and measure screws against the printed diagrams or a ruler. Start every screw square by hand, tighten until the plastic parts meet and stop before crushing or stripping the thread. Keep removed moulding burrs and swarf out of bearings and gears.
Treat the drivetrain as a clean mechanism
Assemble differentials in the stated orientation, apply only the specified grease and rotate each completed stage by hand. Binding is easier to fix before the motor and covers go on. Verify gear mesh, driveshaft seating and wheel rotation rather than assuming later motor power will free a tight part.
Set the radio before speed
Raise the driven wheels clear, switch on in the manufacturer's order and centre the steering trim before fitting the servo horn. Confirm left, right, forward and brake directions, then set the receiver failsafe to a safe neutral or braking state. Test at walking pace on open private ground before increasing speed.
Useful products
A supported chassis, a complete radio bundle and fitting tools
The Tamiya Subaru kit gives the concrete TT-02 build, the Tamiya starter set groups the radio, battery and charger route and the eight-piece tool kit supplies better-fitting drivers. Contents vary, so the article deliberately keeps a final servo-and-electronics checklist rather than promising that three boxes guarantee a running car.
Tamiya 1:10 Subaru Impreza MC '99 TT-02 Kit
The TT-02 exposes the drivetrain and steering without using an obscure platform that is hard to repair.
Tamiya RC Starter Set v3.1, 2.4 GHz
Grouping the radio and power items makes the real total cost more visible than treating the chassis box as complete.
Tamiya RC Tool Kit, 8 piece
Correctly fitting drivers matter on a kit containing many similar cross-head screws.
First build
Build and shakedown a TT-02 rally car
Download and read the exact manual before opening bags. The build is successful when the car runs straight, stops on command and returns with every fastener intact—not when it reaches maximum speed.
- 01
Make the completeness list
Match kit contents, starter-set contents and required extras line by line, including steering servo and polycarbonate paint.
- 02
Prepare the bench
Lay out driver sizes, parts trays, side cutters, a clean cloth and the manual; keep food, carpet fibres and loose grit away.
- 03
Build and rotate each gearbox
Follow orientation marks, grease only as shown and turn shafts by hand before closing each housing.
- 04
Assemble suspension squarely
Compare left and right arms, links and uprights as mirror pairs and check free movement without overtightened pivots.
- 05
Install centred steering
Power the radio safely, centre the servo, switch off again and fit the horn at the manual's neutral angle.
- 06
Finish the shell
Wash as directed, mask from the inside, use light coats of polycarbonate paint and allow full curing before decals or mounting.
- 07
Charge visibly
Use only the compatible charger on a hard non-flammable surface while awake and nearby; stop with any damaged, swollen or unusually hot battery.
- 08
Perform the shakedown
Check failsafe and range, drive slowly on open private ground, listen for binding, then inspect wheel nuts, gears and temperatures.
Troubleshooting
Read the result before changing the setup
A tight drivetrain should be isolated by stage
Remove the motor pinion or separate gearbox sections and rotate each manually. Look for a long screw, reversed gear, trapped shim or overtightened bearing carrier before applying power again.
Steering that pulls needs a mechanical centre
Set transmitter trim near neutral, confirm equal link lengths and fit the servo horn correctly. Large electronic trim should not hide a badly centred linkage.
Cogging or shutdown may be electrical protection
Check battery charge, connector seating, motor wiring and speed-controller calibration. Stop if components overheat; do not keep retrying with a jammed drivetrain.
Flaking body paint indicates the wrong system or preparation
Polycarbonate paint must be applied to the cleaned inside of the shell unless the manufacturer states otherwise. Adding more ordinary paint over a failing layer rarely creates a durable finish.
Skip for now
What can wait
A standard motor and well-built chassis reveal assembly quality. More speed multiplies every loose fastener and steering mistake.
- 01
A faster motor
It increases heat, impact loads and stopping distance before the drivetrain and driving space are understood.
- 02
LiPo batteries
Begin with the supplied or specified NiMH route where possible. Move to LiPo only with a compatible balance charger, low-voltage protection, storage practice and inspection routine.
- 03
Aluminium everything
Metal parts can add weight, move crash forces into expensive components and solve no measured problem. Replace weak or worn parts selectively.
- 04
Cosmetic accessories
Lights and scale details can wait until the body clears moving parts and routine maintenance no longer damages decorations.
Upgrade path
What a better setup changes
The first upgrades should reduce friction and improve control, not simply raise top speed.
Standard TT-02 build
About £240–£290 completeKit + radio/servo + NiMH battery/charger + paint + tools
Teaches the full drivetrain, steering, body and radio sequence.Durability and smoothness
Add about £20–£45Exact bearing set + spare body clips + known weak replacement parts
Reduces drivetrain friction and keeps ordinary impacts from ending a session.Handling setup
Add about £35–£90Oil dampers + measured ride height + suitable tyres
Makes grip and weight transfer adjustable before chasing power.Higher-performance power
Often £100+ extraMatched motor/ESC + suitable gearing + battery/charger system
Raises speed and thermal load only after control, maintenance and charging are dependable.Before upgrading
A useful check before spending more
Upgrade after the same limitation appears twice
One poor drive may be surface, weather or setup. If the car repeatedly bounces, overheats or loses grip under the same conditions, measure that problem and choose the part that directly addresses it.
Keep a build log
Record gear ratios, battery chemistry, charger settings, ride height and replaced screws. A labelled setup prevents unsafe charging and makes performance changes understandable.
Safety
Battery charging and driving space are part of the build
A well-assembled car can still injure someone or start a fire if it is driven carelessly or charged with the wrong equipment.
- Use the charger specified for the exact battery chemistry, voltage and connector; never improvise charging leads.
- Charge on a hard non-flammable surface while awake and nearby, away from exits and combustible materials.
- Stop using swollen, punctured, wet, crushed or unusually hot batteries and follow local disposal guidance.
- Switch the transmitter and model on and off in the manufacturer's order and test the failsafe before driving.
- Use open private ground with permission, away from roads, people, pets and protected habitats.
- Keep fingers, hair and loose clothing away from wheels and gears whenever the battery is connected.
Classes
When outside help is useful
A club is useful after the car runs because experienced drivers can spot radio, geometry and track-etiquette problems quickly. The chassis itself remains a practical home build when the manual and safety limits are followed.
Look for beginner time, frequency control, safe pit charging and help with setup rather than an immediate race entry.
Useful for checking electronics, servo setup and first power-on if the bundle contents or instructions conflict.
Representative UK club and model-shop formats checked 30 July 2026; membership, transponders and track access vary.
Sources
Sources and checking notes
The kit manual anchors every assembly claim, a UK model retailer clarifies kit skill levels and required extras, community builds expose recurring TT-02 errors and fire-service advice defines charging practice.
-
01
Tamiya · TT-02 instruction manual
Primary assembly sequence, component orientation and setup drawings.
Open source -
02
Modelsport · RC buyer's guide
UK retailer explanation of kits, ready-to-run cars, scales and required equipment.
Open source -
03
Modelsport · Skill levels
Practical comparison of model assembly skill levels and package expectations.
Open source -
04
r/rccars · TT-02 as a first kit
Community discussion of TT-02 suitability, required extras and upgrades.
Open source -
05
Mid and West Wales Fire · Lithium battery safety
Official charging, damage and disposal precautions for rechargeable batteries.
Open source -
06
Amazon UK · 1:10 Subaru Impreza MC '99 TT-02 Kit
Exact Tamiya product and direct Amazon UK listing checked for current availability, price context and model identity.
Open source -
07
Amazon UK · RC Starter Set v3.1, 2.4 GHz
Exact Tamiya product and direct Amazon UK listing checked for current availability, price context and model identity.
Open source -
08
Amazon UK · RC Tool Kit, 8 piece
Exact Tamiya product and direct Amazon UK listing checked for current availability, price context and model identity.
Open source
Guide information and links checked 30 July 2026.