Beginner’s guide · Make & create
Block the silhouette first,
then earn the tiny detail.
A wire-and-putty practice figure teaches proportion, support, curing and tool pressure before a display miniature or complex conversion.
Quick answer
Complete one supported practice figure before expanding the setup
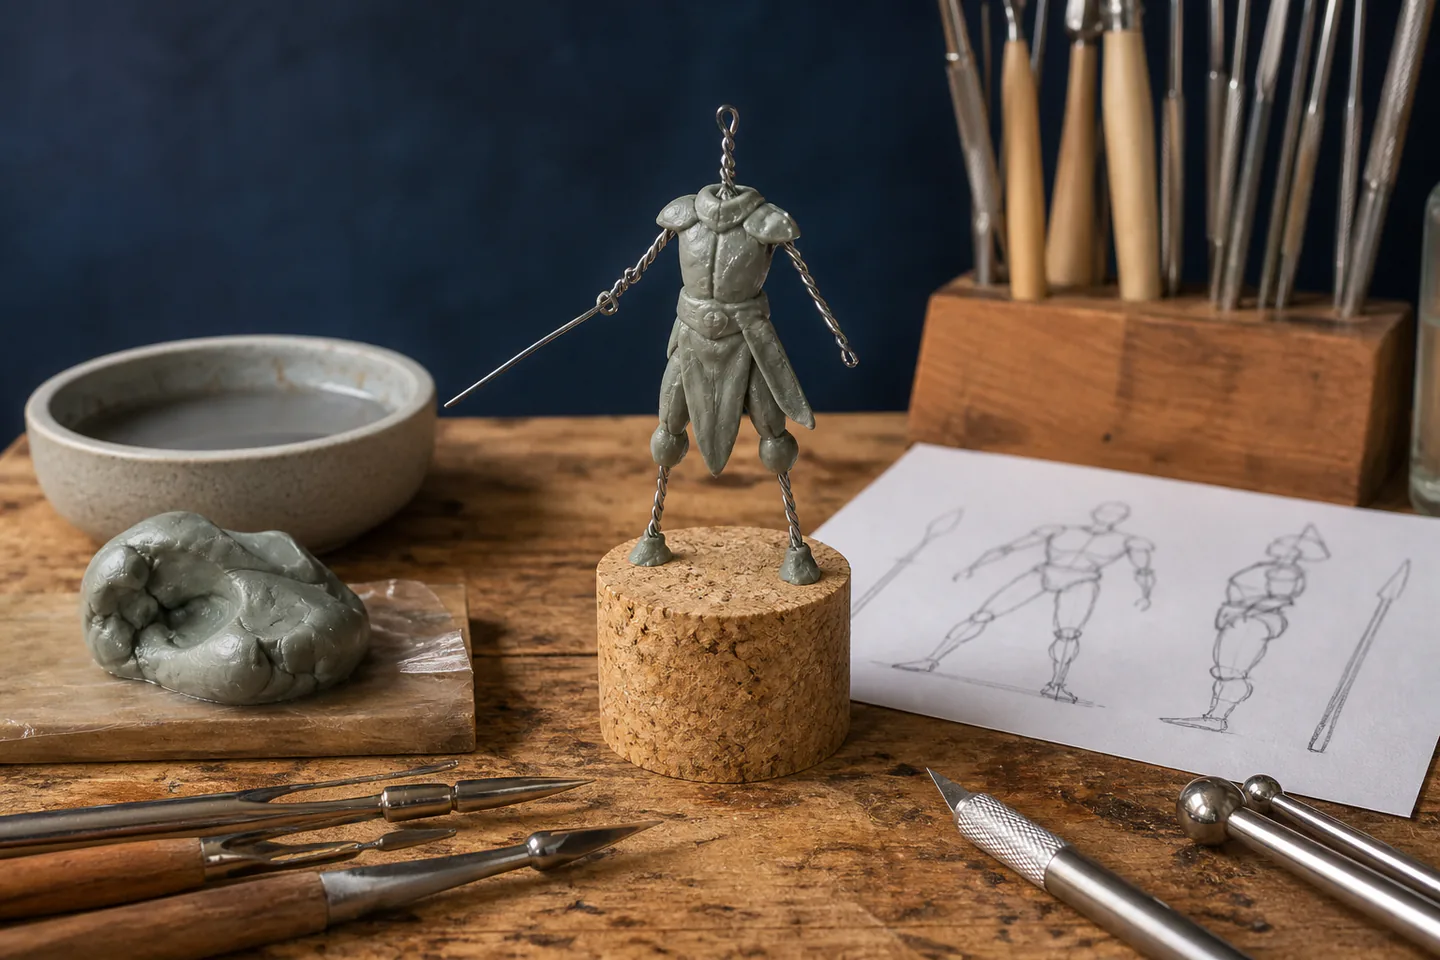
Draw a front and side silhouette at the intended scale, twist a simple wire armature, secure it in a cork, mix only a pea-sized amount of epoxy putty exactly as directed and build the torso and limbs as plain masses. Let that structural layer cure, add one fresh surface layer for clothing or anatomy, keep the face deliberately simple and photograph the figure from four directions before any paint.
- 01
An armature carries pose and proportion; putty should not be asked to hold a long unsupported limb. Record what happened during miniature sculpting so the next attempt changes one known variable instead of several guesses.
- 02
Two-part epoxy begins curing when mixed, so small timed batches waste less material and preserve working control. Record what happened during miniature sculpting so the next attempt changes one known variable instead of several guesses.
- 03
Large readable masses matter more at gaming scale than pores, buckles or individual fingers. Record what happened during miniature sculpting so the next attempt changes one known variable instead of several guesses.
- 04
Cured material can be filed or carved, but dust and sensitising uncured resin require the manufacturer’s controls. Record what happened during miniature sculpting so the next attempt changes one known variable instead of several guesses.
What to expect
What miniature sculpting is really like at the start
The useful beginner controls are preparation, one bounded task and a record of the result; specialist equipment matters only when it solves a repeated limitation.
Scale
A one-millimetre error can change the apparent anatomy, garment thickness or balance of a small figure. Record what happened during miniature sculpting so the next attempt changes one known variable instead of several guesses.
Working time
Fresh putty can be sticky and elastic, while part-cured putty holds edges but resists blending. Record what happened during miniature sculpting so the next attempt changes one known variable instead of several guesses.
Support
Thin ankles, weapons and outstretched arms need wire or staged curing rather than hopeful shaping. Record what happened during miniature sculpting so the next attempt changes one known variable instead of several guesses.
Surface
Fingerprints and tool chatter become visible under primer, so each pass should have a clear purpose. Record what happened during miniature sculpting so the next attempt changes one known variable instead of several guesses.
Core method
The core miniature sculpting method
Plan the silhouette
Mark head height, shoulders, hips, hands and feet on a scale sketch and compare the armature against it. Record what happened during miniature sculpting so the next attempt changes one known variable instead of several guesses.
Build a rigid core
Twist and trim wire, fix it securely to a cork and test that the intended pose reads from several angles. Record what happened during miniature sculpting so the next attempt changes one known variable instead of several guesses.
Sculpt in cured stages
Add simple volumes with a small batch, stop before details and allow a complete cure before the next layer. Record what happened during miniature sculpting so the next attempt changes one known variable instead of several guesses.
Refine without chasing noise
Use a lightly controlled tool to define planes, seams and overlaps and reserve filing for fully cured material. Record what happened during miniature sculpting so the next attempt changes one known variable instead of several guesses.
Useful products
Products with a clear job in the route
Milliput supplies the first controlled epoxy batch and the steel tools provide varied profiles; ordinary wire, cork, foil and a scale sketch can complete the starter setup.
Milliput Standard Yellow-Grey Epoxy Putty, 113 g
A small pack is enough to learn mixing, working time, layering and cured cleanup.
Genround Stainless Wax Carving and Modelling Tools
The varied tips make tool pressure and access easier to compare on one practice sculpt.
3M SecureFit 200 Safety Glasses
They are easy to keep at the bench for routine impact risks.
First project
Sculpt one clothed standing figure in two sessions
Use the first session for the armature and plain body masses and the second for only the largest costume shapes.
- 01
Draw the scale marks
Set the full height and four anatomical landmarks on paper before cutting wire. Record what happened during miniature sculpting so the next attempt changes one known variable instead of several guesses.
- 02
Make and mount the armature
Twist the spine and limbs, trim carefully and lock the feet into a stable cork. Record what happened during miniature sculpting so the next attempt changes one known variable instead of several guesses.
- 03
Mix a tiny structural batch
Combine the stated proportions until uniform and add only torso, pelvis and limb masses. Record what happened during miniature sculpting so the next attempt changes one known variable instead of several guesses.
- 04
Cure and compare
Let the core harden completely, then photograph front, back and sides against the sketch. Record what happened during miniature sculpting so the next attempt changes one known variable instead of several guesses.
- 05
Add one surface layer
Create a coat, tunic or simple armour planes and stop before tiny accessories. Record what happened during miniature sculpting so the next attempt changes one known variable instead of several guesses.
What can wait
What can wait until the first result
Delay anything that adds cost, risk or another variable before the basic workflow has produced something you can review.
- 01
Detailed faces
Expression at this scale needs reliable head proportion and tool pressure first. Record what happened during miniature sculpting so the next attempt changes one known variable instead of several guesses.
- 02
Dynamic one-leg poses
They magnify balance and armature problems. Record what happened during miniature sculpting so the next attempt changes one known variable instead of several guesses.
- 03
Large putty purchases
Freshness, working feel and preferred chemistry become clearer after a small pack. Record what happened during miniature sculpting so the next attempt changes one known variable instead of several guesses.
- 04
Moulding and casting
Release agents, mould design and copied-design rights are separate skills. Record what happened during miniature sculpting so the next attempt changes one known variable instead of several guesses.
Upgrade path
Add the capability you can now name
Each stage should remove a demonstrated constraint rather than make the setup look more advanced.
Use what you own
£0–£20Existing equipment and one written plan
Use wire, cork and one small epoxy pack.Repeat the first route
About £15–£45A complete repeatable starter setup
Repeat the same scale with a different stance.Add one capability
Often £50–£250One selected tool, service or learning resource
Add silicone shapers, a magnifier or a second putty only for a named limitation.Build specialist depth
Club, course or specialist dependentA documented specialist workflow
Study anatomy, mould making or digital-to-physical workflows with specialist teaching.Safety & care
Treat epoxy, blades and dust as workshop materials
Small quantities and tiny tools still create skin, eye, cut and respiratory risks.
- Read the current safety data for both putty components and use gloves and skin protection as directed.
- Never lick tools or use food utensils; wash hands and keep materials away from food, children and pets.
- Cut wire and cured putty away from the body, restrain the work and wear eye protection for clipping or filing.
- Wet-control or extract cured sanding dust and do not blow it from the bench.
- Stop at irritation, unusual heat or unexpected curing and dispose of waste according to the product guidance.
Outside help
When outside help earns its place
A miniature-sculpting workshop is useful for live proportion checks, armature demonstrations and timed feedback on tool pressure.
Choose a session that names the putty, scale, ventilation and supplied safety controls.
Use outside help after the first miniature sculpting attempt can reveal the exact technique, access or safety problem that needs live correction.
Representative UK learning and access routes checked 1 September 2026; local prices, permissions, equipment and tutor support vary.
Sources
Where the guidance came from
Authoritative and specialist guidance supports the method and safety boundaries; community discussion contributes recurring beginner problems rather than unsupported claims.
-
01
Milliput · Safety data sheets
Manufacturer safety information for the epoxy system.
Open source -
02
Milliput · How to use
Mixing, working, curing and finishing guidance.
Open source -
03
Kneadatite · Green Stuff products
Working-time and cured-behaviour context for a common miniature putty.
Open source -
04
Green Stuff World · Sculpting tool instructions
Tool forms and controlled modelling use.
Open source -
05
HSE · COSHH basics
Hazard, exposure and control principles for workshop chemicals.
Open source -
06
Reddit · r/miniaturesculpting
Community evidence on armatures, putty behaviour, tools and early proportion problems.
Open source -
07
Amazon UK · Standard Yellow-Grey Epoxy Putty, 113 g
Exact Amazon UK product page or ISBN used for this recommendation; current price, seller, specification and availability should be confirmed.
Open source -
08
Amazon UK · Stainless Wax Carving and Modelling Tools
Exact Amazon UK product page or ISBN used for this recommendation; current price, seller, specification and availability should be confirmed.
Open source -
09
Amazon UK · SecureFit 200 Safety Glasses
Exact Amazon UK product page or ISBN used for this recommendation; current price, seller, specification and availability should be confirmed.
Open source
Guide information and links checked 1 September 2026.