Beginner’s guide · Observe & photograph
Make one plate look intentional.
Start with the window, not the lamp.
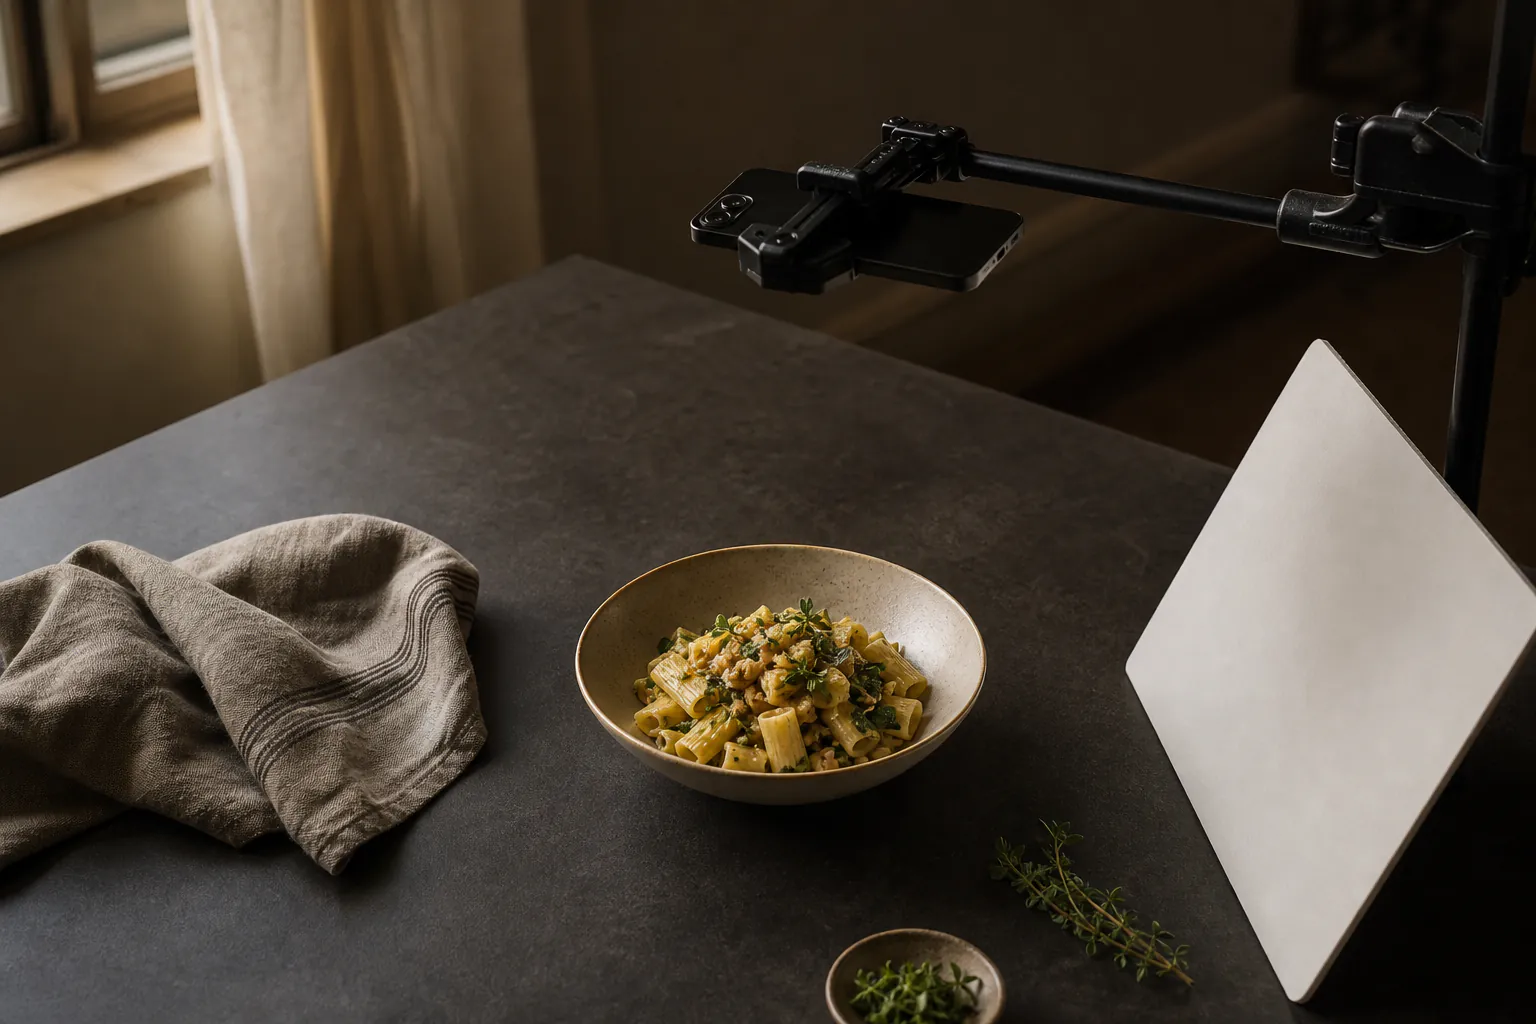
Use a phone or camera beside a large window, shape the light with white card and style one simple dish. Better food photographs begin with angle, freshness and restraint.
Quick answer
Build the photograph before the food loses freshness
Place one uncomplicated plate beside a large window with other room lights off. Turn the plate until side or back light reveals texture, use white card opposite the window to soften deep shadows and choose either overhead for graphic arrangement or 45 degrees for height. Clean the lens, simplify the background and make a test composition before the final garnish arrives.
- 01
A phone with a clean lens and controlled light can teach every important first decision.
- 02
Ring lights are convenient but can flatten texture and create circular reflections. Window light remains the baseline.
- 03
Food styling should keep ingredients safe and honest when the photograph represents a recipe or product.
- 04
Overhead rigs must be stable, counterweighted and kept away from heat, liquids and the plate.
What to expect
The subject changes while the photographer is deciding
Steam fades, sauces skin, herbs wilt and frozen food melts. Preparation and a stand-in plate protect the short final window.
Light
Direct sun creates hard highlights and fast change. Diffuse it or move back from the window.
Angle
Overhead suits flat arrangements; lower angles reveal height. The dish should choose the viewpoint.
Colour
Mixed daylight and warm room lamps are difficult to correct. Switch other lights off before adding equipment.
Background
Texture can support the dish, but too many props compete with the food and complicate cleanup.
Timing
Set camera, cloth, cutlery and exposure with an empty plate before plating the final food.
Editing
Correct exposure, crop and colour without making food radioactive or disguising an unsuccessful recipe.
Core method
Shape one light and one clear plate
Choose the story and viewing angle
Decide whether the image shows freshness, comfort, crisp texture, height or a process. Use a phone preview with an empty plate to test overhead and 45-degree views. Remove props that do not support that idea. Level the background and leave room where a publication crop may need it.
Use the window as a large source
Place the table beside or just behind the window so light travels across the food. Turn off ceiling and under-cabinet lights. If sun is harsh, use a translucent curtain or move farther away. Place white card opposite the window for gentle fill; use black card when shape needs deeper controlled shadow.
Prepare the set before plating
Secure any support, clean the lens and set exposure and focus using a stand-in plate. Arrange linens so they do not create accidental bumps. Keep raw and cooked food, styling tools and camera equipment separated. Bring the finished food only when the frame, light and focus are ready.
Make a small consistent series
Take a safe overall frame, then adjust one element: camera height, plate rotation or reflector distance. Capture one closer detail while the food is fresh. Edit the group with the same white balance and contrast, comparing colour with the real dish rather than an exaggerated social-media preset.
Useful products
A reflector first, then choose one stable phone-support route
The small Andoer reflector is the most broadly useful purchase for shaping window light. The Evershop and alternative overhead mount are mutually exclusive phone-support options; either can help repeat an overhead frame, but neither replaces careful placement and stability checks.
Andoer 60 cm 5-in-1 Photography Reflector
It makes shadow depth visible and adjustable without adding a second powered light.
Evershop Ring Light with Tripod and Overhead Phone Holder
Its main value is stable position; the ring light can be switched off when window light is better.
Acuvar Overhead Phone Mount with Ring Light
It can solve a restricted tripod footprint when the mounting surface is strong and suitable.
First project
Photograph a bowl with one-window light
Use a salad, pasta, soup or fruit bowl with clear shape and colour. Prepare an empty bowl as the focusing stand-in.
- 01
Choose the mood
Write one word—fresh, warm, crisp or calm—and remove anything that contradicts it.
- 02
Test two angles
Frame the empty bowl overhead and at 45 degrees and choose the clearer story.
- 03
Shape the window
Turn off room lights and move white card until shadows retain detail without flattening.
- 04
Secure the device
Use two hands, a tripod or a stable overhead mount away from liquids and heat.
- 05
Plate and photograph quickly
Add the final garnish, take the safe frame and then make only small variations.
- 06
Edit for believable food
Correct crop, exposure and colour and reject a frame with misleading texture or doneness.
What can wait
What can wait until the first result
The first upgrade should solve light consistency or camera position, not add decorative clutter.
- 01
A cupboard of props
One neutral board, cloth and ordinary cutlery are enough to learn hierarchy.
- 02
Several artificial lights
Start with one window or one lamp so every shadow has an understandable cause.
- 03
A macro lens
Close detail is useful later; first make the whole plate coherent.
- 04
Fake steam or inedible treatments
They create safety and honesty problems and are unnecessary for a beginner recipe image.
- 05
Two overhead rigs
Choose one support style after measuring the table, phone and intended angle.
Upgrade path
Upgrade the repeated limitation
Add control only where daylight, stability or field of view has become unreliable.
Window and card
Free to £11Phone + white card or reflector
Learn direction, shadow and colour.Repeatable phone angle
About £30–£34Stable overhead mount or tripod
Hold composition while plating and styling.One soft artificial light
About £80–£250LED or flash + large diffuser + stand
Work independent of weather and time.Camera and selected lens
About £500+Tethering and controlled lighting
Improve workflow and resolution after the visual method is established.Safety & care
Keep the set stable, food-safe and truthful
Camera gear should never fall into food, obstruct cooking or encourage unsafe holding times.
- Counterweight and tighten overhead supports, keep legs out of walkways and never place electronics above boiling liquid or open flame.
- Separate food-contact utensils from styling and camera tools and follow normal refrigeration and allergen controls.
- Discard food that has sat outside safe time and temperature limits or been contaminated during styling.
- Represent ingredients, portion, texture and doneness honestly where the image supports a recipe or sale.
- Ask permission before photographing restaurant staff, kitchens, customers or private premises.
Outside help
When outside help earns its place
A styling workshop can help when the aim becomes commercial consistency, but repeated window-light sessions are the useful first education.
Use examples to compare angle, light size and reflector placement.
Check whether food, props, lighting and image rights are included.
Representative UK prices and free learning routes checked 3 August 2026; local availability, materials and tutor support vary.
Sources
Where the guidance came from
Camera manufacturers and Adobe provide practical light and composition teaching; UK food-safety principles remain in force while a dish is photographed.
-
01
Nikon · Food photography at home
Practical use of available light, reflectors and home setups.
Open source -
02
Canon · Tips for amazing food photography
Angle, lens, composition and light advice from a camera manufacturer.
Open source -
03
Adobe · Food photography guide
Workflow, styling, lighting and post-processing overview.
Open source -
04
Food Standards Agency · Food hygiene
UK food handling, storage and hygiene principles.
Open source -
05
Amazon UK · Andoer 60 cm 5-in-1 reflector
Exact product page, model or ISBN, observed price and availability checked for this guide.
Open source -
06
Amazon UK · Evershop overhead phone and ring-light rig
Exact product page, model or ISBN, observed price and availability checked for this guide.
Open source -
07
Amazon UK · Acuvar overhead phone mount
Exact product page, model or ISBN, observed price and availability checked for this guide.
Open source
Guide information and links checked 3 August 2026.