Beginner’s guide · Make & create
Tension the warp,
then vary the weft.
A small frame loom, strong warp and a few contrasting yarns are enough. Begin with plain weave and learn clean edges before chasing elaborate textures.
Quick answer
Weave a narrow sampler before filling the whole frame
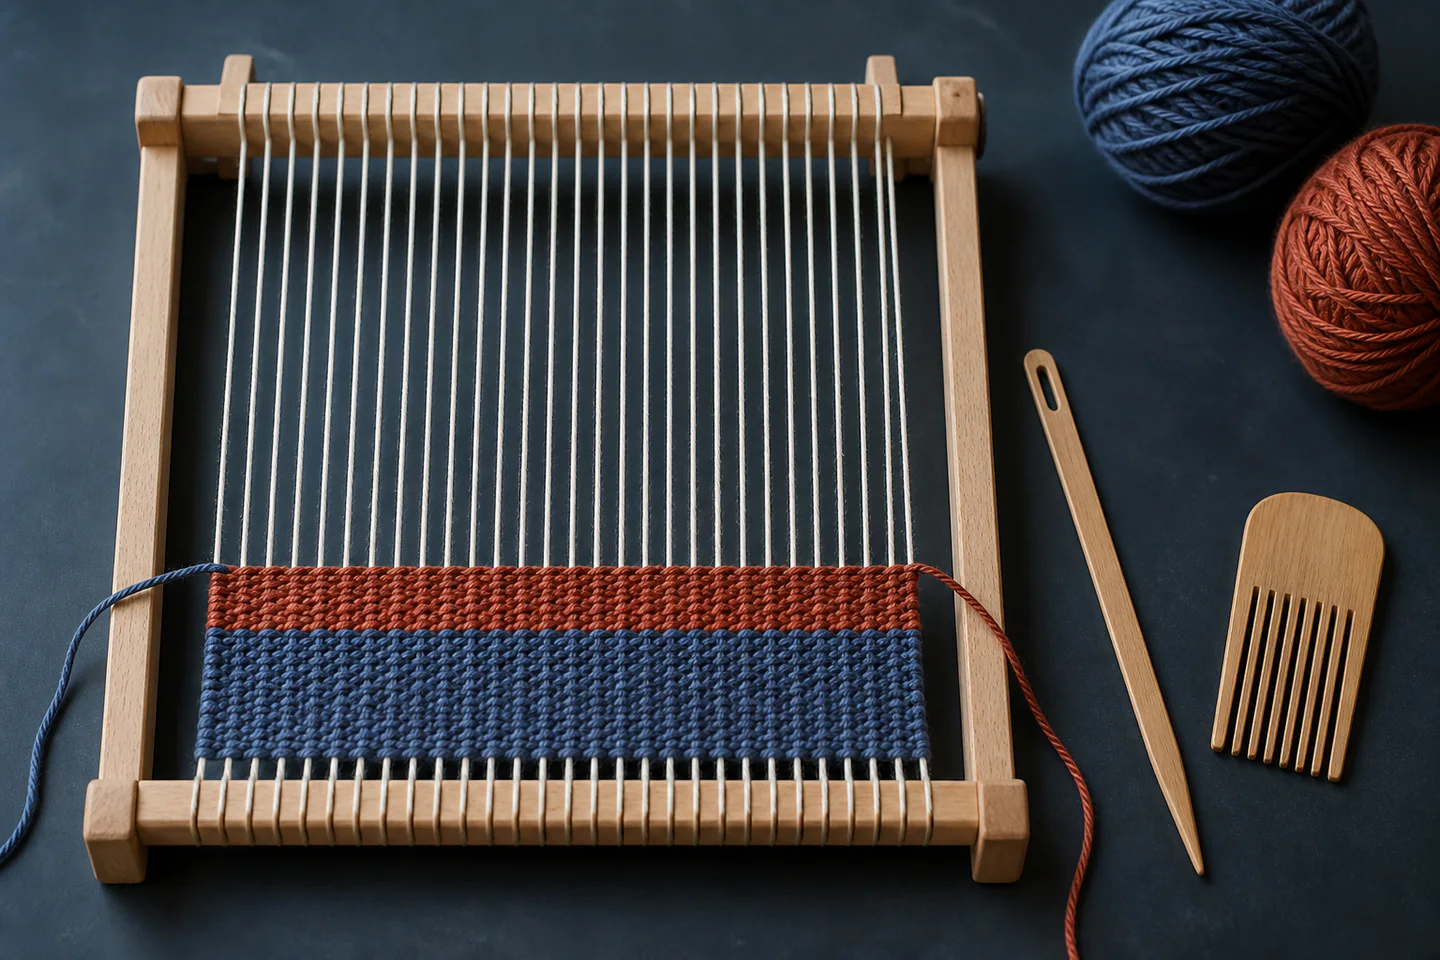
Warp a small frame loom with strong smooth yarn at even spacing. Leave enough waste for finishing, insert a header and weave alternating over-under rows with two contrasting weft yarns. Place each row in a shallow arc before beating it down so the weft does not pull the sides inward. Finish a piece roughly postcard-sized, remove it carefully and secure the warp ends.
- 01
Warp yarn needs strength and low stretch; decorative soft yarn is usually better saved for the weft.
- 02
Even warp spacing matters more than maximum tightness.
- 03
Bubble or arc the weft before beating so it has enough length to travel over and under the warp.
- 04
Do not tug the last pass at each edge; turn around the outer warp without cinching it.
- 05
Record sett, yarn and finishing method because the same yarn behaves differently at another spacing.
What to expect
The rectangle records every tension decision
Plain weave looks simple because only two motions repeat. Its edges reveal whether the warp, turns and beating were consistent.
Warping
Uneven spacing or a crossed warp follows the piece from beginning to end. Count and inspect before weaving.
Take-up
Weft travels around warp threads and needs extra length. Pulling it straight before beating narrows the cloth.
Beating
Hard packing creates a dense fabric; light packing leaves more warp visible. Change deliberately rather than row by row.
Edges
Selvedges should turn cleanly without loops or inward steps. A ruler laid across the work shows width changes early.
Finishing
The loom’s first and last rows need enough waste for knots, fringe, hemming or another chosen finish.
Core method
Separate structure from decoration
Warp the frame
Choose a smooth strong cotton or similar warp, follow the loom’s route and keep each pass equally firm. Insert a temporary spacer if the loom instructions require one and leave adequate end length.
Build a header
Use scrap yarn to spread the warp evenly and establish a straight baseline. Check the width at several points rather than trusting the frame edge.
Weave and beat
Pass the weft over and under, reverse the sequence on the next row, form a shallow arc and beat it into place. Use fingers or a comb gently enough that the warp spacing remains visible.
Change yarn and finish
Overlap or weave in colour changes according to the chosen method. Complete a stable final band, remove the piece without cutting blindly and secure pairs or groups of warp ends consistently.
Useful products
Products with a clear job in the setup
The Homewit frame is a small low-cost introduction; the JMIATRY frame gives more working width; the Willowdale standing loom is a later scale upgrade. One loom is enough to begin.
Homewit 24 × 28 cm Wooden Weaving Loom Kit
Its limited width keeps warping and edge control manageable while including the essential hand tools.
JMIATRY 40 × 30 cm Frame Loom Kit
The larger working area supports a small wall piece without moving to a floor loom.
Willowdale 64 × 49 cm Weaving Loom with Stand
A stand improves access and posture for longer tapestry sessions.
First project
Weave a two-colour plain-weave sampler
A narrow sampler makes width, packing and yarn changes easy to compare.
- 01
Choose the warp
Use one smooth strong yarn and test that a firm pull does not break or stretch it noticeably.
- 02
Warp a narrow section
Use only part of the frame width, count the ends and correct crosses before tying off.
- 03
Insert a scrap header
Weave several temporary rows until spacing and baseline are straight.
- 04
Work plain weave
Alternate over-under rows, arcing each pass before a gentle beat.
- 05
Change one variable
Switch weft colour or packing density for a short band while keeping everything else constant.
- 06
Remove and secure
Follow the loom method, tie or weave ends consistently and trim only after the piece lies flat.
What can wait
What can wait until the first result
A larger loom offers more area, not automatic control. Straight small cloth is the useful prerequisite.
- 01
Floor loom
It adds heddles, reeds, tie-up and substantial space before frame-loom fundamentals are understood.
- 02
Large yarn collection
A few contrasting yarns reveal texture more clearly than dozens of unrelated leftovers.
- 03
Complex tapestry image
Detailed shapes add joins and colour management while basic edges are still changing.
- 04
Very stretchy yarn
It disguises tension while weaving and can distort after removal.
- 05
Expensive tools
A simple shuttle, tapestry needle and comb are enough for the first sampler.
Upgrade path
Upgrade the repeated limitation
Increase loom width, shedding assistance or yarn range only when a specific repeated project needs it.
Narrow sampler
About £18–£40Small frame + owned yarn
Learn warp, beat and selvedges.Small wall piece
About £35–£90Wider frame and chosen fibres
Control colour changes and texture.Faster repeated cloth
About £150–£500Rigid-heddle loom and accessories
Open sheds quickly and produce longer fabric.Multi-shaft weaving
About £700–£3,000+Table or floor loom
Develop complex structures and repeatable yardage.Safety & care
Protect posture, fingers and stored tension
Frame weaving is low risk, but sharp needles, taut warp and long static sessions still need deliberate handling.
- Place the loom on a stable surface and do not brace a sharp corner against the body.
- Store tapestry needles in a container or magnetic holder rather than loose in yarn.
- Take breaks and change height before neck, hand or shoulder discomfort becomes persistent.
- Cut taut warp under control and away from the face because released ends can spring.
- Check fibre care and allergies before making wearables, children’s items or washable household textiles.
Outside help
When outside help earns its place
A frame-loom diagram is enough for plain weave. A guild or workshop becomes useful when moving to rigid heddle or shaft looms, calculating sett and planning longer cloth.
Useful for handling several loom types before buying one.
Ask about loom type, yarn, finishing and whether the work remains on the loom after class.
Representative UK learning options checked 28 August 2026; local prices, access, materials and tutor support vary.
Sources
Where the guidance came from
Museum and loom-maker references establish woven structure; specialist teaching and weaving communities add practical evidence about warp tension, draw-in and finishing.
-
01
Victoria and Albert Museum · woven textiles
Woven structure, warp, weft and textile context.
Open source -
02
The Weaving Loom · beginner weaving
Frame-loom warping, plain weave and finishing tutorials.
Open source -
03
Ashford · weaving resources
Loom-maker instructions and weaving terminology.
Open source -
04
The Handweavers Studio · learning resources
UK specialist teaching and equipment context.
Open source -
05
Reddit · r/weaving
Community evidence on first looms, tension, selvedges and yarn choice.
Open source -
06
Amazon UK · 24 × 28 cm Wooden Weaving Loom Kit
Exact product catalogue page or ISBN used for the recommendation; current price, seller, specification and availability should be confirmed.
Open source -
07
Amazon UK · 40 × 30 cm Frame Loom Kit
Exact product catalogue page or ISBN used for the recommendation; current price, seller, specification and availability should be confirmed.
Open source -
08
Amazon UK · 64 × 49 cm Weaving Loom with Stand
Exact product catalogue page or ISBN used for the recommendation; current price, seller, specification and availability should be confirmed.
Open source
Guide information and links checked 28 August 2026.