Beginner’s guide · Make & create
Recover one seat
and keep its structure honest.
A drop-in dining-chair pad is the right first upholstery project: small, removable and easy to document before stripping. Start with sound foam and frame, then learn removal, tension and neat corners.
Quick answer
Recover a removable seat with a sound base
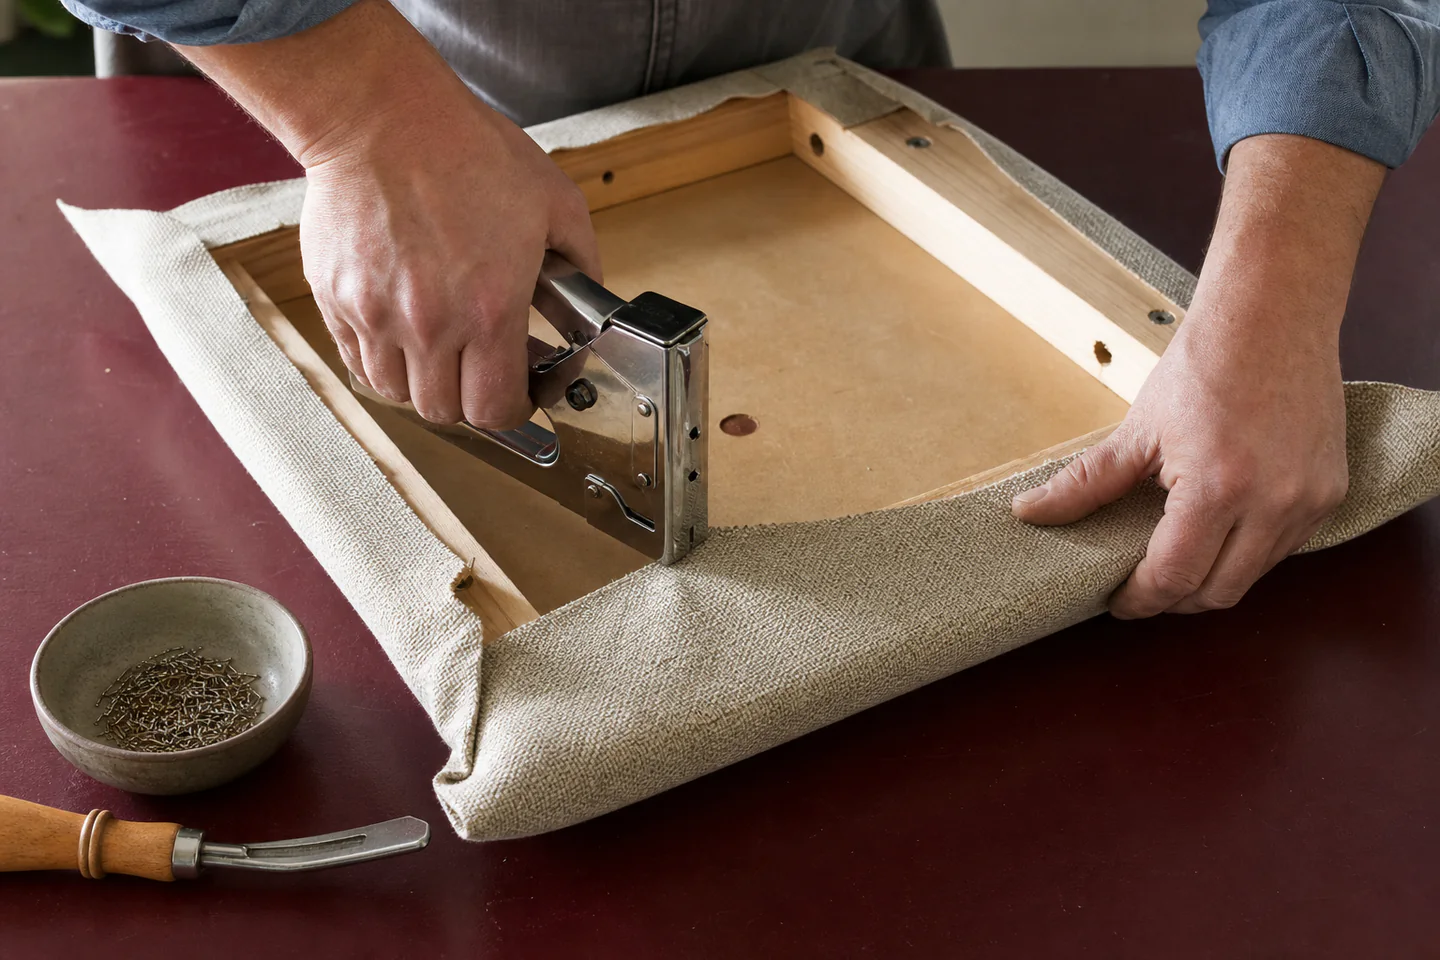
Choose a simple dining chair whose seat lifts out and whose foam, webbing and frame are structurally sound. Photograph every layer, remove staples carefully and fit one stable upholstery fabric with balanced tension.
- 01
Check the frame and filling before assuming new fabric is the only work required. Note the material, setting or measurement used so the result can be repeated or changed for a reason.
- 02
Photograph, label and retain old layers until their order and shaping have been understood. Note the material, setting or measurement used so the result can be repeated or changed for a reason.
- 03
Align fabric grain and motif before placing the first fixing. Note the material, setting or measurement used so the result can be repeated or changed for a reason.
- 04
Work from opposing centres toward corners so tension is distributed rather than chased around the seat. Note the material, setting or measurement used so the result can be repeated or changed for a reason.
- 05
Use fixings that suit the substrate and stop before staples split a thin frame. Note the material, setting or measurement used so the result can be repeated or changed for a reason.
What to expect
The visible fabric is only the final layer
Upholstery combines structure, padding, tension and finish; a simple sound seat keeps the first project focused on removal and covering.
Hidden condition
Old foam may crumble, webbing may sag and frames may loosen. Covering failure does not repair these underlying problems. For upholstery, check this deliberately while the work is still easy to alter; correcting it after the next stage usually costs more time or materials.
Removal time
Taking out old staples cleanly can take longer than fitting new cloth, and sharp hidden tacks are common. For upholstery, check this deliberately while the work is still easy to alter; correcting it after the next stage usually costs more time or materials.
Pattern placement
Stripes and directional motifs make small alignment errors obvious. Plain or small-repeat fabric is easier for a first seat. For upholstery, check this deliberately while the work is still easy to alter; correcting it after the next stage usually costs more time or materials.
Corners
Fabric bulk must be distributed in mirrored folds while keeping the top smooth and avoiding a hard lump underneath. For upholstery, check this deliberately while the work is still easy to alter; correcting it after the next stage usually costs more time or materials.
Core method
Document before dismantling
Assess the seat
Remove the pad, inspect the timber, foam and support layers and choose another project if mould, pests or structural failure are present. For upholstery, check this deliberately while the work is still easy to alter; correcting it after the next stage usually costs more time or materials.
Strip carefully
Wear eye and hand protection, lift each staple or tack without gouging the frame and photograph the fold pattern. For upholstery, check this deliberately while the work is still easy to alter; correcting it after the next stage usually costs more time or materials.
Use the old cover as evidence
Mark front, back and centre lines, compare grain and cut the new cloth with generous working allowance. For upholstery, check this deliberately while the work is still easy to alter; correcting it after the next stage usually costs more time or materials.
Fix from the centres
Place temporary staples at front, back and sides, check the top, then work outward in alternating pairs before forming corners. For upholstery, check this deliberately while the work is still easy to alter; correcting it after the next stage usually costs more time or materials.
Useful products
Products with a clear job in the setup
A controllable manual stapler, proper remover and webbing stretcher are relevant tools; the stretcher can wait unless the seat actually has replaceable webbing.
AECCN Three-in-One Staple Gun for Wood and Furniture
A manual tool offers enough control for a small project without compressor or battery cost.
Tomoyuki Four-Piece Upholstery Staple Remover and Tack Lifter Set
Several tips help reach different fasteners while preserving the frame.
Faithfull Upholstery Webbing Stretcher, 50 mm
It provides leverage more evenly than gripping and pulling webbing by hand.
First project
Recover one plain drop-in seat
A removable square or gently rounded pad teaches alignment and corners without dismantling an entire chair.
- 01
Inspect and photograph
Remove the pad, check that the board and filling are dry and sound, then photograph top, underside and every corner. For upholstery, check this deliberately while the work is still easy to alter; correcting it after the next stage usually costs more time or materials.
- 02
Remove old fixings
Lift staples and tacks methodically, place them in a rigid container and preserve the old cover as a cutting and fold reference. For upholstery, check this deliberately while the work is still easy to alter; correcting it after the next stage usually costs more time or materials.
- 03
Cut and centre
Press the new fabric if appropriate, align its grain with marked seat centres and leave a generous even margin underneath. For upholstery, check this deliberately while the work is still easy to alter; correcting it after the next stage usually costs more time or materials.
- 04
Tension in pairs
Fix front and back centres, then sides, repeatedly turning the seat over to check that the top remains straight and smooth. For upholstery, check this deliberately while the work is still easy to alter; correcting it after the next stage usually costs more time or materials.
- 05
Form and finish corners
Mirror the fold direction, trim only excess that is proven unnecessary and cover the underside only after a final inspection. For upholstery, check this deliberately while the work is still easy to alter; correcting it after the next stage usually costs more time or materials.
What can wait
What can wait until the first result
Springs, deep buttons and major frame repairs require different tools and judgement from a straightforward cover replacement.
- 01
Coil-sprung chair
Spring tying and edge formation are structural upholstery skills, not a larger version of stapling fabric. For upholstery, check this deliberately while the work is still easy to alter; correcting it after the next stage usually costs more time or materials.
- 02
Deep buttoning
Button placement, stuffing distribution and tension need accurate layout and access to the full build. For upholstery, check this deliberately while the work is still easy to alter; correcting it after the next stage usually costs more time or materials.
- 03
Valuable or fire-damaged furniture
Age, provenance, contamination and fire-safety requirements deserve professional assessment. For upholstery, check this deliberately while the work is still easy to alter; correcting it after the next stage usually costs more time or materials.
Upgrade path
Upgrade the repeated limitation
Upgrade according to the next seat’s actual internal construction and the number of fixings involved.
Try it
£30–£75 plus fabricManual stapler, remover and sound seat pad
Stripping, grain alignment, tension and corners become clear.Replace padding
£20–£70 extraUpholstery foam, wadding, adhesive and correct cutting tools
Comfort and edge shape can be restored rather than merely covered.Repair support
£25–£100+Webbing, stretcher and appropriate tacks or staples
Sagging support can be rebuilt on suitable frames.Take on traditional work
VariableSpecialist hand tools, materials and tutor guidance
Springs, stitched edges and historical methods become responsible options.Safety & care
Expect sharp hidden fixings
Eye protection, hand position and a stable workpiece are fundamental during both removal and stapling.
- Wear eye protection when pulling old staples and when firing new ones; use suitable gloves during stripping. Follow the current instructions supplied with the exact material or tool.
- Disconnect or lock powered staplers before clearing jams and never point any stapler at a hand or person. Follow the current instructions supplied with the exact material or tool.
- Assess old foam, mould, pests and unknown dust before disturbing it, using appropriate controls or professional help. Follow the current instructions supplied with the exact material or tool.
- Check UK furniture fire-safety requirements when choosing materials or working on items that will be supplied to others. Follow the current instructions supplied with the exact material or tool.
Outside help
When outside help earns its place
A detailed tutorial is enough for one sound drop-in seat. A class is worthwhile before spring work, webbing replacement, stitched edges or valuable furniture.
Use one complete lesson that includes preparation, the working method, troubleshooting and finishing. Avoid combining measurements from several creators on the first attempt.
Ask whether materials, safe tool use, individual correction and a finished take-home result are included before booking.
Representative UK learning options checked 29 August 2026; local prices, access, materials and tutor support vary.
Sources
Where the guidance came from
The method is grounded in specialist and manufacturer guidance, then checked against recurring beginner problems and the exact products linked here.
-
01
Association of Master Upholsterers and Soft Furnishers
UK professional training and upholstery practice context.
Open source -
02
British Furniture Confederation · Fire safety
UK furniture industry and regulatory context.
Open source -
03
HSE · Hand tools
General safe-use guidance for hand tools.
Open source -
04
Victoria and Albert Museum · Furniture
Museum context for furniture construction and conservation.
Open source -
05
Furniture Industry Research Association
Furniture performance and material context.
Open source -
06
Amazon UK · Three-in-One Staple Gun for Wood and Furniture
Exact product catalogue page or ISBN used for the recommendation; current price, seller, specification and availability should be confirmed.
Open source -
07
Amazon UK · Four-Piece Upholstery Staple Remover and Tack Lifter Set
Exact product catalogue page or ISBN used for the recommendation; current price, seller, specification and availability should be confirmed.
Open source -
08
Amazon UK · Upholstery Webbing Stretcher, 50 mm
Exact product catalogue page or ISBN used for the recommendation; current price, seller, specification and availability should be confirmed.
Open source
Guide information and links checked 29 August 2026.