Beginner’s guide · Cook & bake
Bake useful bread with the kit you have.
Learn the dough before buying the gear.
Begin with a small active starter, strong white bread flour and a digital scale. Use a loaf tin for the most forgiving first bread, or a lidded oven-safe casserole for a crustier round loaf. This guide covers both routes, realistic timings, common early problems and the upgrades that make a visible difference.
Quick answer
Start with a tin loaf or a covered loaf
The easiest route is a tin loaf made with a lively starter, strong white bread flour, water and salt. A 900 g or 2 lb loaf tin supports the dough, so shaping and steam matter less. If you already own a lidded cast-iron or other oven-safe casserole, the same dough can become a round loaf with a crisper crust. Build a starter from flour and water, or obtain a small healthy starter to begin baking sooner.
- 01
Use the bowl, jar, spoon, tea towel, tin or lidded casserole already in your kitchen before buying a specialist kit.
- 02
A digital scale that reads in 1 g steps is the first worthwhile purchase if you do not own one; starter ratios and dough consistency are much easier to repeat by weight.
- 03
Begin with a manageable dough rather than a very wet recipe designed for large holes. A lower-water dough is easier to fold, shape and diagnose.
- 04
Judge fermentation by rise, bubbles and feel as well as time. Room temperature and starter strength can move the schedule by several hours.
- 05
Bake the loaf fully and let it cool for at least one hour before slicing. Cutting it hot can make a properly baked crumb seem wet and gummy.
What to expect
What sourdough is really like
Sourdough is less about constant work than about short jobs spread across a long fermentation. The difficult part is learning when the starter and dough are ready, not kneading for hours.
Schedule
A typical loaf crosses two days: mix and fold on day one, cold-proof overnight, then bake and cool on day two. Most of that time is waiting.
Temperature
A warm kitchen speeds the dough and a cool kitchen slows it. A recipe’s clock is a guide, while visible expansion, bubbles and elasticity tell you what the dough has actually done.
Mess
Expect a sticky bowl, a lightly floured worktop and starter residue in a jar. A scraper and a soak in cool water before washing make clean-up easier.
Results
A first loaf may be lower, tighter and less dramatically open than bakery photographs. Good flavour, an evenly baked crumb and a shape that slices cleanly are better first targets than giant holes.
Waste
A small starter can be maintained with tens of grams rather than a large jar of daily discard. Spare starter can go into fully cooked pancakes, crackers or flatbreads.
Heat and space
The hobby needs little permanent space, but the oven runs hot for close to an hour and a proofing bowl or tin occupies a fridge shelf overnight.
Two routes
Choose the first route that fits your kitchen
Route 1: the forgiving tin loaf
Use a 900 g or 2 lb loaf tin. The tin supports the sides, so the dough can be slightly under-shaped and still become useful sandwich bread. Steam is helpful but not essential, and you do not need to lift a heavy preheated pot. This is the sensible first route when you mainly want reliable slices.
Route 2: a crusty round loaf
Use a lidded oven-safe casserole or Dutch oven that leaves room for the dough to expand. The closed vessel traps moisture released by the dough during the early bake, helping the surface stay flexible while the loaf rises. This route produces a stronger crust and usually better oven spring, but it adds shaping, scoring and a significant hot-pot burn risk.
Get a starter or grow one
A spoonful of healthy starter from a friend, bakery or class removes the week or two needed to establish one. Growing your own needs only flour, water, a clean container and regular small feeds. Neither route makes the final bread more authentic: the important point is a stable culture that rises predictably before it is asked to raise a loaf.
Flour for the first attempt
Strong white bread flour is the easiest baseline because its gluten strength makes dough behaviour easier to read. UK examples checked on 23 July 2026 were about £1.53–£2.19 per kilogram. Wholemeal or rye flour can help a new starter become active, but a mostly white first dough is easier to handle and lets you change one variable at a time.
Starter care
Build a small starter and keep it useful
Start small
Use a clean jar or food container with room for the mixture to at least double. Mix equal weights of flour and water, then keep only a small amount at each feed. A 20 g starter fed with 20 g water and 20 g flour is enough to observe activity without creating a large daily surplus. Mark the level with an elastic band or washable marker and cover the container loosely so gas can escape.
Wait for repeatable strength
A new culture commonly needs 5–14 days and can take longer. Early bubbles are encouraging but do not prove it can raise bread. It is ready for a beginner loaf when it repeatedly doubles in roughly 6–8 hours after feeding, smells clean, tangy and yeasty, and shows bubbles through the mixture rather than only on top.
Keep it at room temperature while establishing it
Feed often enough that it rises and then begins to fall before the next feed. Exact intervals depend on temperature and flour. Changing flour, feed ratio, water and room temperature together makes the culture hard to understand, so adjust one thing at a time.
Refrigerate an established starter
Once it is predictable, a starter used weekly can live in the fridge and be fed about once a week. Give it one or more room-temperature feeds before baking until it returns to its normal rise. A neglected starter may need several feeds rather than one large feed.
Know when to discard it
Grey liquid or a sharp solvent-like smell can mean a hungry culture, but fuzzy mould or pink, orange or other unusual coloured growth is a reason to discard the whole starter and clean the container. Do not taste raw starter or dough. Flour is a raw agricultural ingredient and should be cooked thoroughly.
Starter kit
Buy only what removes a real obstacle
A bowl, spoon, jar, tea towel and loaf tin or lidded casserole are enough to begin. The scale below is the only near-essential purchase when your kitchen lacks a gram scale. The scraper is a cheap convenience for handling dough and cleaning the worktop. The cast-iron cooker appears later because an adequate covered casserole can do the same first job.
Salter Arc Digital Kitchen Scale
One-gram weighing makes small starter feeds and a single loaf repeatable without specialist baking equipment. The tare function also lets flour, water, starter and salt be weighed into the same bowl.
Amazon Basics Multi-Purpose Stainless Steel Bench Scraper
The broad stainless edge lifts tacky dough, divides portions and scrapes dried residue from a suitable worktop, reducing the temptation to add extra flour simply to stop sticking.
Skip for now
What to skip until the dough makes sense
Most beginner frustration comes from starter strength, temperature, fermentation and excess water. Specialist accessories do not correct those variables.
- 01
Large starter jars and large feeds
A small culture proves the same biology with much less flour. Build more starter only when a recipe requires it.
- 02
Very high-hydration recipes
Wet dough can make an open crumb, but it is harder to shape and more sensitive to flour strength and fermentation. Add water in later loaves once the baseline is repeatable.
- 03
All-in-one sourdough kits
Baskets, cloths, whisks, blades and jars bundled together can look economical, but most do not improve the first tin loaf and quality is difficult to judge from a bundle.
- 04
A stand mixer
Folding a single loaf by hand takes only a few short sessions. A mixer becomes useful for larger batches or enriched dough, not because sourdough requires one.
- 05
A banneton and exposed razor
A floured tea towel in a bowl can support a round loaf, and a sharp kitchen knife can make a simple score. Buy specialist shaping and scoring tools after you know you will use them safely.
- 06
Imported starter and rare flour
A local or home-grown culture and ordinary UK bread flour can make excellent bread. Fermentation practice matters more than a romantic origin story.
First loaf
Make a manageable first loaf
This deliberately moderate dough makes one substantial loaf: 500 g strong white bread flour, 325 g water, 100 g ripe starter and 10 g fine salt. Use a 900 g or 2 lb tin, or shape it for a lidded casserole. Flour absorption and kitchen temperature vary, so record what happens rather than forcing the dough to match a photograph.
- 01
Prove the starter is ready
Feed the starter and mark its level. Mix the dough when the culture has risen strongly, is full of bubbles and is near its peak. If it has not been doubling predictably within about 6–8 hours, keep strengthening it before committing 500 g of flour.
- 02
Mix and rest
Combine all four ingredients in a bowl until no dry flour remains. The dough should feel tacky but hold together. Cover and rest for 30 minutes. If your flour produces an unmanageably loose mixture, hold back 25 g water next time rather than adding handfuls of flour now.
- 03
Build strength with folds
With damp hands, lift one edge, stretch it gently and fold it over the centre. Turn the bowl and repeat around the dough. Do three sets at 30-minute intervals, stopping if the dough begins to tear.
- 04
Let the bulk fermentation finish
Leave the covered dough until it looks smoother and aerated, shows bubbles at the edges, jiggles when the bowl moves and has expanded by roughly one-third to one-half. This may take around 3–7 hours in a warm room and longer in a cool one. The dough’s condition matters more than the clock.
- 05
Choose the shape
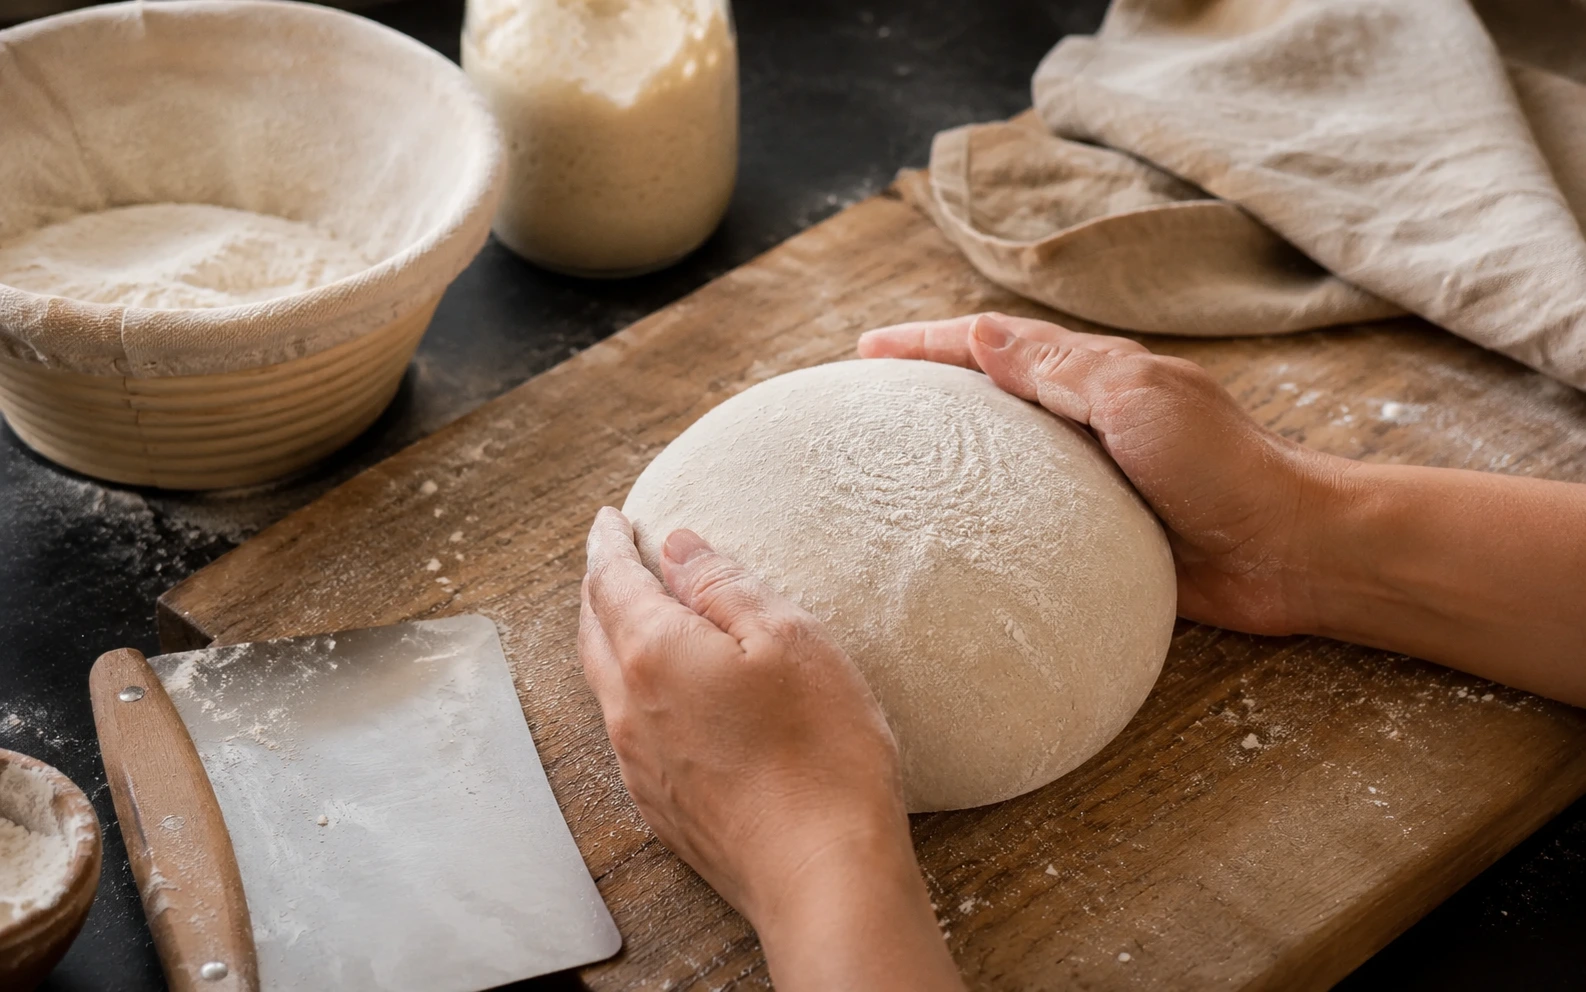
For the tin route, lightly grease the tin, form the dough into a loose cylinder and place it seam-side down. For a round loaf, pre-shape it, rest for 15–20 minutes, tighten the surface gently and place it seam-side up in a well-floured towel-lined bowl.
- 06
Proof with room in the schedule
Cover and refrigerate for about 8–16 hours. Cold dough is easier to score and the overnight pause makes baking easier to plan. A same-day room-temperature proof also works, but it needs closer observation.
- 07
Bake the tin loaf
Heat the oven to 230°C conventional or 210°C fan. Score the top with a sharp knife, then bake for about 40–45 minutes until deeply browned. Turn it out carefully and return it to the oven for a few minutes if the sides look pale. Oven behaviour varies, so use colour and a firm crust as well as time.
- 08
Or bake in a covered casserole
Preheat the lidded vessel for at least 30 minutes at 230°C conventional or 210°C fan. Clear a heatproof landing area, use dry oven gloves, turn the cold dough onto baking paper, score it and lower it into the pot. Bake covered for 20–25 minutes, then uncovered for another 20–25 minutes until deep brown.
- 09
Cool before judging it
Move the loaf to a rack and wait at least one hour, preferably closer to two for a large round loaf. The crumb continues to set as steam leaves. Slice it only when the base and centre no longer feel hot.
Troubleshooting
Fix the process before changing the equipment
Dense, gummy or low
The most common cause is a starter that was not strong enough, or dough that went into the fridge before bulk fermentation had progressed far enough. Strengthen the starter, give the dough more warmth or time, and wait for visible aeration. Cooling the baked loaf fully also prevents a normal crumb being mistaken for an underbaked one.
Wide and flat
The dough may be too wet for the flour, under-strengthened, over-proofed or handled without enough surface tension. Reduce the water by 25 g on the next attempt and keep the rest of the process the same. A smaller pot can constrain a loaf, but it does not repair fermentation or dough strength.
Impossibly sticky
Use damp hands for folds, a lightly floured surface for shaping and a scraper for lifting and cleaning. Adding a great deal of flour during shaping changes the recipe and can leave dry seams. A manageable lower-water dough is a better lesson than wrestling with a fashionable wet one.
Pale, thick or hard crust
Bake until the loaf is properly browned, but check your oven temperature if the crust stays pale or burns early. A covered vessel mainly changes the first part of the bake by holding steam. For a thinner crust, avoid extending the uncovered bake unnecessarily and store the fully cooled loaf in a breathable bread bag rather than leaving it exposed all day.
Sourness is not fixed
Flavour changes with flour, feed frequency, starter maturity, fermentation length and cold proof. Repeat the same loaf a few times before chasing a more or less sour result, otherwise it is difficult to know which change mattered.
Upgrade path
Upgrade only when you can name the change
The useful upgrades make measuring, handling, steam or temperature more predictable. None replaces a lively starter and correctly fermented dough.
Use what you own
About £2–£5 in ingredientsJar, bowl, spoon, tea towel, strong bread flour, salt and either a loaf tin or lidded oven-safe casserole.
Enough to learn starter activity, folds, fermentation and baking without committing to a specialist setup.Reliable measuring
About £10–£18A 1 g digital scale, plus an inexpensive bench scraper if sticky clean-up is putting you off.
Feed ratios and dough changes become repeatable, while the scraper moves dough and cleans the worktop without extra flour.Better steam for round loaves
£0 with a suitable casserole, about £100 for the selected combo cookerA heavy lidded vessel that is oven-safe at bread temperatures and leaves expansion room around the loaf.
The sealed early bake improves crust development and oven spring. A shallow-base combo cooker also makes loading easier than reaching into a deep pot.More consistent shape and scoring
About £15–£35A proofing basket sized to your dough, a safely stored lame and an instant-read thermometer if you want more diagnostics.
The basket supports the surface and the lame allows controlled expansion. They improve presentation, not weak fermentation.Temperature control
£0 for a stable warm spot, £100+ for dedicated controlTrack dough temperature first. Consider a small proofing or starter chamber only if a cold or highly variable kitchen repeatedly breaks the schedule.
Fermentation becomes more predictable across seasons. The device does not make better flavour automatically and occupies worktop or storage space.Safety
Food and oven safety
The main risks are raw flour, allergens, blades, steam and very hot heavy cookware. Treat the starter as raw food and plan the hot-pot movements before opening the oven.
- Do not eat raw flour, starter or dough. Raw flour can contain harmful bacteria, so wash hands and utensils after mixing, clean flour spills and bake dough thoroughly.
- Sourdough made with wheat, rye or barley is not gluten-free. Prevent cross-contact when cooking for someone with coeliac disease or a cereal allergy, and do not rely on fermentation to remove the allergen.
- Keep starter in a loosely covered container with headroom. A sealed rigid jar can build pressure as fermentation produces gas.
- Discard the entire starter if it develops fuzzy mould or pink, orange or otherwise unusual coloured growth. Do not scrape the top and keep the remainder.
- Score on a stable surface, cut away from hands and body, and store a razor-style lame with its cover fitted. A sharp kitchen knife is safer than an exposed loose blade when learning.
- Cast iron remains hot for a long time and the selected combo cooker weighs about 5.8 kg before dough is added. Use dry oven gloves, keep both hands clear of steam, and prepare a trivet or heatproof landing space before lifting it.
- Avoid thermal shock. Do not put hot cookware on a wet or cold surface, add cold liquid to a very hot vessel, or use glass cookware beyond the manufacturer’s stated temperature limits.
- Keep children and pets away from the open oven and hot-pot route. Do not leave baking paper overhanging near an element or flame.
Classes
Classes can shorten the diagnosis loop
Supervision is not required for ordinary home sourdough, but a class lets an instructor show dough at several fermentation stages and correct shaping pressure in real time. That is most valuable after one or two home attempts have given you specific questions.
Repeat one moderate recipe, photograph the dough at each stage and note room temperature, timings and rise. The written record is more useful than changing recipes after every loaf.
Representative 2026 UK examples include a £80 three-hour session at The Fermentarium and a £110 three-hour introduction at Bread Ahead. Check location, which dough stages are shown and what you take home.
A longer course can cover starter management, mixing, shaping and several breads with more individual feedback. Bread Ahead advertised a 6.5-hour complete sourdough day at £220 when checked.
Representative UK prices and course descriptions checked 23 July 2026. Dates, locations, availability and what is included change.
Sources
Sources and checks
Research checked 23 July 2026
Technique and safety were checked against food-safety guidance, established baking specialists and the Real Bread Campaign. Product identity and specifications were checked against manufacturer and exact retailer pages. Recurring beginner problems and buying advice were compared across several community discussions, while UK flour and course examples provide representative current costs.
-
01
Food Standards Agency · Handling flour safely
Established that flour is a raw ingredient that can contain harmful bacteria and that raw dough should not be eaten; supported hygiene and thorough-cooking advice.
Open source -
02
King Arthur Baking · Create a sourdough starter
Supported the usual 5–14 day establishment window and the use of consistent post-feed doubling as a practical readiness test.
Open source -
03
King Arthur Baking · Feeding and maintaining starter
Checked room-temperature and refrigerated maintenance principles, regular feeding and revival before baking.
Open source -
04
King Arthur Baking · A smaller sourdough starter
Established a low-waste 20 g starter, 20 g water and 20 g flour maintenance pattern suitable for a beginner household.
Open source -
05
King Arthur Baking · Easy everyday sourdough bread
Supported a forgiving tin-loaf route with little shaping and a long, flexible schedule as an alternative to a round artisan loaf.
Open source -
06
King Arthur Baking · No-knead sourdough bread
Checked that active hands-on work can remain short while total fermentation and baking time extends across much of a day.
Open source -
07
King Arthur Baking · Baking bread with steam at home
Supported the explanation that a covered Dutch oven traps the loaf’s own steam and improves early expansion and crust development.
Open source -
08
The Perfect Loaf · Beginner’s sourdough bread
Checked the two-day workflow, staged folds, fermentation cues, covered baking and the importance of cooling before slicing.
Open source -
09
The Perfect Loaf · Sourdough starter guide
Cross-checked starter feeding, activity, storage and the need for repeatable strength rather than relying on isolated early bubbles.
Open source -
10
Real Bread Campaign · What is Real Bread?
Established the UK campaign’s distinction between genuine sourdough leavened by a live culture and bread using added raising agents.
Open source -
11
Borough Market · Sourdough bread recipe
Provided a UK-oriented specialist cross-check for a simple flour, water, starter and salt loaf, baking time and rack cooling.
Open source -
12
r/Sourdough · What do I really need for baking?
One of several discussions showing repeated agreement that a scale matters more than a large accessory kit and that ordinary bowls and surfaces can work.
Open source -
13
r/Sourdough · Necessary tools
Cross-checked recurring practitioner value placed on scales, scrapers and covered baking, alongside workable improvised alternatives.
Open source -
14
r/Sourdough · How do you work with sticky dough?
Supported repeated practical advice to use wet hands, a scraper and better dough strength rather than burying a sticky dough in extra flour.
Open source -
15
r/Sourdough · Do I need a smaller Dutch oven?
Supported the recurring warning that a flatter loaf is usually better addressed through fermentation, hydration and shaping before buying a smaller pot.
Open source -
16
Salter · Arc Digital Kitchen Scale, black
Verified model 1066 BKDR15, 3 kg capacity, add-and-weigh function, LCD display, CR2032 power, current UK manufacturer availability and price.
Open source -
17
Amazon UK · Salter Arc Digital Kitchen Scale
Verified the clean UK product page, ASIN B00140VYEG, exact Salter Arc identity, 3 kg capacity, in-stock status and observed £10.25 price.
Open source -
18
Amazon UK · Amazon Basics bench scraper
Verified the exact 6-inch stainless-steel scraper with measurement marks and non-slip handle, ASIN B07255T6SW, UK availability and observed £5.62 price.
Open source -
19
Lodge Cast Iron · 3.2 Quart Combo Cooker
Verified model LCC3, 3.2-quart format, skillet-lid design, seasoned cast iron, oven compatibility, 12.85 lb weight and hand-wash care.
Open source -
20
Amazon UK · Lodge Cast Iron Combo Cooker
Verified the clean UK product page and ASIN B0009JKG9M for the 3 litre or 3.2 quart Lodge LCC3 cooker, with in-stock status and observed £103.36 price.
Open source -
21
Waitrose · White Canadian Bread Flour 1.5 kg
Provided a current UK supermarket example of very strong white bread flour at £2.30 for 1.5 kg, equivalent to £1.53 per kilogram.
Open source -
22
Natural Grocery · Shipton Mill Strong White Organic Bread Flour 1 kg
Provided a current specialist-retailer example of UK-available strong white organic bread flour at £2.19 per kilogram.
Open source -
23
Bread Ahead · Intro to Sourdough
Verified a current London beginner workshop example advertised at £110 for three hours, including the course length and beginner focus.
Open source -
24
Bread Ahead · Complete Sourdough
Verified a current full-day London course example advertised at £220 for 6.5 hours, used only as a representative advanced class cost.
Open source -
25
The Fermentarium · Sourdough bread class
Verified a current three-hour beginner class example advertised at £80, adding a second provider and price point to the course comparison.
Open source
Guide information and links checked 23 July 2026.