Beginner’s guide · Make & create
Tie a pattern
you can wear today.
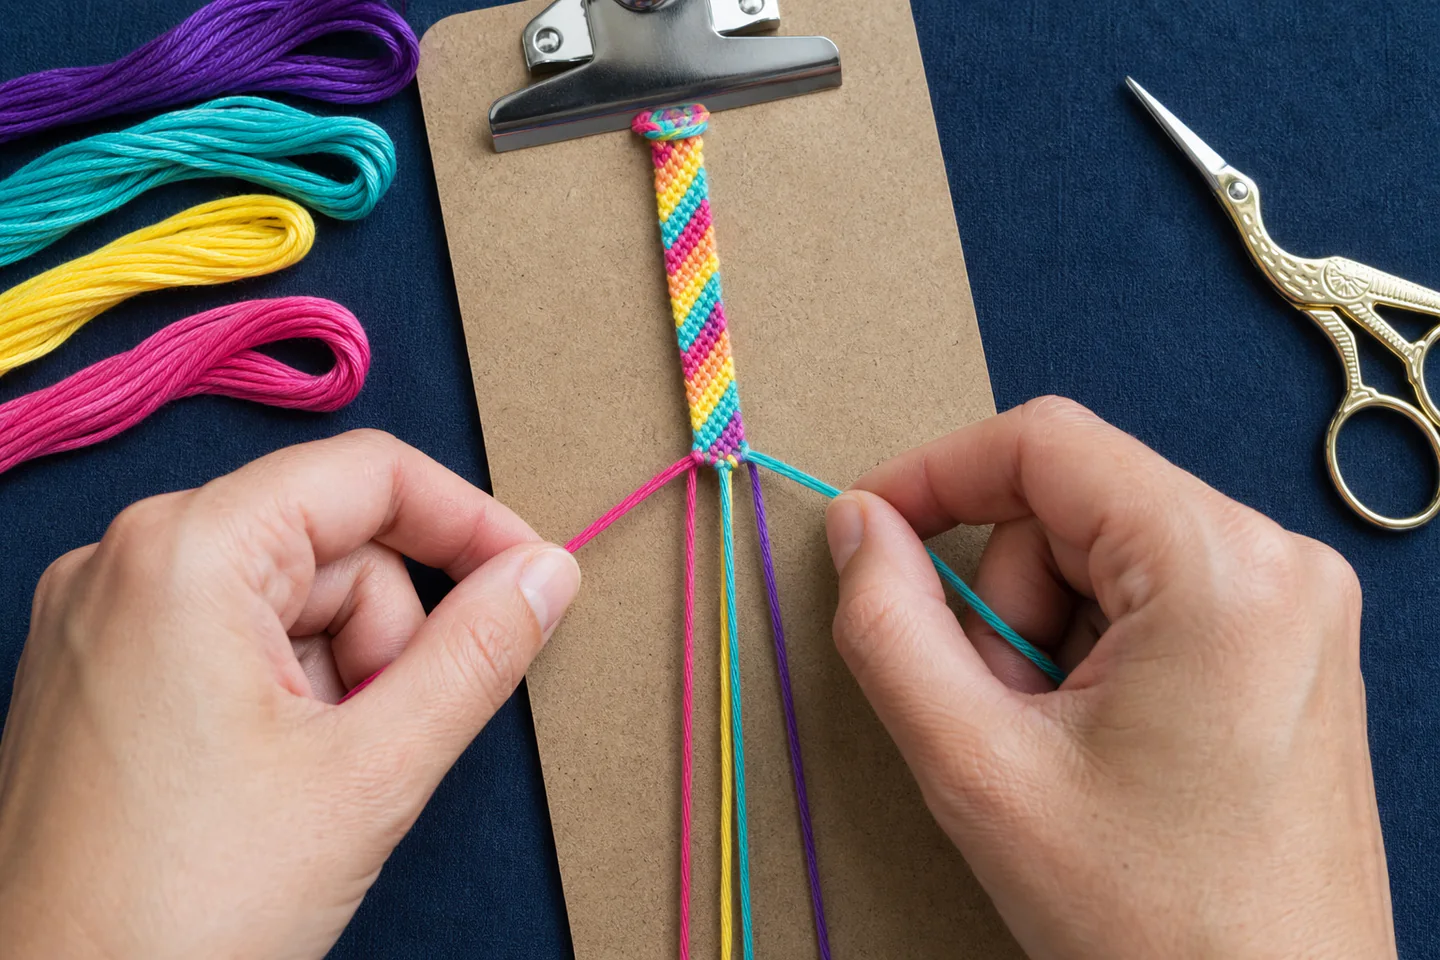
Embroidery floss, a secure working point and four basic knots are enough to make patterned friendship bracelets. Start with diagonal stripes before names, pictures or enormous colour sets.
Quick answer
Learn one stripe pattern with four colours
Cut four colours of six-strand embroidery floss, secure the bundle and practise forward knots in a diagonal-stripe pattern. Each visible bump is usually a double knot made in the same direction.
- 01
Use smooth stranded embroidery floss because its colour range and predictable thickness make patterns easy to read. Note the material, setting or measurement used so the result can be repeated or changed for a reason.
- 02
Anchor the top firmly enough to resist pulling without sticking tape to delicate furniture. Note the material, setting or measurement used so the result can be repeated or changed for a reason.
- 03
Make both halves of each double knot around the same holding thread. Note the material, setting or measurement used so the result can be repeated or changed for a reason.
- 04
Follow the thread order after every row; one misplaced colour changes all later diagonals. Note the material, setting or measurement used so the result can be repeated or changed for a reason.
- 05
Aim for even firmness rather than pulling until the bracelet curls. Note the material, setting or measurement used so the result can be repeated or changed for a reason.
What to expect
The knot is easy; the sequence creates the design
Bracelets need almost no equipment, but pattern reading and tension determine whether a colourful bundle becomes a straight band.
Thread length
Knots consume much more thread than the finished bracelet length suggests. A complete pattern gives safer cutting guidance than guesswork. For friendship bracelet making, check this deliberately while the work is still easy to alter; correcting it after the next stage usually costs more time or materials.
Knot direction
Forward, backward and combination knots move a coloured working thread in different directions. The arrow matters as much as the colour. For friendship bracelet making, check this deliberately while the work is still easy to alter; correcting it after the next stage usually costs more time or materials.
Tension
Tightening against the previous row keeps bands dense, but excessive pulling narrows and twists the bracelet. For friendship bracelet making, check this deliberately while the work is still easy to alter; correcting it after the next stage usually costs more time or materials.
Finishing
A loop-and-braid, button or adjustable closure should suit the wearer and avoid an uncomfortable bulky knot. For friendship bracelet making, check this deliberately while the work is still easy to alter; correcting it after the next stage usually costs more time or materials.
Core method
Read the threads as moving columns
Prepare colours
Choose four clearly different shades, cut equal lengths from a proven pattern and tie or loop the starting end as directed. For friendship bracelet making, check this deliberately while the work is still easy to alter; correcting it after the next stage usually costs more time or materials.
Secure the work
Use a clipboard, board or safety pin on a firm cushion so the top cannot slide while knots are tightened. For friendship bracelet making, check this deliberately while the work is still easy to alter; correcting it after the next stage usually costs more time or materials.
Build one knot
Wrap the working strand over the neighbouring holding strand twice in the same direction, seating each half against the prior row. For friendship bracelet making, check this deliberately while the work is still easy to alter; correcting it after the next stage usually costs more time or materials.
Reset every row
Spread strands back into order and check the leading colour before crossing the next thread. For friendship bracelet making, check this deliberately while the work is still easy to alter; correcting it after the next stage usually costs more time or materials.
Useful products
Products with a clear job in the setup
Good floss and a clear pattern are more valuable than novelty beads. These options cover the basic material, a structured reference and an optional work board.
AUERVO Embroidery Floss, 50 Skeins with Bobbins and Needles
Fifty shades are enough for choice without the duplication and storage of a huge anonymous set.
Design Originals Friendship Bracelets 102
A coherent book prevents random diagrams with missing length or closure information.
HEMOTON Three EVA Friendship Bracelet Braiding Boards
It can reduce tangles when the thread count grows, though a clipboard still works.
First project
Make one four-colour diagonal stripe
A narrow bracelet teaches every basic movement and can be completed before enthusiasm turns into an unfinished twenty-thread pattern.
- 01
Measure from a pattern
Use the pattern’s cutting length, align the strands and form the specified loop or leave enough tail for braids. For friendship bracelet making, check this deliberately while the work is still easy to alter; correcting it after the next stage usually costs more time or materials.
- 02
Arrange the colours
Lay the four strands in the intended left-to-right order and photograph that order for reference. For friendship bracelet making, check this deliberately while the work is still easy to alter; correcting it after the next stage usually costs more time or materials.
- 03
Knot the first row
Use the leftmost strand to make two forward half-knots over each neighbouring strand in turn. For friendship bracelet making, check this deliberately while the work is still easy to alter; correcting it after the next stage usually costs more time or materials.
- 04
Repeat and compare
Return the strands to visible columns after each row and compare band width every few passes. For friendship bracelet making, check this deliberately while the work is still easy to alter; correcting it after the next stage usually costs more time or materials.
- 05
Fit and finish
Stop at the measured wearable length, form matching braids or the chosen closure and trim only after testing the fit. For friendship bracelet making, check this deliberately while the work is still easy to alter; correcting it after the next stage usually costs more time or materials.
What can wait
What can wait until the first result
Names, beads and very wide alpha patterns add sequencing before the four foundational knots are comfortable.
- 01
Hundreds of colours
A limited palette makes the moving thread obvious and is cheaper to organise. For friendship bracelet making, check this deliberately while the work is still easy to alter; correcting it after the next stage usually costs more time or materials.
- 02
Alphabet pattern
Letters use a background-and-letter knot system that is easier after diagonal and chevron patterns. For friendship bracelet making, check this deliberately while the work is still easy to alter; correcting it after the next stage usually costs more time or materials.
- 03
Metal findings
Simple loops and braids work for early bracelets; add clasps only when repeatable sizing matters. For friendship bracelet making, check this deliberately while the work is still easy to alter; correcting it after the next stage usually costs more time or materials.
Upgrade path
Upgrade the repeated limitation
Upgrade the problem you actually meet: tangled strands, repetitive patterns or closures that wear poorly.
Try it
£8–£25Four floss colours, scissors and clipboard
Forward knots and thread movement become clear.Add pattern range
£8–£25Pattern book and organised floss box
Chevrons, diamonds and backward knots become manageable.Work wider
£10–£35Braiding board, bobbins and longer measured strands
More colours stay ordered through longer sessions.Refine wearability
VariableChosen cord, findings and measured closure system
Bracelets fit consistently and survive repeated use.Safety & care
Keep long cords controlled
The materials are simple, but scissors, loose loops and poor posture still need ordinary care.
- Keep long strands and finished loops away from small children and pets because they can entangle. Follow the current instructions supplied with the exact material or tool.
- Use scissors on a stable surface and store spare needles from mixed kits securely. Follow the current instructions supplied with the exact material or tool.
- Do not tie a bracelet so tightly that it affects comfort or circulation. Follow the current instructions supplied with the exact material or tool.
- Take hand and shoulder breaks if repeated pulling creates tension or pain. Follow the current instructions supplied with the exact material or tool.
Outside help
When outside help earns its place
A chart and close-up tutorial are enough for the basic knots. Live help is useful if arrow diagrams remain confusing or a wide alpha pattern keeps drifting.
Use one complete lesson that includes preparation, the working method, troubleshooting and finishing. Avoid combining measurements from several creators on the first attempt.
Ask whether materials, safe tool use, individual correction and a finished take-home result are included before booking.
Representative UK learning options checked 29 August 2026; local prices, access, materials and tutor support vary.
Sources
Where the guidance came from
The method is grounded in specialist and manufacturer guidance, then checked against recurring beginner problems and the exact products linked here.
-
01
DMC · Embroidery thread
Manufacturer information for six-strand cotton floss.
Open source -
02
Craft Yarn Council · Standards
Reference for yarn and thread terminology.
Open source -
03
Macramé Makers Guild
Knotting craft context and learning community.
Open source -
04
Victoria and Albert Museum · Jewellery
Museum context for wearable decorative craft.
Open source -
05
Design Originals · Friendship bracelets
Publisher catalogue used to verify structured pattern references.
Open source -
06
Amazon UK · Embroidery Floss, 50 Skeins with Bobbins and Needles
Exact product catalogue page or ISBN used for the recommendation; current price, seller, specification and availability should be confirmed.
Open source -
07
Amazon UK · Friendship Bracelets 102
Exact product catalogue page or ISBN used for the recommendation; current price, seller, specification and availability should be confirmed.
Open source -
08
Amazon UK · Three EVA Friendship Bracelet Braiding Boards
Exact product catalogue page or ISBN used for the recommendation; current price, seller, specification and availability should be confirmed.
Open source
Guide information and links checked 29 August 2026.