Beginner’s guide · Make & build
A button or sensor reliably controlling an LED
Make one input change one output.
Start with a genuine Arduino Uno starter kit and work through one LED, button or sensor circuit at a time. Copy the first example, then change one value and explain the result.
Quick answer
Build the official Blink example before inventing a circuit
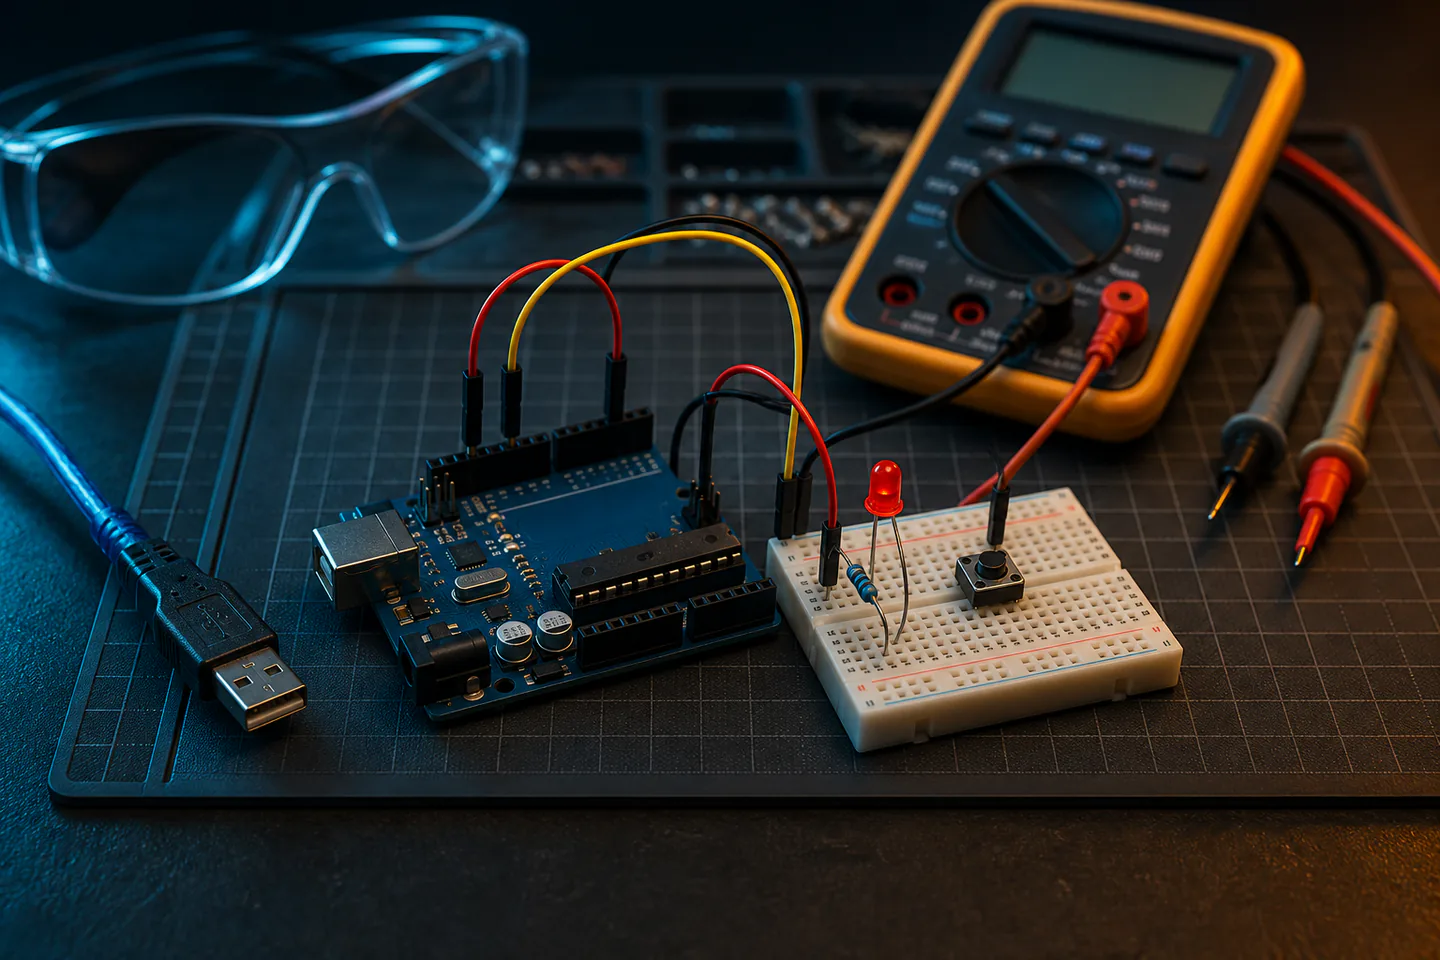
Use an Arduino Uno-compatible board, a breadboard, an LED and the correct resistor from a documented starter kit. Install the official Arduino IDE, select the exact board and port, upload Blink and confirm the onboard LED works. Then power down, build the breadboard LED circuit from the project book, verify polarity and resistor placement, and change only the delay value. This sequence proves the computer, cable, board, code and circuit one layer at a time.
- 01
An LED needs correct polarity and current limiting; connecting it directly across a supply can destroy it or damage the board.
- 02
Breadboard rows are internally connected in groups that are not always obvious. Trace each node rather than copying the visual shape loosely.
- 03
Many upload failures are the wrong board, wrong serial port, charge-only USB cable or another program holding the port.
- 04
A multimeter confirms voltage, continuity and resistance; it should never be placed in current mode directly across a supply.
What to expect
Most early faults are small and completely diagnosable
A circuit that does nothing is not mysterious. Divide the system into power, board connection, program, wiring orientation and component value.
Board
Official and compatible Uno boards run the same core sketches, but USB chips, drivers and supplied documentation may differ.
Breadboard
Power rails can be split and component legs can share the wrong row; inspect the internal connection pattern.
Polarity
LEDs, diodes, electrolytic capacitors and some sensors require the documented orientation.
Code
Compiler errors are different from upload errors and both are different from a correctly uploaded sketch with wrong logic.
Power
USB is appropriate for small starter circuits, not motors, heaters or large LED loads.
Debugging
Change one variable, record the observation and restore a known-working version before adding another part.
Core method
Prove each layer before adding complexity
Install from the official source
Download the Arduino IDE from Arduino, connect the Uno with a known data cable and use Tools to select the board and port. Open the built-in Blink example, compile and upload it without editing. Record the port and any permission or driver issue while the setup is known and simple.
Read the breadboard as connected nodes
Use the project diagram and a continuity check to understand rail and row connections. Insert the LED with its long leg and flat edge oriented as documented, put the resistor in series rather than beside it, and connect ground to the board’s GND pin. Disconnect USB before moving wires.
Change one behaviour at a time
After the circuit works, alter the on and off timing, then replace a fixed value with a button or sensor example from the kit. Add serial output that shows what the program reads. Name pins consistently and comment why a number exists rather than narrating every line.
Debug from evidence
Return to Blink to prove board and upload path. Use the multimeter on the correct function and range to check resistor value, continuity with power removed and expected voltage to ground with power applied. Photograph the wiring, compare nodes rather than colours and replace only one suspect part at a time.
Useful products
Products with a clear job in the setup
The official Starter Kit is the complete learning route and includes the Uno, breadboard, components and project book. Extra jumpers reduce teardown friction; the AstroAI meter is a general diagnostic upgrade and must be used within its documented limits.
Arduino Arduino Starter Kit Multi-language
The official examples let software, component names and project instructions agree, reducing avoidable compatibility uncertainty.
Elegoo Preformed Breadboard Jumper Wire Kit
Colour and length make nodes easier to trace when diagnosing a circuit from a photo or diagram.
AstroAI AM33D Digital Multimeter
It covers the low-voltage continuity, resistance and DC measurements that starter circuits most often need.
First project
Turn an LED on with a pushbutton
The project joins a digital input, a digital output and a clear state change without motors or mains power.
- 01
Prove the board
Upload the unmodified Blink example and confirm the onboard LED and serial port.
- 02
Map the breadboard
Identify connected rows and rails and test continuity with power removed if uncertain.
- 03
Build the LED output
Place the LED and documented series resistor, then test a slow blink.
- 04
Add the button input
Wire it with the tutorial’s pull-up or pull-down arrangement, not a floating pin.
- 05
Print the state
Use the serial monitor to compare the button reading with the physical circuit.
- 06
Change one rule
Reverse the logic or alter blink timing and write down why the result changes.
What can wait
What can wait until the first result
Wireless, mains and high-current projects can wait until the low-voltage signal path is familiar.
- 01
A giant sensor assortment
The starter kit already contains enough parts to learn digital, analogue and actuator basics.
- 02
Soldering the first circuit
A breadboard makes mistakes reversible while the pinout and logic are still being learned.
- 03
Mains relays
Exposed mains voltage needs enclosure, isolation and competence beyond an Uno lesson.
- 04
Large motors from USB
Motors need suitable drivers, supplies and protection; never pull their operating current through an I/O pin.
- 05
Copying an AI-generated circuit blindly
Verify every pin, voltage and component value against primary documentation before powering it.
Upgrade path
Upgrade the repeated limitation
Move from guided circuits to permanent builds only when the prototype is understood and documented.
Official starter projects
About £75–£100Uno + breadboard + documented parts
Learn code, signals and safe low voltage.Measured prototypes
About £15–£35 extraMultimeter + spare jumpers + storage
Diagnose nodes instead of guessing.Soldered small device
About £35–£90 extraSoldering tools + enclosure + perfboard
Make a durable standalone circuit.Motors or wireless
About £30–£150+Rated power, drivers and modules
Add energy and communication with new failure modes.Safety & care
Keep every beginner circuit low-voltage and current-limited
The Uno is forgiving, not indestructible. Shorts, reverse polarity, unsuitable loads, heat and incorrect meter use can damage equipment or cause injury.
- Disconnect power before changing wiring and inspect for shorts between supply and ground before reconnecting.
- Use documented resistors, driver modules and power limits; never run motors, heaters or large loads directly from an I/O pin.
- Keep liquids, conductive debris and loose metal tools away from powered boards and work on a stable non-conductive surface.
- Set a multimeter function and leads before touching a circuit; never measure resistance on a powered circuit or short a supply in current mode.
- Do not experiment with mains electricity, lithium charging circuits or safety-critical controls without appropriate qualified design and supervision.
Outside help
When outside help earns its place
Official examples and the project book are enough for the first circuits. A makerspace session becomes useful when moving into soldering, motors, radio or enclosure fabrication.
Use official examples and pin documentation before adapting community circuits.
Check that low-voltage safety, multimeter use and fault-finding are taught, not just kit assembly.
Representative UK product, club, lesson and venue costs checked 9 August 2026; local prices, access, weather, materials and tutor support vary.
Sources
Where the guidance came from
Primary Arduino documentation governs board and software behaviour; electronics distributors and community troubleshooting supply practical component and fault context.
-
01
Arduino · Getting started
Official board, IDE, upload and first-sketch instructions.
Open source -
02
Arduino · Starter Kit
Official contents and project scope for the selected kit.
Open source -
03
Arduino · Language reference
Primary reference for functions, structure and variables.
Open source -
04
SparkFun · Breadboard tutorial
Specialist explanation of breadboard connections and prototype practice.
Open source -
05
Reddit · r/arduino
Recurring user reports on upload, wiring, power and kit problems.
Open source -
06
Amazon UK · Official Arduino Starter Kit
Exact product page, model or ISBN, observed price and availability checked for this guide.
Open source -
07
Amazon UK · Elegoo preformed jumper wires
Exact product page, model or ISBN, observed price and availability checked for this guide.
Open source -
08
Amazon UK · AstroAI AM33D multimeter
Exact product page, model or ISBN, observed price and availability checked for this guide.
Open source
Guide information and links checked 9 August 2026.