Beginner’s guide · Observe & photograph
Leave the camera still,
let the seasons draw.
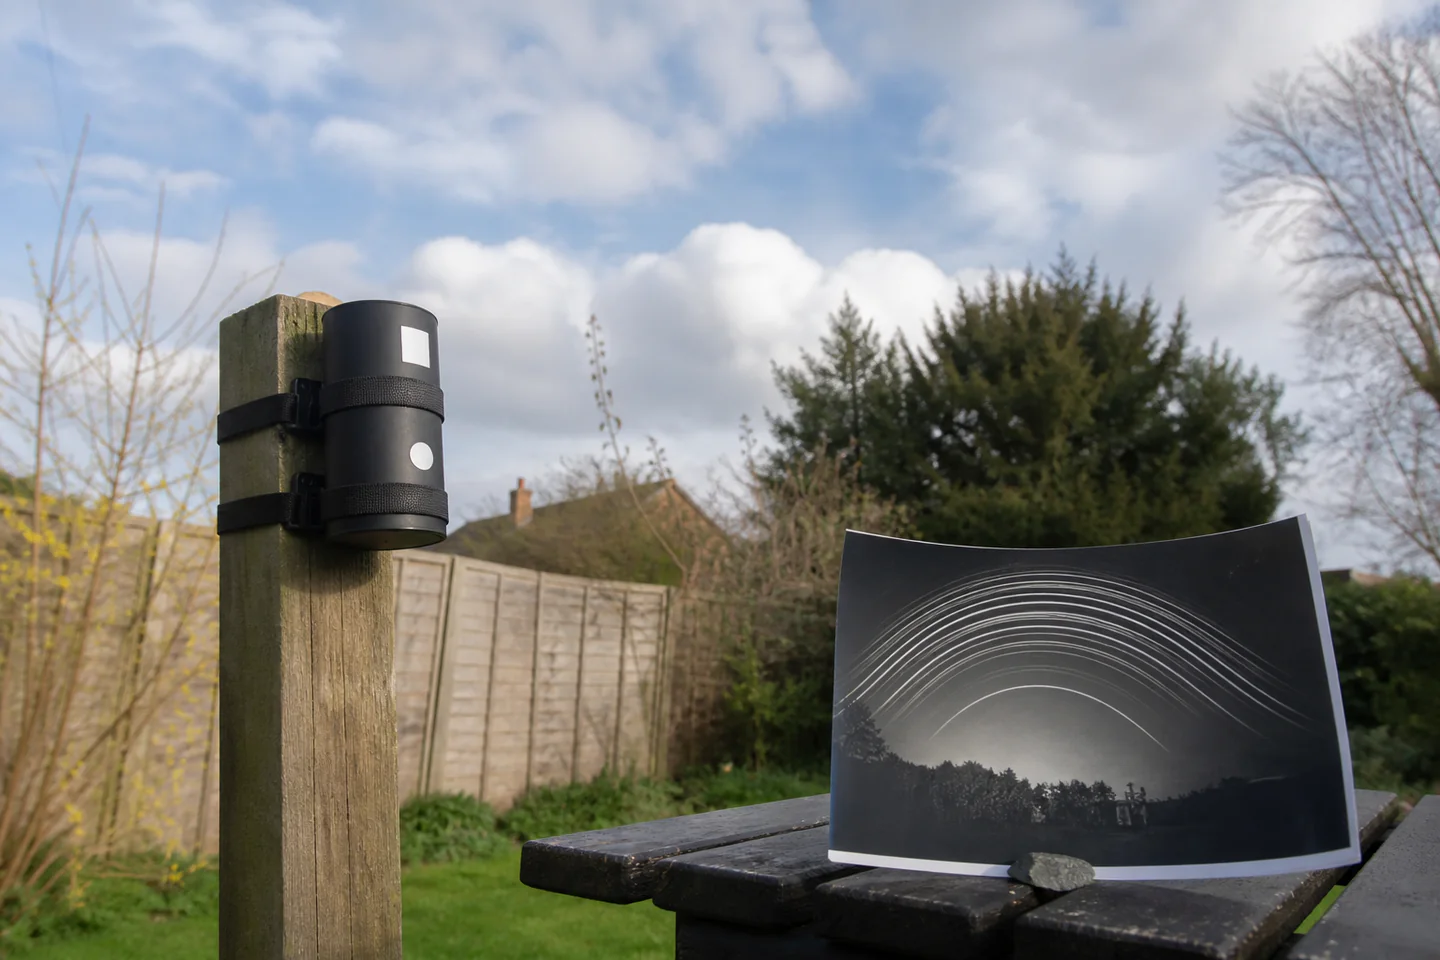
Solargraphy uses a pinhole camera and photographic paper to record the Sun’s path over days or months. Careful siting and permission matter as much as the camera.
Quick answer
Run a one-week test before committing to six months
Load a proven weatherproof solargraph camera with black-and-white photographic paper in the low light specified by its instructions. Choose a private, permitted position with a broad view towards the Sun’s daily arc, secure the camera so wind cannot rotate it and label it clearly with ownership and recovery details. Record a reference photograph, orientation and installation date. Retrieve the first camera after about a week to test leaks and framing, then scan the paper promptly in subdued conditions without chemical development.
- 01
Solargraphy records the Sun’s changing path through a pinhole onto photographic paper; it is not a safe viewing device and must never be looked through at the Sun.
- 02
A long exposure turns tiny mechanical movement into broken or doubled tracks. The mount and camera body must survive wind, rain and temperature change.
- 03
Install only with the landowner’s explicit permission. Do not attach devices to infrastructure, protected sites or places where they alarm people or harm trees.
- 04
The latent paper image can continue changing in light. Retrieve into an opaque bag and scan promptly using a documented low-light workflow.
- 05
A short test reveals leaks, water ingress and field of view before a solstice-to-solstice exposure spends months collecting the same mistake.
What to expect
Most failures happen to the camera, not the exposure
The chemistry can record an arc for months, but weather, condensation, mounting and accidental removal decide whether the paper returns home. Redundancy is part of the method.
Orientation
In Britain, a broad southern view captures longer arcs, but local obstacles and the camera’s pinhole geometry decide composition.
Duration
Days can show repeated tracks; months reveal seasonal height. Longer is not automatically better if the site is insecure.
Weather
Rain can enter the pinhole or seams, while condensation can mark paper even inside an apparently sealed can.
Movement
A few degrees of rotation breaks the continuity between early and late arcs. Photograph the mount so movement can be diagnosed.
Gaps
Clouds interrupt the Sun trace and create dashed paths. That is a record of weather, not a failed exposure.
Scan
The sheet is normally digitised as an unfixed paper negative. Repeated bright scans can fade or alter it, so capture a good master promptly.
Core method
Design the recovery before installing the camera
Use a proven camera design
A commercial solargraph camera or documented metal-can design should have a clean pinhole, dark interior, firmly curved paper and weather-resistant seams. Practise loading with scrap card, then handle real photographic paper only under the recommended light. Mark the top and pinhole direction externally.
Survey a lawful site
Obtain clear permission from the owner or manager and agree the exposure duration. Avoid roads, railways, utilities, security-sensitive structures, wildlife habitats and any tree fixing that damages bark. Choose a viewpoint reachable for inspection and recovery without climbing or trespass.
Mount and document
Use UV- and weather-resistant fixing appropriate to the permitted structure, without covering the pinhole. Add a durable label explaining that it is an art camera, with contact and removal date. Photograph the exact position, record coordinates privately, compass direction and date, then check that nothing can swing into the view.
Retrieve and digitise
Approach safely, confirm the camera has not shifted and cover the pinhole before removal. Put it into an opaque bag and open it in subdued conditions. Scan once at useful resolution following the chosen method, invert and mirror the digital copy if needed, preserve the raw scan and expect the physical sheet to remain light-sensitive.
Useful products
Products with a clear job in the setup
Ilford RC paper is a well-documented image surface for DIY solargraph cameras, while a compact tripod is useful for short controlled balcony or garden tests that can be recovered daily. The Epson flatbed creates a consistent digital master. None of these links replaces a secure weatherproof body or permission for the installation site.
Ilford MULTIGRADE IV RC Deluxe Glossy Paper, 8 × 10 in, 25 Sheets
A larger sheet can be cut under correct darkroom conditions to fit multiple cylindrical or box cameras.
Manfrotto PIXI Mini Tripod
A small support helps check framing from a private windowsill or sheltered garden position without permanent mounting.
Epson Perfection V39 Flatbed Photo and Document Scanner
A flatbed makes exposure, resolution and orientation more repeatable than a handheld phone photograph.
First project
Run a seven-day garden solargraph
A week is long enough to reveal sun arcs, pinhole direction, leaks and movement without waiting a season for basic feedback.
- 01
Practise with scrap card
Load, curve and remove a dummy sheet until it can be done without touching the image area.
- 02
Ask permission
Agree the exact private mounting point, label and removal date.
- 03
Mark the geometry
Record top, pinhole direction and the intended southern sky view.
- 04
Secure and photograph
Use a non-damaging weather-resistant mount and take reference images from several angles.
- 05
Cover before recovery
Close the pinhole, place the camera in an opaque bag and note any movement or water.
- 06
Scan one master
Work in subdued light, keep the raw scan and make edits only on copies.
What can wait
What can wait until the first result
A solstice-to-solstice exposure should be the second or third camera, not the first time the seams and angle meet real weather.
- 01
Six-month exposure
A one-week test can reveal framing, leaks and movement while there is still time to correct them.
- 02
Public installations
They raise permission, alarm, removal and liability issues that a private garden avoids.
- 03
Dozens of cameras
Every installation needs consent, labelling, records and guaranteed recovery.
- 04
Chemical development
Solargraph paper is usually scanned as an unfixed negative; conventional development produces a different result.
- 05
Unprotected paper boxes
Cardboard alone absorbs weather and changes shape; use a proven weatherproof design.
Upgrade path
Upgrade the repeated limitation
Extend duration only after the short test returns dry, still and correctly framed.
One-week test
About £15–£40DIY camera + RC paper
Prove loading, angle and weather sealing.Seasonal exposure
About £20–£60Reinforced body and documented mount
Record changing solar height.Multiple viewpoints
About £40–£120Numbered cameras and site log
Compare horizon, aspect and weather.Exhibition workflow
About £150–£600+Scanner, calibrated editing and archival output
Turn fragile negatives into repeatable prints.Safety & care
A camera left outdoors is a responsibility
Permission, clear labelling, non-damaging attachment and certain recovery are part of the photograph. Never disguise a container or leave it where it can reasonably cause concern.
- Never use a pinhole camera, lens, optical viewfinder or improvised device to look at the Sun; solargraphy is unattended recording, not solar observation.
- Install only with explicit permission and avoid transport, utility, security, protected wildlife and public-access locations.
- Do not climb, work near live traffic or attach anything above people; choose a site that can be installed and retrieved safely from the ground.
- Use non-damaging weather-resistant fixing, a clear explanatory label and a firm removal date; retrieve every camera even if the project appears to have failed.
- Handle photographic paper as light-sensitive material, cut safely in the correct conditions and store unused and exposed sheets in labelled opaque containers.
Outside help
When outside help earns its place
The Solarcan instructions and a private test site are enough to start. A photography or environmental-art group becomes helpful when arranging permission, multi-camera records or archival scanning.
Use a documented camera and retrieval workflow rather than an unlabelled online diagram.
Ask about paper handling, site permission, scanning and take-home cameras.
Representative UK learning options checked 18 August 2026; local prices, access, materials and tutor support vary.
Sources
Where the guidance came from
Solarcan documents the practical long-exposure workflow. Pinhole educators, environmental-art projects and community results add evidence about orientation, weatherproofing, mounting and recovery failures.
-
01
Solarcan · Instructions
Manufacturer installation, exposure and retrieval workflow.
Open source -
02
Solarcan · The booklet
Detailed camera, siting, scanning and image context.
Open source -
03
Worldwide Pinhole Photography Day
Pinhole principles and international project examples.
Open source -
04
Justin Quinnell · Solargraphy
Experienced practitioner instructions for long paper exposures.
Open source -
05
Reddit · r/Solargraphy
Community evidence on weather sealing, siting, scans and long-exposure failures.
Open source -
06
Amazon UK · MULTIGRADE IV RC Deluxe Glossy Paper, 8 × 10 in, 25 Sheets
Exact product catalogue page or ISBN used for the recommendation; current price, seller, specification and availability should be confirmed.
Open source -
07
Amazon UK · PIXI Mini Tripod
Exact product catalogue page or ISBN used for the recommendation; current price, seller, specification and availability should be confirmed.
Open source -
08
Amazon UK · Perfection V39 Flatbed Photo and Document Scanner
Exact product catalogue page or ISBN used for the recommendation; current price, seller, specification and availability should be confirmed.
Open source
Guide information and links checked 18 August 2026.