Beginner's guide · Make & create
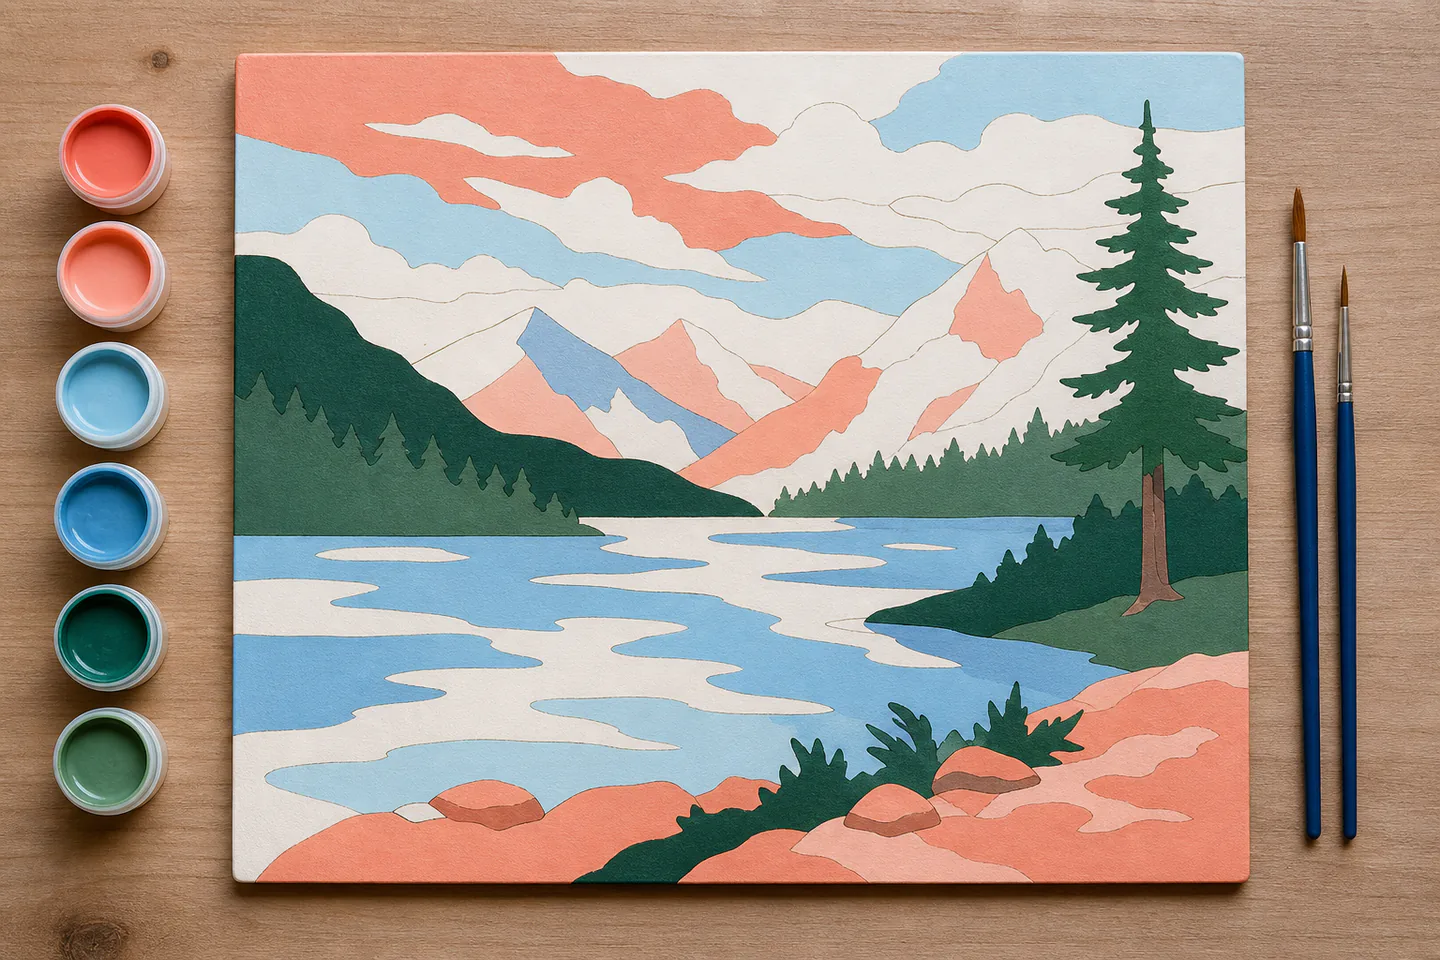
Choose a board with larger shapes.
Finish section by section.
Start with a branded adult kit on a rigid board, good light and the brush supplied. Paint in comfortable sections, close every pot immediately and expect some pale colours to need a second thin coat; extra media are optional fixes, not entry requirements.
Quick answer
Choose a board with larger shapes.
Choose an image with clear medium and large shapes, on a rigid board if possible. Photograph the numbered guide, work one hand-sized section at a time from the side opposite the painting hand, close each paint pot between dips and apply a second thin coat only after the first is dry.
- 01
A branded Schipper or Ravensburger kit gives a board, matched acrylic paint, brush and reference rather than an anonymous rolled canvas with uncertain paint volume.
- 02
The included brush is enough to start. Replace it only if it cannot hold a point after correct rinsing and reshaping.
- 03
Do not buy gesso, flow improver, extra white and a magnifier before seeing how the delivered board and paint behave.
- 04
Pale yellow, cream and white may need two coats. Thick blobs cover a number but leave a visibly different texture.
What to expect
What the first attempts really involve
The first project is useful because it exposes the decisions that shopping pages tend to hide.
Image choice
A beautiful detailed image can contain hundreds of hairline cells. Look at complexity and board size, not only the finished box art.
Paint condition
Small acrylic pots lose water quickly while open. Work with one colour at a time within a section and close the lid fully.
Coverage
Some pigments are naturally more transparent. Two controlled coats are usually cleaner than one heavy layer.
Brush wear
Numbered boards are abrasive. Rinse frequently, keep paint out of the ferrule and reshape rather than leaving a brush standing in water.
Orientation
Working from top left to bottom right for a right-handed painter, or the reverse for a left-handed painter, reduces accidental contact with wet areas.
Fundamentals
Build the first attempt on reliable fundamentals
Inspect the kit before painting
Compare every paint number with the legend, photograph the unpainted board and reference sheet, and check for leaking or dried pots. Flatten or mount only according to the kit instructions. A rigid branded board can usually begin without clear gesso, which may obscure fine numbers or alter the supplied surface.
Set a clean section workflow
Use bright neutral light, a distinct rinse cup, paper towel and a covered table. Open one pot, dampen and blot the brush, load only the working part of the bristles and paint a group of neighbouring cells. Close the pot whenever attention moves away.
Protect the paint and brush
Rinse every few cells before acrylic begins to dry near the ferrule. Lay the brush flat during breaks and reshape after washing. If a pot thickens, follow the kit maker's recovery advice and test a very small adjustment; random household additives can change colour and adhesion.
Starter products
One complete kit first, better brushes only when needed
The Schipper Walk in Autumn kit is the recommended manageable first route. The Ravensburger gallery set is an alternative visual style, not an additional purchase. Schipper's four-brush set is a later replacement if the included brush becomes the proven limitation.
Schipper Paint by Numbers: Walk in Autumn, 24 × 30 cm
Its manageable board size and included materials let the hobby begin immediately while retaining better product identity than an anonymous rolled canvas.
Ravensburger CreArt Gallery Wall Set
Enjoying the image is important across several sessions; this option keeps the complete-kit benefits while changing the subject and format.
First painting
Complete one 24 × 30 cm Schipper board
Use the exact kit instructions for paint handling and any board preparation. The sequence below keeps the work clean across several sessions.
- 01
Inventory and photograph
Confirm every numbered pot and make clear photographs of the untouched board, legend and finished reference.
- 02
Choose the starting corner
Right-handed painters generally begin upper left; left-handed painters generally begin upper right. Adjust for comfort and the kit layout.
- 03
Prepare the brush
Rinse, blot until damp rather than dripping and shape the point. Never begin with dried paint still at the ferrule.
- 04
Paint a small section
Complete nearby cells of one colour with a thin even layer, keeping the brush inside the printed boundary without scrubbing.
- 05
Close the pot
Seal it before rinsing the brush or answering a message. Remove paint from the lid rim so the closure remains tight.
- 06
Let pale colour dry
Inspect from two angles and add a second thin coat only after the first is fully dry.
- 07
Record the stopping point
Photograph progress, check every pot is closed and cover the dry board against dust without trapping wet paint.
- 08
Finish all sections
Continue in a comfortable reading order rather than chasing every occurrence of one number across the whole board.
- 09
Review before varnish or frame
Let the complete painting cure, check missed cells against the reference and use only a finish compatible with the manufacturer guidance.
Troubleshooting
Read the result before buying another tool
A thick pot needs cautious recovery
Check the manufacturer's instructions first. Add only the smallest recommended amount, stir gently with a clean tool and test one cell; excessive water can reduce opacity and adhesion.
Visible numbers under pale paint need another coat
Let the layer dry and repeat it thinly. Do not press harder with the brush or build a mound that makes one cell glossier and higher than its neighbours.
A splayed brush needs cleaning or replacement
Remove dried acrylic with a brush-safe cleaner if appropriate, reshape and dry flat. If the point does not return, replace that size rather than buying a large miscellaneous set.
Skip for now
What can wait
The complete kit should reveal its actual friction before extra surface treatments and accessories are introduced.
- 01
Clear gesso
It can help some inexpensive canvases, but a branded rigid board is prepared for its supplied paint. Unneeded texture can obscure tiny cells.
- 02
Flow medium or flow aid
They are different products and require different handling. Use only when thick paint is a demonstrated problem and follow the maker's dilution instructions.
- 03
A large detail-brush bundle
Most kits need one or two dependable points. Replace by useful size after the included brush has been cared for and assessed.
- 04
An easel
A flat or gently angled board on a well-lit table is stable. Add an easel only if posture or the selected board size makes it genuinely more comfortable.
Upgrade path
What a better setup changes
Upgrades should address a proven issue—brush point, lighting, posture or dry paint—rather than turn a complete kit into a supply project.
First rigid-board kit
About £15–£25Complete branded kit + water + paper towel + good light
Tests whether the structured painting process is enjoyable.More comfortable repeat kits
Add £15–£40Two selected synthetic brushes + daylight desk light
Improves fine-cell control and colour judgement without changing the method.Larger detailed canvases
VariableFirm board support + magnification if needed + tested medium
Makes tiny cells manageable after paint care and finishing habits are established.Safety
Work safely from the first attempt
Small acrylic pots and rinse water should be treated as art materials, never food or drink.
- Keep the rinse cup visually distinct and physically separate from any drink.
- Do not lick brushes; wash hands after painting and follow every paint label.
- Protect the work surface and clothing, and clean spills before acrylic dries.
- Keep paint pots and detachable caps away from children and pets.
- Use regular posture breaks and change the working angle before neck, hand or eye strain builds.
Classes
When outside help is useful
A class is rarely necessary because the numbered board supplies the structure, but a relaxed social session may help with routine and motivation.
A short social painting session should include a manageable kit, clear lighting and enough time to learn paint and brush care.
Choose a general acrylic class only when the goal has moved beyond filling cells into colour mixing, blending and original painting.
Representative UK creative-session formats checked 30 July 2026; paint-by-numbers-specific tuition is uncommon.
Sources
Sources and checking notes
Ravensburger confirms what a complete branded kit contains, current practitioner discussions inform paint and brush care and exact Amazon pages verify the selected Schipper and CreArt options.
-
01
Ravensburger UK · CreArt for adults
Current adult range and structured kit format.
Open source -
02
Ravensburger · Custom CreArt contents
Board, acrylic paint, brush, instructions and template contents.
Open source -
03
r/paintbynumbers · Brush care
Current practitioner guidance on dampening, rinsing and ferrule care.
Open source -
04
r/paintbynumbers · Beginner advice
Current discussion cautioning against unnecessary extras for a first kit.
Open source -
05
Amazon UK · Schipper Walk in Autumn
Exact 24 by 30 cm adult board kit checked for current UK availability.
Open source -
06
Amazon UK · Ravensburger Gallery Wall
Exact adult CreArt alternative checked for current UK availability.
Open source -
07
Amazon UK · Schipper four brushes
Exact four-brush replacement set checked for current UK availability.
Open source -
08
Amazon UK · Schipper French Flower Shop
Representative larger 40 by 50 cm upgrade checked for comparison.
Open source
Guide information and links checked 30 July 2026.