Beginner's guide · Make & create
Close each ring cleanly.
Let the pattern follow.
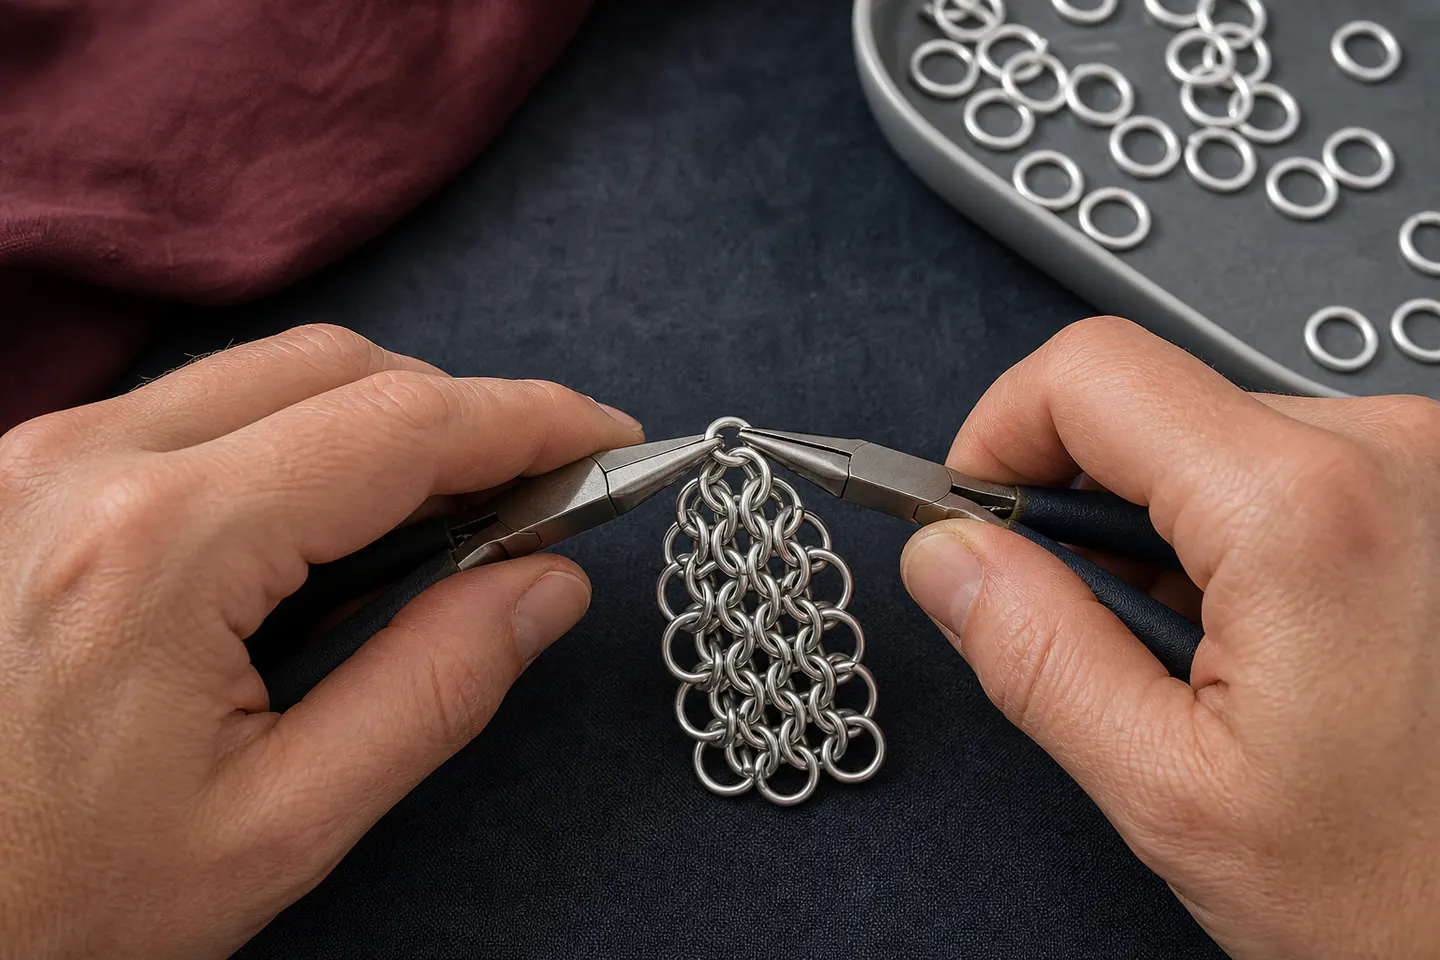
Start with pre-cut bright-aluminium rings, two smooth-jaw pliers and a small European 4-in-1 swatch. Ring closure and orientation matter more than speed, armour plans or decorative complexity.
Quick answer
Close each ring cleanly.
Use pre-cut bright-aluminium rings in one documented size and two smooth-jaw pliers. Open each ring by twisting the ends sideways, link it through the instructed rings, then reverse the twist until the cut ends meet flush without overlap.
- 01
European 4-in-1 is a strong visual starting point: every ring passes through four neighbours in a repeating sheet that can be laid flat and inspected.
- 02
Ring size is wire diameter plus internal diameter, and the relationship between them is the aspect ratio. A tutorial must match the actual rings.
- 03
Bright aluminium is easier on beginner hands than stainless steel and inexpensive enough to reopen while learning, though it can tarnish and mark.
- 04
Stop when grip weakens or hands ache. Better plier shape and shorter sessions improve control more than squeezing harder.
What to expect
What the first attempts really involve
The first project is useful because it exposes the decisions that shopping pages tend to hide.
Closure
A visible gap catches fabric and weakens jewellery. Most early practice should be judged by the ring ends, not by how many rows were completed.
Orientation
A ring can be linked correctly and still lie the wrong way. Hanging or pinning the growing swatch often makes the repeating direction easier to see.
Sizing systems
AWG and SWG use different wire diameters for the same gauge number. Millimetres and a stated aspect ratio avoid expensive assumptions.
Material
Aluminium is light and forgiving; steel is stronger and harder on tools and hands. Material choice changes feel, wear and required pliers.
Time
Even a small wearable object contains hundreds of closures. Maille rewards rhythm but does not become a fast route to inexpensive armour.
Core technique
Learn the ring before learning many weaves
Hold near the cut, not across the circle
Grip each side of the opening with a separate smooth-jaw plier. Twist one hand slightly forward and the other back; do not pull the circle wider like a wishbone. Sideways twisting preserves the ring shape and can be reversed with control.
Close past alignment, then settle
Bring the ends just past each other with a tiny sideways motion, then settle them together. The goal is no daylight, no step and no sharp overlap. Run a fingernail lightly across the join. Reopen and correct a poor closure before the ring is buried in the sheet.
Keep one reference unit visible
Make a five-ring unit from a tutorial and place it on a contrasting cloth in the correct lay. Build the next unit beside it rather than rotating the whole project in the hands. Two ring colours can help orientation later, but one affordable metal keeps the first buying decision simple.
Starter products
Choose one route: complete kit or focused components
The Chainmail Joe kit is the most complete route and is repeatedly recommended, but it is large and imported availability or price can vary. A focused route uses one known ring size plus two pliers; the separate ring bag and Xuron plier show what that upgrade looks like. Do not buy all three products together by default.
Chainmail Joe Complete Chainmail Kit with 20-Weave Book
Matched rings, two pliers and a visual tutorial book keep the first session focused on closure and pattern rather than sourcing.
First project
Make a small European 4-in-1 swatch
Follow a photographed tutorial that states the ring dimensions. Aim for a palm-sized rectangle whose closures remain visible enough to inspect.
- 01
Set up two pliers
Use smooth jaws with comfortable handles. Cover or replace serrated jaws rather than accepting deep tool marks on every practice ring.
- 02
Prepare open and closed rings
Close a small group perfectly and twist another group open only far enough to pass through linked rings.
- 03
Build one five-ring unit
Pass one open ring through four closed rings, close it flush and arrange the four neighbours in the tutorial's alternating lay.
- 04
Anchor the orientation
Pin or hang the unit on a contrasting cloth so every ring leans in a visible, repeatable direction.
- 05
Add the next unit
Use the tutorial's row method and stop after each linking ring to check both membership and orientation.
- 06
Audit every join
Inspect against light and feel each closure. Replace badly cut or distorted rings rather than forcing them into the pattern.
- 07
Record the ring specification
Label the swatch with material, wire diameter, internal diameter, gauge system and supplier so a successful weave can be repeated.
Troubleshooting
Most early errors are closure or orientation errors
A widening gap means the ring was pulled apart
Round the ring gently by reversing the opening motion and close with controlled sideways twists. If the metal is kinked, work-hardened or badly cut, discard it. A few rejected rings cost less than a snagging finished piece.
A row that refuses to lie flat may be flipped
Hang the work and compare each ring to the reference unit. Trace one linking ring at a time through the correct neighbours. Undo to the last clear row instead of compensating with a different weave accidentally.
Hand pain is a setup problem
Release the death grip, move closer to the ring cut and shorten the session. Smooth short-nose or parallel pliers can reduce force for the relevant material. Steel and heavy wire may need stronger purpose-made tools rather than stronger hands.
Skip for now
What can wait
Maille scales dramatically. Jewellery, costume panels and riveted historical armour are related crafts with very different time, tool and safety demands.
- 01
The one-pound ring bag
Bulk is economical only after one wire diameter, internal diameter and weave have proved useful. A wrong aspect ratio creates a large box of frustration.
- 02
Xuron pliers
Quality short-nose pliers are a meaningful comfort upgrade after the preferred ring gauge and hand position are known. The full kit already includes basic pliers.
- 03
Stainless-steel rings
Steel makes durable work but increases hand force, tool wear and closure difficulty. Learn the pattern and clean joins in aluminium first.
- 04
A shirt or coif
Armour consumes thousands of rings, needs shaping and becomes heavy. Finish several swatches and a small accessory before estimating the commitment.
- 05
Making rings from wire
Coiling and cutting add mandrels, saw or cutters, sharp burrs and quality control. Consistent pre-cut rings protect the first weaving lesson.
Upgrade path
What a better setup changes
Upgrade by improving hand comfort and ring consistency, then by choosing a project-specific material and aspect ratio.
Practice swatch
About £20–£50Small aluminium ring supply + two basic pliers
Learn opening, closure, orientation and European 4-in-1.Several jewellery weaves
About £50–£130Multiple documented ring sizes + better smooth-jaw pliers
Match aspect ratio to Byzantine, box, spiral and other patterns.Durable accessories
Project dependentAnodised aluminium or steel + project-rated findings
Improve wear and colour while accepting harder closures and more tool demand.Historical armour
Hundreds of pounds and many monthsCorrect rings + riveting tools + pattern and fitting knowledge
Move from decorative butted maille to researched construction and body shaping.Safety
Work safely from the first attempt
The work creates sharp cut ends, flying rings and repetitive hand load. Wearable pieces also need skin, snagging and hardware checks.
- Wear eye protection when opening hard rings or cutting wire; a slipped ring or fragment can travel unpredictably.
- Use smooth, correctly sized pliers and take frequent breaks before hand pain, numbness or weakened grip develops.
- Discard burrs, cracks and closures that catch a fine cloth; do not sell or wear a piece whose joins are not consistently secure.
- Check metal composition before prolonged skin contact and tell a wearer what material and coating are present.
- Keep loose rings and tools away from children and pets; small rings are a choking and ingestion hazard.
- Decorative butted maille is not certified personal protective equipment and should never be represented as reliable protection from weapons or machinery.
Classes
When outside help is useful
Free tutorials are sufficient for a practice swatch. A class helps when hand position is difficult to interpret, when ring sizing is confusing or when historical riveted maille is the actual goal.
Select instructions that give wire diameter, internal diameter, gauge system and a clear view of every closure.
A short supervised session can teach two-plier handling and complete a small pair of earrings or bracelet section.
Useful for coiling, punching, riveting and understanding how armour construction differs from decorative butted rings.
Representative UK jewellery and heritage-maille workshops and 2026 availability checked 27 July 2026.
Sources
Sources and checking notes
Current chainmail communities consistently recommend bright aluminium, two pliers, clean closures and a documented aspect ratio. Manufacturer information supports the plier choice; UK workshops show the separate route into riveted historical maille.
-
01
r/chainmailartisans · Getting started in 2026
Recent beginner consensus around bright aluminium, European 4-in-1 and the Chainmail Joe kit.
Open source -
02
r/chainmailartisans · Beginner jewellery and ring sizes
Detailed practitioner advice on AWG versus SWG, aspect ratio, pliers and beginner weaves.
Open source -
03
r/chainmailartisans · First ring order
Community recommendation for pre-cut bright aluminium and a modest first quantity.
Open source -
04
r/chainmailartisans · Pliers and hand comfort
UK-oriented discussion of Xuron, parallel pliers, grip and hand pain.
Open source -
05
Chainmail Joe · Complete 20-weave kit
Manufacturer contents, exact ring sizes, pliers and included tutorial list.
Open source -
06
Xuron · 475 Short Nose Pliers
Manufacturer description of a short-nose plier designed for jump rings and chainmail.
Open source -
07
Butser Ancient Farm · Chainmail making workshop
Current 2026 UK workshop covering traditionally riveted maille.
Open source -
08
Weald & Downland Living Museum · Introduction to maille
UK beginner workshop focused on European 4-in-1 and other weaves.
Open source -
09
Amazon UK · Chainmail Joe complete kit
Exact 20-weave kit with rings, clasps, book and two pliers.
Open source -
10
Amazon UK · Chainmail Joe bright-aluminium rings
Exact one-pound 16 SWG 5/16-inch internal-diameter ring bag shown as a later bulk option.
Open source -
11
Amazon UK · Xuron 475 Short Nose Pliers
Exact smooth short-nose plier selected as a later comfort upgrade.
Open source
Guide information and links checked 27 July 2026.