Beginner’s guide · Make & create
Count the fabric threads,
and let the white rhythm build on indigo.
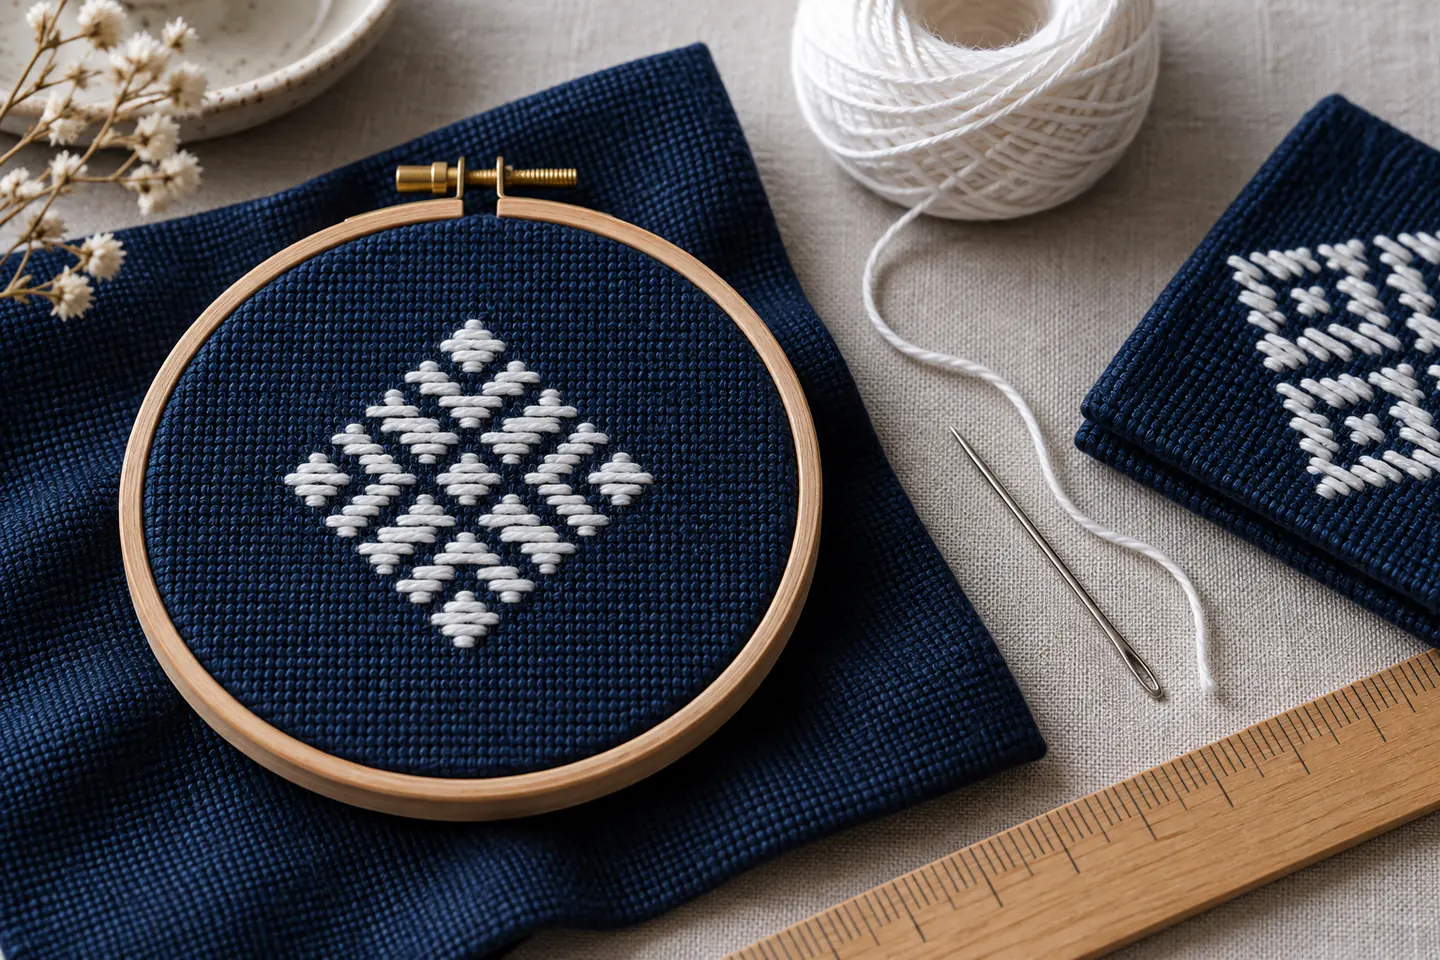
Kogin is a counted running-stitch tradition from Aomori, Japan. Start with one small modoko pattern on visible evenweave fabric.
Quick answer
Complete one one centred kogin coaster motif before expanding the setup
Choose dark evenweave fabric whose threads are easy to count, thick white cotton and a blunt tapestry needle. Centre one small credited modoko chart, work horizontal running stitches by counting the fabric threads rather than drawing every line and keep the thread relaxed enough that the cloth stays square. Finish the sample as a flat coaster after checking the reverse.
- 01
Kogin is a specific counted reinforcement and decorative tradition from northern Japan, not a synonym for all sashiko. For a first kogin embroidery attempt, keep the materials, measurements and sequence written beside the work. Photograph or measure the result before correcting it, because a visible record separates a technique problem from a material or setup problem.
- 02
The chart maps stitch lengths across fabric threads, so fabric count and thread thickness must suit each other. For a first kogin embroidery attempt, keep the materials, measurements and sequence written beside the work. Photograph or measure the result before correcting it, because a visible record separates a technique problem from a material or setup problem.
- 03
Long horizontal stitches show tension errors quickly and should rest on the surface rather than pull. For a first kogin embroidery attempt, keep the materials, measurements and sequence written beside the work. Photograph or measure the result before correcting it, because a visible record separates a technique problem from a material or setup problem.
- 04
A single traditional unit teaches counting and rhythm before a large all-over pattern. For a first kogin embroidery attempt, keep the materials, measurements and sequence written beside the work. Photograph or measure the result before correcting it, because a visible record separates a technique problem from a material or setup problem.
What to expect
What kogin embroidery is really like at the start
The useful beginner controls are setup, repeatable movement and a finished sample. Counting horizontal fabric threads while keeping long stitches relaxed is the main skill to observe before adding scale or decoration.
Fabric
Irregular or very fine weave makes chart counting difficult. For a first kogin embroidery attempt, keep the materials, measurements and sequence written beside the work. Photograph or measure the result before correcting it, because a visible record separates a technique problem from a material or setup problem.
Count
One missed thread shifts later symmetry even when the line appears almost correct. For a first kogin embroidery attempt, keep the materials, measurements and sequence written beside the work. Photograph or measure the result before correcting it, because a visible record separates a technique problem from a material or setup problem.
Tension
Pulling long stitches tight puckers the ground and narrows the motif. For a first kogin embroidery attempt, keep the materials, measurements and sequence written beside the work. Photograph or measure the result before correcting it, because a visible record separates a technique problem from a material or setup problem.
Context
Pattern names and regional history should come from credible Japanese or museum sources. For a first kogin embroidery attempt, keep the materials, measurements and sequence written beside the work. Photograph or measure the result before correcting it, because a visible record separates a technique problem from a material or setup problem.
Core method
The core kogin embroidery method
Test the fabric count
Work several lengths on the edge and confirm the chosen thread covers without crowding. For a first kogin embroidery attempt, keep the materials, measurements and sequence written beside the work. Photograph or measure the result before correcting it, because a visible record separates a technique problem from a material or setup problem.
Centre one chart unit
Mark only the centre and boundary, then count each run directly from the weave. For a first kogin embroidery attempt, keep the materials, measurements and sequence written beside the work. Photograph or measure the result before correcting it, because a visible record separates a technique problem from a material or setup problem.
Work horizontal rows
Use manageable thread lengths and check symmetry after every row. For a first kogin embroidery attempt, keep the materials, measurements and sequence written beside the work. Photograph or measure the result before correcting it, because a visible record separates a technique problem from a material or setup problem.
Finish without distortion
Secure tails discreetly, remove test marks and press only as the materials permit. For a first kogin embroidery attempt, keep the materials, measurements and sequence written beside the work. Photograph or measure the result before correcting it, because a visible record separates a technique problem from a material or setup problem.
Useful products
Products with a clear job in the route
These two products cover distinct jobs in the beginner route; they are not a requirement to buy a bundle. Use materials already owned when they meet the same specification, and confirm every live listing before ordering.
Swpeet Linen Embroidery Kit with Hoops and 50 Floss Colours
Plain fabric makes stitch placement and tension easier to inspect.
Pllieay Embroidery Starter Kit with Hoops and 100 Threads
The hoops, needles and stranded cotton support several specialist embroidery samples.
First project
Make one centred kogin coaster motif
Keep the project small enough to finish, inspect and repeat. The first result is evidence about material compatibility, sequence and control rather than a performance test.
- 01
Prepare the workspace and materials
Work several lengths on the edge and confirm the chosen thread covers without crowding. For a first kogin embroidery attempt, keep the materials, measurements and sequence written beside the work. Photograph or measure the result before correcting it, because a visible record separates a technique problem from a material or setup problem.
- 02
Make the first controlled pass
Mark only the centre and boundary, then count each run directly from the weave. For a first kogin embroidery attempt, keep the materials, measurements and sequence written beside the work. Photograph or measure the result before correcting it, because a visible record separates a technique problem from a material or setup problem.
- 03
Check the central technique
Use manageable thread lengths and check symmetry after every row. For a first kogin embroidery attempt, keep the materials, measurements and sequence written beside the work. Photograph or measure the result before correcting it, because a visible record separates a technique problem from a material or setup problem.
- 04
Complete the structure
Secure tails discreetly, remove test marks and press only as the materials permit. For a first kogin embroidery attempt, keep the materials, measurements and sequence written beside the work. Photograph or measure the result before correcting it, because a visible record separates a technique problem from a material or setup problem.
- 05
Finish, measure and record
Let the work settle or dry by the relevant material instructions, then measure, photograph and label the result. Record the one change that would make the next kogin embroidery attempt more controlled. For a first kogin embroidery attempt, keep the materials, measurements and sequence written beside the work. Photograph or measure the result before correcting it, because a visible record separates a technique problem from a material or setup problem.
What can wait
What can wait until the first result
Delay anything that adds cost, risk or another variable before the basic workflow has produced something you can review.
- 01
Large table runner
Hundreds of counted repeats amplify small shifts. For a first kogin embroidery attempt, keep the materials, measurements and sequence written beside the work. Photograph or measure the result before correcting it, because a visible record separates a technique problem from a material or setup problem.
- 02
Loose ordinary linen
Uneven threads make chart translation unreliable. For a first kogin embroidery attempt, keep the materials, measurements and sequence written beside the work. Photograph or measure the result before correcting it, because a visible record separates a technique problem from a material or setup problem.
- 03
Many motif names
Learn the structure and provenance of one first. For a first kogin embroidery attempt, keep the materials, measurements and sequence written beside the work. Photograph or measure the result before correcting it, because a visible record separates a technique problem from a material or setup problem.
- 04
Garment placement
Fit, seams and repeated laundering need planning. For a first kogin embroidery attempt, keep the materials, measurements and sequence written beside the work. Photograph or measure the result before correcting it, because a visible record separates a technique problem from a material or setup problem.
Upgrade path
Add the capability you can now name
Each stage should remove a demonstrated limitation rather than make the setup look more advanced.
Single modoko
Use owned tools where possibleOne small sample and written notes
Learn the central movement and material behaviour.Coaster set
About £20–£80A repeatable complete starter setup
Repeat the result with cleaner finish and fewer corrections.All-over panel
About £50–£180A selected tool or structured class
Add one technique, size or design capability.Garment or researched reproduction
Cost varies widelyA documented specialist workflow
Develop original work with provenance, testing and appropriate safety.Safety & care
Safety, care and respectful practice in kogin embroidery
The practical risks are manageable when tools, materials and cultural claims remain specific and proportionate.
- Store blunt and sharp needles securely and count them after use. For a first kogin embroidery attempt, keep the materials, measurements and sequence written beside the work. Photograph or measure the result before correcting it, because a visible record separates a technique problem from a material or setup problem.
- Use bright lighting and visual breaks during close counting. For a first kogin embroidery attempt, keep the materials, measurements and sequence written beside the work. Photograph or measure the result before correcting it, because a visible record separates a technique problem from a material or setup problem.
- Relax shoulders and hands instead of pulling the thread to correct a miscount. For a first kogin embroidery attempt, keep the materials, measurements and sequence written beside the work. Photograph or measure the result before correcting it, because a visible record separates a technique problem from a material or setup problem.
- Test fibre colourfastness before washing an indigo-and-white piece. For a first kogin embroidery attempt, keep the materials, measurements and sequence written beside the work. Photograph or measure the result before correcting it, because a visible record separates a technique problem from a material or setup problem.
- Credit Japanese pattern and teaching sources rather than relabelling generic geometry as kogin. For a first kogin embroidery attempt, keep the materials, measurements and sequence written beside the work. Photograph or measure the result before correcting it, because a visible record separates a technique problem from a material or setup problem.
Outside help
When outside help earns its place
A guided session is useful when equipment setup, live hand correction, heat, sharp tools or a specialist press blocks safe progress. A clear source is enough for the smallest kogin embroidery sample.
Choose one coherent lesson that covers preparation, the central kogin embroidery technique, finishing and common mistakes.
Ask which tools and materials are included, whether the project can be finished in the session and what safety induction is provided.
Representative UK learning and access routes checked 20 September 2026; local prices, equipment and tutor support vary.
Sources
Where the guidance came from
Authoritative and specialist guidance supports the method, terminology and safety boundaries; community discussion contributes recurring beginner problems rather than unsupported claims.
-
01
Royal School of Needlework · Stitch Bank
Specialist stitch structure, terminology and diagrams.
Open source -
02
Royal School of Needlework
UK specialist teaching and technique context.
Open source -
03
DMC · Stitch guide
Manufacturer diagrams for common hand-embroidery stitches.
Open source -
04
Victoria and Albert Museum · Embroidery
Historical, material and object context for embroidery.
Open source -
05
Embroiderers’ Guild
UK community, education and regional-group routes.
Open source -
06
Reddit · r/Embroidery
Recurring beginner evidence on tension, fabric and finishing.
Open source -
07
Amazon UK · Linen Embroidery Kit with Hoops and 50 Floss Colours
Exact Amazon UK catalogue page or ISBN used for the recommendation; confirm current price, seller, specification and availability.
Open source -
08
Amazon UK · Embroidery Starter Kit with Hoops and 100 Threads
Exact Amazon UK catalogue page or ISBN used for the recommendation; confirm current price, seller, specification and availability.
Open source
Guide information and links checked 20 September 2026.