Beginner’s guide · Make & create
A layered colour study with clean lights and shadows
Layer lightly before reaching for the darkest mark.
Start with artist-grade half sticks, toothy paper and one simple still life. Soft pastel gives colour immediately, but deliberate pressure, layering and dust control make that colour easier to shape.
Quick answer
Use toothy paper and build one coloured object from broad shapes
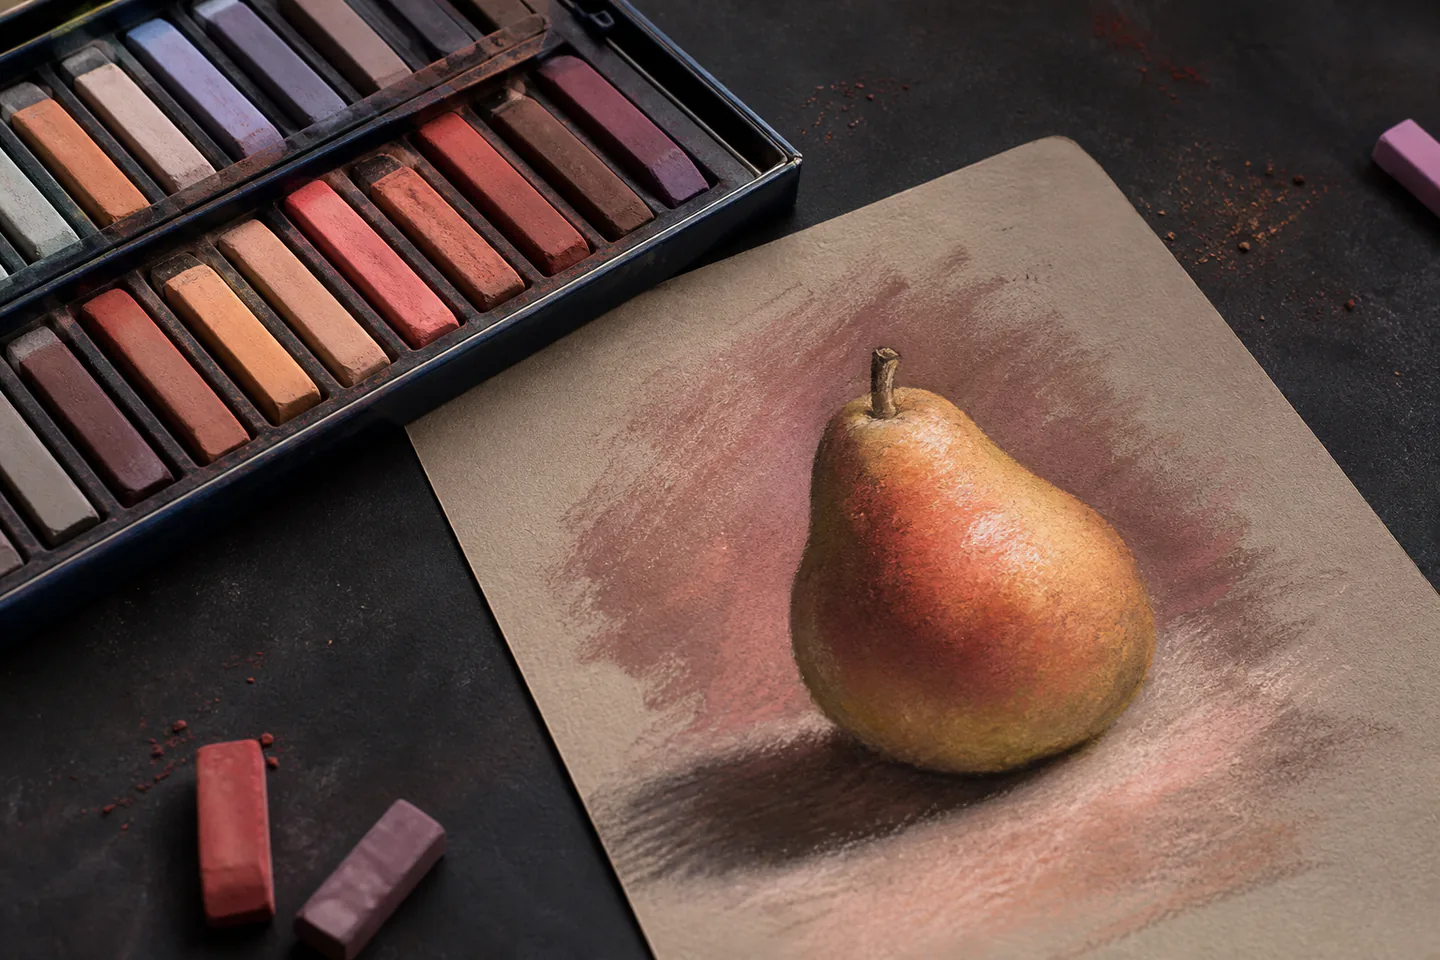
Tape one sheet of pastel paper to a rigid board, place a pear or mug under a single lamp and choose no more than six related colours. Block the largest light, middle and dark shapes with the side of a stick using very little pressure. Layer a second colour only where it changes the form, reserve the paper or a light pastel for the brightest area, and add the few sharp edges last. Work upright or slightly inclined so loose dust falls away rather than being blown across the page.
- 01
Soft pastel is mostly pigment with a small amount of binder; it is different from oil pastel and the two do not behave as interchangeable starter materials.
- 02
Paper needs enough tooth to hold several layers. Smooth printer paper fills quickly and encourages rubbing instead of controlled marks.
- 03
Artist-grade half sticks provide more usable colours for the price than full sticks and are easy to use on their side.
- 04
Do not blow pastel dust, use compressed air or dry-sweep the workspace. Let particles settle and damp-wipe surfaces.
What to expect
The medium is direct, forgiving and physically dusty
There is no drying time, but every touch changes the surface. Progress comes from deciding which marks should stay broad, which edges should sharpen and when to stop layering.
Pressure
Light early layers leave tooth available. Heavy pressure fills the surface and makes later colour skid or mix into mud.
Colour
Optical layers stay brighter than repeatedly rubbing pigments together; choose a direction before adding more hues.
Edges
Soft edges turn form and suggest distance, while a few hard edges attract attention. Not every boundary needs outlining.
Value
A colourful drawing still needs a readable light–dark pattern. Squint or photograph in greyscale to check it.
Corrections
Lift loose colour with a kneadable eraser or dry clean brush, but accept that stained paper may remain part of the next layer.
Finish
Glassine and careful storage protect loose surfaces. Fixative can darken or alter colour and should be tested on a scrap first.
Core method
Build colour over a clear value plan
Prepare the surface and subject
Use one sheet from a purpose-made pastel pad and mount it with low-tack tape to a board. Place a simple object under one steady light, make a thumbnail showing only three values and choose a limited group of sticks. Put unused pastels on a tray so they do not roll or collect grit.
Block in with the side
Use the side of a stick for the background and the largest subject shapes. Hold it loosely and make directional strokes that follow the form. Leave small gaps of paper rather than forcing an opaque coat everywhere; the remaining tooth is the capacity for later layers.
Layer without scrubbing
Add adjacent warm and cool colours with light hatching, broken strokes or gentle side marks. Blend only a small test area with a clean tool or finger covered appropriately, then compare it with the livelier unblended marks. Clean stick tips on a scrap or dry cloth before returning to a light area.
Resolve the focal area
Sharpen only the most important contour and add a few accents: the deepest contact shadow, a reflected colour and one highlight. Step back frequently. When the value pattern reads at a distance, stop before the entire sheet becomes equally detailed.
Useful products
Products with a clear job in the setup
The Rembrandt half-stick set supplies a compact artist-grade palette; Mi-Teintes gives the pigment a proven textured surface; the black-paper pad is an optional second surface for learning to build light. The two pads are alternatives, not a combined requirement.
Royal Talens Rembrandt Soft Pastels, 30 Half Sticks
Half sticks put more colours within reach and their broad sides suit the blocking method in this guide.
Canson Canson Mi-Teintes Pastel Paper Pad, Black
A black sheet turns the exercise into building light rather than filling white paper.
Canson Canson XL Black Drawing Pad, 9 × 12 in
It provides repeatable sheets for exercises and is easy to trim or mount.
First project
Make a six-colour pear study
One object is enough to practise value, layering, edge control and a deliberate finish.
- 01
Choose three values
Make a thumbnail and mark the light direction before opening the full palette.
- 02
Tape the paper
Secure one sheet to a board and keep the lower edge clear for falling dust.
- 03
Block broad shapes
Use stick sides and light pressure for background, object and cast shadow.
- 04
Layer colour
Hatch related hues without rubbing every transition smooth.
- 05
Sharpen the focus
Use an edge or corner for the darkest accent and one highlight.
- 06
Store safely
Place clean glassine over the surface and damp-wipe settled dust.
What can wait
What can wait until the first result
Large sets and finishing chemicals add cost before pressure and paper choice are understood.
- 01
A 100-colour box
A restricted palette teaches value and colour relationships and reveals which missing hues you actually use.
- 02
Routine spray fixative
It can change saturation and value; test the exact product outside and on a scrap before considering it.
- 03
Pastel pencils for everything
They are useful for small details but slower and less expressive for the broad foundation.
- 04
An elaborate easel
A taped board propped safely on a washable surface provides the useful downward dust path.
- 05
Constant finger blending
Layered marks keep more colour variation and reduce repeated skin contact with pigment.
Upgrade path
Upgrade the repeated limitation
Add surface, individual colours or storage only when a repeated limit is visible in finished studies.
First studies
About £35–£6530 half sticks + one pastel pad
Learn pressure, value and layers.Targeted palette
About £5–£30Individual darks, lights or missing hues
Fill actual colour gaps without duplicating a set.Surface control
About £20–£80Sand-textured papers or prepared boards
Hold more layers and support lifting techniques.Studio storage
About £40–£200+Flat files, glassine and secure easel
Protect more finished and work-in-progress pieces.Safety & care
Keep dust settled and pigments out of the body
Read the safety information for every pigment and fixative. The practical baseline is to minimise airborne dust, ingestion, prolonged skin contact and contamination of eating areas.
- Do not blow, shake, vacuum with unsuitable equipment or dry-sweep pastel dust; let it settle and clean with damp disposable material.
- Keep food and drink out of the work area, wash hands after use and do not point or lick sticks.
- Check pigment labels, especially when children, pregnancy, respiratory conditions or toxic metals are relevant; choose safer formulations where possible.
- Use spray fixative only if needed, outdoors or with the ventilation and respiratory controls stated by its safety information, away from flames.
- Store sticks and drawings so dust cannot spread, protect finished work under glassine and frame behind glazing with a spacer.
Outside help
When outside help earns its place
A book or reputable demonstration is enough for the first study. A workshop becomes valuable when it offers live feedback on pressure, colour temperature and framing rather than a requirement to buy a large set.
Look for side-of-stick blocking, light layering and safe cleanup.
Ask whether materials, easels, ventilation and framing advice are included.
Representative UK product, workshop, lesson and club costs checked 13 August 2026; local prices, access, materials and tutor support vary.
Sources
Where the guidance came from
Manufacturer information defines materials and lightfastness; artist organisations and experienced pastel communities add practical surface, layering and dust-control evidence.
-
01
Royal Talens · Rembrandt soft pastels
Manufacturer range, composition and colour information.
Open source -
02
Canson · Mi-Teintes
Paper weight, texture and media suitability.
Open source -
03
The Pastel Society UK
Established pastel practice, exhibitions and artist examples.
Open source -
04
Jackson’s Art · Soft pastel guide
Specialist comparison of sticks, surfaces and techniques.
Open source -
05
WetCanvas · Pastels forum
Long-running artist discussion of brands, surfaces and fixing.
Open source -
06
Amazon UK · Rembrandt 30 half-stick pastels
Exact product page, model or ISBN, observed price and availability checked for this guide.
Open source -
07
Amazon UK · Canson Mi-Teintes black pad
Exact product page, model or ISBN, observed price and availability checked for this guide.
Open source -
08
Amazon UK · Canson XL black drawing pad
Exact product page, model or ISBN, observed price and availability checked for this guide.
Open source
Guide information and links checked 13 August 2026.