Beginner’s guide · Make & build
Make one square wooden box.
Let each tool solve one clear problem.
Start with a small softwood box using a tenon saw, sharp chisel, block plane and clamps. Learn marking, holding and fitting before buying a workshop full of tools.
Quick answer
Build a small object with a short tool list
Buy straight planed softwood and make an open box with butt or rebate joints. Mark from one reference face, clamp the work securely, saw on the waste side, plane edges to the line and use a sharp chisel only where the joint calls for it. Dry-fit the four sides, compare diagonals, glue and clamp without forcing the box out of square.
- 01
A stable workpiece is a safety tool. Clamping and bench position matter before a premium saw.
- 02
Sharp tools are more controllable, but sharpening itself is a skill and needs a reliable method.
- 03
Measure from the same reference face and mark waste clearly; cumulative measuring creates avoidable mismatch.
- 04
Softwood is affordable but can crush and tear. Test plane direction and chisel cuts on an offcut.
What to expect
Accuracy comes from a sequence, not one perfect cut
The first box may show gaps, bruised fibres or a slight twist. Each fault can identify whether marking, holding, cutting or assembly needs attention.
Timber
Wood moves with moisture and has grain direction. Even planed boards can cup or twist.
Marking
A fine knife or pencil line is meaningful only when every part references the same face and edge.
Sawing
The saw starts beside the line and the cut is corrected early. Forcing it later creates a curved kerf.
Planing
A block plane can true edges and chamfer, but grain direction and blade projection control tear-out.
Chiselling
Remove small amounts with the bevel understood and keep hands behind the cutting edge.
Assembly
Clamps apply force, not squareness. Dry-fit, check diagonals and use cauls before glue creates a deadline.
Core method
Mark, hold and cut from reliable references
Choose manageable prepared timber
Use straight, dry, planed softwood of one thickness for the first box. Reject severe twist or split ends. Mark one broad face and one adjacent edge as references. Produce all widths and lengths from those faces, and keep labelled offcuts for testing the saw, plane and finish.
Make the work immovable
Use a sound bench or heavy table, clamps and a sacrificial board. Arrange the cut so the tool moves away from the body and cannot strike a clamp. Good lighting should reveal the line without placing the free hand near the blade. Stop if the work shifts.
Approach the line in stages
Knife or pencil the dimension, hatch the waste and begin the saw with short light strokes. Leave a small amount for planing where a fitted edge matters. Set the block plane for a fine shaving, read grain direction and check square frequently. Pare with a chisel only when the work is supported.
Dry-fit before introducing glue
Assemble without adhesive and compare diagonals. Correct one high spot at a time. Prepare clamps, damp cloth and cauls before spreading glue. Apply only enough pressure to close the joint, recheck square and leave the assembly for the adhesive’s stated cure time before trimming or finishing.
Useful products
A compact cutting and holding kit
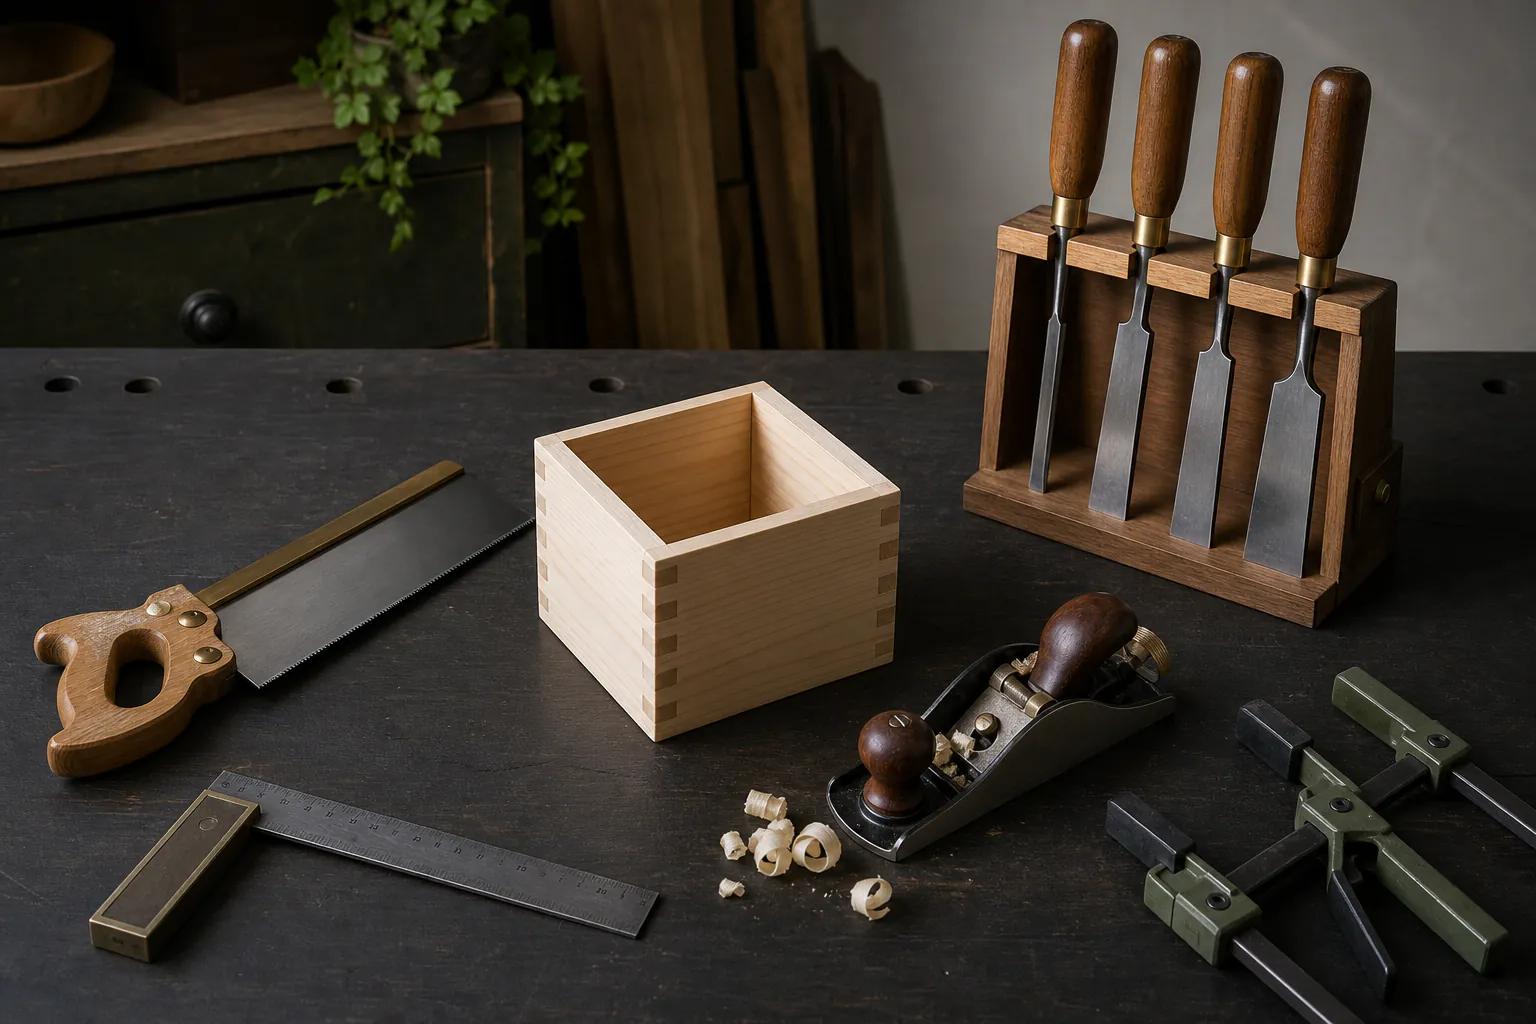
The tenon saw makes controlled crosscuts, the block plane trues and chamfers edges, the chisel set handles small joint and cleanup work, and the quick clamps hold parts safely. Add a reliable square, marking tool and sharpening method chosen for the blades you actually own.
Spear & Jackson Predator 10-Inch Tenon Saw
It suits the crosscuts and simple joint shoulders that teach starting and following a line.
Stanley No. 220 Block Plane
It adds controlled correction and surface preparation without a large plane collection.
Gunpla Four-Piece Wood Chisel Set
The widths cover typical beginner tasks without assuming a full specialist collection.
IRWIN Quick-Grip 300 mm Clamps, Twin Pack
Two clamps can secure a board or apply balanced pressure to a small assembly.
First project
Make a small open utility box
Use four equal-height sides and a simple plywood or solid-wood base. The goal is a stable square assembly, not fine dovetails.
- 01
Select and reference timber
Choose straight stock and mark one face and edge on every board.
- 02
Make a cutting list
Record finished dimensions and account for which sides overlap at each corner.
- 03
Mark all matching parts
Use one setup to transfer repeated lengths and mark waste clearly.
- 04
Saw and plane to line
Leave the line, then true edges with fine plane shavings and frequent square checks.
- 05
Dry-fit and measure diagonals
Correct the one joint or edge preventing the box from closing square.
- 06
Glue, clamp and finish
Use moderate pressure, clean squeeze-out and apply a simple labelled finish after full cure.
What can wait
What can wait until the first result
Buy the next tool because a repeated operation needs it, not because a complete workshop photograph contains it.
- 01
A large plane set
One tuned block plane can teach grain, shaving thickness and edge work before a bench-plane decision.
- 02
Dovetails
A square butt-jointed box establishes marking and assembly; decorative joinery can follow.
- 03
A powered saw
It changes risk, dust and space requirements and is unnecessary for this small project.
- 04
Rare hardwood
Practise on affordable straight stock before mistakes become expensive or irreplaceable.
- 05
Elaborate finish systems
A simple compatible oil or water-based finish exposes the quality of preparation.
Upgrade path
Upgrade the repeated limitation
Add precision and capacity around the operation that remains frustrating.
First box
About £70 plus basicsSaw, plane, chisels and clamps
Learn the complete reference-to-assembly sequence.Reliable sharpening
About £25–£100Stones or plates + guide + strop
Keep plane and chisel behaviour predictable.Bench holding
About £50–£300Workmate, vice, dogs or bench
Improve safety and consistency across operations.Joinery toolkit
About £50–£200Marking gauge, mallet and selected saw or plane
Cut rebates, housing joints and dovetails deliberately.Safety & care
Control the workpiece, edge and dust
Hand tools are quieter than machines but still cause serious cuts, punctures, eye injuries and dust exposure.
- Clamp work securely and keep the free hand behind the cutting edge and outside the projected path.
- Wear suitable eye protection for chopping, striking or any operation that may eject chips.
- Use effective dust control and respiratory protection for sanding, especially with MDF or sensitising hardwoods.
- Store saws and chisels with edges protected and never carry a chisel loose in a pocket.
- Read finish and adhesive labels, ventilate the space and store oily cloths according to fire-safety guidance.
Outside help
When outside help earns its place
A short practical induction can quickly correct unsafe body position, sharpening and work holding, but the first small box remains home-doable.
Review UK control measures for dust, tools and workshop practice.
Choose a small class that includes sharpening, holding and a finished joint.
Representative UK prices and free learning routes checked 3 August 2026; local availability, materials and tutor support vary.
Sources
Where the guidance came from
UK safety guidance establishes dust and tool controls; established woodworking instruction supports reference faces, sharp tools and staged fitting.
-
01
HSE · Woodworking health and safety
UK overview of woodworking machinery, dust, training and workplace controls.
Open source -
02
HSE · Wood dust and health
Health risks and controls for cutting and sanding wood.
Open source -
03
HSE · Woodworking information sheet WIS23
Practical guidance relevant to safe woodworking activity.
Open source -
04
Paul Sellers · Common Woodworking
Specialist hand-tool projects and explanations of marking, sawing, planing and joinery.
Open source -
05
Amazon UK · Spear & Jackson Predator tenon saw
Exact product page, model or ISBN, observed price and availability checked for this guide.
Open source -
06
Amazon UK · Stanley 220 block plane
Exact product page, model or ISBN, observed price and availability checked for this guide.
Open source -
07
Amazon UK · Gunpla four-piece wood chisel set
Exact product page, model or ISBN, observed price and availability checked for this guide.
Open source -
08
Amazon UK · IRWIN Quick-Grip clamp twin pack
Exact product page, model or ISBN, observed price and availability checked for this guide.
Open source
Guide information and links checked 3 August 2026.