Beginner’s guide · Make & build
Make one useful thing.
Then improve the fit.
Try the workflow without owning a machine by designing or downloading a small model and using a library, makerspace or print service. For regular home use, begin with a compact filament printer and one spool of PLA. Resin printing is a separate, messier route with stricter ventilation, handling and disposal needs.
Quick answer
Choose a service or a small filament printer
There are two sensible ways to begin. Design or download one small model and have a library, makerspace or print service produce it, or buy a compact fused-filament printer and learn with plain PLA. Both routes teach the same core loop: prepare a model, slice it, watch the first layer, wait, test the fit and revise.
- 01
Use Tinkercad or a licensed downloadable model to try the digital workflow before buying a printer.
- 02
For repeat home printing, start with one pre-assembled filament printer, one 1 kg spool of 1.75 mm PLA and the manufacturer’s standard 0.20 mm profile.
- 03
Choose a small, one-colour object that sits flat and needs no supports. A cable organiser, spacer, hook or storage divider teaches more than a decorative stress test.
- 04
Treat resin printing as a different workshop route. Its fine detail comes with liquid resin, washing solvent, curing, protective equipment, ventilation and contaminated waste.
What it is like
The printer is only half the hobby
A modern printer can automate levelling and calibration, but it cannot decide whether a model is licensed, strong enough, sensibly oriented or dimensioned for the real object it must fit.
Model
Create a simple shape, adapt a permitted design or download a model whose licence allows what you plan to do.
Slice
Choose the exact printer, plate, nozzle and filament profile, then inspect the preview for supports, weak layers and unexpected travel.
Start
Clean the build surface as its manufacturer recommends, run calibration and watch the first layer attach evenly.
Wait
Small parts may take an hour; larger or finer parts can occupy the printer all day. Faster settings trade against noise, surface finish and reliability.
Finish
Let the plate cool, remove the part, trim wisps or support marks and keep hot tools away from hands and worktops.
Measure
Layer lines and small dimensional errors are normal. A useful part often becomes right on the second version, not the first.
Choose a route
Use the route that matches the result
Try the workflow without owning a printer
Start with a ruler, a computer or tablet and a free browser tool such as Tinkercad. Create a small object or download a model from a reputable library, check its licence, then ask a library, makerspace or print service for a quote. You will learn file preparation, scale, orientation, tolerances and finish without finding permanent space for a heated machine.
A service normally wants an STL or 3MF model and may ask which material, colour, strength and finish you need. Ask whether support removal is included and whether the quote changes if the part needs redesigning.
Filament printing at home
Fused-filament fabrication feeds a reel of thermoplastic into a hot nozzle and lays the object down one line at a time. PLA is the lowest-friction starting material for ordinary indoor models and useful household parts. It prints at comparatively modest temperatures, is widely stocked and works with standard profiles, but it still produces particles and vapours, shows layer lines and can deform in significant heat.
An open printer needs clear space around its moving bed and a room where emissions can be controlled. A compact build volume is enough for brackets, organisers, miniatures, plant labels, jigs and many replacement knobs. It becomes limiting when you regularly need helmets, large boxes, long panels or several parts on one plate.
Resin printing is a separate workshop
Vat-polymerisation printers cure liquid photopolymer with light. They can produce much finer miniature and jewellery-scale detail than a standard filament setup, but the printer is only one part of the system. You also need a dedicated cleanable area, ventilation, resin-compatible gloves and eye protection, washing, UV curing, spill control and a lawful way to handle contaminated liquid and solid waste.
Do not buy resin as a general upgrade from PLA. Choose it only when the target genuinely needs the detail and you can maintain the chemical workflow every time.
What early results look like
Expect visible layer lines, a slight texture from the build plate and occasional strings or seams. Flat, chunky parts usually succeed before thin hinges, snap fits, unsupported overhangs and dimensionally exact mechanisms. A first print can be useful, but a first design often needs one measured revision before it fits properly.
Software & files
Keep the digital workflow simple
Design with basic shapes first
Tinkercad is enough for organisers, spacers, plant labels, brackets, hole templates and simple enclosures. Begin with boxes, cylinders, holes and accurate measurements. A digital caliper becomes useful when a part has to fit around a real object; measure more than once and allow a small clearance rather than copying one reading blindly.
Slice for the exact machine
A model file is not normally ready for the printer. FlashPrint and other slicers convert geometry into layer-by-layer machine instructions. Select the exact printer, nozzle, build plate and material. Use a supplied standard profile before changing speed, temperature or flow.
Prefer STL or 3MF model files and slice them yourself. G-code is tied to a particular machine and setup, so do not treat someone else’s machine instructions as universal. The preview should show where each layer starts, how much support is added and whether the part is unexpectedly hollow, tiny or off the plate.
Check the licence before printing or selling
Model libraries such as Printables contain files under different licences. Some allow modification or commercial use, some require attribution and some prohibit selling prints. Keep the designer’s page and licence with the downloaded file. Buying a printer does not give you rights to another person’s model, character or brand.
Starter kit
A home setup, a measuring tool and one later comparison
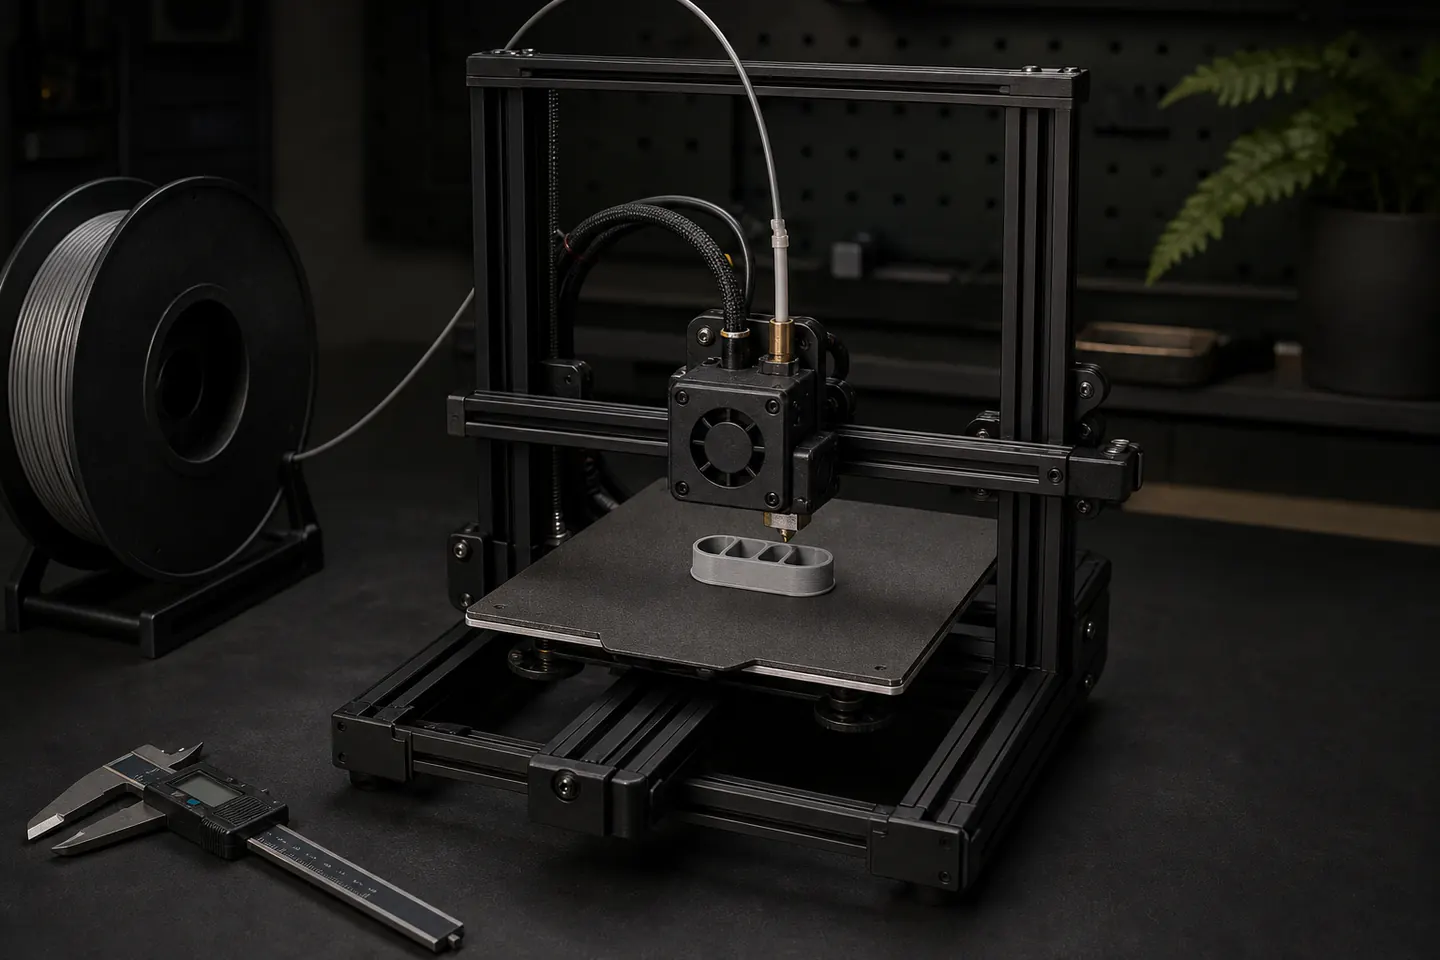
For the home route, the Adventurer 5M and one grey PLA spool are the working pair. The caliper is optional until you design parts to fit real objects. The enclosed 5M Pro is an alternative printer, not an add-on: do not buy both machines.
Flashforge Adventurer 5M 3D Printer
Automatic levelling, a removable build plate and a common 220 mm build volume remove several avoidable first-machine frustrations.
ELEGOO PLA Filament 1.75 mm Grey, 1 kg
Plain grey PLA is inexpensive, easy to inspect and suitable for the printer’s standard beginner profiles.
Kynup Digital Caliper, 150 mm
It captures diameters and clearances that a ruler misses, which makes a first revision more informative.
Flashforge Adventurer 5M Pro 3D Printer
It keeps the 5M workflow while adding an enclosure and integrated filtration for a more isolated setup.
First useful print
Print a small cable organiser
A flat-backed cable organiser is small, measurable and useful. It teaches clearance, first-layer adhesion and revision without supports, tiny decorative detail or a day-long print.
- 01
Measure the job
Measure the cable diameter and the space where the organiser will sit. Decide how many channels it needs and whether it will be fixed with removable tape, screws or simply placed on a desk.
- 02
Make or choose the model
Build a simple base and rounded channels in Tinkercad, or use a licensed model that can be resized. Keep the underside flat and leave a little clearance around each cable.
- 03
Slice conservatively
Select the exact printer and PLA profile, use the standard 0.20 mm layer preset and keep the default walls and infill. Orient the flat face on the bed and add no supports unless the preview shows they are genuinely needed.
- 04
Prepare and watch
Clean the plate using its manufacturer’s method, load PLA, run the printer’s calibration and stay with it while the first layer is laid down. Stop if lines are loose, clumped or being dragged by the nozzle.
- 05
Cool and remove
Let the build plate cool before lifting or flexing it as designed. Trim only loose wisps and keep fingers away from a hot nozzle, bed or freshly heated tool.
- 06
Test and revise
Try the real cables without forcing them. If a channel pinches, enlarge it slightly and print again. Do not use a hobby print as electrical insulation or to hold a damaged mains lead together.
Buy later
What can wait
Add equipment only after a real print shows what is missing. The most advertised extras solve specific problems and can add cost, waste, space or maintenance before they add useful capability.
- 01
A multicolour feeder
Automatic colour changes are convenient, but a single-nozzle system must purge material between colours. That can add substantial waste and print time. Paint, assemble separate parts or change filament between layers first.
- 02
A filament dryer
Store the first PLA spool sealed with fresh desiccant. Buy a controlled dryer when popping, rough surfaces, brittleness or excessive stringing point to moisture, not as an automatic part of the first basket.
- 03
A 0.2 mm nozzle
It can improve tiny text-free detail and miniature features, but the narrower line makes prints much slower and clogs more easily. Learn the supplied 0.4 mm nozzle first.
- 04
Carbon-fibre or glow filament
Abrasive additives can wear a standard nozzle and often need different profiles, ventilation and hardware. They do not make an ordinary part better by default.
- 05
A resin printer
Choose resin for a proven fine-detail target and a dedicated chemical workspace, not because it appears to be the next level after filament.
Upgrade path
What a better setup actually changes
Upgrade the limitation, not the shopping list. Build volume changes one-piece size, nozzle diameter changes the balance between detail and speed, an enclosure changes isolation and draft control, and resin changes the entire process.
Use outside equipment
From a few poundsDesign + makerspace or print service
Learn modelling, licences, orientation and fit without owning a heated machine or storing filament.Print repeatedly at home
About £170–£230Compact printer + 1 kg PLA
Make small functional parts on demand, revise them immediately and accept the selected printer’s 220 mm one-piece limit.Make larger pieces
Often £230–£500+Larger open printer
Fit bigger organisers, costume sections and batches on one plate. It does not improve fine detail by itself and needs more clear desk depth.Add an enclosure
About £339 for the checked alternativeAdventurer 5M Pro or a comparable enclosed filament printer
Reduce drafts and isolate moving parts while keeping the same 220 mm build volume. Integrated filtration does not replace suitable room ventilation.Pursue very fine detail
Several hundred pounds all-inResin printer + wash + cure + PPE + ventilation
Produce smoother miniature-scale detail in exchange for liquid chemicals, post-curing and contaminated waste handling.Safety
Control heat, movement and emissions
A 3D printer is a heated electrical machine that deliberately melts or cures material. Put the controls around the process before chasing speed or exotic filament.
- Use a stable, level and preferably non-combustible surface with clear space for the moving bed, gantry, cable and filament spool.
- Ventilate the room and favour source control, enclosure and suitable filtration where practical. PLA is a sensible starter material, not a fume-free permission to print beside a bed or in a small unventilated living space.
- Keep a working smoke alarm nearby, inspect plugs and cables, follow the manufacturer’s power instructions and do not leave a new or faulting setup running while you are asleep or out.
- Nozzles and beds can burn, and fast moving parts can catch hair, clothing or fingers. Keep children and pets away from an operating printer and let parts cool before maintenance.
- For resin, use a dedicated cleanable area, ventilation, eye protection and chemical-resistant gloves specified by the resin safety data sheet. Keep uncured resin and contaminated solvent off skin and out of household drains.
- Do not assume a hobby print is suitable for a toy, medical use, food contact, mains electricity, vehicle safety, load-bearing work or an appliance repair. Safety-critical parts need appropriate design, material evidence, testing and legal compliance.
- Keep failed prints, purge and support waste separated by material. Do not put them in household recycling or compost unless the local scheme explicitly accepts that exact plastic and form.
Makerspaces & classes
When shared equipment or tuition helps
The first modelling and slicing steps can be learned independently. A makerspace becomes especially useful when you want to try a machine before buying, compare materials or get someone to check a troublesome model in person.
FabLab Devon listed 3D printing at £1 per hour plus 5p per gram of PLA for members, or £2 per hour plus material for non-members, with a separate making service available by quote.
Useful for learning plate preparation, filament loading and safe removal while using shared equipment. Check age limits, induction rules, booking and whether you must supply a ready-to-print file.
A four-hour POW Workshops listing covered printer types, materials, slicing, accessible modelling, troubleshooting and buying decisions.
Representative UK makerspace and class listings checked 27 July 2026; access, staffing, dates and prices change.
Sources
See what shaped the advice.
Follow the evidence.
Safety guidance, manufacturer specifications, software documentation, current UK product and makerspace pages, and recurring real-world beginner advice were checked for this guide.
-
01
NIOSH · Safe 3D Printing is for Everyone, Everywhere
Authoritative overview of filament and vat-polymerisation hazards, ultrafine particles, volatile compounds, heat, moving parts, electrical risks, ventilation and source control
Open source -
02
NIOSH · Approaches to Safe 3D Printing
Detailed guidance for makerspaces, schools, libraries and small businesses covering risk assessment, printing, post-processing, cleaning and maintenance
Open source -
03
NIOSH · Safe 3D Printing: Vat Polymerization
Resin-specific controls for ventilation, personal protective equipment, spills, solvents, curing and disposal
Open source -
04
Lincolnshire Trading Standards · safety warning on 3D-printed products
UK warning that sold prints, including toys, remain subject to product-safety, testing, labelling and traceability duties
Open source -
05
UK Government · 3D-printed spare parts for consumer appliances
Government research on safety, liability and quality concerns around non-authorised printed appliance parts
Open source -
06
Tinkercad · 3D design
Free browser-based design route suitable for first measured models made from basic shapes
Open source -
07
Prusa Knowledge Base · first print with PrusaSlicer
Independent manufacturer documentation for the general model-to-slicer-to-printer workflow
Open source -
08
Prusa Knowledge Base · where to get 3D models
Explains that downloaded STL or 3MF models must be sliced for the selected printer
Open source -
09
Printables · 3D model library
Current source of downloadable models with individual creator and licence information
Open source -
10
Creative Commons · Attribution 4.0
Primary licence terms for attribution, adaptation and reuse where a model uses CC BY 4.0
Open source -
11
r/3Dprinting · A1 mini as a first printer
One of several discussions showing the recurring trade-off between compact price and the occasions when a 180 mm bed becomes limiting
Open source -
12
r/3Dprinting · A1 versus A1 mini
Recent comparison of first-printer experience, desk space and build-volume needs
Open source -
13
r/3Dprinting · multicolour printing and waste
Recurring owner experience that single-nozzle colour changes add purge waste and longer print times
Open source -
14
r/3Dprinting · AMS waste question
Additional recent discussion confirming that purge quantity depends on colour changes, layout and settings
Open source -
15
r/3Dprinting · is a dryer necessary for PLA
Repeated practical advice to store PLA sealed first and buy a dryer when moisture symptoms appear
Open source -
16
r/3Dprinting · is a filament dryer necessary
A second discussion used to check that dryer advice was recurring rather than based on one comment
Open source -
17
FabLab Devon · access and charges
Current public-library makerspace membership, support, pay-per-hour 3D-printing charges and making service
Open source -
18
Oxfordshire County Council · Makerspace
Current example of public-library makerspace access to 3D printers and other digital-making equipment
Open source -
19
POW Workshops London · 3D printing class
Current four-hour beginner-class structure, age guidance, topics and listed price
Open source -
20
Flashforge · Adventurer 5M
Manufacturer build-volume, levelling, nozzle, material and software specifications.
Open source -
21
Flashforge · Adventurer 5M Pro
Manufacturer enclosure, filtration, build-volume and material specifications.
Open source -
22
r/3Dprinting · beginner printer discussion
Recent real-world recommendations repeatedly included the Adventurer 5M alongside other low-friction first printers.
Open source -
23
r/3Dprinting · 2026 beginner recommendations
Community comparison of the Adventurer 5M/5M Pro, Bambu A1 mini and enclosed alternatives.
Open source -
24
Amazon UK · Flashforge Adventurer 5M
Exact printer page, £209 observed price, Flashforge Official seller and in-stock status.
Open source -
25
Amazon UK · ELEGOO PLA 1.75 mm Grey 1 kg
Exact filament page, £15.99 observed price, ELEGOO UK seller and in-stock status.
Open source -
26
Amazon UK · Kynup 150 mm digital caliper
Exact measuring-tool page, £15.99 observed price and current availability.
Open source -
27
Amazon UK · Flashforge Adventurer 5M Pro
Exact enclosed-printer page, £339 observed price, Flashforge Official seller and in-stock status.
Open source
Guide information and links checked 27 July 2026.