Beginner’s guide · Photograph & film
Photograph the specimen
after the microscope view is stable.
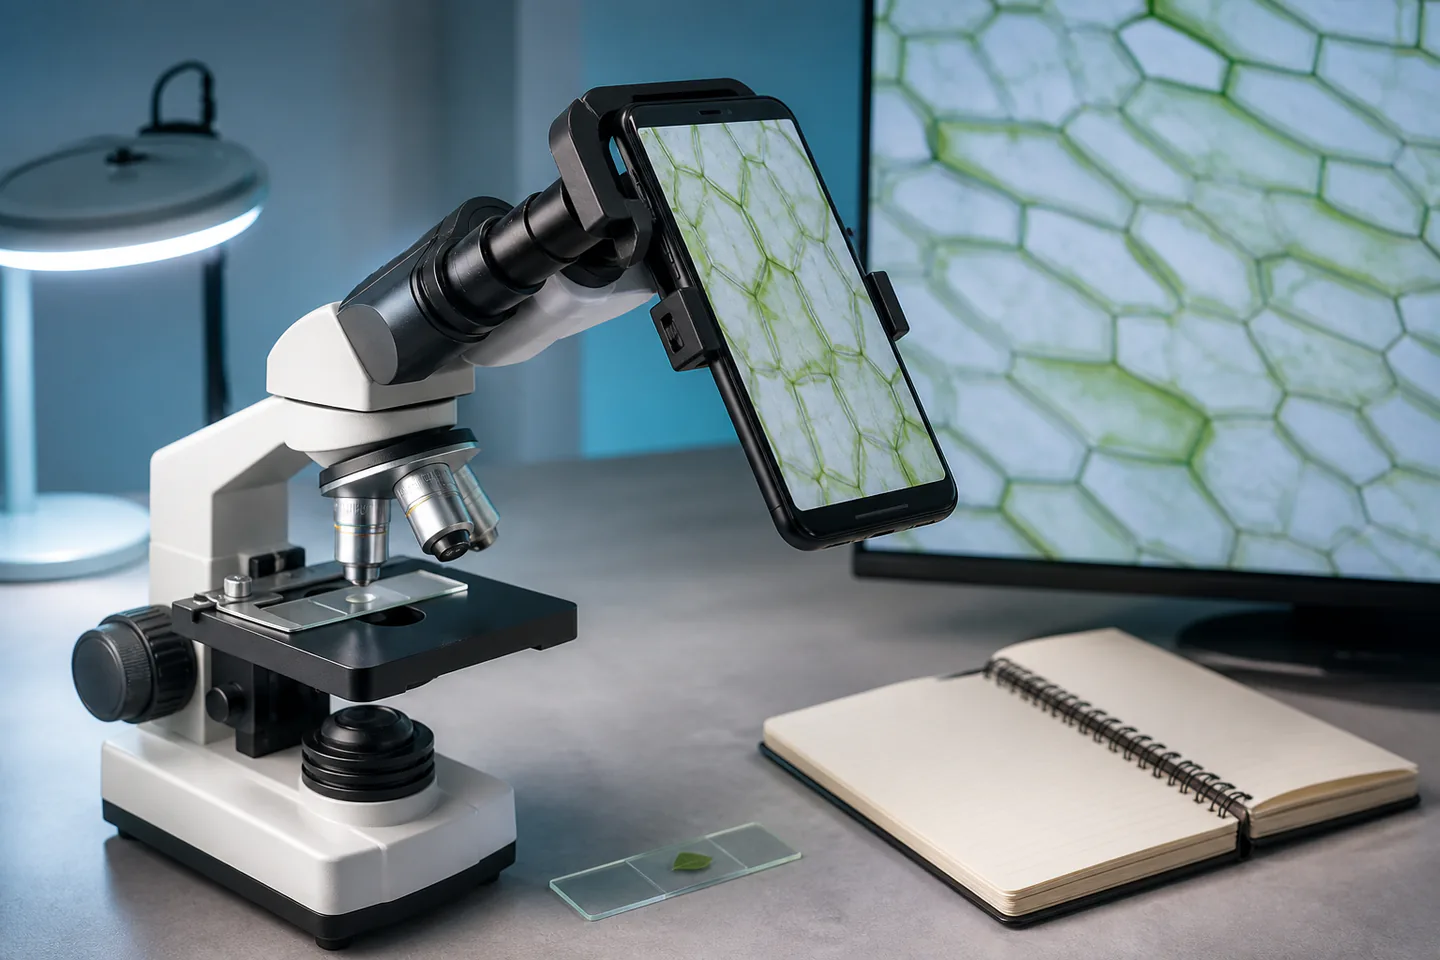
Microphotography turns a stable, correctly illuminated microscope view into a photograph through careful focus, phone alignment and honest scale notes.
Quick answer
Control light and position before buying another lens
Start with a prepared slide or flat opaque specimen you can identify. Achieve a clear visual view first, then align a phone over the eyepiece, lock exposure and focus, use a timer and record magnification and specimen details.
- 01
Clean only the optical surfaces the manufacturer permits, stabilise the microscope and choose a known specimen with suitable illumination and no biological hazard. Keep the first attempt narrow enough that preparation, the main action and the result can all be reviewed together.
- 02
Set the visual focus and illumination first, then centre the phone lens and change only fine focus across a short image sequence. Keep the first attempt narrow enough that preparation, the main action and the result can all be reviewed together.
- 03
Inspect edge sharpness, colour cast, glare, vignetting, vibration, compression and whether the label honestly states specimen and optical setup. Keep the first attempt narrow enough that preparation, the main action and the result can all be reviewed together.
- 04
Remove the phone adapter without stressing the eyepiece, dispose of or store slides safely and cover the microscope from dust. Keep the first attempt narrow enough that preparation, the main action and the result can all be reviewed together.
What to expect
A repeatable setup teaches more than a lucky frame
The useful result comes from controlled light, stable framing and reviewing failures at full size.
The first attempt
A prepared slide with bold contrast separates camera alignment from specimen collection and slide-making technique. For microphotography, note what actually happened rather than relying on memory; that turns the next attempt into a controlled change instead of another guess.
The control point
Set the visual focus and illumination first, then centre the phone lens and change only fine focus across a short image sequence. For microphotography, note what actually happened rather than relying on memory; that turns the next attempt into a controlled change instead of another guess.
The useful signal
Inspect edge sharpness, colour cast, glare, vignetting, vibration, compression and whether the label honestly states specimen and optical setup. For microphotography, note what actually happened rather than relying on memory; that turns the next attempt into a controlled change instead of another guess.
The common trap
High advertised magnification enlarges blur, empty resolution and vibration when optics, illumination and specimen preparation are limiting. For microphotography, note what actually happened rather than relying on memory; that turns the next attempt into a controlled change instead of another guess.
Core method
Plan the light, stabilise the camera and compare frames
Prepare deliberately
Clean only the optical surfaces the manufacturer permits, stabilise the microscope and choose a known specimen with suitable illumination and no biological hazard. For microphotography, note what actually happened rather than relying on memory; that turns the next attempt into a controlled change instead of another guess.
Control the central variable
Set the visual focus and illumination first, then centre the phone lens and change only fine focus across a short image sequence. For microphotography, note what actually happened rather than relying on memory; that turns the next attempt into a controlled change instead of another guess.
Read the result
Inspect edge sharpness, colour cast, glare, vignetting, vibration, compression and whether the label honestly states specimen and optical setup. For microphotography, note what actually happened rather than relying on memory; that turns the next attempt into a controlled change instead of another guess.
Reset before repeating
Remove the phone adapter without stressing the eyepiece, dispose of or store slides safely and cover the microscope from dust. For microphotography, note what actually happened rather than relying on memory; that turns the next attempt into a controlled change instead of another guess.
Useful products
Products with a clear job in the setup
The pocket microscope with phone clip offers the simplest capture route; the compound microscope adds transmitted-light specimens and the second pocket model supports surface exploration.
Carson MP-250 MicroFlip 100–250× with Smartphone Clip
The supplied adapter connects observation and photography without a separate camera system.
Swift SW200DL 40–1000× Compound Microscope
Fine focus and objective choice reveal the difference between useful and empty magnification.
Carson MM-300 MicroBrite Plus 60–120× Pocket Microscope
Low cost and portable lighting make specimen choice the focus.
First project
Capture one prepared slide at two useful magnifications
Label the specimen and optical setup, then choose the frame with real resolved detail rather than the largest number.
- 01
Set up
Clean only the optical surfaces the manufacturer permits, stabilise the microscope and choose a known specimen with suitable illumination and no biological hazard. For microphotography, note what actually happened rather than relying on memory; that turns the next attempt into a controlled change instead of another guess.
- 02
Begin the first attempt
A prepared slide with bold contrast separates camera alignment from specimen collection and slide-making technique. For microphotography, note what actually happened rather than relying on memory; that turns the next attempt into a controlled change instead of another guess.
- 03
Hold one variable steady
Set the visual focus and illumination first, then centre the phone lens and change only fine focus across a short image sequence. For microphotography, note what actually happened rather than relying on memory; that turns the next attempt into a controlled change instead of another guess.
- 04
Inspect the result
Inspect edge sharpness, colour cast, glare, vignetting, vibration, compression and whether the label honestly states specimen and optical setup. For microphotography, note what actually happened rather than relying on memory; that turns the next attempt into a controlled change instead of another guess.
- 05
Reset and record
Remove the phone adapter without stressing the eyepiece, dispose of or store slides safely and cover the microscope from dust. For microphotography, note what actually happened rather than relying on memory; that turns the next attempt into a controlled change instead of another guess.
What can wait
What can wait until the first result
Delay specialist optics until framing, light or working distance is the proven limitation.
- 01
A large first setup
Scale multiplies High advertised magnification enlarges blur, empty resolution and vibration when optics, illumination and specimen preparation are limiting. before the basic routine is known. For microphotography, note what actually happened rather than relying on memory; that turns the next attempt into a controlled change instead of another guess.
- 02
Premium specialist equipment
It should solve a limitation you can describe after several microphotography sessions. For microphotography, note what actually happened rather than relying on memory; that turns the next attempt into a controlled change instead of another guess.
- 03
Several methods at once
Changing materials and technique together makes the cause of a result hard to see. For microphotography, note what actually happened rather than relying on memory; that turns the next attempt into a controlled change instead of another guess.
- 04
Buying for a future version
Finish and review the small route before equipping an imagined advanced practice. For microphotography, note what actually happened rather than relying on memory; that turns the next attempt into a controlled change instead of another guess.
Upgrade path
Upgrade the repeated limitation
Upgrade the constraint visible in repeated photographs.
Try it
About £20 with an existing microscope; £80–£250 to startExisting microscope and phone held securely
Complete one meaningful result and learn the whole sequence.Repeat it
About £20 with an existing microscope; £80–£250 to startPhone adapter, prepared slides and notebook
Reduce setup friction and compare several attempts.Improve the bottleneck
£100–£400Dedicated camera adapter or focus rail
Address High advertised magnification enlarges blur, empty resolution and vibration when optics, illumination and specimen preparation are limiting. with a targeted change.Go deeper
VariableCalibrated scale, stacking and original specimens
Add scale, precision or public participation with evidence from practice.Safety & care
Treat slides, samples and scale claims carefully
Broken glass, stains and living specimens create practical and ethical responsibilities beyond camera alignment.
- Handle slides by the edges and dispose of broken glass in an appropriate sharps container. Follow current manufacturer, food-safety, access, wildlife or local guidance wherever it applies.
- Do not culture unknown microorganisms or collect protected, hazardous or medically derived specimens. Follow current manufacturer, food-safety, access, wildlife or local guidance wherever it applies.
- Use immersion oil, stains and cleaners only as their manufacturer directs. Follow current manufacturer, food-safety, access, wildlife or local guidance wherever it applies.
- Keep bright illuminators comfortable for the eyes and never use direct sunlight through optics. Follow current manufacturer, food-safety, access, wildlife or local guidance wherever it applies.
- Record magnification and scale honestly; digital enlargement is not added optical resolution. Follow current manufacturer, food-safety, access, wildlife or local guidance wherever it applies.
Outside help
When outside help earns its place
A microscopy club or natural-history group helps with specimen preparation, identification and optical limits after phone alignment is working.
Use one complete lesson that covers preparation, the central technique, common mistakes and finishing. For a first microphotography attempt, one coherent method is easier to diagnose than fragments collected from several creators.
Outside help earns its place when safe setup, access, identification or live correction removes a real obstacle. Ask what equipment, materials, access and follow-up support are included before booking.
Representative UK learning options checked 31 August 2026; local prices, access, materials and tutor support vary.
Sources
Where the guidance came from
The method is grounded in specialist, manufacturer and public guidance, then checked against recurring beginner problems and the exact products linked here.
-
01
Royal Microscopical Society · Resources
Microscopy education, practice and standards.
Open source -
02
Nikon MicroscopyU · Digital imaging
Manufacturer microscopy imaging principles.
Open source -
03
Evident Scientific · Microscopy resource center
Optics, illumination and digital-image guidance.
Open source -
04
Quekett Microscopical Club
UK amateur microscopy learning and community.
Open source -
05
Reddit · r/microscopy
Community evidence on adapters, illumination, focus and specimens.
Open source -
06
Amazon UK · MP-250 MicroFlip 100–250× with Smartphone Clip
Exact Amazon UK product page or ISBN used for the recommendation; current price, seller, specification and availability should be confirmed.
Open source -
07
Amazon UK · SW200DL 40–1000× Compound Microscope
Exact Amazon UK product page or ISBN used for the recommendation; current price, seller, specification and availability should be confirmed.
Open source -
08
Amazon UK · MM-300 MicroBrite Plus 60–120× Pocket Microscope
Exact Amazon UK product page or ISBN used for the recommendation; current price, seller, specification and availability should be confirmed.
Open source
Guide information and links checked 31 August 2026.