Beginner’s guide · Make & create
Pull a print
before the paint dries.
A reusable gel plate, soft brayer and modest acrylic palette make layered monoprints without a press. Start with thin paint, flat masks and one clean pull before chasing complex ghost layers.
Quick answer
Print one colour, one mask and one ghost
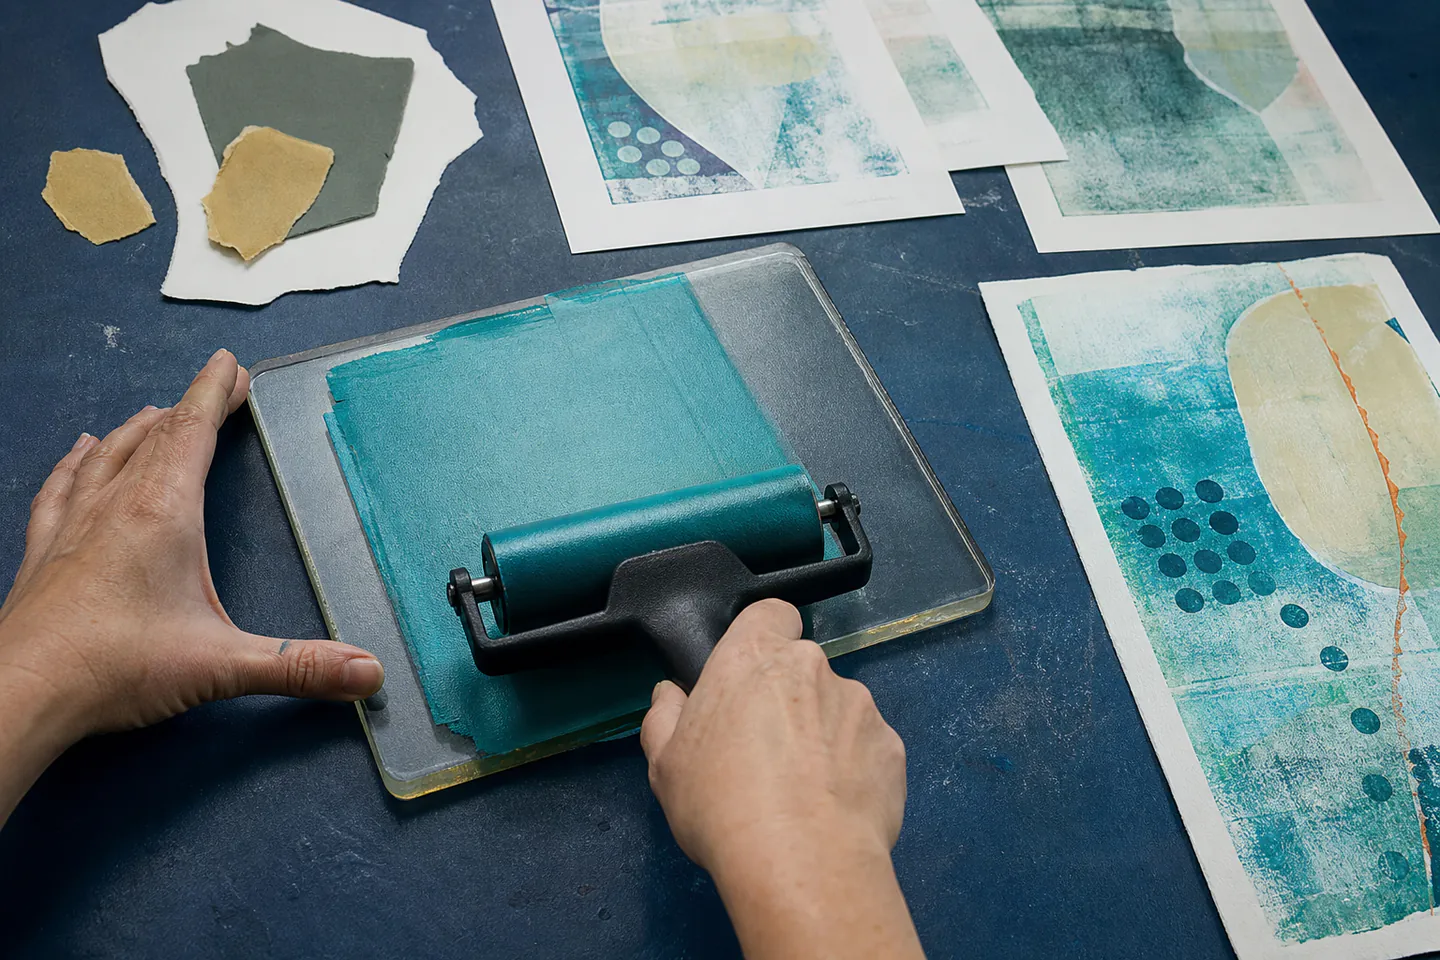
Roll a small amount of ordinary acrylic into a thin even film on an 8 × 10 inch gel plate. Place flat paper shapes, pull the first print, remove the masks and take a lighter ghost print.
- 01
Use less paint than seems necessary because thick paint fills texture and dries slowly on paper. Note the material, setting or measurement used so the result can be repeated or changed for a reason.
- 02
Roll the brayer in several directions without repeatedly scrubbing a drying layer. Note the material, setting or measurement used so the result can be repeated or changed for a reason.
- 03
Keep masks flat and free from sharp edges that could mark the plate. Note the material, setting or measurement used so the result can be repeated or changed for a reason.
- 04
Lay paper once, burnish evenly and peel in one steady motion. Note the material, setting or measurement used so the result can be repeated or changed for a reason.
- 05
Clean according to the plate maker’s instructions and never attack residue with a blade or harsh solvent. Note the material, setting or measurement used so the result can be repeated or changed for a reason.
What to expect
Fast decisions create unpredictable but readable layers
Gel printing rewards experimentation, yet good records and controlled paint films make successful effects repeatable.
Open time
Thin acrylic begins drying as soon as it is rolled. Room warmth, paint body and the number of passes change the working window. For gel-plate printing, check this deliberately while the work is still easy to alter; correcting it after the next stage usually costs more time or materials.
Pressure
Even hand pressure transfers a broad area; missed corners and heavy streaks often come from burnishing rather than the design. For gel-plate printing, check this deliberately while the work is still easy to alter; correcting it after the next stage usually costs more time or materials.
Layer order
The first shape printed can become the top visual layer once later paint is added. Small labelled tests clarify this reversed sequence. For gel-plate printing, check this deliberately while the work is still easy to alter; correcting it after the next stage usually costs more time or materials.
Cleanup
Dried acrylic can sometimes lift in later pulls, but scraping or solvent can permanently damage a soft plate. For gel-plate printing, check this deliberately while the work is still easy to alter; correcting it after the next stage usually costs more time or materials.
Core method
Treat paint thickness as the main control
Condition the workspace
Place the plate on a smooth stable surface, reserve a separate rolling area and prepare more paper than one planned print. For gel-plate printing, check this deliberately while the work is still easy to alter; correcting it after the next stage usually costs more time or materials.
Roll a thin film
Add a pea-sized amount, spread it with the brayer and stop when the surface has an even satin appearance without ridges. For gel-plate printing, check this deliberately while the work is still easy to alter; correcting it after the next stage usually costs more time or materials.
Mask and pull
Arrange flat torn or cut paper, place the print sheet carefully, rub the whole back and peel without sliding. For gel-plate printing, check this deliberately while the work is still easy to alter; correcting it after the next stage usually costs more time or materials.
Build deliberate layers
Let the first pull dry, align the next colour by eye or simple corner marks and keep one variable different between tests. For gel-plate printing, check this deliberately while the work is still easy to alter; correcting it after the next stage usually costs more time or materials.
Useful products
Products with a clear job in the setup
The plate, brayer and paint each have one clear job. This established trio is enough for many sessions without a press.
Gelli Arts Gel Printing Plate, 8 × 10 in
The 8 × 10 format is large enough to explore while remaining easy to ink and store.
Daler-Rowney System3 Acrylic Paint Introduction Set
A known artist paint gives more predictable coverage than a huge anonymous craft assortment.
Falling in Art Soft Rubber Brayer Rollers, 10 cm and 6 cm
A soft dedicated brayer is more consistent than improvised foam rollers.
First project
Pull a three-print mask sequence
Three related prints show how full paint, masked areas and residue behave without demanding a finished masterpiece.
- 01
Prepare shapes
Tear three bold paper masks and lay out three labelled print sheets plus scrap for cleaning the brayer. For gel-plate printing, check this deliberately while the work is still easy to alter; correcting it after the next stage usually costs more time or materials.
- 02
Roll the first colour
Spread a thin even film and take one plain pull to learn pressure and paint quantity. For gel-plate printing, check this deliberately while the work is still easy to alter; correcting it after the next stage usually costs more time or materials.
- 03
Add masks
Re-ink lightly, place the flat masks and pull a second sheet without shifting them. For gel-plate printing, check this deliberately while the work is still easy to alter; correcting it after the next stage usually costs more time or materials.
- 04
Take the ghost
Remove the masks and immediately pull remaining paint onto a third sheet, comparing the softer reversed shapes. For gel-plate printing, check this deliberately while the work is still easy to alter; correcting it after the next stage usually costs more time or materials.
- 05
Clean and annotate
Follow manufacturer cleaning guidance, let every print dry flat and write the paint, paper and order on the back. For gel-plate printing, check this deliberately while the work is still easy to alter; correcting it after the next stage usually costs more time or materials.
What can wait
What can wait until the first result
Texture collections and complex transfer tricks are easier after thin films and clean pulls are consistent.
- 01
Large plate
A large surface uses more paint, requires faster rolling and is harder to burnish evenly. For gel-plate printing, check this deliberately while the work is still easy to alter; correcting it after the next stage usually costs more time or materials.
- 02
Every texture tool
Leaves, flat masks and torn paper already reveal positive, negative and ghost layers. For gel-plate printing, check this deliberately while the work is still easy to alter; correcting it after the next stage usually costs more time or materials.
- 03
Image transfers
Transfer success depends on toner, paper, paint and timing; learn the plate’s ordinary behaviour first. For gel-plate printing, check this deliberately while the work is still easy to alter; correcting it after the next stage usually costs more time or materials.
Upgrade path
Upgrade the repeated limitation
Upgrade for a repeated limitation such as paper size, registration or paint drying too quickly.
Try it
£35–£708 × 10 plate, soft brayer, acrylic set and paper
Thin films, masks and ghost pulls become understandable.Refine layers
£15–£50 extraBetter print paper, stencils and simple registration guides
Multi-layer prints align and survive handling better.Extend open time
£10–£35Compatible open acrylic or retarder used as directed
Complex texture and transfer experiments gain working time.Work as an edition
VariableDocumented colour recipes and registration system
Related monoprints can share intentional structure without becoming identical.Safety & care
Protect the soft plate and work surface
The process is low risk, but paint contact, sharp textures and careless storage can end a plate quickly.
- Use non-toxic materials as labelled, ventilate the workspace and wash paint from skin promptly. Follow the current instructions supplied with the exact material or tool.
- Keep knives, pointed plants, rough edges and solvent cleaners away from the gel surface. Follow the current instructions supplied with the exact material or tool.
- Do not use the craft plate or tools for food preparation. Follow the current instructions supplied with the exact material or tool.
- Store the clean dry plate flat in the manufacturer’s recommended packaging and temperature range. Follow the current instructions supplied with the exact material or tool.
Outside help
When outside help earns its place
A complete beginner demonstration is enough for masks and ghost prints. A workshop helps with image transfer, colour registration and diagnosing persistent dry or muddy pulls.
Use one complete lesson that includes preparation, the working method, troubleshooting and finishing. Avoid combining measurements from several creators on the first attempt.
Ask whether materials, safe tool use, individual correction and a finished take-home result are included before booking.
Representative UK learning options checked 29 August 2026; local prices, access, materials and tutor support vary.
Sources
Where the guidance came from
The method is grounded in specialist and manufacturer guidance, then checked against recurring beginner problems and the exact products linked here.
-
01
Gelli Arts · How to
Manufacturer guidance for using, cleaning and storing gel plates.
Open source -
02
Daler-Rowney · System3 acrylic
Paint characteristics and manufacturer information.
Open source -
03
Tate · Monoprint
Museum definition and printmaking context.
Open source -
04
Handprinted · Gel plate printing
UK specialist practical printmaking tutorials.
Open source -
05
V&A · Prints
Museum context for layered and repeat print imagery.
Open source -
06
Amazon UK · Gel Printing Plate, 8 × 10 in
Exact product catalogue page or ISBN used for the recommendation; current price, seller, specification and availability should be confirmed.
Open source -
07
Amazon UK · System3 Acrylic Paint Introduction Set
Exact product catalogue page or ISBN used for the recommendation; current price, seller, specification and availability should be confirmed.
Open source -
08
Amazon UK · Soft Rubber Brayer Rollers, 10 cm and 6 cm
Exact product catalogue page or ISBN used for the recommendation; current price, seller, specification and availability should be confirmed.
Open source
Guide information and links checked 29 August 2026.