Beginner’s guide · Make & build
Build for balance,
then wait for safe wind.
A small diamond kite made from paper, straight spars and proper line teaches almost every useful principle. The build is quick; trimming it safely is the real craft.
Quick answer
Make a small symmetrical diamond and test it in a clear field
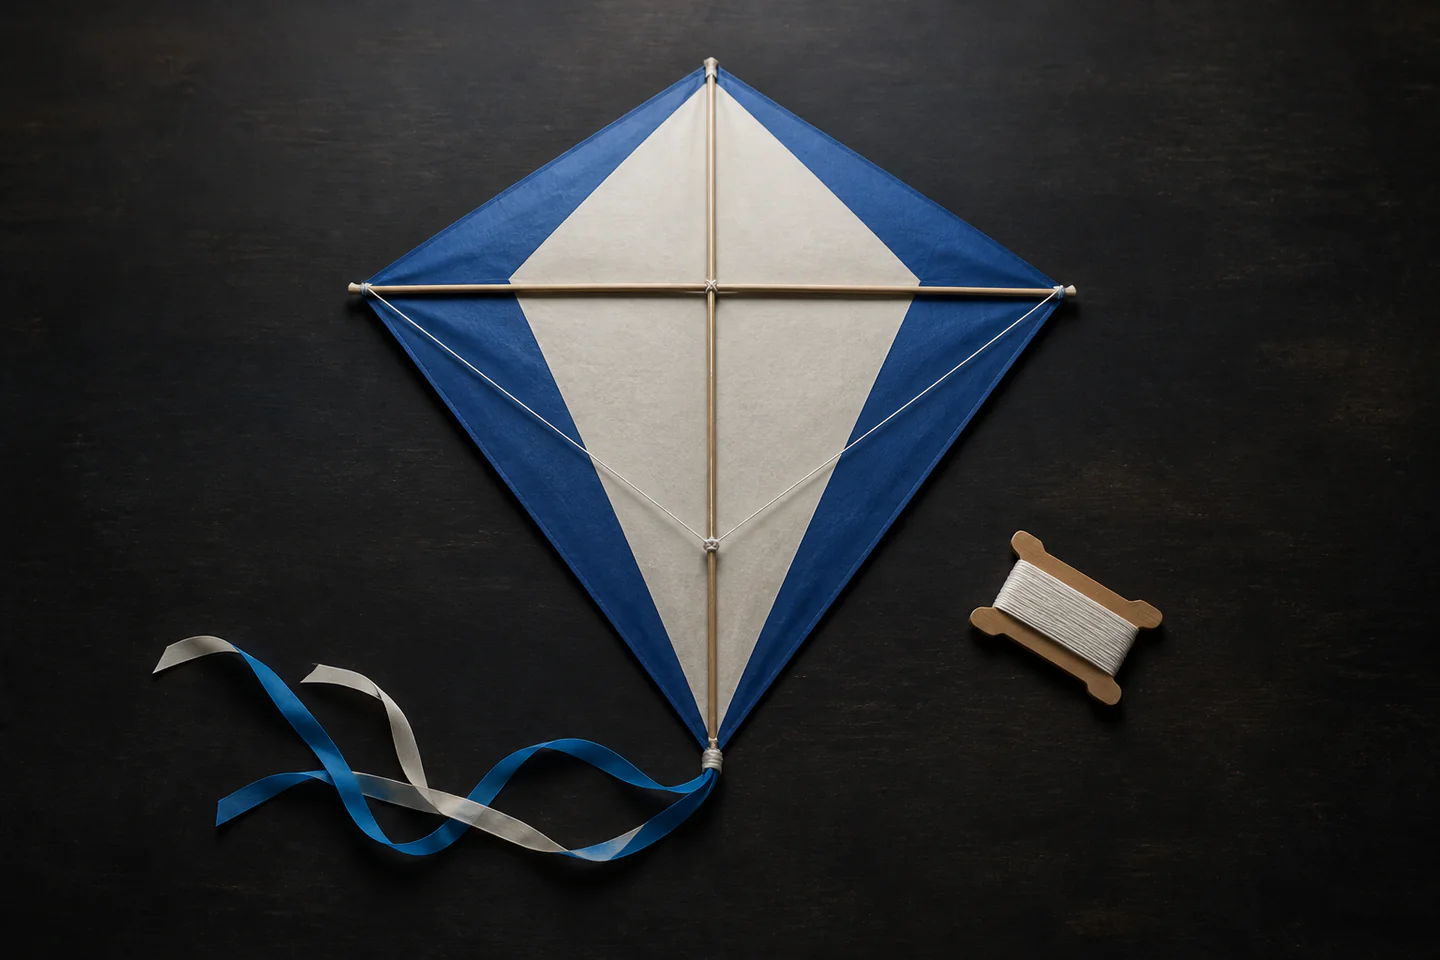
Cut one diamond sail from strong paper or lightweight kite material using a template. Attach two straight light spars at right angles, reinforce the four corners, tie a two-point bridle around the frame and add a light tail. Check that the left and right halves match before connecting proper kite line. Choose a broad open site far from roads, trees, power lines, people, animals and airfields, then launch only in moderate steady wind and within current UK rules.
- 01
Symmetry matters more than decoration. Unequal sail area, twisted spars or off-centre bridle points make the kite turn.
- 02
Use line sold for kites and a comfortable winder; fishing line can be hard to see, cut skin and behave unpredictably.
- 03
A tail adds drag and can calm side-to-side hunting, but excessive tail weight prevents climbing.
- 04
Never fly near overhead lines, roads, railways, airports, crowds or storms. Check current CAA and local land rules before every site.
- 05
If the kite pulls hard, dives repeatedly or the wind is gusty, land it. A stronger tug is not proof that conditions are better.
What to expect
The first flight is a diagnostic test, not a performance
A handmade kite rarely emerges perfectly trimmed. Short low launches reveal which adjustment is needed while the loads and recovery distance remain manageable.
Frame
Bent or mismatched spars introduce a turn before the kite leaves the ground. Sight along them and replace poor pieces.
Sail
Wrinkles are less damaging than uneven tension. Secure opposite corners gradually so the frame stays square.
Bridle
The tow point controls flying angle. Move it in small measured steps and mark the original position.
Tail
Add or remove equal sections rather than tying random heavy objects to one side.
Wind
Buildings and trees create turbulence. A clean open field can transform the same kite.
Recovery
Wind line onto a proper winder under light tension and inspect it for knots, abrasion and contamination after flying.
Core method
Build straight, measure twice and trim one variable
Choose a forgiving plan
Use a documented small diamond or sled-kite plan with exact dimensions. Read the full materials list before substituting anything; sail weight, spar stiffness and bridle position are a system. A paper diamond is inexpensive and makes symmetry visible, while a ripstop version is a later durability upgrade.
Make the frame first
Cut two straight spars to length, mark their centres and lash or bind the cross point without crushing them. Lay the frame over the template and measure matching corner-to-cross distances. Bow only if the chosen plan requires it. A square frame saves far more trimming than a decorative perfect sail.
Fit sail, bridle and tail
Cut outside the frame line to leave the planned hem or fold. Reinforce corners before attaching the sail evenly. Tie the bridle to structural points, not just the paper, and use secure knots shown by the plan. Fit a light centred tail and connect the flying line with a knot that can be inspected.
Test low and change one thing
At a safe open site, have a helper hold the kite only if the plan and conditions allow. Let line out for a short controlled launch; do not run into hazards or traffic. If it turns, land and recheck symmetry before moving the bridle or tail. Record each small change so a better setting can be repeated.
Useful products
Products with a clear job in the setup
The craft knife and cutting mat help make a symmetrical sail and clean reinforcements. The kite-design book is an optional reference with reusable plans. Basic paper, straight spars, adhesive, proper kite line and a winder must still match the chosen plan; buy materials only after selecting one design.
OLFA AK-1 Art Knife with 25 Blades
Clean matching edges make symmetry easier to preserve than tearing or forcing blunt scissors.
Fiskars A3 Self-Healing Cutting Mat
The A3 area suits a small kite template and helps keep long cuts controlled.
Lee Scott Newman Kite Craft: The History and Processes of Kitemaking Throughout the World
It explains why frames, sails, bridles and tails differ and gives the hobby room to grow.
First project
Build and trim one paper diamond kite
Keep the span modest so measuring, carrying and low-risk test flights remain manageable.
- 01
Print or draw the plan
Include spar lengths, cross point, corners, bridle points and tail attachment.
- 02
Square the frame
Lash straight spars and compare both diagonals and matching side lengths.
- 03
Attach the sail evenly
Reinforce corners and work opposite sides so tension stays balanced.
- 04
Tie and inspect the bridle
Use the plan’s knots and mark the starting tow point.
- 05
Choose a safe site
Check wind, CAA guidance, local rules and all surrounding hazards.
- 06
Launch low and trim
Change symmetry, tow point or tail one variable at a time after landing.
What can wait
What can wait until the first result
Large, fast and hard-pulling kites multiply consequences before construction and site judgement are reliable.
- 01
A stunt or power kite
Two-line control and high loads are different skills from trimming a small single-line build.
- 02
Carbon spars and technical sailcloth
Paper and simple straight spars expose the same geometry at far lower cost.
- 03
Very strong line
Line must suit the kite and expected load; excessive strength can transfer dangerous force elsewhere.
- 04
A giant decorative tail
Tail is a trim component, not free decoration; unnecessary mass prevents flight.
- 05
Flying cameras or lights
Payload changes balance, regulation and public risk and is not part of the first build.
Upgrade path
Upgrade the repeated limitation
Upgrade durability or design only after the first kite launches, climbs and lands under control.
Paper diamond
About £15–£40Simple sail, wood spars and proper line
Learn symmetry and trimming.Reusable ripstop build
About £30–£80Ripstop sail + stronger fittings
Survive damp grass and repeated flights.Alternative single-line forms
About £40–£120Delta, sled or box-kite materials
Explore stability and structure.Specialist or traction kites
About £100–£500+Purpose-made equipment and instruction
Manage higher speed and load safely.Safety & care
The flying site is part of the equipment
Kites can contact power lines, distract road users, injure bystanders and conflict with aviation. Build quality cannot compensate for a poor site or unsuitable wind.
- Check current CAA guidance, airspace restrictions, local bylaws and landowner permission; distance limits and protected sites can change.
- Stay far from overhead lines, substations, roads, railways, airports, livestock, crowds and thunderstorms; never attempt to retrieve a kite from electrical equipment.
- Wear gloves if the plan and load require them, use a proper winder and never wrap flying line around hands, fingers or the body.
- Choose line appropriate to the kite, inspect every knot and retire frayed line; do not use hard-to-see monofilament fishing line.
- Children need close competent supervision for both sharp construction tools and flying. Land early when wind, visibility or public use changes.
Outside help
When outside help earns its place
A documented plan is enough for a paper diamond. A kite festival workshop or experienced club becomes useful for sewing ripstop, tuning unusual bridles and learning safe handling of larger designs.
Use one complete plan and current UK flying guidance.
Ask about age limits, materials, flying insurance and the test site.
Representative UK learning options checked 17 August 2026; local prices, access, materials and tutor support vary.
Sources
Where the guidance came from
Aviation and electrical guidance set the hard safety boundaries; kite organisations, museums and experienced builders explain plans, knots, trim and suitable wind.
-
01
Civil Aviation Authority · Kites and model aircraft
Current UK aviation considerations for kite flying.
Open source -
02
National Grid · Safety around overhead lines
Electrical safety and exclusion around power infrastructure.
Open source -
03
The Kite Society of Great Britain
UK club, event and safe-flying context.
Open source -
04
NASA Glenn · Beginner’s guide to kites
Aerodynamic explanations of lift, drag, balance and kite geometry.
Open source -
05
Reddit · r/kites
Community experience of builds, wind ranges, bridles and field problems.
Open source -
06
Amazon UK · AK-1 Art Knife with 25 Blades
Exact product catalogue page or ISBN used for the recommendation; current price, seller and availability should be confirmed.
Open source -
07
Amazon UK · A3 Self-Healing Cutting Mat
Exact product catalogue page or ISBN used for the recommendation; current price, seller and availability should be confirmed.
Open source -
08
Amazon UK · Kite Craft: The History and Processes of Kitemaking Throughout the World
Exact product catalogue page or ISBN used for the recommendation; current price, seller and availability should be confirmed.
Open source
Guide information and links checked 17 August 2026.