Beginner’s guide · Make & create
Make lace
from one flipped knot.
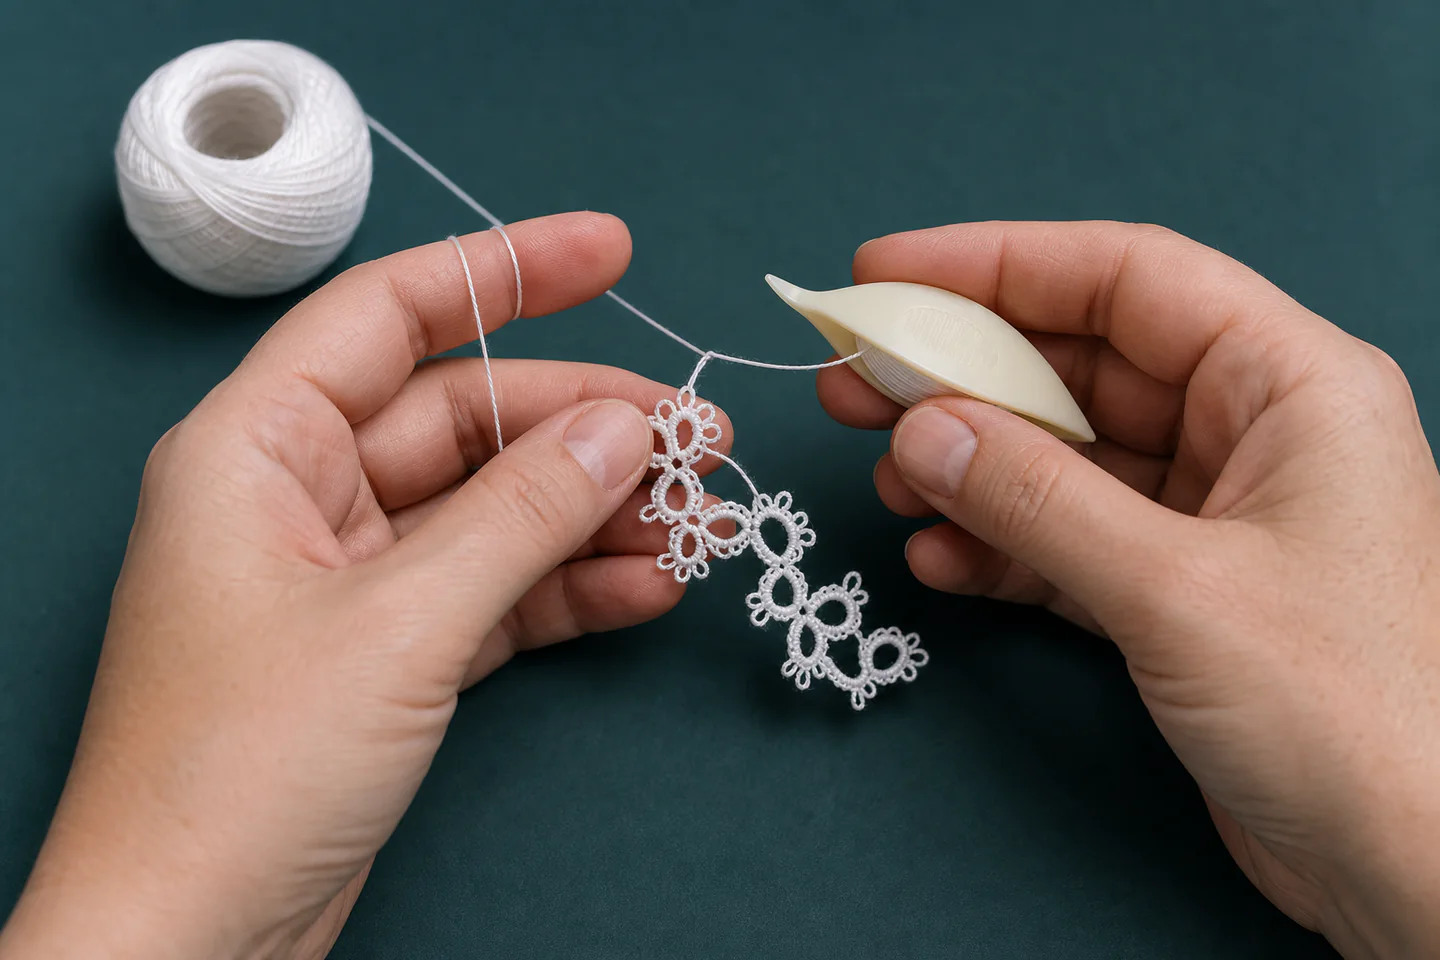
Shuttle tatting turns fine thread into rings, chains and picots. Start with one visible shuttle, smooth crochet cotton and a short edging so the double stitch can become automatic.
Quick answer
Learn the flip before chasing patterns
Use one simple shuttle and pale size 10 or 20 crochet cotton so every knot is visible. Practise the first and second half of the double stitch until the ring thread still slides freely.
- 01
Keep the shuttle thread as the straight core and deliberately transfer each working loop onto it. Note the material, setting or measurement used so the result can be repeated or changed for a reason.
- 02
Test that completed double stitches slide before closing a ring; locked stitches cannot form the intended ring. Note the material, setting or measurement used so the result can be repeated or changed for a reason.
- 03
Make picots by leaving measured spaces, not by tying a different knot. Note the material, setting or measurement used so the result can be repeated or changed for a reason.
- 04
Count double stitches aloud or mark the pattern because tiny repeats are easy to misread. Note the material, setting or measurement used so the result can be repeated or changed for a reason.
- 05
Use a light thread against a contrasting surface until the structure is easy to see. Note the material, setting or measurement used so the result can be repeated or changed for a reason.
What to expect
The motion feels impossible until the transfer clicks
Tatting uses very little equipment, but the double-stitch flip is a specific hand movement that must be understood rather than tightened by force.
The flip
The working loop changes ownership so the knot sits around the shuttle thread. A sliding core is the quickest test that it worked. For tatting, check this deliberately while the work is still easy to alter; correcting it after the next stage usually costs more time or materials.
Counting
Patterns abbreviate rings, chains, picots and joins. One missing pair changes the symmetry even when the lace still looks plausible. For tatting, check this deliberately while the work is still easy to alter; correcting it after the next stage usually costs more time or materials.
Thread choice
Smooth firmly twisted cotton shows structure and survives unpicking better than soft fuzzy yarn. For tatting, check this deliberately while the work is still easy to alter; correcting it after the next stage usually costs more time or materials.
Closing rings
A ring should pull closed steadily. If it jams, stop and find the unflipped or split knot instead of pulling harder. For tatting, check this deliberately while the work is still easy to alter; correcting it after the next stage usually costs more time or materials.
Core method
Control the core thread first
Wind the shuttle
Load a modest amount of thread evenly without overfilling the shuttle, leaving enough free thread to practise. For tatting, check this deliberately while the work is still easy to alter; correcting it after the next stage usually costs more time or materials.
Form half stitches
Make the first half and second half slowly, watching each loop transfer and keeping the core able to slide. For tatting, check this deliberately while the work is still easy to alter; correcting it after the next stage usually costs more time or materials.
Build a ring
Count a small sequence of double stitches and picots, check movement, then draw the ring closed without twisting it. For tatting, check this deliberately while the work is still easy to alter; correcting it after the next stage usually costs more time or materials.
Add chains and joins
Introduce a ball thread for chains only after rings are reliable, and use the shuttle point or a small hook for joins as directed. For tatting, check this deliberately while the work is still easy to alter; correcting it after the next stage usually costs more time or materials.
Useful products
Products with a clear job in the setup
A simple named shuttle, suitable thread and a dependable pattern source are enough; bulky mixed craft kits usually obscure the key motion.
Prym Assorted 65 mm Tatting Shuttle
One uncluttered shuttle keeps attention on thread control rather than accessories.
Generic Two-Piece Tatting Shuttle Lace-Making Set
A second shuttle is a practical upgrade without committing to a large kit.
Search Press One-Shuttle Tatting
The scope prevents a beginner from buying more tools before mastering basic rings and joins.
First project
Make a short chain of joined rings
The aim is not a large doily; it is ten or twelve clean rings that close and match.
- 01
Wind and position
Wind the shuttle evenly, leave a manageable tail and arrange pale thread over the non-dominant hand as the guide shows. For tatting, check this deliberately while the work is still easy to alter; correcting it after the next stage usually costs more time or materials.
- 02
Practise the flip
Make repeated first and second halves without closing a ring, testing after each pair that the core thread slides. For tatting, check this deliberately while the work is still easy to alter; correcting it after the next stage usually costs more time or materials.
- 03
Add measured picots
Leave small consistent gaps between selected double stitches, using the same visual spacing each time. For tatting, check this deliberately while the work is still easy to alter; correcting it after the next stage usually costs more time or materials.
- 04
Close and repeat
Draw the first ring closed gently, then repeat the same count and compare size before joining motifs. For tatting, check this deliberately while the work is still easy to alter; correcting it after the next stage usually costs more time or materials.
- 05
Block lightly
Lay the finished sample to shape as the thread maker allows, then record the thread size and stitch count. For tatting, check this deliberately while the work is still easy to alter; correcting it after the next stage usually costs more time or materials.
What can wait
What can wait until the first result
The first challenge is the transferred knot, not ownership of every shuttle style and fine thread size.
- 01
Very fine thread
Fine cotton makes delicate lace but hides the knot structure and is harder to unpick. For tatting, check this deliberately while the work is still easy to alter; correcting it after the next stage usually costs more time or materials.
- 02
Beaded tatting supplies
Beads change loading, tension and pattern order. Add them after ordinary joins are dependable. For tatting, check this deliberately while the work is still easy to alter; correcting it after the next stage usually costs more time or materials.
- 03
Complex multi-shuttle pattern
Two-colour and split-ring techniques are easier once one-shuttle rings close consistently. For tatting, check this deliberately while the work is still easy to alter; correcting it after the next stage usually costs more time or materials.
Upgrade path
Upgrade the repeated limitation
Upgrade for handling comfort or a technique the chosen pattern genuinely requires.
Try it
£10–£30One shuttle, visible cotton thread and beginner pattern
The flip, ring closure and picot spacing become understandable.Improve handling
£8–£25 extraHook-tipped or ergonomic shuttle and thread gauge
Joins and repeated picot sizes become quicker and neater.Add techniques
£15–£45Second shuttle, finer threads and structured pattern book
Chains, split rings and more complex motifs become possible.Design lace
VariableGraphing tools, samples and specialist tuition
Repeat structure and negative space become original design decisions.Safety & care
Keep fine tools visible and hands relaxed
Tatting is portable, which makes sensible storage and posture more important than it first appears.
- Store pointed or hook-tipped shuttles where they cannot catch skin, clothing or bags. Follow the current instructions supplied with the exact material or tool.
- Take hand breaks before gripping the shuttle tightly; relaxed motion helps technique as well as comfort. Follow the current instructions supplied with the exact material or tool.
- Keep long thread loops away from small children and pets. Follow the current instructions supplied with the exact material or tool.
- Use strong light and contrast rather than holding fine work very close to the eyes for long periods. Follow the current instructions supplied with the exact material or tool.
Outside help
When outside help earns its place
A close-up video is often the clearest way to see the double-stitch transfer. A class helps when the knot repeatedly locks despite careful practice.
Use one complete lesson that includes preparation, the working method, troubleshooting and finishing. Avoid combining measurements from several creators on the first attempt.
Ask whether materials, safe tool use, individual correction and a finished take-home result are included before booking.
Representative UK learning options checked 29 August 2026; local prices, access, materials and tutor support vary.
Sources
Where the guidance came from
The method is grounded in specialist and manufacturer guidance, then checked against recurring beginner problems and the exact products linked here.
-
01
Ring of Tatters
UK tatting organisation and learning context.
Open source -
02
The Online Tatting Class
Long-running structured tatting lessons and technique archive.
Open source -
03
Antique Pattern Library · Tatting
Public-domain historical patterns for later exploration.
Open source -
04
Craft Yarn Council · Thread standards
Reference context for thread and yarn labelling.
Open source -
05
The Lace Guild
Specialist lace organisation and wider lace-making context.
Open source -
06
Amazon UK · Assorted 65 mm Tatting Shuttle
Exact product catalogue page or ISBN used for the recommendation; current price, seller, specification and availability should be confirmed.
Open source -
07
Amazon UK · Two-Piece Tatting Shuttle Lace-Making Set
Exact product catalogue page or ISBN used for the recommendation; current price, seller, specification and availability should be confirmed.
Open source -
08
Amazon UK · One-Shuttle Tatting
Exact product catalogue page or ISBN used for the recommendation; current price, seller, specification and availability should be confirmed.
Open source
Guide information and links checked 29 August 2026.