Beginner’s guide · Cook & bake
Charcoal grilling
Start with one useful result.
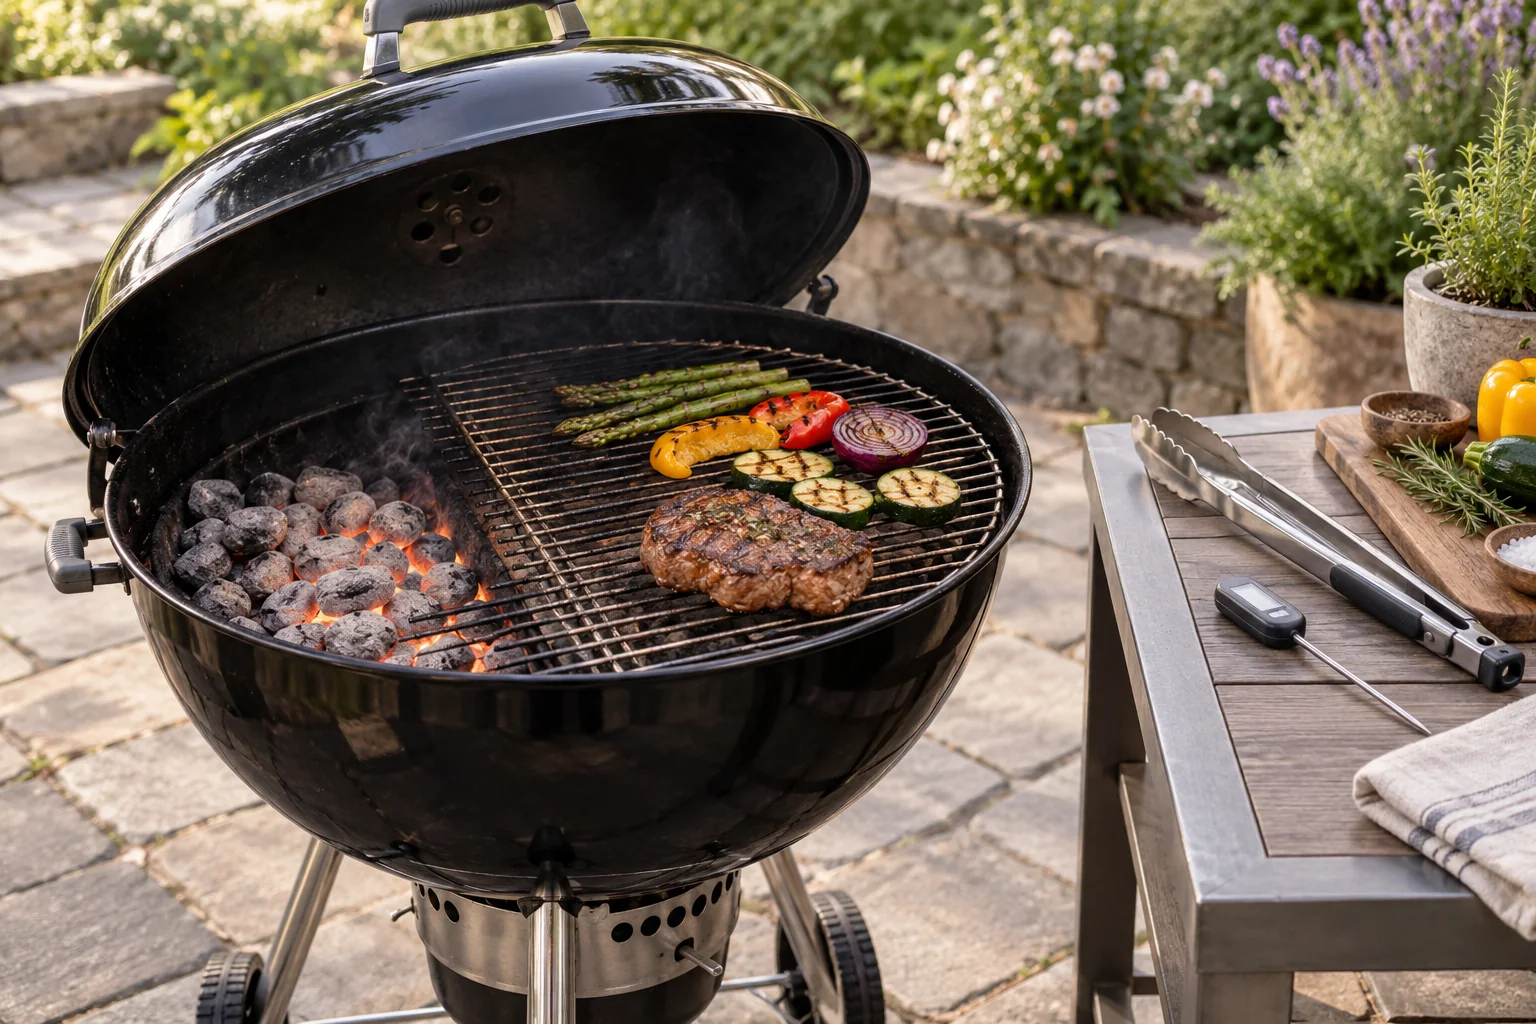
Charcoal grilling becomes easier when the coals are treated as two cooking zones. Learn one hot side for colour and one cooler side for finishing, with a lid and thermometer rather than chasing timing alone.
Quick answer
Start with a two-zone cook with vegetables and one small protein
Charcoal grilling becomes easier when the coals are treated as two cooking zones. Learn one hot side for colour and one cooler side for finishing, with a lid and thermometer rather than chasing timing alone.
- 01
Stable outdoor lidded charcoal grill, charcoal and approved firelighter
- 02
Long tongs, clean raw and cooked plates, heatproof gloves
- 03
Food thermometer for meat and a small selection of vegetables
What to expect
What the first attempt is really like
The useful skill here is reading the fire and moving food between direct and indirect heat. These details matter more than a polished first result.
Control
The lid and vents affect heat; opening repeatedly changes the fire.
Timing
Wind, fuel and food thickness make printed minutes approximate.
Cleanup
Ash must be fully cold before disposal, and the grill needs a clean cooking grate.
The method
The method worth learning
Arrange the area before lighting
Work outdoors on a stable non-combustible base with clearance specified by the grill maker. Put long tongs, dry heatproof gloves, an approved firelighter, raw-food plate and a separate serving plate within reach. Make space to put down a hot chimney or lid safely. Wind, pets and foot traffic matter more than how impressive the grill looks.
Create a hot side and a finishing side
Light the measured charcoal charge by an approved method. A chimney makes repeatable lighting easier, but it is optional if you have a suitable manufacturer-approved method. Wait until the fuel is burning properly, then bank it to one side. Leave the other side free of coals so food can move away from the fiercest heat. The cool side is still hot and is for finishing, not storing raw food.
Learn with a small mixed meal
Use courgette slices or pepper pieces to see where browning happens, then cook a few evenly sized sausages or another straightforward recipe. Turn with tongs and move food when the outside colours too quickly. Close the lid for controlled finishing and follow the maker’s vent guidance. Do not treat every vent position as a universal temperature setting: fuel, grill size and weather change the response.
Finish by evidence and clean up later
Use a clean thermometer to check the thickest part of meat. The UK FSA benchmark is 70°C for two minutes or an equivalent such as 75°C for 30 seconds. Browning, clear-looking juices or a fixed number of minutes are not a reliable substitute. Serve from the clean plate. Follow the grill’s shutdown procedure, keep the station supervised while hot and put ash into a suitable metal container only when completely cold. Charcoal can remain dangerous after the meal is over.
Useful products
Equipment with a clear job
Start with suitable equipment you already own. These exact UK listings are useful examples when a missing tool limits the first project; prices and availability were checked on 2 October 2026 and delivery may add to the cost.
Weber Rapidfire Compact Chimney Starter
Make a small first charcoal charge easier to light consistently without liquid lighter fuel.
Thermapen ONE Thermometer
Check sausage or chicken centres while you learn when colour and temperature disagree.
What can wait
What can wait
Keep the first project small and learn what the equipment is doing before adding more.
- 01
A grate full of different meats
It combines several timings and doneness checks. Begin with one meat type and a few vegetables.
- 02
Smoking accessories immediately
Learn lighting, zones and vents first; smoke wood adds another variable rather than improving fire control.
- 03
Grilling in a garage or enclosed porch
Charcoal produces carbon monoxide even when rain makes outdoor cooking inconvenient. Postpone the session instead.
First project
First project: A two-zone cook with vegetables and one small protein
Start with a two-zone cook with vegetables and one small protein. Use the listed equipment, take notes on the result and repeat the small project before expanding it.
- 01
Set the area
Place the grill outdoors away from walls and overhanging material. Arrange clean tools and separate plates.
- 02
Create two zones
Light charcoal safely and bank it on one side when ready; keep the opposite side free of coals.
- 03
Cook by movement
Start suitable food over direct heat, then move thicker pieces away from the coals to finish with the lid on.
- 04
Check and clear
Probe meat to the appropriate safe temperature, serve with clean utensils and allow ash to cool completely.
Troubleshooting
When the first attempt goes wrong
The outside burns before the centre cooks
Move the food to the indirect side and close the lid as instructed. Make smaller, more even pieces next time. Adding sauce with substantial sugar early can also encourage burning.
The fire will not stay lit
Check whether ash blocks the inlet and whether the fuel was fully lit before transfer. Do not pour liquid fuel onto hot charcoal. Use the manual’s safe recovery method.
Fat causes flare-ups
Move the food away from direct coals and manage the lid as the cooker manual advises. Do not spray water into a hot grill or carry it while burning. Clean grease buildup before the next session.
There is too little indirect room
Reduce the first batch rather than covering the whole grate with food. A larger grill helps only when smaller loads have proved genuinely limiting.
Upgrade path
Where to go after the first result
Repeat the simple route first, then choose the next step that solves a problem you have actually met.
Routine
Food and fuelRepeat a small two-zone meal
Keep the fuel amount constant and map which part of the grate browns fastest.Lighting
£19.99 listed; postage extraA compact chimney
Makes small fuel charges repeatable. Choose larger capacity for repeated full-size kettle cooks.Space
Get a current exact grill quoteA larger lidded kettle
Adds indirect space when serving more people; it requires more storage and potentially more fuel.Safety & care
Safety and practical limits
Use the current instructions for the exact food, material or equipment in front of you.
- Charcoal produces carbon monoxide. Never light or operate it indoors, in a tent, garage or enclosed porch.
- Use separate plates for raw and cooked food and verify meat with a clean thermometer.
- Follow manufacturer rules for lighting, hot surfaces and ash disposal.
Learning & help
Learning at home and optional help
A class is optional for this first route. Use the free guidance before paying for help.
Weber’s free temperature-control instructions explain the lid and vents. Use the exact grill manual for lighting, clearance and shutdown.
Optional barbecue instruction can be useful once you can identify a specific problem, such as flare-ups or uneven cooking. Check whether you practise on charcoal and what the fee includes. Ordinary home trials need no class.
Learning sources checked 2 October 2026. No unverified class fee or booking availability is quoted.
Sources
Where the guidance came from
Food and wildlife authorities, exact maker instructions, specialist guidance, practitioner observations and UK product listings support the route above. Community accounts inform practical expectations; they do not establish food safety, wildlife rules or current prices.
-
01
Food Standards Agency · BBQ food safety
Barbecue hygiene and thorough cooking
Open source -
02
Food Standards Agency · Cooking your food
UK cooking and thermometer advice
Open source -
03
USDA FSIS · Grilling food safely
Raw and cooked separation and doneness
Open source -
04
Weber UK · Controlling charcoal barbecue temperature
Direct versus indirect cooking and vents
Open source -
05
Thermapen UK · Thermapen ONE
Exact instant-read thermometer and specifications
Open source -
06
r/charcoal · Getting started
Several cooks recommend two heat zones and discuss chimney capacity and thermometers; authority guidance supplies safety targets.
Open source -
07
r/smoking · First smoke choices
Multiple cooks discuss shorter chicken cooks, forgiving pork shoulder and rehearsing before feeding guests. Food-safety targets come from authorities, not the comments.
Open source -
08
Weber · Rapidfire Compact Chimney Starter
Exact selected model, price and availability used for the recommendation; recheck delivery and checkout.
Open source
Guide information and links checked 2 October 2026.