Beginner’s guide · Make & create
Print with sunlight
and careful timing.
Cyanotype uses iron-salt chemistry and ultraviolet light to make Prussian-blue contact prints. Pre-coated paper is the simplest first route; mixing sensitiser is the controlled upgrade.
Quick answer
Begin with pre-coated paper and flat objects
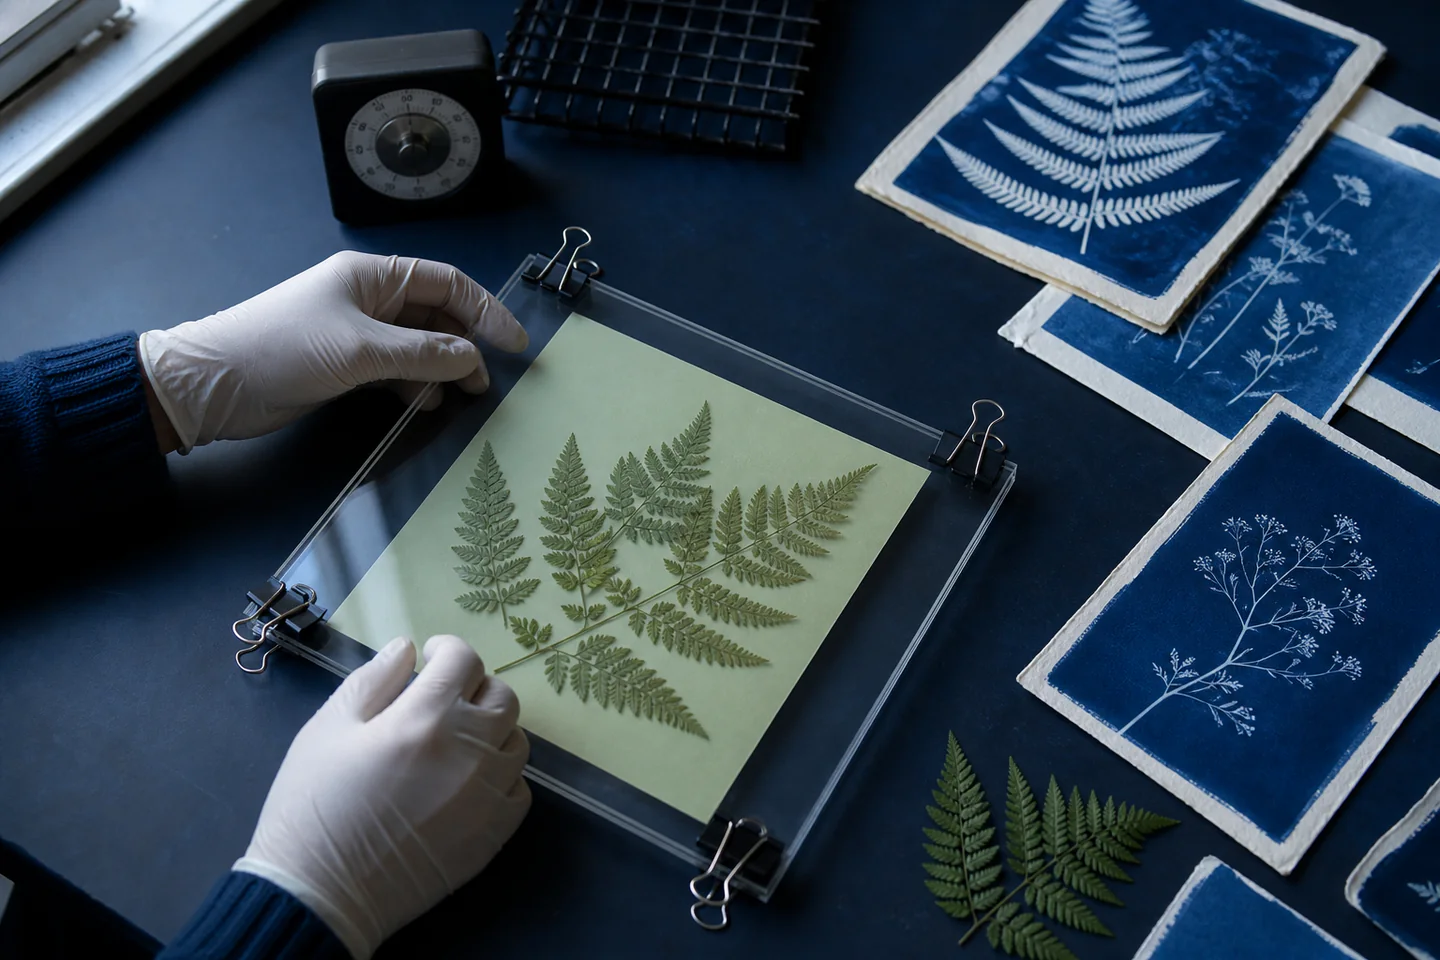
Use ready-sensitised cyanotype paper, opaque leaves or cut shapes and a clear acrylic sheet. Assemble away from strong UV, expose according to the paper and conditions, then wash fully in plain water.
- 01
Keep sensitised paper in its light-safe packaging until every object and clip is ready. Note the material, setting or measurement used so the result can be repeated or changed for a reason.
- 02
Use flat opaque specimens because gaps create soft edges during contact exposure. Note the material, setting or measurement used so the result can be repeated or changed for a reason.
- 03
Make a small timed test strip when sunlight or season differs from the instructions. Note the material, setting or measurement used so the result can be repeated or changed for a reason.
- 04
Wash until unreacted chemistry is removed and allow the blue to deepen as the print oxidises. Note the material, setting or measurement used so the result can be repeated or changed for a reason.
- 05
Treat mixed sensitiser as photographic chemistry and follow its safety sheet, storage and disposal instructions. Note the material, setting or measurement used so the result can be repeated or changed for a reason.
What to expect
Sunlight is the variable you cannot set with a dial
Cyanotype is simple in materials but exposure changes with cloud, season, latitude, object density and the exact sensitised surface.
Exposure
A time that works at noon in summer may underexpose on a cloudy winter afternoon. The colour change and a test strip are better guides than memory. For cyanotype printing, check this deliberately while the work is still easy to alter; correcting it after the next stage usually costs more time or materials.
Contact
Sharp outlines require the object, negative and coated surface to touch closely across the whole image. For cyanotype printing, check this deliberately while the work is still easy to alter; correcting it after the next stage usually costs more time or materials.
Washing
An under-washed print can stain or change unpredictably. Fresh water and the stated rinse time complete the process. For cyanotype printing, check this deliberately while the work is still easy to alter; correcting it after the next stage usually costs more time or materials.
Oxidation
The final deep blue may take time to appear. Judge a dry oxidised print rather than the first pale image from the rinse. For cyanotype printing, check this deliberately while the work is still easy to alter; correcting it after the next stage usually costs more time or materials.
Core method
Separate setup light from exposure light
Plan in ordinary indoor light
Arrange dry objects and clips before opening the packet, avoiding direct sun or strong UV sources. For cyanotype printing, check this deliberately while the work is still easy to alter; correcting it after the next stage usually costs more time or materials.
Make firm contact
Place the object on the coated side, cover with clean acrylic or glass and secure it without allowing the stack to slide. For cyanotype printing, check this deliberately while the work is still easy to alter; correcting it after the next stage usually costs more time or materials.
Expose and record
Follow the kit’s starting time, note sky conditions and make a test when precision matters. For cyanotype printing, check this deliberately while the work is still easy to alter; correcting it after the next stage usually costs more time or materials.
Wash and dry
Rinse in clean water for the directed time, handle wet paper gently and dry flat before judging density. For cyanotype printing, check this deliberately while the work is still easy to alter; correcting it after the next stage usually costs more time or materials.
Useful products
Products with a clear job in the setup
Pre-coated paper gets to the first print safely and quickly. A larger format and measured two-part chemistry are genuine next steps, not required purchases.
Generic 32-Piece A5 Cyanotype Paper Kit with Acrylic Panel and Clips
It avoids mixing chemistry while still teaching composition, contact, exposure and washing.
Generic 32-Piece A4 Cyanotype Paper Kit
A4 allows larger plants and negatives without introducing wet coating chemistry.
Generic Two-Component Cyanotype Sensitiser Kit, 200 g
Self-coating gives more surface choice but makes chemistry, brush marks and storage part of the process.
First project
Make a four-exposure test with one leaf
A small exposure ladder produces useful local timing and still leaves room for a composed final print.
- 01
Prepare four sheets
Label the backs in indoor light and choose one flat opaque leaf or cut-paper silhouette for consistent testing. For cyanotype printing, check this deliberately while the work is still easy to alter; correcting it after the next stage usually costs more time or materials.
- 02
Secure contact
Place the object and acrylic on the first sheet, clip without bowing the stack and take it outside covered. For cyanotype printing, check this deliberately while the work is still easy to alter; correcting it after the next stage usually costs more time or materials.
- 03
Vary only time
Expose the four sheets for planned increasing intervals while keeping position and object unchanged. For cyanotype printing, check this deliberately while the work is still easy to alter; correcting it after the next stage usually costs more time or materials.
- 04
Wash consistently
Rinse each sheet for the same directed time in fresh water and lay it flat away from direct sun. For cyanotype printing, check this deliberately while the work is still easy to alter; correcting it after the next stage usually costs more time or materials.
- 05
Choose and print
After drying and oxidation, select the best exposure and use it for a more considered multi-object composition. For cyanotype printing, check this deliberately while the work is still easy to alter; correcting it after the next stage usually costs more time or materials.
What can wait
What can wait until the first result
Mixed chemistry, digital negatives and toning add variables after exposure and washing should already be predictable.
- 01
Home-coated paper
Coating introduces mixing, brush marks, drying and dark storage. Pre-coated sheets teach the image-making cycle first. For cyanotype printing, check this deliberately while the work is still easy to alter; correcting it after the next stage usually costs more time or materials.
- 02
UV exposure unit
Sunlight is free and sufficient for early contact prints; a controlled lamp matters when repeatability becomes the limit. For cyanotype printing, check this deliberately while the work is still easy to alter; correcting it after the next stage usually costs more time or materials.
- 03
Toning recipes
Tea, tannin and other toners change colour and permanence. Establish a well-washed standard blue print before altering it. For cyanotype printing, check this deliberately while the work is still easy to alter; correcting it after the next stage usually costs more time or materials.
Upgrade path
Upgrade the repeated limitation
Upgrade for repeatable exposure, custom surfaces or a specific photographic negative process.
Try it
£12–£40Pre-coated paper, flat objects, acrylic and water tray
Composition, contact, exposure and washing are learned.Work larger
£15–£45 extraA4 sheets and stronger contact frame
Larger botanical arrangements remain sharp across the surface.Coat surfaces
£25–£80Two-part sensitiser, dedicated tools and suitable paper or cloth
Brush texture and unusual formats become possible.Control exposure
£60–£250+Enclosed UV source, timer and calibrated test negative
Printing becomes repeatable regardless of weather and season.Safety & care
Use UV and chemistry deliberately
Pre-coated paper is approachable, but stronger UV sources and sensitiser require real safety controls.
- Wear gloves and eye protection when mixing or coating chemistry and follow the product safety data. Follow the current instructions supplied with the exact material or tool.
- Do not stare into UV lamps or expose skin; use only a properly enclosed source designed for the process. Follow the current instructions supplied with the exact material or tool.
- Keep chemicals, trays and brushes labelled and permanently separate from food preparation. Follow the current instructions supplied with the exact material or tool.
- Identify plants safely, avoid protected specimens and wash hands after handling outdoor material. Follow the current instructions supplied with the exact material or tool.
Outside help
When outside help earns its place
Pre-coated sun paper needs only a clear demonstration. A photography or printmaking workshop is useful before coating fabric, making digital negatives or installing a UV unit.
Use one complete lesson that includes preparation, the working method, troubleshooting and finishing. Avoid combining measurements from several creators on the first attempt.
Ask whether materials, safe tool use, individual correction and a finished take-home result are included before booking.
Representative UK learning options checked 29 August 2026; local prices, access, materials and tutor support vary.
Sources
Where the guidance came from
The method is grounded in specialist and manufacturer guidance, then checked against recurring beginner problems and the exact products linked here.
-
01
Victoria and Albert Museum · Cyanotypes
Museum explanation of the cyanotype process and history.
Open source -
02
AlternativePhotography.com · Cyanotype
Specialist process guidance and troubleshooting.
Open source -
03
Royal Photographic Society
Photographic practice and learning context.
Open source -
04
Science and Media Museum · Cyanotype
Museum context for photographic printing chemistry.
Open source -
05
Mike Ware · Cyanotype
Technical reference on cyanotype chemistry and permanence.
Open source -
06
Amazon UK · 32-Piece A5 Cyanotype Paper Kit with Acrylic Panel and Clips
Exact product catalogue page or ISBN used for the recommendation; current price, seller, specification and availability should be confirmed.
Open source -
07
Amazon UK · 32-Piece A4 Cyanotype Paper Kit
Exact product catalogue page or ISBN used for the recommendation; current price, seller, specification and availability should be confirmed.
Open source -
08
Amazon UK · Two-Component Cyanotype Sensitiser Kit, 200 g
Exact product catalogue page or ISBN used for the recommendation; current price, seller, specification and availability should be confirmed.
Open source
Guide information and links checked 29 August 2026.