Beginner's guide · Make & create
Bind one folded signature.
Learn the grain before the hard cover.
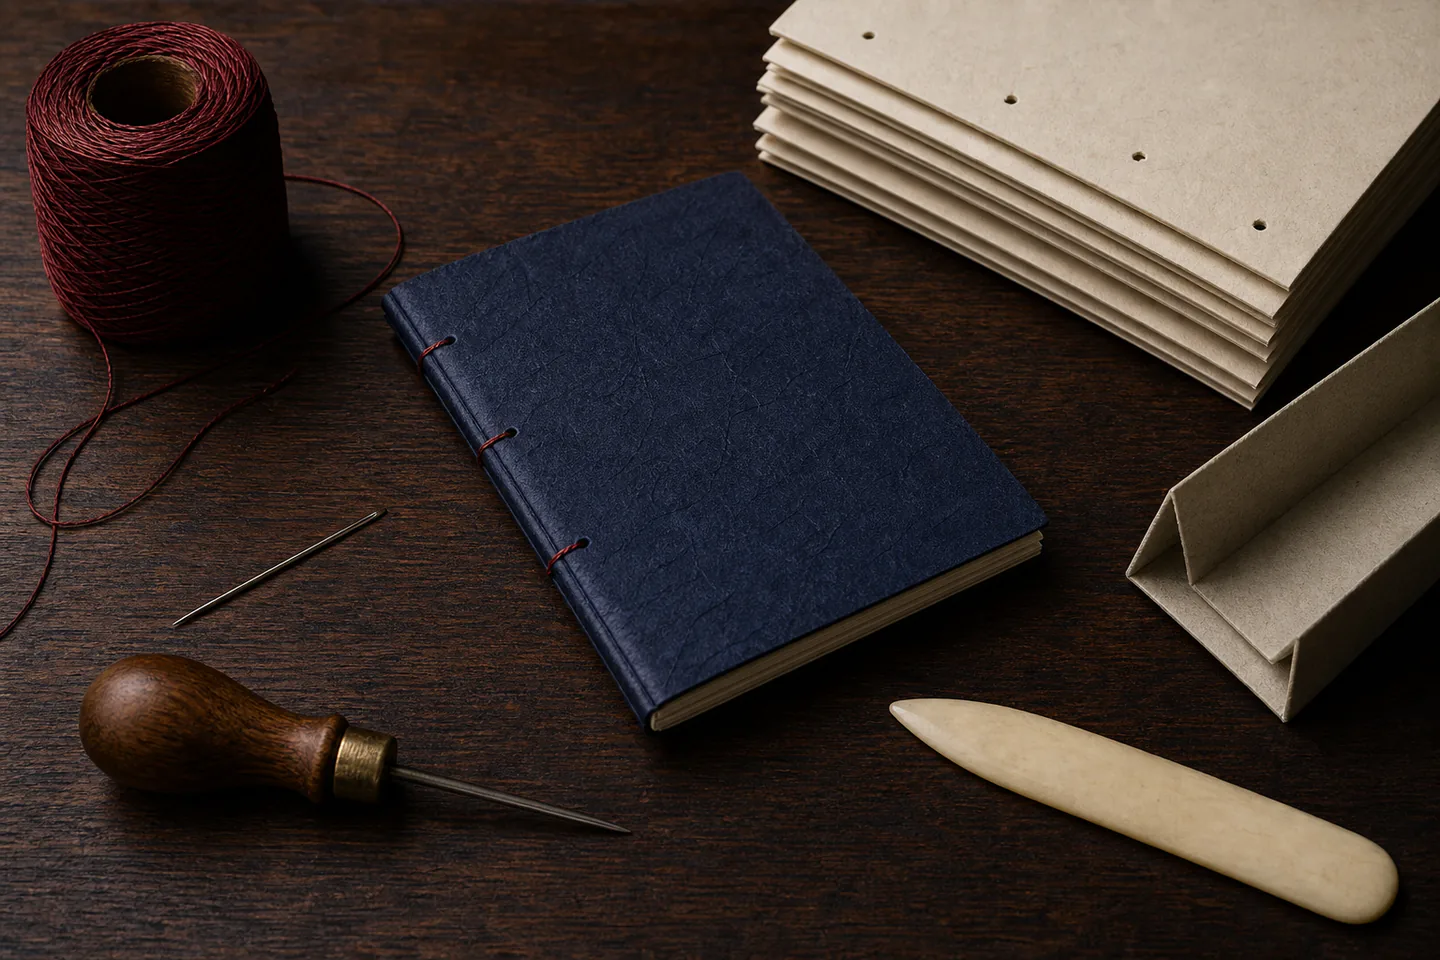
Start with a three-hole pamphlet stitch: folded paper, a card cover, waxed thread, a needle, an awl and a bone folder. It creates a real usable booklet while teaching grain, clean folds, hole placement and sewing order without glue or a press.
Quick answer
Bind one folded signature.
Fold a small stack of paper into one signature, wrap it in a heavier card cover and punch three aligned holes through the fold using a paper cradle or folded guide. Sew with one length of waxed thread and tie the ends around the long central stitch.
- 01
The Library of Congress book-arts resources link a visual pamphlet-stitch method, and bookbinding communities repeatedly recommend this as the simplest useful first structure.
- 02
Keep the first signature thin enough to fold cleanly. Cramming many sheets together causes fore-edge creep and weak sewing holes.
- 03
Punch into a cradle or protected folded corrugated card, never toward a hand or thigh.
- 04
pH-neutral PVA and a press belong to later case-bound structures; the first pamphlet needs neither.
What to expect
What the first attempts really involve
The first project is useful because it exposes the decisions that shopping pages tend to hide.
Grain
Paper and board bend more willingly parallel to the grain. Folding against it causes spring, cracking and a book that resists opening.
Creep
Nested folded sheets project farther at the fore edge. A small signature keeps this manageable without trimming equipment.
Hole alignment
A template and cradle keep every hole on the fold. Off-fold holes make pages open unevenly and can tear toward the edge.
Thread tension
Loose sewing shifts the signature; excessive tension cuts paper and puckers the spine.
Structure choice
Pamphlet, Japanese stab, Coptic and case binding behave differently. Master one complete simple structure before combining tutorials.
Fundamentals
Build the first attempt on reliable fundamentals
Read paper grain
Gently bend the sheet in both directions without creasing. The easier bend usually runs with the grain; confirm with the supplier where possible. Plan the fold so the grain runs parallel to the spine. Use ordinary paper for the first test rather than expensive watercolour stock.
Make a thin accurate signature
Fold each sheet individually with a bone folder, nest them and check the stack closes without excessive spring. Add a heavier paper or light card cover folded in the same grain direction. A first booklet of roughly four to six folded sheets is easier to punch and trim than a thick journal.
Punch and sew from a template
Mark one hole at the centre and two evenly spaced toward head and tail, leaving enough paper beyond them to resist tearing. Support the fold in a cradle and keep the awl path away from the body. Sew through the middle, around both ends and back to the centre, then tie around the long stitch without trapping slack.
Starter products
One compact tool kit, with glue held for the next structure
The Jodsen kit contains the bone folder, awl, needles and waxed thread needed for the first pamphlet. The Lineco adhesive is a later upgrade for structures that call for pH-neutral PVA; the punching cradle is useful when repeated signatures make alignment the real bottleneck.
Jodsen 23-piece Bookbinding Tool Kit
The kit makes it possible to fold, punch and sew immediately while the article narrows attention to the bone folder, awl, needle and waxed thread.
DaKuan 20-piece Bookbinding Tool Set
It keeps the same core pamphlet workflow without pretending that a second near-identical tool kit improves the first booklet.
First book
Sew an eight-page pamphlet notebook
Use four folded sheets for eight leaves, plus a separate card cover. Follow a visual pamphlet-stitch diagram alongside this sequence before making the first hole.
- 01
Confirm the grain
Test every sheet and cover, mark the grain direction lightly and orient it parallel to the future spine.
- 02
Fold the leaves
Fold sheets one at a time, align corners and sharpen each fold with the bone folder before nesting.
- 03
Fold the cover
Use slightly heavier stock with the same grain direction, then place the signature inside and check the head and tail.
- 04
Make the template
Fold a waste strip the height of the spine and mark centre, head and tail holes at safe even distances.
- 05
Punch safely
Open the book into a cradle, align the template and punch all layers at each mark with the awl directed into the support.
- 06
Measure thread
Use the tutorial's length rule, thread a bookbinding needle and avoid an excessively long strand that tangles.
- 07
Sew the pattern
Enter the centre hole, work around both end holes and return to the centre while keeping the long spine stitch clear.
- 08
Set tension and tie
Pull parallel to the spine just enough to remove slack, place both ends on opposite sides of the long stitch and tie securely.
- 09
Finish and record
Trim thread tails, close the booklet under a clean weight if needed and label the structure, paper and date inside.
Troubleshooting
Read the result before buying another tool
A book that springs open may fight the grain
Check whether the fold runs across the stiff direction or the signature is too thick. A heavier press will not permanently correct the wrong material orientation.
Torn holes mean the sewing path is stressed
Recheck hole distance from the ends, awl diameter and thread tension. Do not pull sideways across the paper edge when tightening.
Loose pages need tension reset
Before tying, trace the whole thread path and remove slack section by section while supporting the fold. Do not yank only the two ends.
Skip for now
What can wait
The pamphlet stitch is intentionally complete without adhesive, board cutting or a press.
- 01
A book press
Clean boards and a safe distributed household weight are enough for a thin pamphlet. A press matters after repeated glued structures need controlled pressure.
- 02
Case-binding board and cloth
Hard covers add accurate board cutting, hinges, pastedowns and moisture control. Finish several signatures before attempting a case.
- 03
Large decorative paper packs
Paper grain and fold quality matter before pattern. Use a single tested cover stock and add decoration after structure is sound.
- 04
Book restoration
Repairing an old or valuable book is conservation work, not a beginner craft project. Practise on newly made structures and seek a professional for significant items.
Upgrade path
What a better setup changes
The path adds signatures and adhesive only when the previous structure makes their purpose clear.
Pamphlet notebook
About £10–£20Awl + needle + waxed thread + bone folder
Teaches grain, folds, hole alignment and sewing tension without glue.Multi-signature exposed binding
Add paper, thread and a cradleSeveral signatures + Coptic or long-stitch pattern
Adds sewing stations, sequence and spine consistency while keeping structure visible.Case-bound book
Add £20–£60+Board + book cloth + pH-neutral PVA + pressing boards
Adds board cutting, hinges, adhesive moisture and casing-in as a separate project.Safety
Work safely from the first attempt
Awls, needles, knives and adhesives require a workspace that keeps every force directed away from the body.
- Punch into a cradle or protected work surface; never support the signature with a hand or leg behind the hole.
- Store awls and needles with points covered and account for every needle after sewing.
- Use knives only on a cutting mat with a metal ruler and cut away from fingers and body.
- Follow adhesive ventilation, skin-contact and cleanup instructions, even for water-based PVA.
- Do not attempt repair on valuable, mouldy or contaminated books; conservation and mould remediation require specialist handling.
Classes
When outside help is useful
A class becomes useful before case binding because grain, board cutting, glue moisture and casing-in are easier to diagnose in person.
A short session should complete pamphlet, concertina or simple Japanese structures and teach safe punching.
A full day is worthwhile for a small case-bound or long-stitch book with board, cloth and adhesive practice.
Representative UK West Dean and book-arts formats checked 30 July 2026; structure and material quality drive price.
Sources
Sources and checking notes
Library of Congress resources anchor the pamphlet structure, current bookbinding communities reinforce the entry point and product pages verify a compact tool route.
-
01
Library of Congress · Book arts resources
Curated pamphlet stitch and introductory book-arts resources.
Open source -
02
Library of Congress · Pamphlet stitch PDF
Visual pamphlet-stitch reference.
Open source -
03
r/bookbinding · Make a pamphlet
Practitioner recommendation of the simplest useful first structure.
Open source -
04
r/bookbinding · Beginner resources
Current discussion of modern beginner books and structure progression.
Open source -
05
Amazon UK · Jodsen tool kit
Exact 23-piece beginner tool kit checked for current UK availability.
Open source -
06
Amazon UK · Lineco neutral-pH adhesive
Exact 8 oz archival-style PVA upgrade checked for current UK availability.
Open source -
07
Amazon UK · DaKuan tool kit
Exact alternative compact tool set checked for comparison.
Open source -
08
Amazon UK · Bamboo punching cradle
Exact later alignment-tool option checked for current UK availability.
Open source
Guide information and links checked 30 July 2026.