Beginner's guide · Make & build
Make one open mould.
Test the cure first.
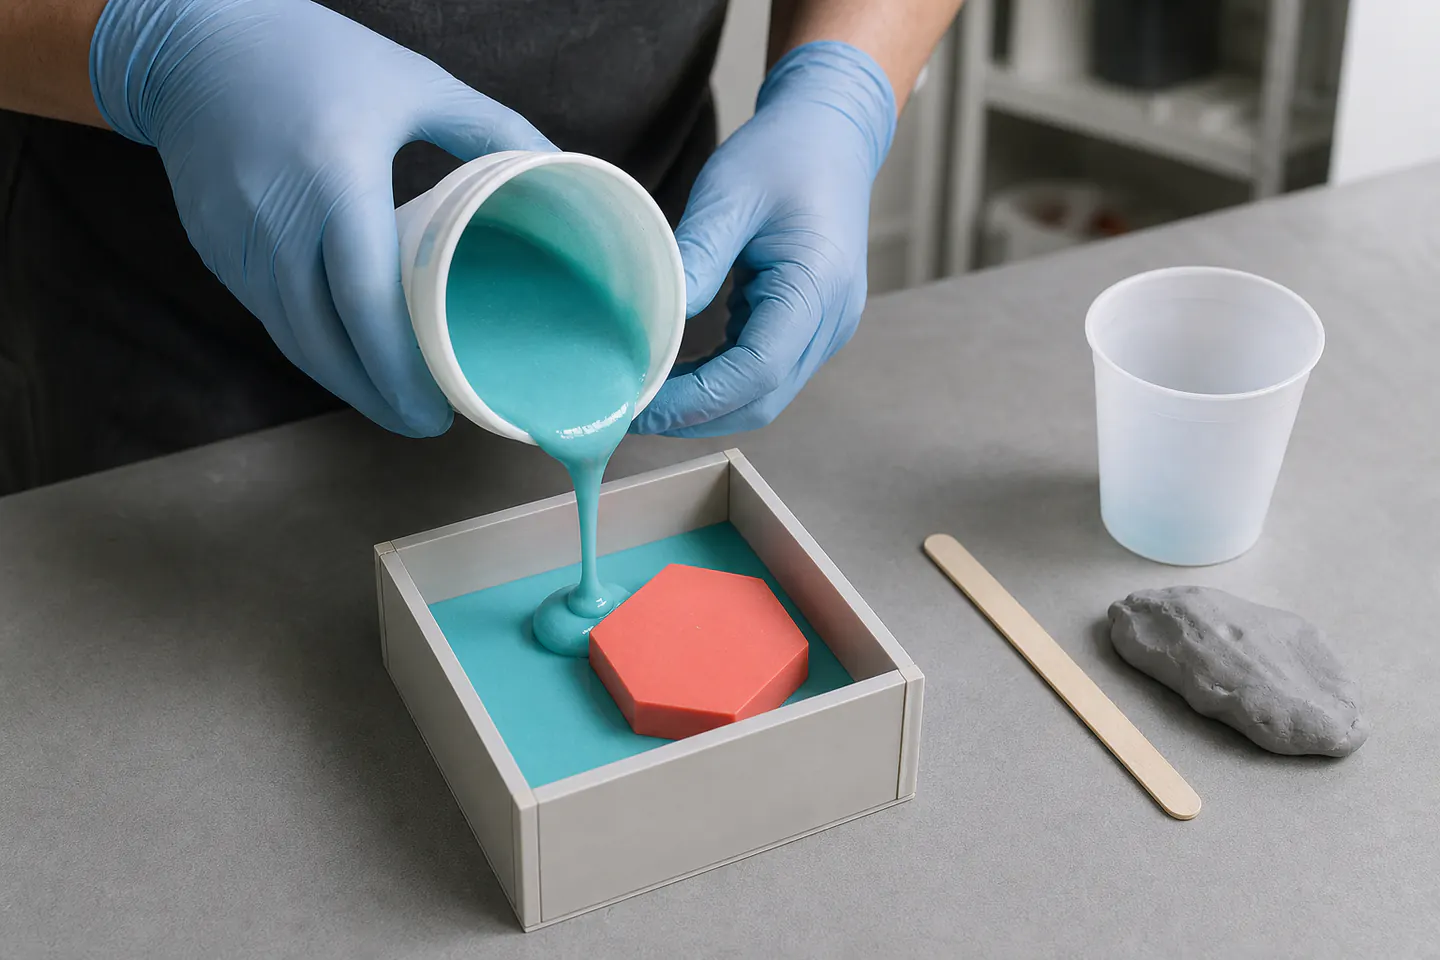
Start with a small, sealed, flat-backed master in a leakproof box. A one-part open mould teaches volume, mixing, bubble control and cure inhibition without attempting a complex split mould.
Quick answer
Make one open mould.
Choose a simple sealed object with one flat face and no deep undercuts. Build a close-fitting, leakproof box around it, calculate the empty volume, run a tiny compatibility cure test, then mix and pour the selected two-part silicone exactly as its instructions specify.
- 01
The selected BBDINO kit is a 1:1 platinum-cure system. Platinum silicone can fail against sulfur clay, latex, some resins, moisture or contaminated tools.
- 02
An open mould has one exposed face. It is far easier to demould and diagnose than a two-part mould with keys, vents and a parting line.
- 03
Use a slow, narrow pour into the lowest corner and let the silicone rise around the master. Pouring directly onto details can trap bubbles.
- 04
Craft mould materials are not automatically certified for skin, food, hot metal, candles or every casting resin. Match both mould and casting material to a documented end use.
What to expect
What the first attempts really involve
The first project is useful because it exposes the decisions that shopping pages tend to hide.
Ratio
Some silicones specify equal volume, others equal weight and many use unequal ratios. The current technical sheet always overrides a familiar habit.
Inhibition
Platinum silicone can remain liquid or tacky where it touches incompatible material. A small test cure is cheaper than losing the full batch and master.
Bubbles
Mixing introduces air. Slow folding, scraping the cup and a thin pour reduce visible bubbles, but vacuum degassing is a later production technique.
Undercuts
Silicone flexes, yet deep hooks and fragile projections can lock or tear the mould. Beginner masters should release in one obvious direction.
Volume
A large box wastes expensive rubber. Close walls, adequate margins and a measured fill test prevent both shortages and needless overpour.
Plan the mould
Design the release direction before the box
Read the shape as it leaves the mould
Imagine lifting the finished casting straight upward. Any hook, reverse angle or enclosed loop that catches the rubber is an undercut. A shallow relief, coaster-sized tile or simple knob with one flat back is a better first master than a figurine with limbs.
Seal and test the master
Porous wood, plaster and some 3D prints can hold air, absorb silicone components or inhibit cure. Use a sealer proven compatible with both the master and silicone, then allow its full cure. Mix a spoonful of silicone and place it against the exact prepared material; a clean, firm cure is evidence for that combination, not every material in the workshop.
Build a close leakproof box
Leave a sensible silicone wall around every side and above the highest detail, following the material maker's minimum recommendations. Seal the external box seams and fasten the master so it cannot float. A water or dry-media volume rehearsal is useful only if the master and box can be dried completely before silicone enters.
Starter products
Silicone first, reusable clay later, precision measurement where specified
The 600 g BBDINO kit is enough for a genuinely small mould if the box is efficient. Reusable oil clay helps with sealing and future parting lines, while the precision scale is a later tool for materials whose instructions specify weight. Never convert a volume ratio to weight without manufacturer data.
BBDINO Super Elastic Silicone Mould Making Kit, 600 g
The equal-volume system and modest pack size reduce the equipment and leftover material needed for a first open mould.
First project
Pour one small flat-backed mould
Use the exact silicone instructions for ratio, working time, minimum temperature and cure. The sequence below organises the job but does not replace that technical sheet.
- 01
Choose and prepare the master
Select a sealed nonporous shape with a flat back and easy release direction. Clean it and let every coating reach full cure.
- 02
Run a compatibility test
Mix a tiny correct-ratio sample with dedicated tools, cure it against the prepared master and check both contact surface and bulk silicone.
- 03
Build and leak-test the box
Fix the master flat, keep walls close but adequately thick, and seal every outside seam. Confirm the box sits level.
- 04
Calculate the batch
Estimate box volume minus master volume, then add only the margin recommended for mixing and transfer loss. Keep within the kit capacity.
- 05
Measure exactly
Condition both components as instructed. Use equal marked volumes for the selected kit, or the exact method stated on the current label.
- 06
Mix and scrape
Fold steadily, scraping the bottom and walls into a fresh cup if the maker recommends double mixing. Avoid whipping air into the rubber.
- 07
Pour from one corner
Use a thin stream into the lowest empty point and let the level rise across the master. Do not move the box once filling begins.
- 08
Cure and demould
Protect the level box from dust and leave it for the full stated cure. Flex the mould away from the master rather than pulling delicate details.
Troubleshooting
Tacky silicone is evidence, not a cue to wait forever
Local tack points to contact inhibition
If the bulk cures but the surface touching the master stays wet, suspect the master, coating, clay, release agent or contamination. Keep the failed material contained, consult the silicone manufacturer and repeat only after a successful small cure test.
A completely soft batch points to ratio or mixing
Check whether the product ratio was by volume or weight, whether both components were homogenised before dispensing and whether cup walls were scraped. Do not add extra catalyst after pouring; uncured material should be handled and disposed of according to the safety data.
Tears reveal mould design
Thin walls, sharp internal corners and severe undercuts concentrate stress. Repair may be temporary. Redesign the box with more rubber at the weak point or simplify the master rather than blaming hardness alone.
Skip for now
What can wait
The first useful upgrade is usually a better mould design, not production equipment.
- 01
A vacuum chamber
Degassing can improve repeated fine-detail work but adds vessel, pump, volume expansion and maintenance concerns. A thin corner pour is enough to learn.
- 02
A pressure pot
Pressure casting requires a genuinely pressure-rated vessel, regulator and safe operating practice. It is not an improvised paint pot project.
- 03
A two-part mould
Parting lines, keys, release agent and vents create several new failure modes. Learn clean cure and demoulding in one open mould first.
- 04
Skin or body casting
Body-safe materials, release, heat, entrapment and emergency removal require product-specific training. General mould silicone is not permission.
- 05
Food mould claims
Use only products explicitly documented for the intended food contact and keep food tools permanently separate from craft casting materials.
Upgrade path
What a better setup changes
A better setup improves repeatability through material records, accurate volume planning and controlled bubbles before it adds complex mould geometry.
One open mould
About £25–£45Small silicone kit + sealed master + simple box
Learn compatibility, ratio, mixing, pouring and release.Repeatable small moulds
About £50–£120Dedicated cups + scale where specified + reusable box materials
Record batch mass or volume and reduce wasted silicone.Two-part moulds
About £80–£200Sulfur-free clay + keys + correct release + vent plan
Cast shapes without a flat back while accepting a visible parting line.Bubble-controlled production
About £200–£700+Purpose-rated vacuum or pressure equipment + training
Improve repeated fine-detail casts after the process and safety system justify the cost.Safety
Work safely from the first attempt
Read the current safety data for every silicone, sealer, release and casting material. A cured mould does not make an unsafe casting material safe.
- Wear the eye, skin and ventilation protection specified by each product; uncured components can irritate or sensitise.
- Keep dedicated mould tools away from food preparation, and never return contaminated stirrers or scales to the kitchen.
- Do not use craft silicone for skin, dental, medical, food, hot-metal or candle applications unless the exact product documents that use.
- Never improvise a pressure vessel. Use certified equipment within its rated pressure with training and inspection.
- Contain uncured spills and dispose of components according to the safety data rather than washing them into a drain.
- Label stored moulds with the silicone, date, master coating and intended casting materials so later compatibility is not guessed.
Classes
When outside help is useful
A class becomes valuable when the shape needs a parting line, vents, rigid support shell or pressure equipment. A simple open mould can be learned at home with a technical sheet and test cure.
Use the supplier's technical sheet and video for the exact silicone before relying on a general social-media ratio or cure time.
Current UK sessions cover materials, box design and hands-on casting with workshop equipment.
Useful for split moulds, detailed masters and supported practice with release agents and casting systems.
Representative UK mould-making workshops and 2026 prices checked 27 July 2026.
Sources
Sources and checking notes
Manufacturer technical bulletins establish cure-inhibition and ratio rules. Practitioner discussions reinforce small test cures, sulfur-free clay and modest first shapes; current workshops anchor the optional training section.
-
01
Smooth-On · Inhibit X technical bulletin
Manufacturer guidance on platinum-silicone cure inhibition and barrier treatment.
Open source -
02
Smooth-On · Technical data charts
Comparative manufacturer data showing that ratios, pot lives and cure times vary by silicone.
Open source -
03
Smooth-On · UV resin and platinum silicone best practices
Compatibility and post-cure guidance for resin-printed masters.
Open source -
04
Alumilite · Crafting, moulding and casting instructions
Manufacturer sequence for measuring, mixing, mould boxes and casting.
Open source -
05
r/ResinCasting · Silicone selection and cure discussion
Practitioner discussion of platinum silicone, curing and bubble-management equipment.
Open source -
06
r/DiceMaking · UK silicone recommendations
UK community experience with BBDINO 20A and 30A materials.
Open source -
07
r/moldmaking · Sulfur-free clay and inhibition
Recent practitioner warning that sulfur-containing clay can inhibit platinum cure.
Open source -
08
Bentley Advanced Materials · Workshops
Current UK basic moulding and casting sessions at £102 and two-day workshops at £216.
Open source -
09
Amazon UK · BBDINO silicone mould kit
Exact 600 g 1:1 platinum-silicone kit selected for a small open mould.
Open source -
10
Amazon UK · HUE Clay grey 500 g
Exact reusable oil-based modelling clay selected for later sealing and parting-line work.
Open source -
11
Amazon UK · ACCUWEIGHT precision scale
Exact 300 g by 0.01 g scale shown for materials whose instructions specify measurement by weight.
Open source
Guide information and links checked 27 July 2026.