Beginner's guide · Make & create
Piece one small quilted mat.
Square beats ambitious.
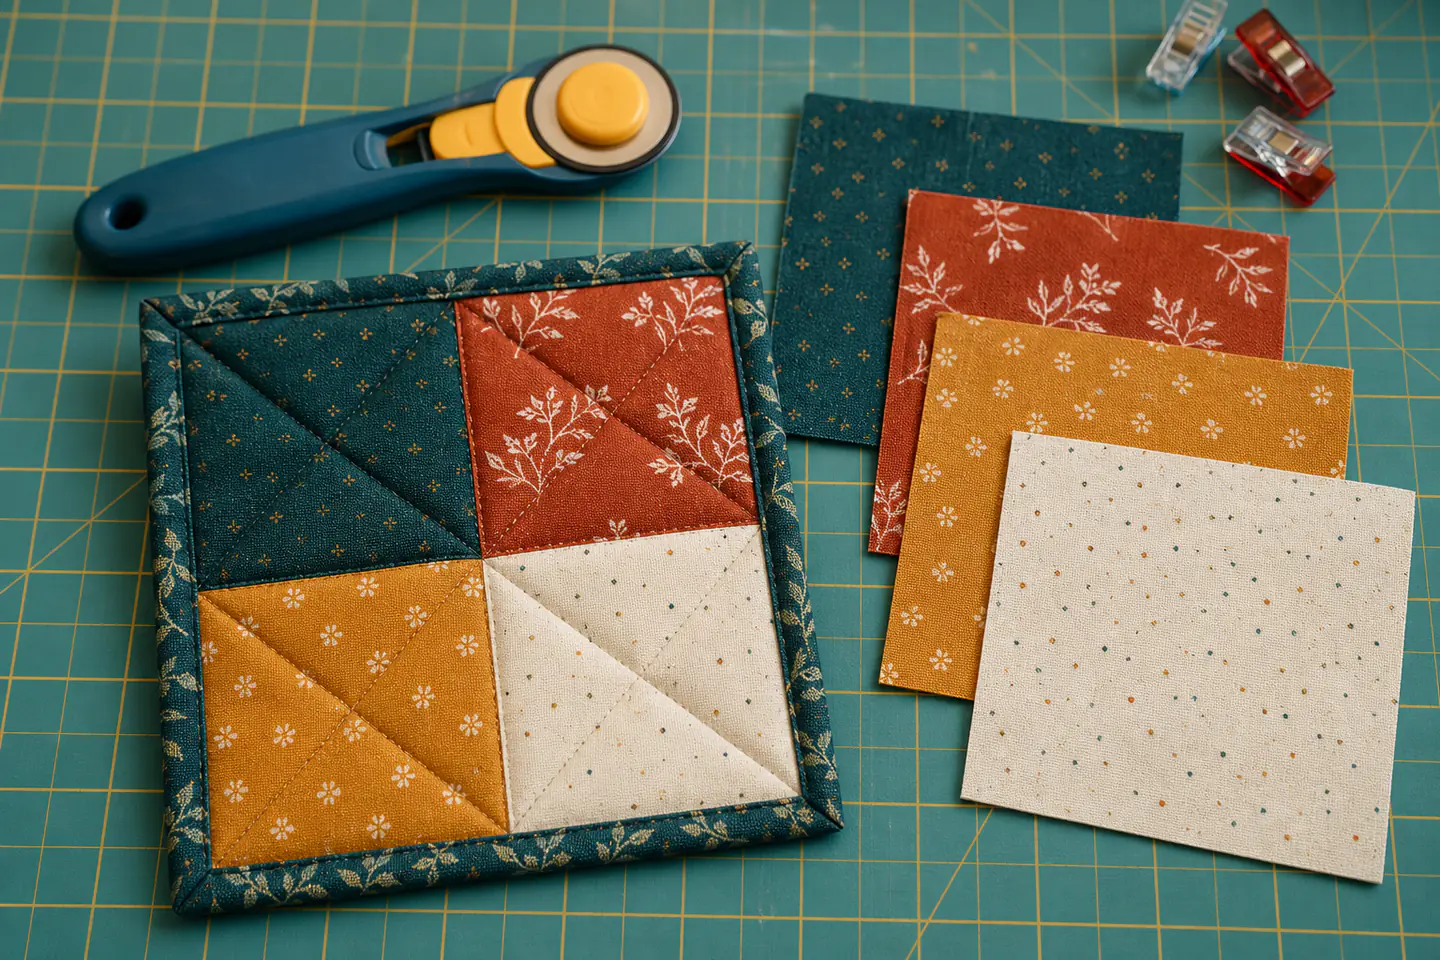
Start with a four-patch table mat or mug rug, cotton fabric and a straight running stitch. Accurate cutting and consistent seam allowance matter more than owning a sewing machine; hand piecing keeps the first project compact and understandable.
Quick answer
Piece one small quilted mat.
Cut four equal cotton squares, sew them into two pairs with the same seam allowance, press the seams in opposite directions and join the rows. Add thin batting and backing, quilt simple straight lines, then bind or turn the edges using a complete beginner pattern.
- 01
Hand piecing is a valid first route and avoids buying a sewing machine before learning how patchwork alignment works.
- 02
A rotary cutter needs a self-healing mat and a proper quilting ruler; never use one freehand or leave its blade open.
- 03
Choose stable woven cotton and a low-loft batting. Stretchy jersey and very thick fleece make accurate first seams harder.
- 04
A small washable mat exposes every stage—cutting, piecing, layering, quilting and edge finishing—without the weight of a bed quilt.
What to expect
What the first attempts really involve
The first project is useful because it exposes the decisions that shopping pages tend to hide.
Cutting
Inaccurate pieces cannot be pressed into a perfect block. Measure from the ruler, not from worn mat lines alone.
Seam allowance
The same small allowance must be repeated. A few millimetres of drift across several pieces changes the final row length.
Pressing
Pressing sets seams and controls bulk; dragging an iron back and forth can distort small bias edges.
Layering
The quilt top, batting and backing can shift independently. Basting is a structural step, not an optional nuisance.
Scale
A bed quilt multiplies every cut, join and square-up task. A small mat teaches the same sequence with far lower cost and fatigue.
Fundamentals
Build the first attempt on reliable fundamentals
Choose a complete small pattern
Use a tested mug-rug or table-mat pattern that states finished size, square size, seam allowance, batting and edge method. Read it to the end before cutting. A four-patch uses two rows of two squares, making misalignment easy to see and correct.
Cut safely and consistently
Press fabric first, align a quilting ruler with the grain and keep the non-cutting hand entirely on top of the ruler. Cut away from the body, close the rotary blade after every pass and never reach across an open blade. Scissors can cut the first four squares if a rotary setup is not yet owned.
Press, nest and baste
After sewing each pair, press the seam as the pattern directs. Opposing allowances can nest at the centre intersection. Once the top is square, layer backing, batting and top on a flat surface, smooth without stretching and baste closely enough that quilting does not create pleats.
Starter products
Safe cutting tools shown as a set, not isolated gadgets
The OLFA rotary cutter is only recommended with the self-healing mat and a suitable ruler. Clover clips are optional for holding layered edges and binding. Beginners who are not ready for the complete cutting setup can use fabric scissors for four squares.
OLFA RTY-2DX Deluxe Rotary Cutter, 45 mm
The ergonomic handle and established blade format suit repeat patchwork, but the recommendation is inseparable from a mat, ruler and strict closing habit.
OLFA RM-IC-S-RC Self-Healing Rotary Mat, 18 × 24 in
A proper self-healing mat is not an optional accessory when a circular blade is used; it also makes the first repeated squares easier to support.
Clover Wonder Clips Assortment, 10 pieces
They are most useful at layered edges and binding, while the small pack avoids buying a hundred generic clips before the preferred method is known.
First quilt
Hand-piece a four-patch mug rug
Follow a complete tested pattern for dimensions and edge finishing. The sequence below explains the control points that carry into larger quilts.
- 01
Prewash only when the pattern calls for it
Treat all fabrics consistently, dry and press them flat before measuring. Mixed prewashed and unwashed cotton can shrink differently.
- 02
Cut four squares
Use scissors or the complete mat-ruler-cutter setup. Check each square against the same ruler before sewing.
- 03
Mark the seam allowance
For hand piecing, draw the stitching line lightly on the wrong side with a removable fabric marker tested on scrap.
- 04
Sew two pairs
Place right sides together and use a short even running stitch with secure ends. Do not pull the thread so tightly that the seam puckers.
- 05
Press the pairs
Set the stitches, then press allowances in opposite directions if the pattern uses nested seams.
- 06
Join the rows
Match the centre seams first, clip or pin, sew and inspect the four corners before pressing the final allowance.
- 07
Square the top
Measure through the centre and trim only after confirming the pattern's intended dimensions.
- 08
Layer and baste
Place backing, low-loft batting and top in the stated order, smooth on a flat surface and secure against shifting.
- 09
Quilt and finish
Stitch straight lines a safe distance from the seams, then use the pattern's turned-edge or binding method and add a label with the date.
Troubleshooting
Read the result before buying another tool
A lost centre point starts in the first row
Check the four square sizes, seam allowance and pressing direction. Unpick the short centre section and rematch it rather than stretching the block into alignment.
Wavy edges indicate distortion
Press rather than scrub, support fabric while it cools and avoid pulling thread tight. Bias edges stretch easily when handled repeatedly.
Pleats on the back mean the layers shifted
Stop before quilting over them. Unpick to the flat area, smooth the backing and add closer basting instead of hoping the edge finish will hide the fold.
Skip for now
What can wait
The first small quilt can be entirely hand sewn and teaches whether repetitive precision is satisfying.
- 01
A new sewing machine
Borrow or use an existing machine only after understanding its manual and safe threading. Hand piecing proves the hobby without a large purchase.
- 02
A large fabric bundle
Four coordinating cottons or scraps are enough. Precuts can wait until a pattern is chosen around their exact size.
- 03
A bed-size project
It adds large-surface cutting, hundreds of seams, heavy basting and difficult quilting before the small sequence is reliable.
- 04
Free-motion quilting equipment
Straight hand quilting or machine lines are sufficient. Free-motion control is a later technique with its own setup and practice.
Upgrade path
What a better setup changes
The path moves from a complete small hand project to repeatable cutting, then to machine-assisted piecing and larger quilting only when space supports it.
Hand-pieced mug rug
Use scraps or about £15–£30Fabric scissors + needle + cotton thread + small batting
Teaches the entire quilt sequence without a machine.Repeat patchwork
Add about £50–£80Rotary cutter + large mat + quilting ruler
Makes strips and repeated squares faster and more consistent.Larger quilts
VariableServiced machine + walking foot + larger workspace
Speeds piecing and straight-line quilting but increases handling and planning demands.Safety
Work safely from the first attempt
Rotary cutters and irons cause serious injuries when their ordinary routines become casual.
- Use a rotary cutter only with a self-healing mat and stable quilting ruler; cut away from the body.
- Close or lock the blade after every cut, not only at the end of the session.
- Keep the ruler hand away from its edge and never catch a slipping cutter with the other hand.
- Set the iron on a stable heatproof surface, route the cable safely and switch it off when leaving the room.
- Store needles, pins and clips in closed containers and count pins before the project leaves the workspace.
Classes
When outside help is useful
A class becomes useful before buying a machine or tackling binding and larger quilt layers, because posture and fabric handling are easier to correct in person.
A half-day patchwork class should complete at least one block and teach cutting, seam allowance and pressing.
A full day is worthwhile when it includes machine setup, layering, quilting and binding on a small finished piece.
Representative UK beginner quilting formats checked 30 July 2026; machine access and materials affect price.
Sources
Sources and checking notes
OLFA supplies explicit rotary safety and beginner tool guidance, while exact product pages confirm the cutter, mat and clips shown in the upgrade route.
-
01
OLFA · Rotary cutter safety
Cut-away direction, ruler position, blade closure and posture.
Open source -
02
OLFA · Beginner quilter advice
Stable cotton, cutting tools, machine manual and sharp-blade guidance.
Open source -
03
OLFA · Maintaining a rotary mat
Mat storage, cleaning and avoiding repeated grooves.
Open source -
04
OLFA · Cutting squares and rectangles
Practical repeated-shape cutting sequence.
Open source -
05
Amazon UK · OLFA 45 mm cutter
Exact RTY-2DX cutter checked for current UK availability.
Open source -
06
Amazon UK · OLFA medium mat
Exact 18 by 24 inch OLFA mat checked for current UK availability.
Open source -
07
Amazon UK · Clover Wonder Clips
Exact 10-piece clip assortment checked for current UK availability.
Open source -
08
Amazon UK · OLFA turquoise cutter
Exact alternative 45 mm OLFA cutter checked for comparison.
Open source
Guide information and links checked 30 July 2026.