Beginner’s guide · Make & build
Build one believable corner.
Keep the layout reversible.
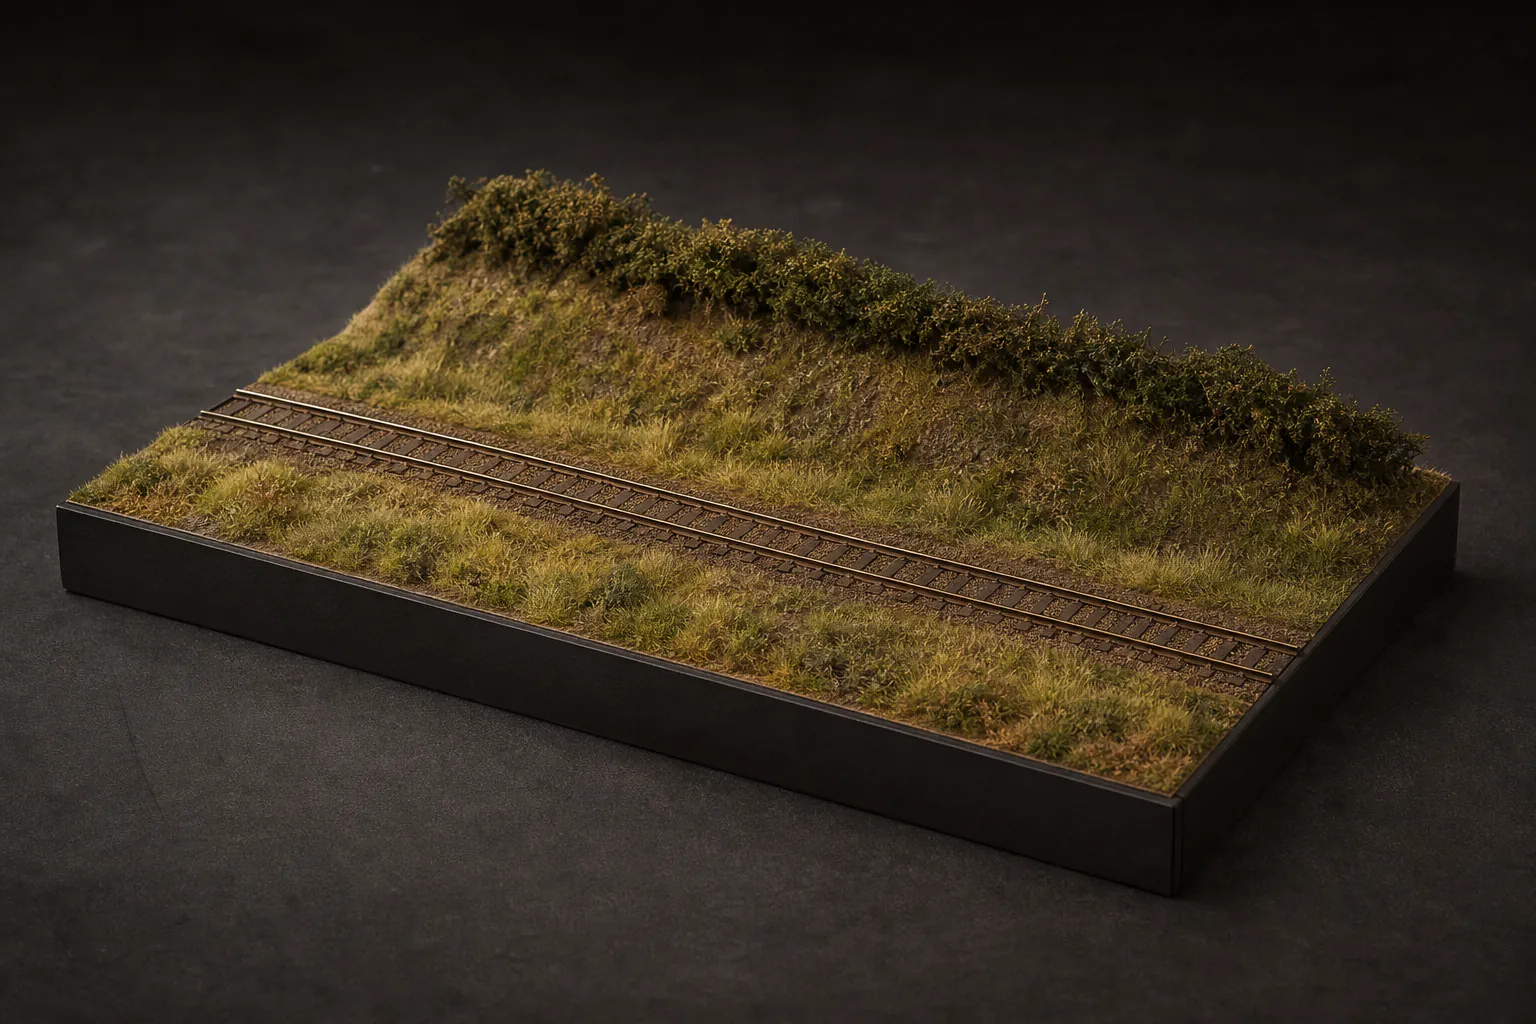
Practise ground colour, fine turf, longer grass and one hedgerow on a removable board before fixing scenery around track. A small diorama teaches the same layering skills without risking the railway you have already built.
Quick answer
Practise away from the working railway
Use an offcut of rigid board and make a hand-sized rural verge or display scene. Seal the surface, paint the whole ground an earth tone, add fine turf while it is still visually sparse, then build selected patches of longer grass, low foliage and one small tree or hedgerow. The base colour should remain believable wherever the scatter is thin.
- 01
Choose a season and location from reference photographs before choosing packets of green material.
- 02
Work from low and fine textures to taller, coarser ones; real ground rarely has one uniform colour or height.
- 03
Test diluted PVA and specialist adhesive on the practice board because too much liquid can warp card, float scatter or stain finished track.
- 04
A static-grass applicator is an upgrade for upright fibres. Fine turf, short fibres and foliage can teach composition without one.
What to expect
Scenery is controlled layering rather than instant ground cover
The convincing scenes use less material per pass than a beginner expects. Colour and texture vary gradually, while buildings, track and trees remain consistent with the chosen scale.
Scale
A coarse clump that reads as a shrub in OO may look like a tree in N. Check fibre height and object size before fixing it.
Ground colour
Bare white plaster or foam flashes through scatter. A matte earth base makes thin areas read as soil instead of mistakes.
Adhesive
PVA works for many loose materials, while static grass may need a tackier layer. The right glue depends on what must stand or soak in.
Variation
Uniform bright green looks artificial. Dry grass, weeds, soil, shade and traffic create changes in tone and height.
Drying
A scene may look wrong while adhesive is wet. Vacuuming, brushing or adding another layer too early moves the material.
Layout protection
Loose fibres, water and glue can enter points, motors and wheel paths. Cover or remove vulnerable railway parts before scenic work.
Plan the scene
Use observation before texture
Pick one real place and season
Use your own photograph or a street-level reference that shows the ground, not only the trains. Note the proportion of soil, short grass, rough grass, bushes and hard surface. A summer verge may include straw, brown seed heads and bare wheel marks; it is not simply brighter green.
Make the landform stable and removable
Use a rigid sealed base. Build modest height with suitable foam, card formers or crumpled paper covered by a compatible shell, keeping slopes gentle enough for the scale. Let each wet layer dry flat. Do not experiment with expanding foam, plaster or water beside live point motors.
Paint before scattering
Cover the terrain in flat earth colours and vary them while damp. Add fine turf and soil-like material first, then short fibres and finally taller grass, bushes or small trees. Keep paths, drainage and human use visible rather than coating every square centimetre.
Finish by removing, not only adding
When adhesive is fully dry, invert or gently vacuum through a stocking to recover loose material. Look at the scene from normal layout height. Thin a heavy patch, soften a straight boundary and leave quiet space around the focal point.
Useful products
Three materials that teach different scenery layers
The static-grass starter pack teaches a first upright grass layer, the foliage kit adds hedges and bushes, and the Woodland Scenics fine turf supplies a low ground texture beneath them. Use small amounts on one practice board; the three products are not instructions to cover every scene with the same landscape.
War World Scenics Static Grass Starter Kit 2
The contained pack lets a beginner test adhesive and short fibres without committing to a powered applicator.
War World Scenics Tree and Hedgerow Foliage Starter Kit 1
Several foliage textures make one natural edge more convincing than a row of identical finished trees.
Woodland Scenics T1349 Green Blend Fine Turf
Fine turf sits visually below longer grass and helps merge painted soil into vegetation.
First scene
Make a removable trackside verge
A short spare track section may be placed temporarily for scale, but it does not need to be powered or permanently glued to learn the scenery sequence.
- 01
Choose the view
Select a reference showing a verge, path or low bank and define the season in one sentence.
- 02
Mark the composition
Position the temporary track, path and one focal feature; keep the base edges and loading gauge clear.
- 03
Seal and shape
Prepare a rigid base and add only enough landform to create a gentle change in level. Let it dry flat.
- 04
Paint all ground
Use two or three matte earth tones so no white construction material remains visible.
- 05
Add low texture
Apply fine turf and soil-like scatter in irregular patches, leaving some painted ground visible.
- 06
Add grass selectively
Use the starter method and adhesive directions for short fibres, testing a small patch before the scene.
- 07
Build one hedge
Combine darker interior foliage with lighter tips and vary the height instead of making a solid rectangular wall.
- 08
Dry, clean and review
Wait fully, recover loose material and inspect at normal viewing distance before adding anything else.
What can wait
What can wait until the small board works
A complete layout multiplies every material decision and makes errors harder to remove.
- 01
A powered static-grass applicator
It becomes worthwhile for larger upright areas and mixed fibre heights. The checked starter fibres can first be tested by the supplied method.
- 02
Deep-pour water
Resin needs sealed boundaries, careful mixing and controlled depth. Learn colour and texture before introducing a permanent glossy pour.
- 03
A forest of finished trees
The foliage kit can make a few varied forms. Repeating identical ready-made trees makes scale and spacing errors more visible.
- 04
Permanent ballast near points
Loose stone and adhesive can immobilise mechanisms or bridge electrical contact. Practise on spare track first.
- 05
Every scenic packet in one scene
A smaller palette tied to a reference looks more coherent and leaves useful materials for a genuinely different location.
Upgrade path
Move from a sample board to controlled layout sections
The main upgrade is repeatability: known adhesives, recorded colour mixes and test pieces for every new material.
Hand-sized diorama
About £15–£50Board, earth paint, fine scatter and selected foliage
Learn layering and drying with no risk to a working layout.Trackside test section
About £30–£90Spare track, ballast, fibres and scale details
Practise clearances, ballast shoulders and protecting rail surfaces.Powered grass system
About £70–£180Static applicator, matching adhesive and several fibre lengths
Stand longer fibres upright and blend layered grass over larger areas.Full scenic district
£150–£600+Landforms, structures, roads, vegetation, lighting and access plan
Create visual continuity while keeping track and mechanisms serviceable.Practical limits
Protect the railway and the room
Scenery uses fine particles, wet adhesive, blades, paints and sometimes electrically charged applicators.
- Disconnect layout power and cover rails, point blades, motors, speakers and electronics before loose or wet work.
- Cut foam and board with the ventilation, blade control and dust precautions appropriate to the exact material.
- Do not use dried garden soil or plant material without considering insects, mould, colour change and long-term stability.
- Follow the static-applicator instructions and keep its earth pin, charged sieve and stored energy away from people and electronics.
- Vacuum loose fibres and powders carefully; keep them away from food, pets and breathing zones.
Outside help
When another layout is useful
A club visit is most useful after the practice board, when you can compare how real layouts protect track, disguise access panels and maintain scenery.
Use the technique sheets for a bounded material test rather than treating a product catalogue as a required list.
Ask to see unfinished scenery and access construction, not only the completed public face.
Free learning resources and representative club arrangements checked 31 July 2026; local access and membership prices vary.
Sources
Where the guidance came from
The guide combines established scenery sequencing, manufacturer technique material and recurring modeller advice to test on a removable diorama first.
-
01
National Model Railroad Association · Beginner’s guide, scenery
Established model-railway sequence for building and finishing scenery.
Open source -
02
Woodland Scenics · Learning aids
Manufacturer learning kits and techniques for specific scenery layers.
Open source -
03
r/modeltrains · Small diorama before the main layout
Practitioner example and consensus that an offcut scene is a useful test for ballast and static grass.
Open source -
04
Amazon UK · War World Scenics Static Grass Starter Kit 2
Exact product page, model or ISBN, observed price and availability checked for this guide.
Open source -
05
Amazon UK · War World Scenics tree and hedgerow foliage kit
Exact product page, model or ISBN, observed price and availability checked for this guide.
Open source -
06
Amazon UK · Woodland Scenics T1349 Green Blend Fine Turf
Exact product page, model or ISBN, observed price and availability checked for this guide.
Open source
Guide information and links checked 31 July 2026.