Beginner’s guide · Make & create
Follow one running line,
let the rhythm show.
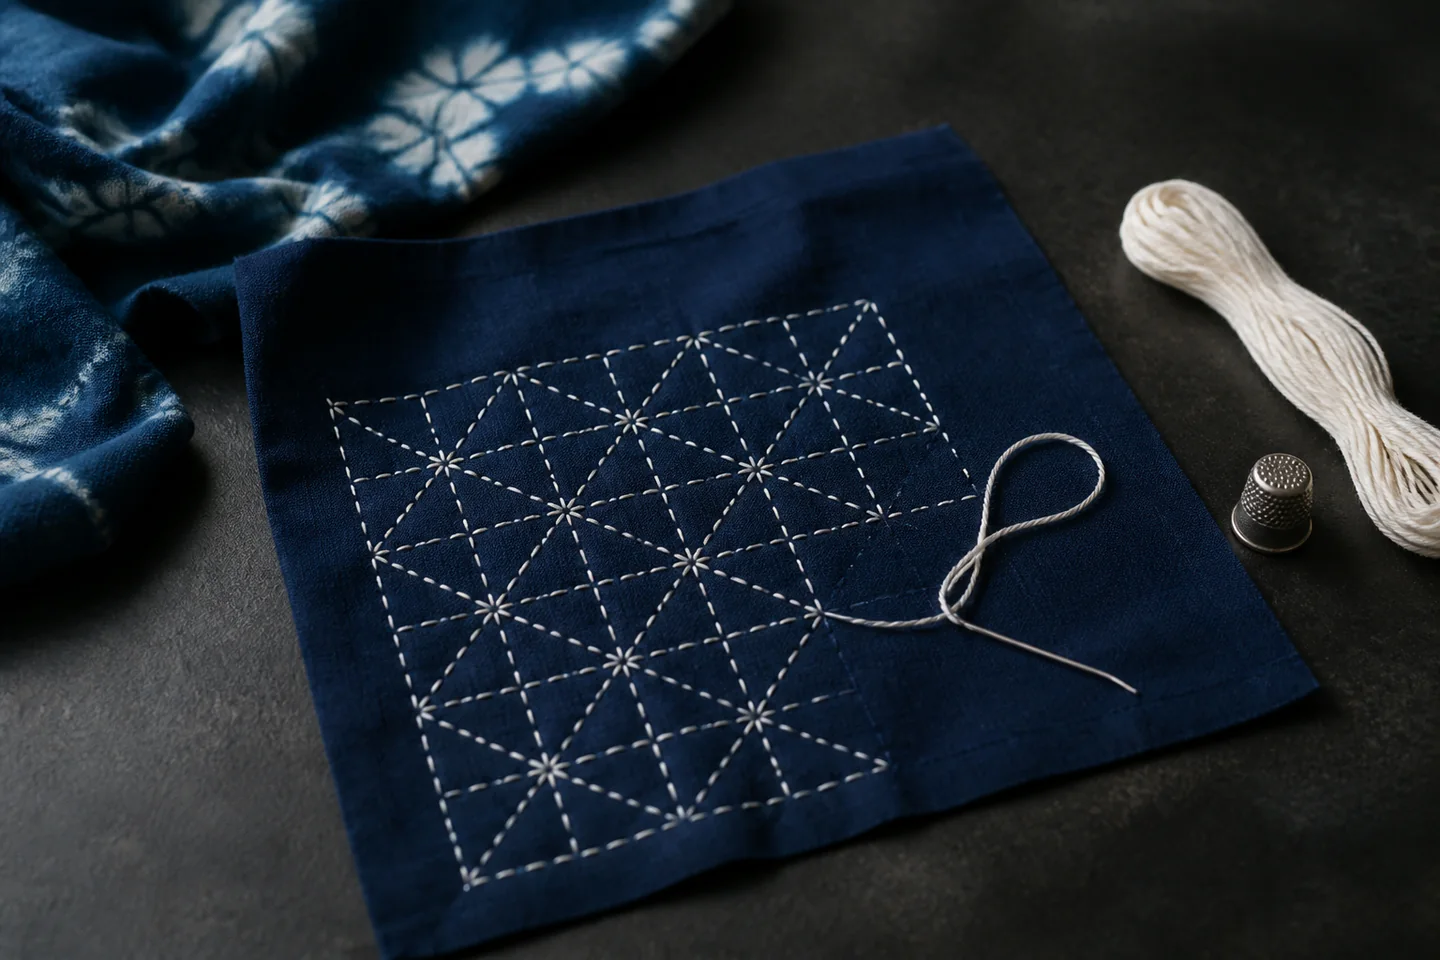
Begin with visible cotton cloth, contrasting sashiko thread and a printed or washable grid. Even spacing and relaxed thread matter more than filling a large panel.
Quick answer
Stitch one straight grid before a dense geometric panel
Use firm woven cotton, visible sashiko thread and a long sashiko needle. Mark or choose a simple grid, make a secure beginning without a bulky knot where possible, then load several running stitches onto the needle while gently gathering the cloth. Pull the thread through and smooth the fabric completely before the next section. Leave a small loop at direction changes so the finished cloth does not pucker.
- 01
Choose a plain weave whose threads and marks remain easy to see. Record what you used on the first attempt so the result can be repeated or changed for a reason.
- 02
Aim for consistent stitch-to-gap proportion rather than tiny perfection. Record what you used on the first attempt so the result can be repeated or changed for a reason.
- 03
Load stitches with the needle nearly parallel to the cloth. Record what you used on the first attempt so the result can be repeated or changed for a reason.
- 04
Smooth the fabric after every pull and never tighten the running thread like embroidery floss. Record what you used on the first attempt so the result can be repeated or changed for a reason.
- 05
Follow one pattern’s travel order so crossings and direction changes remain deliberate. Record what you used on the first attempt so the result can be repeated or changed for a reason.
What to expect
The finished geometry depends on relaxed cloth
Sashiko uses a familiar running stitch, but its rhythm, intersections and unpuckered finish take more attention than the simple motion suggests.
Cloth
Very soft or stretchy fabric is harder to mark and control. A stable cotton sampler makes spacing visible. In sashiko, this is worth checking deliberately rather than trying to correct it after the next stage.
Thread
Traditional sashiko thread is softly twisted and fills the line differently from six-strand embroidery floss. In sashiko, this is worth checking deliberately rather than trying to correct it after the next stage.
Needle
A longer strong needle loads multiple stitches; its feel changes with fabric weight and thimble use. In sashiko, this is worth checking deliberately rather than trying to correct it after the next stage.
Corners
Thread must travel without tight turns. Leave ease on the back whenever a line changes direction. In sashiko, this is worth checking deliberately rather than trying to correct it after the next stage.
Wear
Decorative sampling and structural mending overlap, but a repair also needs sound surrounding fabric and suitable reinforcement. In sashiko, this is worth checking deliberately rather than trying to correct it after the next stage.
Core method
Control spacing without drawing the cloth tight
Prepare a visible grid
Press the cloth, transfer one simple design with a removable method and test that the mark actually disappears. In sashiko, this is worth checking deliberately rather than trying to correct it after the next stage.
Choose thread and needle
Use one strand of sashiko thread and a needle that passes without forcing an oversized hole. In sashiko, this is worth checking deliberately rather than trying to correct it after the next stage.
Load and smooth
Rock the needle through several marks, pull the thread through and lay the fabric flat before checking tension. In sashiko, this is worth checking deliberately rather than trying to correct it after the next stage.
Travel deliberately
Follow the pattern order, leave ease at turns and avoid carrying dark thread across areas where it will show. In sashiko, this is worth checking deliberately rather than trying to correct it after the next stage.
Useful products
Products with a clear job in the setup
The complete starter kit is the simplest first route. The Olympus needle pack is a focused reusable tool, and the coaster kit supplies a bounded repeat project. Buy the complete kit or assemble the focused route, not every option.
Generic Sashiko Starter Kit with Cloth, Thread, Needles and Template
The included pattern keeps the first piece bounded while exposing stitch rhythm and tension.
Olympus Olympus Sashiko Needles and Threader Set
Different lengths allow comparison without buying a large mixed sewing kit.
Generic Four Sashiko Coaster Kit
Repeating a compact format makes improvements in spacing and tension easy to compare.
First project
Stitch one 12 cm grid sampler
Straight lines and a few intersections reveal stitch proportion and tension before curves or dense traditional motifs.
- 01
Press and mark
Prepare a square of stable cotton and transfer a simple 1 cm grid with a tested removable marker. In sashiko, this is worth checking deliberately rather than trying to correct it after the next stage.
- 02
Thread a manageable length
Use a single length short enough to pull without abrasion or tangling. In sashiko, this is worth checking deliberately rather than trying to correct it after the next stage.
- 03
Run the first line
Load several stitches, keeping the needle parallel to the fabric and the gaps consistent. In sashiko, this is worth checking deliberately rather than trying to correct it after the next stage.
- 04
Smooth before continuing
Lay the cloth flat after every pull and restore any ease lost at the edge. In sashiko, this is worth checking deliberately rather than trying to correct it after the next stage.
- 05
Cross the grid
Follow the chosen intersection rule consistently rather than improvising at each crossing. In sashiko, this is worth checking deliberately rather than trying to correct it after the next stage.
- 06
Remove marks and assess
Finish securely, remove marks as directed and dry the sample flat before judging tension. In sashiko, this is worth checking deliberately rather than trying to correct it after the next stage.
What can wait
What can wait until the first result
Large repairs and elaborate traditional patterns make more sense after one flat, evenly spaced sampler.
- 01
Dense all-over motif
More intersections make travel order and puckering harder to diagnose. In sashiko, this is worth checking deliberately rather than trying to correct it after the next stage.
- 02
Stretch denim repair
Thick seams and worn fibres require reinforcement decisions beyond the first sampler. In sashiko, this is worth checking deliberately rather than trying to correct it after the next stage.
- 03
Many thread colours
Contrast is useful while learning; colour collections do not improve spacing. In sashiko, this is worth checking deliberately rather than trying to correct it after the next stage.
- 04
Permanent marking pens
A line that remains visible can spoil an otherwise successful piece. In sashiko, this is worth checking deliberately rather than trying to correct it after the next stage.
- 05
Decorative thimble collection
Try the supplied method first, then buy the thimble style that matches the hand position. In sashiko, this is worth checking deliberately rather than trying to correct it after the next stage.
Upgrade path
Upgrade the repeated limitation
Add better cloth, pattern complexity or repair work when running tension is already reliable.
Grid sampler
About £10–£20Cotton, sashiko thread and needle
Learn spacing and ease.Coaster set
About £15–£35Printed small motifs
Repeat neat finishing.Garment embellishment
About £25–£70Chosen cloth, transfers and colours
Plan placement and wear.Structural boro-style repair
About £40–£120+Patches, suitable thread and garment assessment
Combine decoration with reinforcement.Safety & care
Respect sharp tools and the item being repaired
Sashiko is approachable hand sewing, but thick cloth, repeated needle pressure and uncertain marking products can cause avoidable injury or damage.
- Use a suitable thimble or palm protection and push a resistant needle away from the other hand. Follow the current instructions supplied with the exact material, tool or living specimen.
- Retire bent, burred or corroded needles instead of forcing them through dense cloth. Follow the current instructions supplied with the exact material, tool or living specimen.
- Test markers, washing and colourfastness on a hidden scrap before treating a valued garment. Follow the current instructions supplied with the exact material, tool or living specimen.
- Take regular breaks if fingers, wrist, neck or eyes become strained. Follow the current instructions supplied with the exact material, tool or living specimen.
- Do not treat decorative stitching alone as a repair for protective, load-bearing or safety-critical clothing. Follow the current instructions supplied with the exact material, tool or living specimen.
Outside help
When outside help earns its place
A well-made tutorial is enough for the first controlled result. In-person help becomes worthwhile when garment repair, pattern travel or traditional thimble technique remains confusing.
Use one complete method from start to finish instead of combining several creators’ measurements.
Ask whether materials, preparation, troubleshooting and mark removal and a flat finished sample are included.
Representative UK learning options checked 28 August 2026; local prices, access, materials and tutor support vary.
Sources
Where the guidance came from
The method is grounded in specialist and public guidance, then checked against recurring beginner questions and the exact products linked here.
-
01
Victoria and Albert Museum · sashiko
Historical and material context for sashiko and mending.
Open source -
02
Japan House London · sashiko
Japanese cultural context and stitch practice.
Open source -
03
Olympus Thread · sashiko
Manufacturer information on sashiko thread, needles and cloth.
Open source -
04
Needlework for Wellbeing · sashiko
Beginner technique and project guidance.
Open source -
05
Reddit · r/sashiko
Community evidence on tension, marking, thread and repairs.
Open source -
06
Amazon UK · Sashiko Starter Kit with Cloth, Thread, Needles and Template
Exact product catalogue page or ISBN used for the recommendation; current price, seller, specification and availability should be confirmed.
Open source -
07
Amazon UK · Olympus Sashiko Needles and Threader Set
Exact product catalogue page or ISBN used for the recommendation; current price, seller, specification and availability should be confirmed.
Open source -
08
Amazon UK · Four Sashiko Coaster Kit
Exact product catalogue page or ISBN used for the recommendation; current price, seller, specification and availability should be confirmed.
Open source
Guide information and links checked 28 August 2026.