Beginner’s guide · Observe & photograph
Photograph the light,
your eyes leave out.
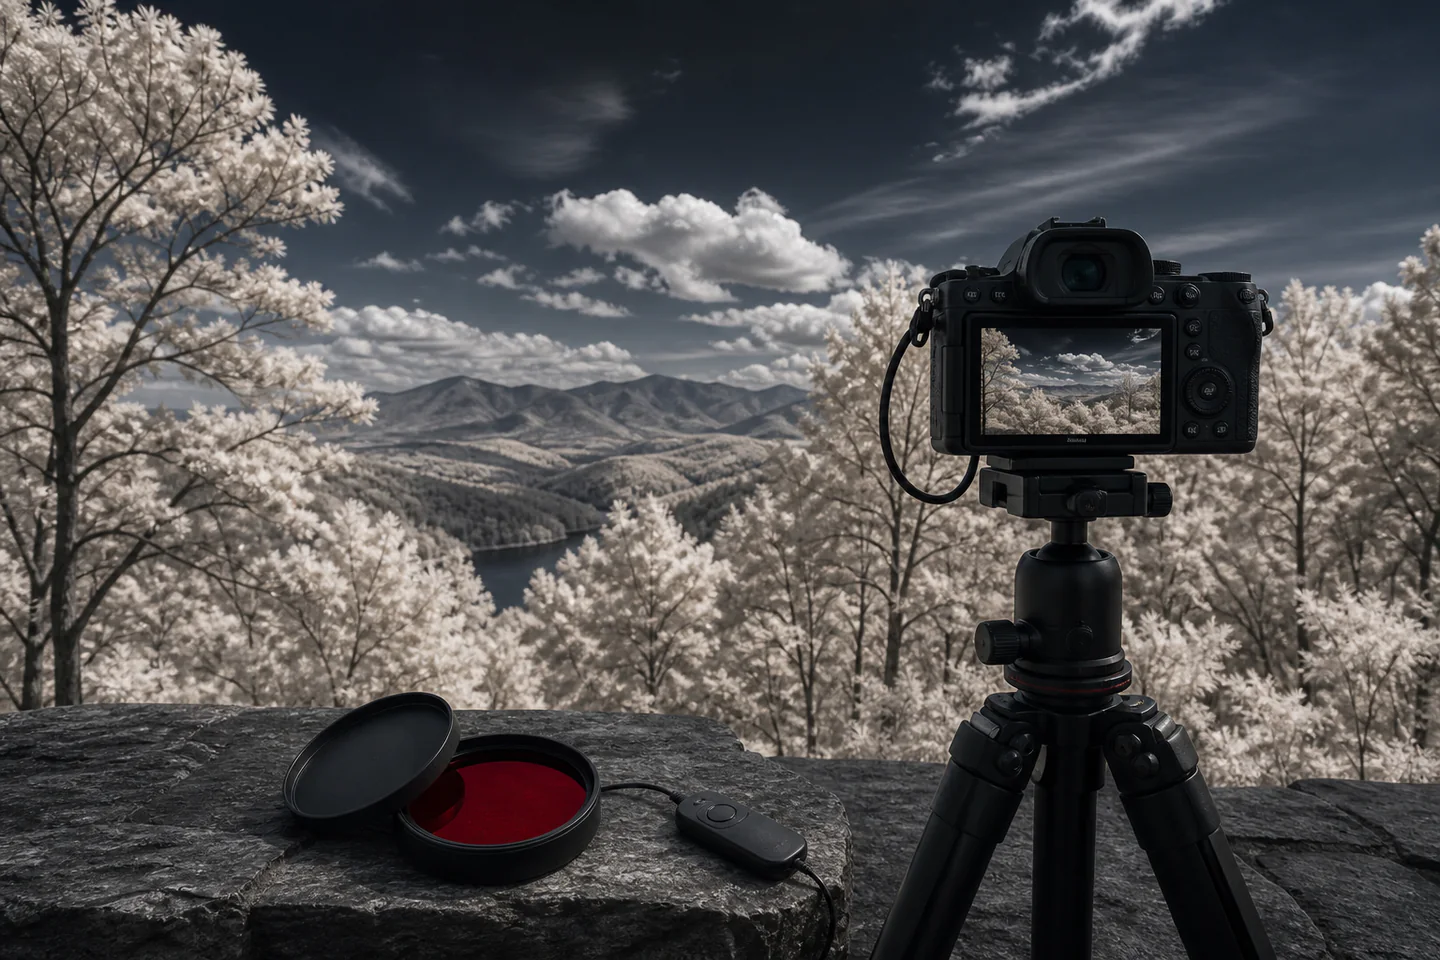
Begin with a compatible digital camera, a correctly sized 720 nm filter and a tripod. Expect red previews, long exposures and substantial processing before foliage turns pale.
Quick answer
Test the camera before buying a conversion
Check whether the existing camera can record enough near-infrared light by using a reputable compatibility test or borrowing a filter. Buy a 720 nm filter that matches the lens thread printed on the lens barrel, not the focal length. Compose and focus before fitting the dark filter, switch to manual exposure, shoot RAW and support the camera firmly. Start in bright sun with foliage, bracket several exposures and process one file in monochrome before attempting channel swaps or a permanent camera conversion.
- 01
Most unconverted digital cameras include an internal infrared-cut filter. Some pass enough IR for seconds-long exposures; others remain impractically dark or develop hotspots.
- 02
Filter diameter is a physical thread size such as 58 mm. It is not the lens focal length, and a step-up ring changes fit but not camera compatibility.
- 03
An R72-style filter blocks most visible light, so a tripod, delayed release and RAW capture are normally part of the first setup.
- 04
Focus can shift in infrared. Live view or mirrorless contrast detection may help, but every lens and aperture still needs a sharpness test.
- 05
The red file is not the final image. White balance, monochrome conversion, contrast and sometimes red–blue channel swaps create the familiar result.
What to expect
The filter reveals the whole capture chain
A good camera, lens and scene can still produce a central hotspot, minute-long exposure or soft focus. Infrared is a compatibility experiment before it is a shopping list.
Camera
A strong internal hot mirror can make the filter route too slow. Older models sometimes work better, but online lists are starting points rather than guarantees.
Lens
Coatings and internal reflections can create bright central hotspots, especially at smaller apertures. Test the exact lens and settings.
Exposure
Visible-light meters may not predict IR perfectly. Bracketing and checking the histogram matter more than memorising one compensation value.
Focus
Infrared wavelengths focus differently. Re-focus with live view where possible and inspect files at full size.
Colour
A custom white balance can improve the preview, but RAW processing keeps more options. Monochrome is the simplest first finish.
Conversion
Removing the internal filter restores normal shutter speeds but permanently changes the camera unless a specialist full-spectrum system is used.
Core method
Prove camera, lens and filter as one system
Check the optical path
Confirm the camera model can respond to near infrared and inspect sample results from the exact lens for hotspots. Identify the filter thread printed beside the diameter symbol. If several lenses are planned, buy for the largest suitable thread and use quality step-up rings rather than stacking many small filters.
Build a repeatable exposure
Use a stable tripod, RAW capture, low base ISO and a moderate aperture that avoids obvious diffraction or hotspots. Compose and focus without the filter when the view becomes too dark, then fit it without moving focus. Cover the optical viewfinder on a DSLR during long exposures.
Bracket a useful subject
Photograph sunlit healthy foliage against blue sky because the Wood effect is easy to recognise. Use the histogram to avoid clipped highlights, vary shutter time in full stops and trigger with a timer or remote. Record camera, lens, filter, aperture, ISO and weather.
Process a neutral first file
Set a custom white balance from foliage or adjust temperature and tint as far as the converter allows, then make a monochrome version with controlled contrast. Check corners and centre for flare, hotspots and softness. Attempt false colour only after a technically clean file exists.
Useful products
Products with a clear job in the setup
The Hoya 58 mm R72 is a known 720 nm-class filter, but it fits only a 58 mm lens thread or a suitable step-up arrangement. The K&F tripod and Pixel timer remote address long-exposure movement and also transfer to night, pinhole and time-lapse photography. Check that the remote variant matches the exact camera connector before ordering.
Hoya 58 mm Infrared R72 Screw-In Filter
Hoya R72 is a long-established reference filter with documented behaviour and widespread sample images.
K&F Concept 163 cm Aluminium Camera Tripod with Ball Head
Stable support improves infrared, night, pinhole and ordinary landscape work rather than serving one niche only.
Pixel TW-283 Wireless Timer Shutter Release
A timer remote makes repeated brackets and bulb exposures easier while preserving composition.
First project
Make a monochrome foliage test grid
One sunny composition photographed at several exposures and apertures reveals response, hotspot and focus before artistic processing hides them.
- 01
Confirm filter fit
Read the diameter on the lens and test the filter threads without forcing them.
- 02
Frame without the filter
Choose bright foliage and sky, focus carefully and switch to manual focus.
- 03
Fit and shade the lens
Avoid touching focus or zoom and block stray light with the proper hood.
- 04
Bracket shutter time
Keep ISO and aperture stable while varying exposure in full stops.
- 05
Test one second aperture
Compare the centre for a hotspot and the edges for sharpness.
- 06
Finish in monochrome
Adjust white balance and contrast on a RAW copy, preserving an untouched original.
What can wait
What can wait until the first result
A converted camera is transformative only after the beginner knows which focal lengths, filter style and finish are genuinely appealing.
- 01
Permanent camera conversion
It changes normal colour response and should follow successful filter tests and specialist advice.
- 02
Several filter wavelengths
590, 665, 720 and 850 nm produce different colour options; one 720 nm filter teaches the workflow.
- 03
Very cheap variable IR filters
Unclear spectral claims and uneven colour make camera diagnosis harder.
- 04
Multiple step rings
Stacking adapters increases vignetting and stuck-thread risk; plan around one sensible filter size.
- 05
A new lens for hotspots
First vary aperture, angle and stray-light control and check trusted samples from the exact lens.
Upgrade path
Upgrade the repeated limitation
Upgrade when exposure time or lens behaviour repeatedly prevents a picture that the filter test has already proved worthwhile.
Borrowed or single filter
About £45–£140R72 + existing camera + tripod
Test response, focus and processing.Better workflow
About £80–£220Remote, rings and tested lens
Bracket faster and avoid known hotspots.Dedicated conversion
About £250–£700Used body + specialist conversion
Recover hand-holdable speeds and live preview.Full-spectrum system
About £500–£1,500+Converted body + external filters
Choose visible, UV-adjacent or IR looks flexibly.Safety & care
A filter is dark, not safe for looking at the Sun
Infrared photography of landscapes is not solar observation. A photographic filter whose transmission looks black may still pass dangerous radiation and must never be treated as eye protection.
- Never look at the Sun through an infrared, neutral-density or photographic effect filter and never improvise solar viewing or eclipse equipment.
- Use a stable tripod clear of roads and paths, keep control of it in wind and use reflective or visible precautions in low light.
- Check camera, cable, battery and filter compatibility before ordering; never force a filter into damaged or mismatched threads.
- Protect the sensor from excessive heat and follow the camera manual during long exposures; stop if equipment becomes abnormally hot.
- Permanent conversion should be completed by a reputable specialist and understood as a change to normal warranty, dust sealing and colour behaviour.
Outside help
When outside help earns its place
A borrowed filter and RAW tutorial are enough for the first test. A specialist workshop becomes useful for comparing converted cameras, wavelength choices and colour workflows before paying for irreversible work.
Match steps to the exact camera, filter and software version.
Ask whether converted bodies and several wavelengths can be tried.
Representative UK learning options checked 18 August 2026; local prices, access, materials and tutor support vary.
Sources
Where the guidance came from
Filter makers and camera specialists define wavelength, compatibility and conversion. Experienced photographers and communities add exact lens behaviour, hotspot reports and realistic post-processing expectations.
-
01
Hoya Filter USA · Digital infrared photography
Manufacturer explanation of R72 capture and suitable subjects.
Open source -
02
Hoya · Infrared R72
Official transmission and product-size information.
Open source -
03
LifePixel · Infrared basics
Specialist camera compatibility, capture and conversion tutorials.
Open source -
04
Kolari Vision · Lens hotspot database
Specialist reports of lens behaviour in infrared photography.
Open source -
05
Reddit · r/infraredphotography
Community evidence on cameras, filters, hotspots and processing.
Open source -
06
Amazon UK · 58 mm Infrared R72 Screw-In Filter
Exact product catalogue page or ISBN used for the recommendation; current price, seller, specification and availability should be confirmed.
Open source -
07
Amazon UK · 163 cm Aluminium Camera Tripod with Ball Head
Exact product catalogue page or ISBN used for the recommendation; current price, seller, specification and availability should be confirmed.
Open source -
08
Amazon UK · TW-283 Wireless Timer Shutter Release
Exact product catalogue page or ISBN used for the recommendation; current price, seller, specification and availability should be confirmed.
Open source
Guide information and links checked 18 August 2026.