Beginner's guide · Make & build
Cut one clean shape.
Stitch it for years.
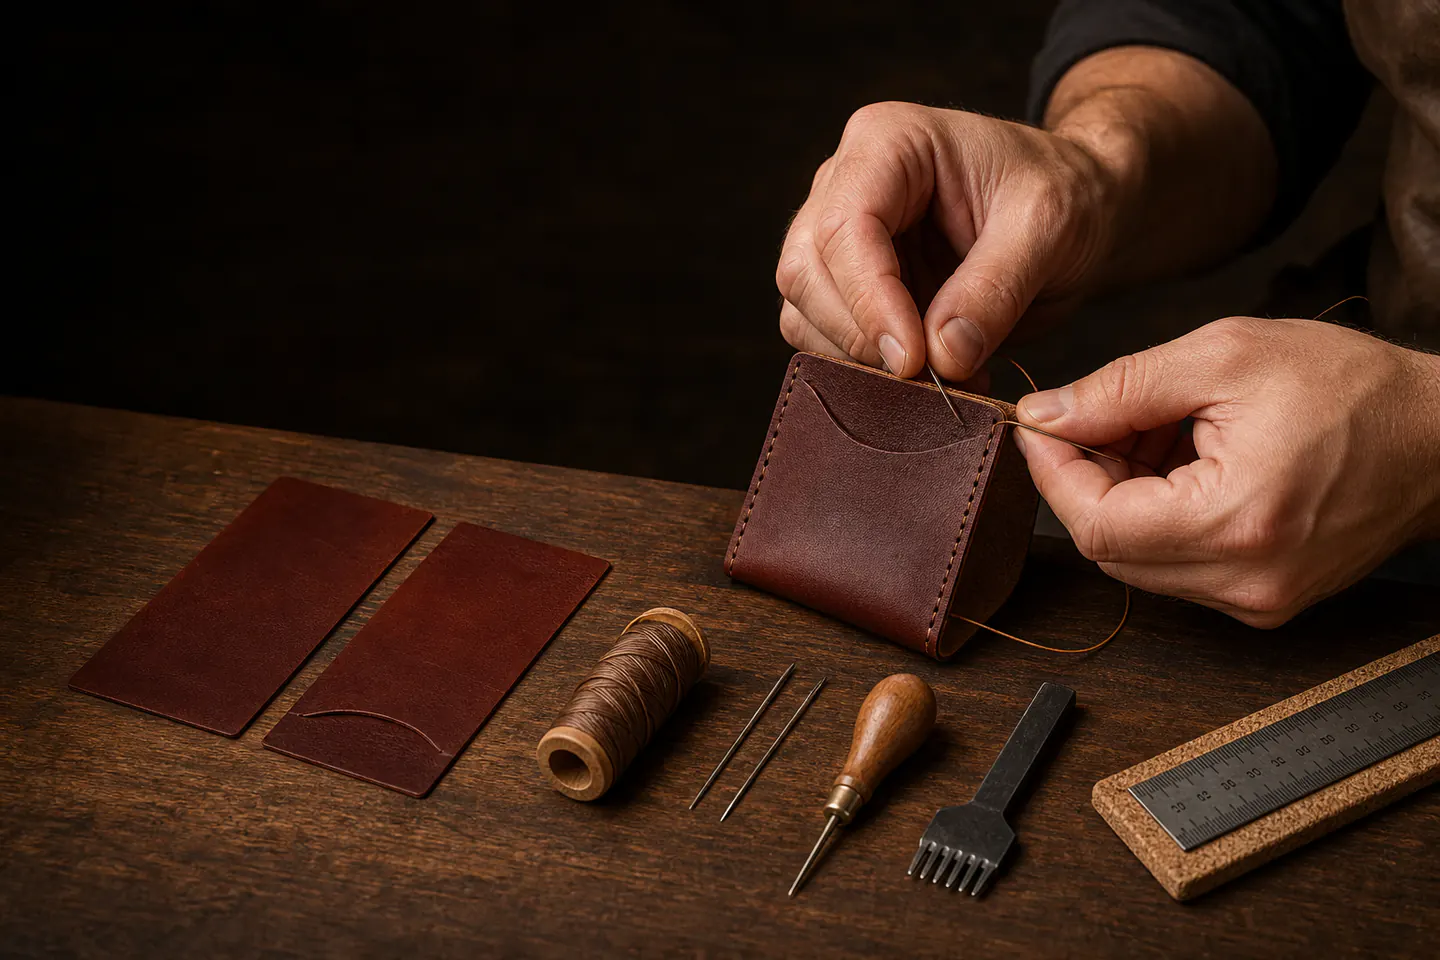
A two-pocket card sleeve teaches the useful core of leatherwork: a paper pattern, safe cutting, consistent stitch holes, saddle stitch and patient edge finishing. Begin with a small piece of firm vegetable-tanned leather rather than a box of mystery scraps.
Quick answer
Cut one clean shape.
Make a flat card sleeve from firm vegetable-tanned leather around 1.2–1.8 mm thick. Prove the shape in card, cut leather with several controlled passes, mark a consistent stitch line, punch onto a proper backing board and use two needles to saddle-stitch without pulling so hard that the edge buckles.
- 01
Leather type and thickness matter more than a large kit. Soft upholstery offcuts and very thick belt leather both make a simple wallet harder.
- 02
A starter tool set can reveal which operations are enjoyable, but its knife, punches and edge tools may not be long-term quality. Replace only the tool whose limitation is visible.
- 03
Stitching chisels mark and pierce spacing; they do not replace a cutting mat or sacrificial punch board. Never drive them into a table or stone surface.
- 04
Dyes, contact adhesives and finishes introduce ventilation, skin-contact and compatibility questions. A natural, unlined first sleeve can be made without them.
What to expect
What the first attempts really involve
The project looks simple because the construction is visible. That also means uneven cuts, drifting holes and inconsistent tension remain visible, so accuracy at each quiet stage matters more than speed.
Material
Vegetable-tanned leather is firm enough to mark, bevel and burnish; chrome-tanned leather is often softer and behaves differently with adhesives and edge treatments.
Pattern allowance
Cards need clearance and the stitched seam occupies space. A paper prototype catches dimensions before valuable leather is cut.
Cut quality
A sharp blade and repeated light passes give more control than forcing one deep cut. Corners can be refined after the main straight edges are established.
Hole spacing
A beautiful stitch line begins with consistent distance from the edge and aligned front and back pieces. Punching each layer separately can create mismatched holes.
Tension
Saddle stitch locks each hole, but alternate hand order or changing pull strength produces a wandering appearance. Rhythm is a learned part of the craft.
Fundamentals
Build the first attempt on reliable fundamentals
Design in paper first
Trace a real card, add ease and seam allowance, then make a folded or taped card prototype. Insert several cards and check access with the thumb. Mark a centre line, stitch line and any pocket curve on the paper. A reusable pattern turns the final leather into execution rather than live design.
Choose a cooperative first hide
A small full-grain vegetable-tanned panel around 1.2–1.8 mm is firm enough for a card sleeve yet still manageable by hand. Natural marks are normal; avoid placing a deep scar or loose belly area across a fold or narrow seam. Keep a scrap for cutting, punching and edge tests before touching the project pieces.
Cut with the body out of the path
Use a fresh blade against a metal ruler on a real cutting mat. Stand so the cut travels away from hands and body, keep fingertips behind the ruler edge and make several light passes without twisting the knife. Store or cover the blade immediately after the cut.
Build a consistent stitch line
Mark the same edge distance, lightly secure the layers, then punch through them into dense scrap leather or a purpose-made board. Saddle stitch uses one thread with a needle at each end; pass each side through every hole in the same order and pull across the seam rather than upwards. Backstitch as the pattern requires and trim carefully.
Useful products
Enough tools for one card sleeve, with clear upgrade points
The NAMOON set covers needles, thread, punches and basic edge work, the Wanderings panel provides known full-grain leather and the Fiskars mat makes controlled cutting practical. The Olfa knife is shown as a focused cutting upgrade when the generic blade becomes the weak link.
NAMOON Leather Working Tools and Supplies Kit
It enables a complete simple wallet without presenting every included tool as essential or permanent.
Wanderings Full-grain Buffalo Leather Panel, Brown
It avoids an anonymous mixed scrap bag and gives enough area to select around natural variation.
Fiskars A3 Self-healing Cutting Mat
It gives the knife a predictable surface and makes keeping the cut inside a defined area easier.
First wallet
Make a natural two-pocket card sleeve
Use a proven free pattern or draw a minimal symmetrical version in card. Leave dye, lining, snaps and decorative tooling out so fit and stitch quality can be judged directly.
- 01
Prototype the fit
Build the complete shape in card, tape the seam and test it with the real number of cards before transferring any line.
- 02
Read the leather
Choose firm, even areas for both pockets, align grain direction visually and avoid scars where holes or folds will sit.
- 03
Transfer the pattern
Use a scratch awl lightly on the flesh side or another removable method suited to the leather; mark reference points, not a thick uncertain outline.
- 04
Cut safely
Place the ruler securely, keep the free hand behind it and make repeated outward passes with a sharp blade.
- 05
Refine and dry-fit
Match the two pieces, ease the corners and insert cards again before committing to holes.
- 06
Mark and punch
Set one stitch line, plan the corner spacing and punch through aligned layers onto a sacrificial board with the tool vertical.
- 07
Saddle stitch
Use a comfortable thread length, follow the same needle order in every hole and tighten consistently without crushing the edge.
- 08
Finish conservatively
Trim thread, lightly sand or burnish testable vegetable-tanned edges and condition only with a product compatible with that leather.
Troubleshooting
Read the result before changing the setup
A cut that wanders should not be chased freehand
Stop, return to the pattern and decide whether the edge can be squared slightly smaller. Repeated corrective slivers often create a wavy line; practise the replacement cut on scrap first.
Misaligned holes come from layer movement
Dry-fit and secure the pieces more reliably, punch through the final stack when the tool and thickness allow, and plan corners before the straight run. Do not force a needle through an accidental half-hole beside the original.
Buckled edges indicate excessive tension
Pull the thread across the seam with equal force rather than yanking each stitch upwards. On the next sample, deliberately make a loose, medium and tight row to see the leather's response.
Muddy edges need a material-specific method
Vegetable-tanned leather can often be sanded and burnished; soft chrome-tan may need edge paint or a turned construction. Do not keep adding water or compound without identifying the leather.
Skip for now
What can wait
The card sleeve works because the construction is short and inspectable. Decoration and complex hardware can follow after fit, cutting and stitching are dependable.
- 01
A large stamp set
Tooling is a separate design and moisture-control skill. A clean untooled surface makes the first construction quality easier to evaluate.
- 02
Dye and contact adhesive
Both change ventilation, cleanup and finish compatibility. Natural leather and a stitched seam remove them from the first build.
- 03
A stitching pony
It improves hand position on longer seams but is not essential for a small flat sleeve. Make or buy one when holding the work becomes the limiting step.
- 04
A premium full tool chest
High-quality pricking irons and knives are worthwhile when spacing and cutting preferences are known. They cannot rescue a pattern that does not fit.
Upgrade path
What a better setup changes
Better tools mainly improve repeatability, speed and finish. Upgrade the operation that repeatedly produces the visible fault.
First card sleeve
About £55–£85Starter hand-tool set + small leather panel + cutting mat
Teaches pattern, cut, holes, saddle stitch and basic edges.Cleaner cutting
Add about £10–£25Reliable replaceable-blade knife + cork-backed ruler
Improves straight lines and repeat work while keeping blades inexpensive.More consistent stitching
Add about £35–£90Known-spacing pricking irons + better needles + stitching pony
Makes longer seams and repeated spacing easier after the preferred stitch size is known.Structured bags or belts
Project dependentThicker hides, skiving, hardware, adhesives and edge systems
Adds load, folds, layered thickness and material-specific finishing beyond a flat wallet.Before upgrading
A useful check before spending more
Upgrade the operation, not the catalogue
If cuts wander, improve blade, ruler and body position. If holes drift, improve marking and punches. If the pattern is wrong, buying either tool will not solve the actual problem.
Record leather details
Keep the seller, tanning method, thickness and finish with a small labelled scrap. The next project can then repeat a useful material rather than starting from an unnamed offcut.
Safety
Work safely from the first attempt
Sharp blades, punches, needles and chemical finishes are the main hazards. A deliberate bench layout keeps the working hand out of each tool's path.
- Cut away from the body with fingers behind a stable metal ruler; retract or cover the blade immediately.
- Punch onto a proper sacrificial surface, wear eye protection when striking metal tools and inspect mushroomed tool heads.
- Keep awls and needles capped or in a tray rather than loose beneath leather scraps.
- Ventilate adhesives, dyes and finishes according to their safety data and keep them away from flames.
- Test finishes on scrap for colour transfer and compatibility before treating an item that touches clothing or skin.
- Dispose of blades in a rigid sharps container and keep small hardware away from children and pets.
Classes
When outside help is useful
A class becomes useful for skiving, tooling, fitted cases and bags, where watching pressure and hand position saves material. A simple stitched sleeve remains a realistic home start.
A good session includes pattern, safe cutting, punching, saddle stitch and a finished item rather than decoration alone.
Useful for skiving, hardware, edge systems and managing several leather thicknesses.
Representative UK leathercraft workshop formats checked 30 July 2026; hides and tool use included vary.
Sources
Sources and checking notes
Leathercraft specialists establish the tool and material sequence, a practical manual supports basic technique and community patterns reveal recurring fit and stitching issues.
-
01
Tandy Leather · Beginner's guide
Beginner tools, leather choices and approachable first projects.
Open source -
02
Tandy Leather · Essential tools
Functions and upgrade priorities across cutting, stitching and finishing tools.
Open source -
03
Tandy Europe · Basic tools for beginners
Practical specialist overview of a compact starting tool set.
Open source -
04
Purdue Extension · Leathercraft manual
Structured manual covering safety, tools, lacing, stitching and project planning.
Open source -
05
r/Leathercraft · Beginner guide and free patterns
Current community advice and accessible pattern routes.
Open source -
06
Amazon UK · Leather Working Tools and Supplies Kit
Exact NAMOON product and direct Amazon UK listing checked for current availability, price context and model identity.
Open source -
07
Amazon UK · Full-grain Buffalo Leather Panel, Brown
Exact Wanderings product and direct Amazon UK listing checked for current availability, price context and model identity.
Open source -
08
Amazon UK · A3 Self-healing Cutting Mat
Exact Fiskars product and direct Amazon UK listing checked for current availability, price context and model identity.
Open source -
09
Amazon UK · AK-1 Art and Model Knife
Exact Olfa product and direct Amazon UK listing checked for current availability, price context and model identity.
Open source
Guide information and links checked 30 July 2026.