Beginner’s guide · Make & create
Repair the weak area,
then make it worth seeing.
Start on a sound cotton sock or practice swatch. A darning mushroom, contrasting yarn and repeated rows teach structure before decorative patches and speed-weaving tools.
Quick answer
Practise the woven structure before repairing a favourite garment
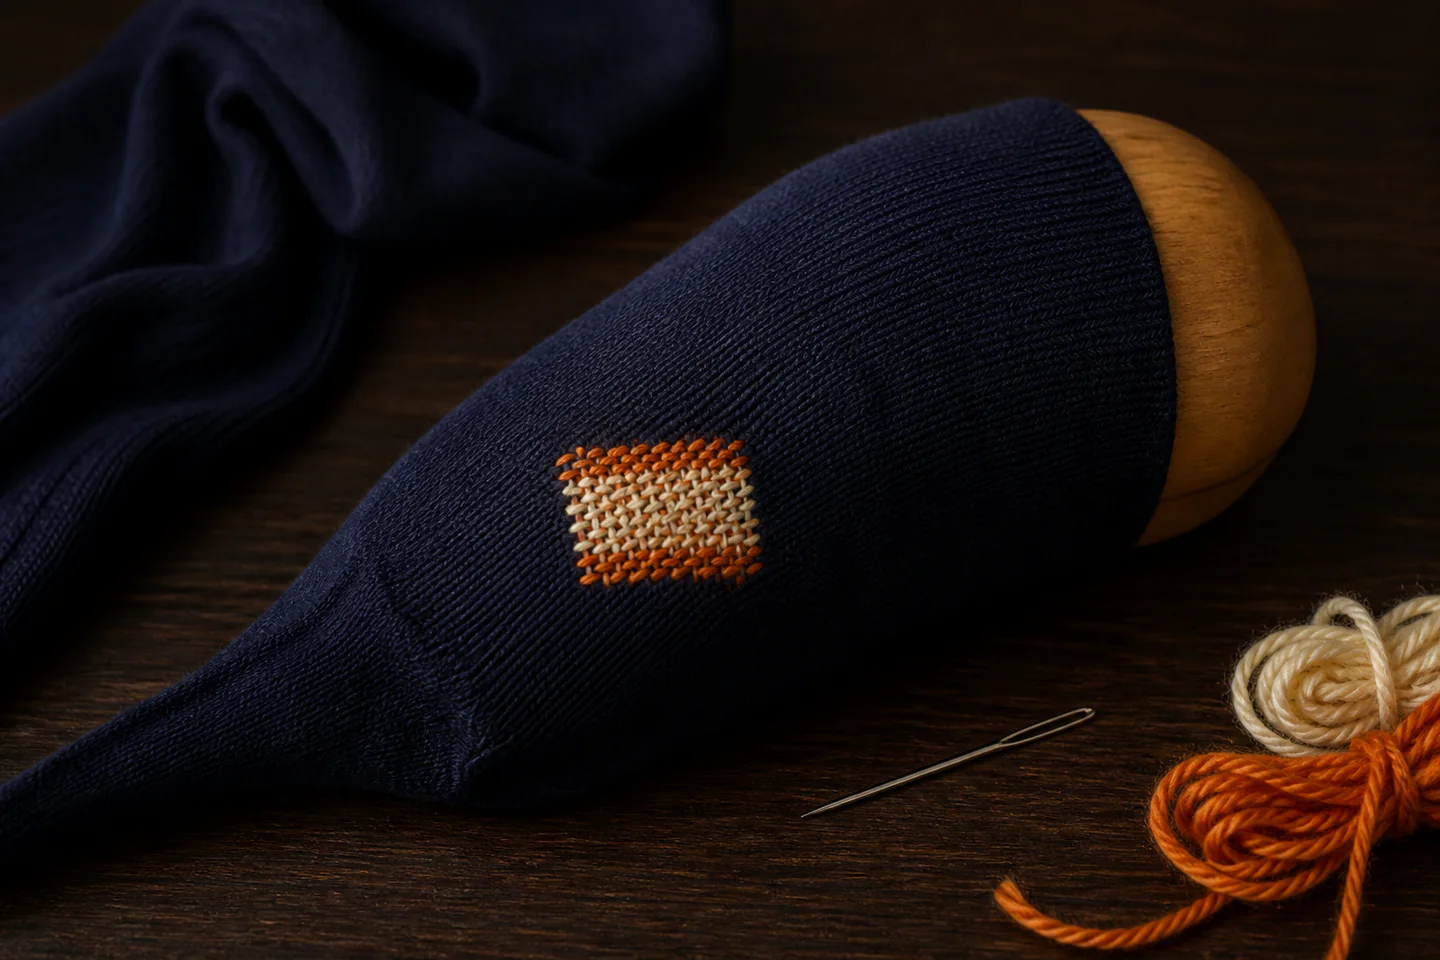
Place a practice hole or simple worn sock over a darning mushroom, secure the sound surrounding fabric without stretching it and run parallel foundation threads beyond the weak area. Weave a second colour over and under those threads, alternating each row and leaving a tiny loop at every turn. Cover the unstable fibres, taper the repair into sound cloth and test flexibility before trimming any ends.
- 01
Assess the whole worn area in strong light; the visible hole is often smaller than the weak fabric. Record what you used on the first attempt so the result can be repeated or changed for a reason.
- 02
Match repair thread to the weight, stretch, wash temperature and use of the item. Record what you used on the first attempt so the result can be repeated or changed for a reason.
- 03
Anchor in sound fabric without pulling the opening closed and distorting the shape. Record what you used on the first attempt so the result can be repeated or changed for a reason.
- 04
Leave ease at row ends so the darn flexes rather than forming a hard puckered patch. Record what you used on the first attempt so the result can be repeated or changed for a reason.
- 05
Practise on an ordinary item before attempting sentimental, valuable or technical clothing. Record what you used on the first attempt so the result can be repeated or changed for a reason.
What to expect
A durable mend spreads load into sound fabric
Decoration can celebrate the repair, but the stitch structure, material match and boundary of the weak area decide whether it lasts.
Assessment
Thin translucent fibres around a hole also need support. Stitching only across the gap leaves the next failure at its edge. In visible mending, this is worth checking deliberately rather than trying to correct it after the next stage.
Stretch
Knits change shape in wear. Hold the item close to its normal dimensions and avoid a rigid oversized patch. In visible mending, this is worth checking deliberately rather than trying to correct it after the next stage.
Abrasion
Heel, knee and elbow repairs face repeated rubbing. Bulky knots or hard thread can be uncomfortable and wear adjacent fibres. In visible mending, this is worth checking deliberately rather than trying to correct it after the next stage.
Washing
Fibre, colour and shrinkage must suit the garment’s normal care. Test unknown thread before committing. In visible mending, this is worth checking deliberately rather than trying to correct it after the next stage.
Expectations
Some damage is beyond a sensible home repair, especially protective clothing, waterproof membranes and heavily degraded seams. In visible mending, this is worth checking deliberately rather than trying to correct it after the next stage.
Core method
Choose a repair structure for the damage
Map the weak area
Clean the item, inspect both sides and mark a boundary in sound fabric beyond fraying or thinning. In visible mending, this is worth checking deliberately rather than trying to correct it after the next stage.
Support the original shape
Use a mushroom, egg or flat insert without stretching the fabric, and keep the working surface comfortably visible. In visible mending, this is worth checking deliberately rather than trying to correct it after the next stage.
Build a woven darn
Lay spaced parallel threads into sound cloth, then weave alternating rows while keeping each edge relaxed. In visible mending, this is worth checking deliberately rather than trying to correct it after the next stage.
Finish and test
Secure ends without bulky knots, flex the repair by hand and wash according to the least tolerant material. In visible mending, this is worth checking deliberately rather than trying to correct it after the next stage.
Useful products
Products with a clear job in the setup
The OurHands kit covers mixed visible-mending methods. The wooden mushroom is the simple hand-darning support; the Speedweve-style loom is an optional way to create a small woven patch. Start with one method.
OurHands Visible Mending and Sashiko Repair Kit
It lets a beginner compare darning and decorative reinforcement without buying bulk supplies.
ZOOFOX Wooden Darning Mushroom with Needles
A mushroom keeps the non-tool hand away from the needle and makes tension easier to see.
Generic 14-Hook Small Darning Loom
The hooks make the over-under sequence visible and can speed repeated small rectangular darns.
First project
Make a two-colour practice darn
A scrap of old cotton jersey or an ordinary sock shows how support, edge loops and material thickness change flexibility.
- 01
Cut a controlled opening
Use a washed scrap and make a small slit, leaving plenty of sound material around it. In visible mending, this is worth checking deliberately rather than trying to correct it after the next stage.
- 02
Mount without stretching
Place the mushroom below the opening and secure the fabric close to its natural shape. In visible mending, this is worth checking deliberately rather than trying to correct it after the next stage.
- 03
Lay foundation rows
Run parallel threads beyond the opening into sound cloth without pulling the sides together. In visible mending, this is worth checking deliberately rather than trying to correct it after the next stage.
- 04
Weave the fill
Alternate over and under, change the starting sequence each row and leave small turning loops. In visible mending, this is worth checking deliberately rather than trying to correct it after the next stage.
- 05
Blend the boundary
Shorten the final rows or add spaced stitches so the stiffness tapers gradually. In visible mending, this is worth checking deliberately rather than trying to correct it after the next stage.
- 06
Flex and wash
Secure ends, bend the patch in several directions and wash-test before using the method on a valued item. In visible mending, this is worth checking deliberately rather than trying to correct it after the next stage.
What can wait
What can wait until the first result
Decorative ambition should follow a repair that is comfortable, washable and proportionate to the surrounding fabric.
- 01
Favourite cashmere
Fine fibres, moth damage and cleaning needs make the first attempt unusually costly. In visible mending, this is worth checking deliberately rather than trying to correct it after the next stage.
- 02
Waterproof outdoor shell
Home needles and patches can compromise a membrane and seam sealing. In visible mending, this is worth checking deliberately rather than trying to correct it after the next stage.
- 03
Large knee reconstruction
A broad worn area may need an internal patch and garment-shaped reinforcement. In visible mending, this is worth checking deliberately rather than trying to correct it after the next stage.
- 04
Many thread packs
Use leftovers that match the first washable practice cloth before buying a palette. In visible mending, this is worth checking deliberately rather than trying to correct it after the next stage.
- 05
Perfectly invisible finish
Visible mending values an honest repair; colour matching is a separate advanced skill. In visible mending, this is worth checking deliberately rather than trying to correct it after the next stage.
Upgrade path
Upgrade the repeated limitation
Choose a later tool or technique because a repeated repair needs it, not because the first kit contains space for it.
Practice darn
About £5–£15Needle, matching yarn and household support
Learn woven tension.Useful sock repair
About £10–£30Mushroom and suitable darning wool
Restore shape and comfort.Decorative garment patch
About £20–£60Patch cloth, sashiko thread and marking
Combine strength and design.Specialist restoration
About £60–£200+Species-specific fibres and tuition
Work on fine or valuable textiles.Safety & care
Know when a garment should not be home-mended
A repair can alter fit, stretch, waterproofing, fire performance and load paths. Cosmetic success is not evidence that protective function remains.
- Store needles in a case and use a support or thimble so the point cannot enter the holding hand. Follow the current instructions supplied with the exact material, tool or living specimen.
- Do not home-mend PPE, climbing equipment, motorcycle protection or other safety-critical textiles unless the manufacturer explicitly permits the method. Follow the current instructions supplied with the exact material, tool or living specimen.
- Wash and dry the item before assessing damage, following its care label. Follow the current instructions supplied with the exact material, tool or living specimen.
- Use ventilation and follow instructions if fusible patches, glues or solvents enter a later repair. Follow the current instructions supplied with the exact material, tool or living specimen.
- Stop if the repair creates numbness, pressure or abrasion when the garment is worn. Follow the current instructions supplied with the exact material, tool or living specimen.
Outside help
When outside help earns its place
A well-made tutorial is enough for the first controlled result. In-person help becomes worthwhile when knit structure, fine fibres or garment reconstruction becomes the real problem.
Use one complete method from start to finish instead of combining several creators’ measurements.
Ask whether materials, preparation, troubleshooting and a flexible secure repair are included.
Representative UK learning options checked 28 August 2026; local prices, access, materials and tutor support vary.
Sources
Where the guidance came from
The method is grounded in specialist and public guidance, then checked against recurring beginner questions and the exact products linked here.
-
01
Victoria and Albert Museum · visible mending
Museum guidance and context for decorative repair.
Open source -
02
Love Your Clothes · repair
UK clothing-care and repair guidance.
Open source -
03
Textile Conservation Centre Foundation
Conservation context for valuable and historic textiles.
Open source -
04
Repair What You Wear
Practical garment repair techniques and teaching resources.
Open source -
05
Reddit · r/Visiblemending
Community evidence on durable stitches, thread and common failures.
Open source -
06
Amazon UK · Visible Mending and Sashiko Repair Kit
Exact product catalogue page or ISBN used for the recommendation; current price, seller, specification and availability should be confirmed.
Open source -
07
Amazon UK · Wooden Darning Mushroom with Needles
Exact product catalogue page or ISBN used for the recommendation; current price, seller, specification and availability should be confirmed.
Open source -
08
Amazon UK · 14-Hook Small Darning Loom
Exact product catalogue page or ISBN used for the recommendation; current price, seller, specification and availability should be confirmed.
Open source
Guide information and links checked 28 August 2026.