Beginner’s guide · Make & create
Fit one clean leaf,
before building a whole picture.
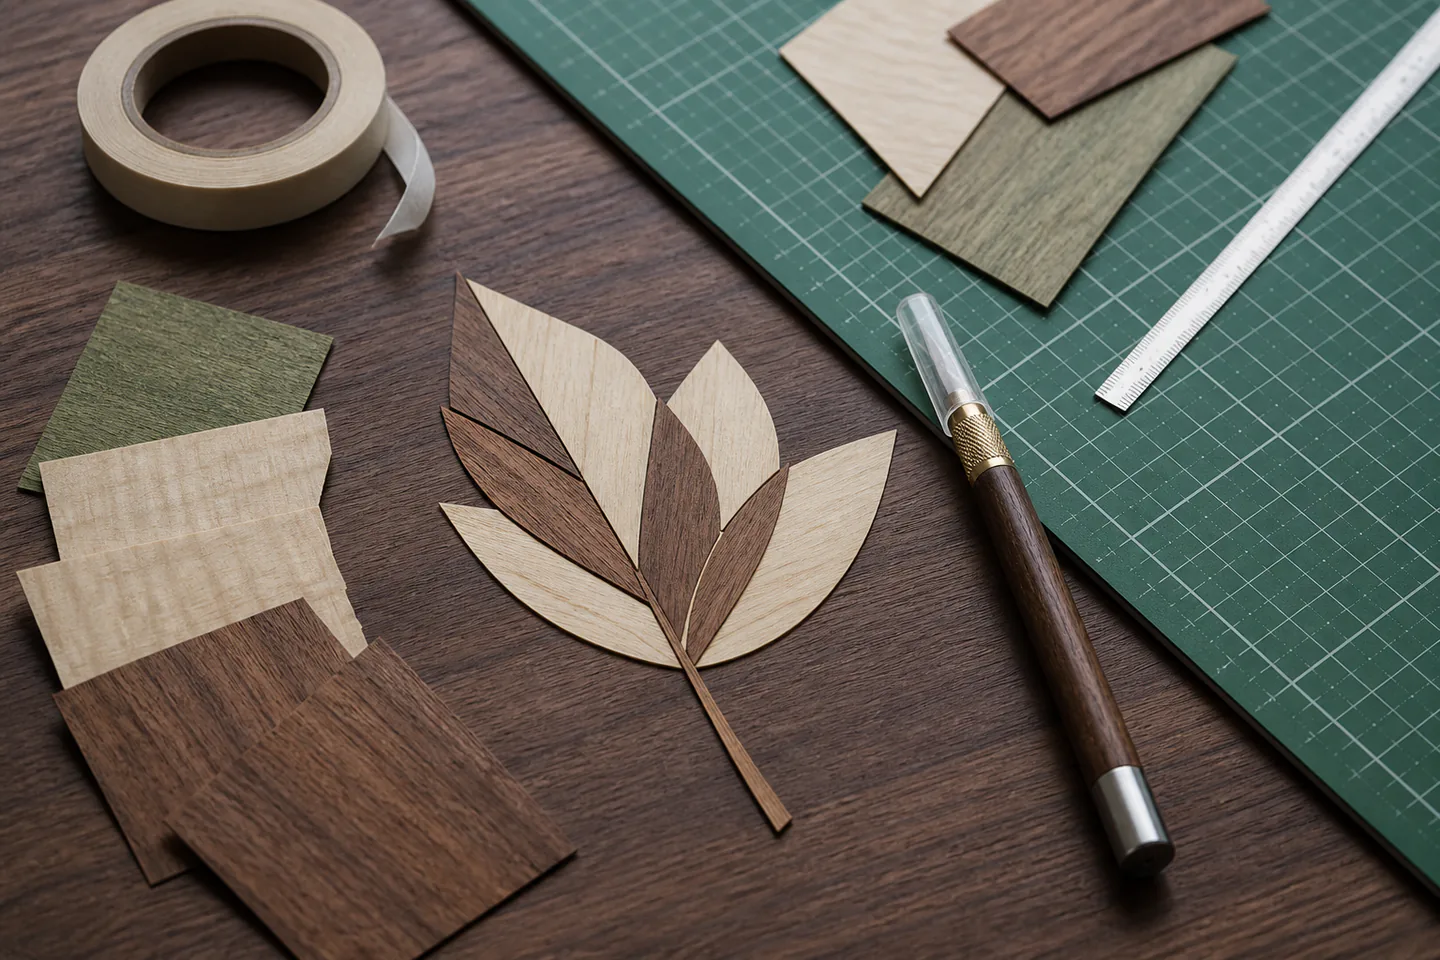
Two contrasting veneers, a sharp knife, a cutting mat and the window method can produce a complete first panel. Multiple light cuts beat force.
Quick answer
Cut a two-colour window test piece
Tape a simple leaf drawing over a plain veneer, cut the window with several light vertical passes, position a contrasting veneer behind it for grain direction, cut the insert against the window edge, then tape the fitted pieces before pressing them to a stable substrate.
- 01
Marquetry builds an image from veneer; inlay usually inserts material into a recessed solid surface. Keep the first attempt narrow enough that preparation, the main action and the result can all be reviewed together.
- 02
Keep the knife upright so mating edges remain square. Keep the first attempt narrow enough that preparation, the main action and the result can all be reviewed together.
- 03
Short repeated cuts are safer and cleaner than trying to cut through in one pass. Keep the first attempt narrow enough that preparation, the main action and the result can all be reviewed together.
- 04
Veneer moves with moisture, so a balanced backing and even press matter. Keep the first attempt narrow enough that preparation, the main action and the result can all be reviewed together.
What to expect
The gap begins at the knife angle
Thin veneer makes tiny inaccuracies obvious after glue and finish deepen the contrast.
Grain
The knife can follow long fibres away from the intended line. For marquetry, note what actually happened rather than relying on memory; that turns the next attempt into a controlled change instead of another guess.
Window
Cutting the opening first lets the insert grain be positioned visually. For marquetry, note what actually happened rather than relying on memory; that turns the next attempt into a controlled change instead of another guess.
Tape
Temporary assembly must hold joints without pulling fibres from the face. For marquetry, note what actually happened rather than relying on memory; that turns the next attempt into a controlled change instead of another guess.
Pressing
Uneven pressure or too much glue can telegraph ridges and bubbles. For marquetry, note what actually happened rather than relying on memory; that turns the next attempt into a controlled change instead of another guess.
Core method
Cut and fit before glue enters the project
Prepare a test packet
Choose two flat veneers, mark the clean face and tape the drawing as a hinge. For marquetry, note what actually happened rather than relying on memory; that turns the next attempt into a controlled change instead of another guess.
Cut the window
Turn the work often and extend each line in short controlled passes. For marquetry, note what actually happened rather than relying on memory; that turns the next attempt into a controlled change instead of another guess.
Choose and cut the insert
Slide the contrasting veneer until its grain supports the design, then cut against the opening. For marquetry, note what actually happened rather than relying on memory; that turns the next attempt into a controlled change instead of another guess.
Assemble and press
Tape the fit, glue the substrate rather than flooding veneer joints and press between flat cauls. For marquetry, note what actually happened rather than relying on memory; that turns the next attempt into a controlled change instead of another guess.
Useful products
Products with a clear job in the setup
The OLFA knife and Fiskars mat are the cutting system; the fine-tip glue is useful for small paper mock-ups but final veneer pressing should use an adhesive and method chosen for the substrate.
OLFA AK-1 Art Knife with 25 Blades
A sharp, controllable blade makes repeated light passes cleaner than forcing a dull one.
Fiskars A3 Self-Healing Cutting Mat
The larger area keeps small patterns and materials flat while cutting.
Bearly Art Precision Craft Glue Mini, 2 fl oz
The fine tips reduce squeeze-out on small parts and paper work.
First project
Make a two-tone leaf coaster panel
The leaf has curves, a point and grain direction but remains small enough to recut.
- 01
Flatten and label
Identify face, grain and clean side on both veneers. For marquetry, note what actually happened rather than relying on memory; that turns the next attempt into a controlled change instead of another guess.
- 02
Transfer the outline
Hinge the drawing so registration is not lost. For marquetry, note what actually happened rather than relying on memory; that turns the next attempt into a controlled change instead of another guess.
- 03
Cut the background
Use short strokes and rotate the mat, not the wrist. For marquetry, note what actually happened rather than relying on memory; that turns the next attempt into a controlled change instead of another guess.
- 04
Fit the insert
Trim only the high point rather than enlarging the whole gap. For marquetry, note what actually happened rather than relying on memory; that turns the next attempt into a controlled change instead of another guess.
- 05
Tape, press and inspect
Use a flat substrate and check for bubbles only after full cure. For marquetry, note what actually happened rather than relying on memory; that turns the next attempt into a controlled change instead of another guess.
What can wait
What can wait until the first result
Extra equipment becomes useful only when the basic method has exposed a specific, repeated limitation.
- 01
Sand shading
It adds heat and colour control before basic joints are reliable. For marquetry, note what actually happened rather than relying on memory; that turns the next attempt into a controlled change instead of another guess.
- 02
A fretsaw packet
Multiple-layer cutting introduces bevel and blade control. For marquetry, note what actually happened rather than relying on memory; that turns the next attempt into a controlled change instead of another guess.
- 03
Large figured veneer
Expensive material makes recutting harder to accept. For marquetry, note what actually happened rather than relying on memory; that turns the next attempt into a controlled change instead of another guess.
- 04
A furniture door
Large balanced veneering needs better pressing and substrate control. For marquetry, note what actually happened rather than relying on memory; that turns the next attempt into a controlled change instead of another guess.
Upgrade path
Upgrade the repeated limitation
Improve cutting repeatability and pressing before expanding the image.
Window test
£15–£40Knife, mat and two veneers
Learn fit and grain direction.Small panel
£30–£90Tape, substrate, adhesive and cauls
Learn pressing and flattening.Fret-sawn packet
£80–£300Fretsaw, donkey and stacked veneers
Cut multiple contrasting parts.Applied furniture work
VariableVacuum bag or reliable press and balanced construction
Scale panels without bubbles or warp.Safety & care
Control the knife, dust and veneer provenance
The small material scale does not remove deep-cut risk, sensitising dust or responsible sourcing.
- Cut on a stable mat with the free hand outside the projected blade path. Follow current manufacturer, food-safety, access, wildlife or local guidance wherever it applies.
- Replace dull blades safely; never force a cut or leave loose blades on the bench. Follow current manufacturer, food-safety, access, wildlife or local guidance wherever it applies.
- Control sanding dust and identify sensitising or restricted timber species. Follow current manufacturer, food-safety, access, wildlife or local guidance wherever it applies.
- Use adhesives and finishes with the ventilation and precautions on their current labels. Follow current manufacturer, food-safety, access, wildlife or local guidance wherever it applies.
- Choose traceable legal veneer and avoid purchasing material from protected species without documentation. Follow current manufacturer, food-safety, access, wildlife or local guidance wherever it applies.
Outside help
When outside help earns its place
The Marquetry Society’s beginner material is enough for a first window piece; a workshop helps with packet cutting and pressing.
Follow the window-method test piece before adapting a personal pattern.
Ask whether veneer, cutting tools, pressing and a finished panel are included.
Representative UK learning options checked 31 August 2026; local prices, access, materials and tutor support vary.
Sources
Where the guidance came from
Established marquetry organisations and working practitioners support the small window-method panel as the clearest first route.
-
01
The Marquetry Society · Getting started
Window-method beginner test piece and cutting sequence.
Open source -
02
The Marquetry Society · What do I need?
Starter materials and tool context.
Open source -
03
American Marquetry Society · Beginner guide
Detailed window-method technique and material handling.
Open source -
04
Fine Woodworking · Get started in marquetry
Modern knife-cut process and affordable setup.
Open source -
05
Reddit · r/Marquetry
Recurring discussion of gaps, grain and fitting.
Open source -
06
Amazon UK · AK-1 Art Knife with 25 Blades
Exact Amazon UK product page or ISBN used for the recommendation; current price, seller, specification and availability should be confirmed.
Open source -
07
Amazon UK · A3 Self-Healing Cutting Mat
Exact Amazon UK product page or ISBN used for the recommendation; current price, seller, specification and availability should be confirmed.
Open source -
08
Amazon UK · Precision Craft Glue Mini, 2 fl oz
Exact Amazon UK product page or ISBN used for the recommendation; current price, seller, specification and availability should be confirmed.
Open source
Guide information and links checked 31 August 2026.