Beginner’s guide · Make & build
Cutting-board making
Start with one useful result.
A small edge-grain cutting board teaches layout, glue-up and finishing without a large machine. Buy prepared, dry, closed-grain hardwood strips, arrange the grain, clamp a flat panel and finish only with a product suitable for the intended food contact.
Quick answer
Start with a small edge-grain hardwood board from prepared strips
A small edge-grain cutting board teaches layout, glue-up and finishing without a large machine. Buy prepared, dry, closed-grain hardwood strips, arrange the grain, clamp a flat panel and finish only with a product suitable for the intended food contact.
- 01
Prepared dry food-suitable hardwood strips of consistent thickness
- 02
Adhesive whose maker confirms suitability for the use, clamps and a flat protected bench
- 03
Sanding tools and a finish specifically appropriate for a cutting surface
What to expect
What the first attempt is really like
The useful skill here is keeping the glue-up flat and finishing a surface that can be washed. These details matter more than a polished first result.
Wood
Open pores, unstable stock and unknown reclaimed treatments make hygiene and movement harder.
Glue-up
Excess clamp pressure can bow a panel; dry-clamp first to see the alignment.
Finish
A finish must be fully cured or applied as its maker instructs before food use.
The method
The method worth learning
Prepared timber is the practical home route
Ask a timber supplier for dry untreated food-suitable hardwood strips of consistent thickness, with straight square edges ready for gluing. Maple or beech from a known source are sensible examples. Reject unknown reclaimed wood, pressure treatments, pronounced cracks and stock whose species or previous use is uncertain. Milling rough timber accurately needs tools and skills that buying prepared strips can avoid.
Design for your tools and sink
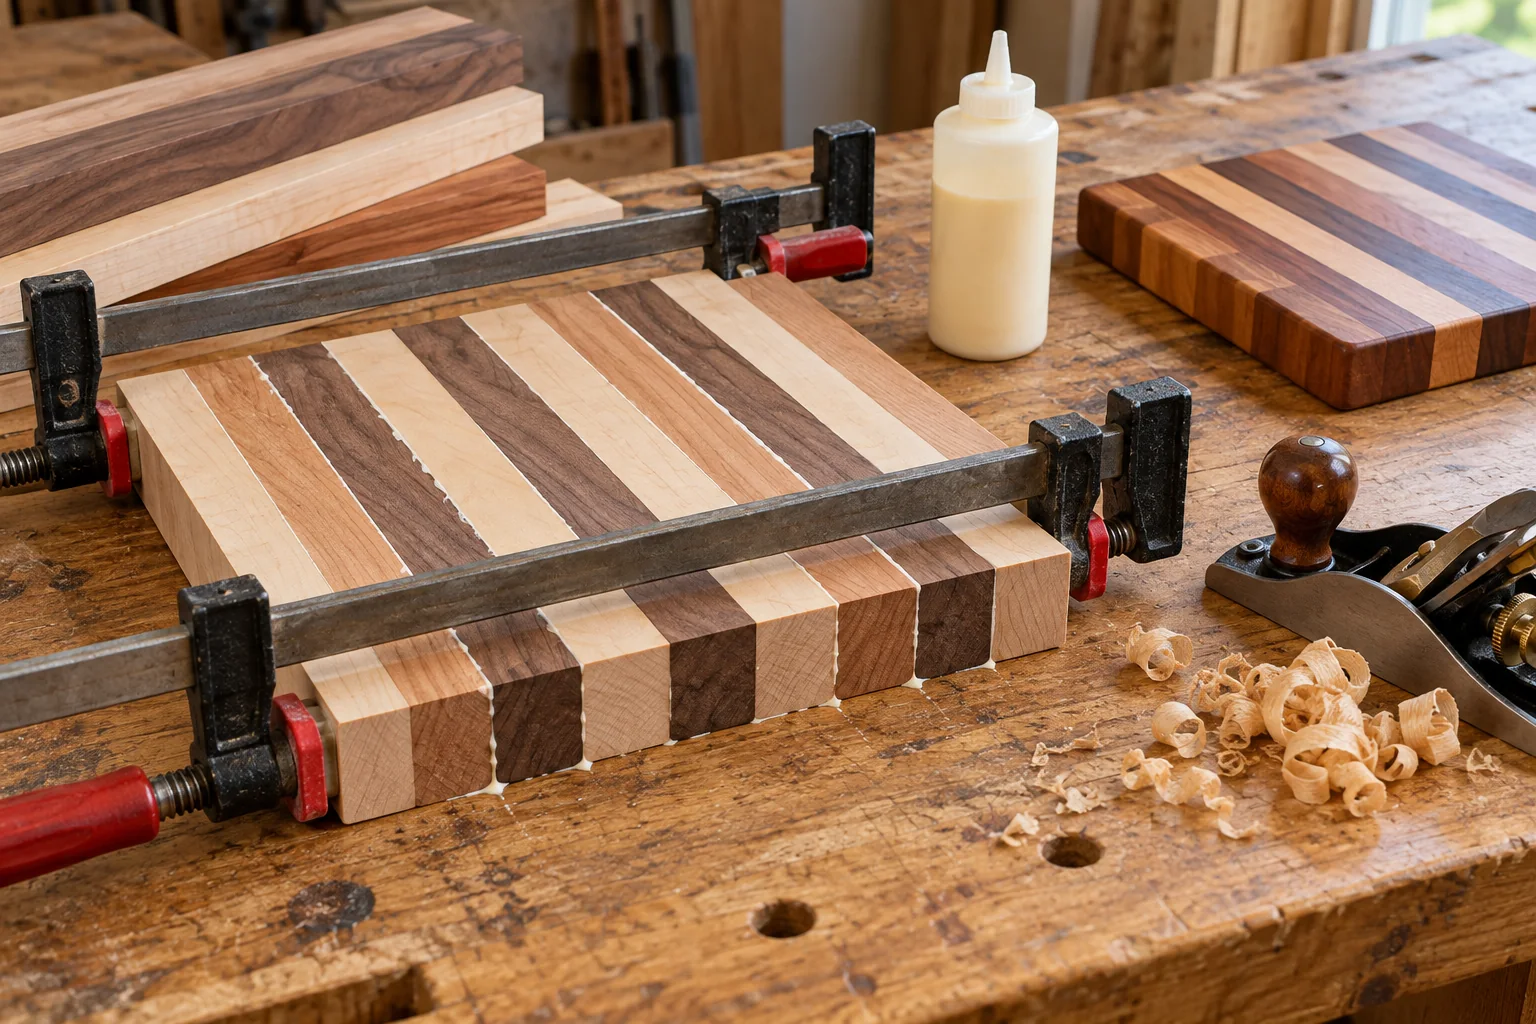
Plan a small rectangular board that can be clamped with the equipment you own and washed comfortably. Keep strip grain directions compatible with later flattening. Dry-fit without adhesive on a flat protected surface and inspect each joint in good light. Edges should meet without using extreme clamp force to close gaps. Mark the order and faces so the layout can be reproduced during glue-up.
Make the joints before applying the finish
Use an adhesive whose maker confirms suitability for indirect food contact on boards and follow its temperature, working-time and clamping instructions. Apply evenly to clean mating edges, align the strips and tighten suitable clamps progressively. Alternate clamp positions when helpful to keep the panel flat, and use protected straight cauls if you understand their setup. Do not oil the wood before gluing. Allow full cure before flattening or stressing the joints; a short initial clamp time is not the same as readiness for use.
Flatten, sand and keep the finish simple
Check both faces on a reliable flat reference and remove glue residue without creating hollows. If the glue-up is badly stepped, a competent supplier can flatten it more cheaply than buying a machine for one board. Sand progressively with a flat block, following the grain, and ease sharp outer edges without rounding the cutting surface. Remove dust. Apply a verified food-grade mineral oil or another finish explicitly suitable for this use, following its own instructions. Treat both faces and edges, wipe excess and allow the specified preparation time before food contact. Mineral oil is a renewable treatment, not a hard curing waterproof coating.
Useful products
Equipment with a clear job
Start with suitable equipment you already own. These exact UK listings are useful examples when a missing tool limits the first project; prices and availability were checked on 2 October 2026 and delivery may add to the cost.
Titebond III Ultimate Wood Glue, 237 ml
A small bottle gives enough working material for a modest well-fitted edge-grain glue-up.
Chestnut Products Food Safe Finish, 500 ml
A clearly identified food-grade mineral oil provides a simple first finish and later renewal.
What can wait
What can wait
Keep the first project small and learn what the equipment is doing before adding more.
- 01
End-grain patterns
They add cutting, alignment and flattening demands. An edge-grain panel is a meaningful first board.
- 02
A planer for one project
Prepared stock and an occasional supplier flattening service can avoid a large machine purchase.
- 03
Decorative varnish or unknown oils
The finish must suit repeated knife and food contact. Kitchen cooking oils and generic coatings are not automatic substitutes.
First project
First project: A small edge-grain hardwood board from prepared strips
Start with a small edge-grain hardwood board from prepared strips. Use the listed equipment, take notes on the result and repeat the small project before expanding it.
- 01
Plan the board
Choose a small size, align grain direction and dry-fit prepared strips on a flat surface.
- 02
Glue and clamp
Apply the chosen adhesive to clean edges, clamp evenly and follow its full cure instruction.
- 03
Flatten and smooth
Remove squeeze-out, bring both faces flat and sand progressively without rounding the main cutting surface.
- 04
Finish and care
Apply a suitable finish as directed, let it cure, then hand-wash and dry the board upright after use.
Troubleshooting
When the first attempt goes wrong
Gaps remain between strips
The edges may not be straight or square. More glue and greater clamp force cannot reliably replace proper joint fit. Correct the prepared edges before another glue-up.
The panel bows or twists
Check stock dryness, clamp arrangement and alignment during the dry run. Avoid forcing an already bowed panel flat and assuming it will stay there after unclamping.
The surface is ridged
Use a flat sanding block for modest differences; deep steps need proper flattening. Soft foam sanding alone can hollow the surface while leaving the ridge.
The board quickly looks dry or feels greasy
Follow the finish’s repeat-application instructions and remove surplus. Hand-wash, never soak or put it in the dishwasher, then dry upright with airflow to both faces. A failing glue joint or deep crack is a hygiene problem to assess, not cover with more oil.
Upgrade path
Where to go after the first result
Repeat the simple route first, then choose the next step that solves a problem you have actually met.
Repeatability
Prepared timber and consumablesA second simple edge-grain board
Improve joint fit and alignment, keeping a note of clamp placement and finish uptake.Preparation
Get a local service quoteSupplier milling or flattening
Adds accurate faces without requiring you to buy and safely operate a machine.Design
Quote tools after choosing a processMore involved grain patterns
End grain and shaped details need a complete safe cutting and flattening plan. Do not run end-grain glue-ups through an unsuitable planer.Safety & care
Safety and practical limits
Use the current instructions for the exact food, material or equipment in front of you.
- Keep clamps and cutting tools controlled; wear eye and dust protection appropriate to the operation.
- Use untreated, known hardwood and follow adhesive and finish instructions for food contact and cure time.
- Hand-wash and dry the completed board; discard a board with failing glue joints or deep unsanitary cracks.
Learning & help
Learning at home and optional help
A class is optional for this first route. Use the free guidance before paying for help.
Woodcraft and Rockler’s free board guides show the sequence. Titebond’s maker guidance determines adhesive use; the finish instructions determine application, and FSA advice governs kitchen hygiene.
A timber supplier can prepare strips or quote for flattening. An optional woodworking class helps with machinery if later projects require it. Ask for the exact service, timber specification and current price; hand-tool glue-up from prepared stock does not need a class.
Learning sources checked 2 October 2026. No unverified class fee or booking availability is quoted.
Sources
Where the guidance came from
Food and wildlife authorities, exact maker instructions, specialist guidance, practitioner observations and UK product listings support the route above. Community accounts inform practical expectations; they do not establish food safety, wildlife rules or current prices.
-
01
Woodcraft · Making cutting boards
Beginner edge-grain board process
Open source -
02
Rockler · DIY cutting board plans
Glue-up, sanding and finishing sequence
Open source -
03
Woodcraft · Food-safer finishes
Food-contact finish and cure considerations
Open source -
04
Rockler · Cutting-board glue
Choosing glue for a cutting board
Open source -
05
Food Standards Agency · Chopping board hygiene
Cross-contamination and washing between tasks
Open source -
06
r/woodworking · Mineral oil and board care
Several makers discuss oil uptake, excess removal and maintenance. The first route avoids heated oil and homemade wax mixtures.
Open source -
07
Woodworking Stack Exchange · Planing a cutting board
Workholding, blade setting and grain-direction troubleshooting in use.
Open source -
08
Titebond · Wood glue FAQs
Maker guidance on indirect food contact, clamping and cure; water resistance is not dishwasher approval.
Open source -
09
Chestnut Products · Food Safe Finish safety data
Maker identification of the food-grade mineral-oil finish. Use the supplied application instructions.
Open source -
10
Titebond · III Ultimate Wood Glue, 237 ml
Exact selected model, price and availability used for the recommendation; recheck delivery and checkout.
Open source -
11
Chestnut Products · Food Safe Finish, 500 ml
Exact selected model, price and availability used for the recommendation; recheck delivery and checkout.
Open source
Guide information and links checked 2 October 2026.