Beginner’s guide · Make & create
Place one colour,
keep the canvas clean.
Begin with a small round-drill kit whose symbols are easy to read. Work in sections, label every packet and keep the protective film over adhesive you are not using.
Quick answer
Choose a small round-drill kit with strong colour blocks
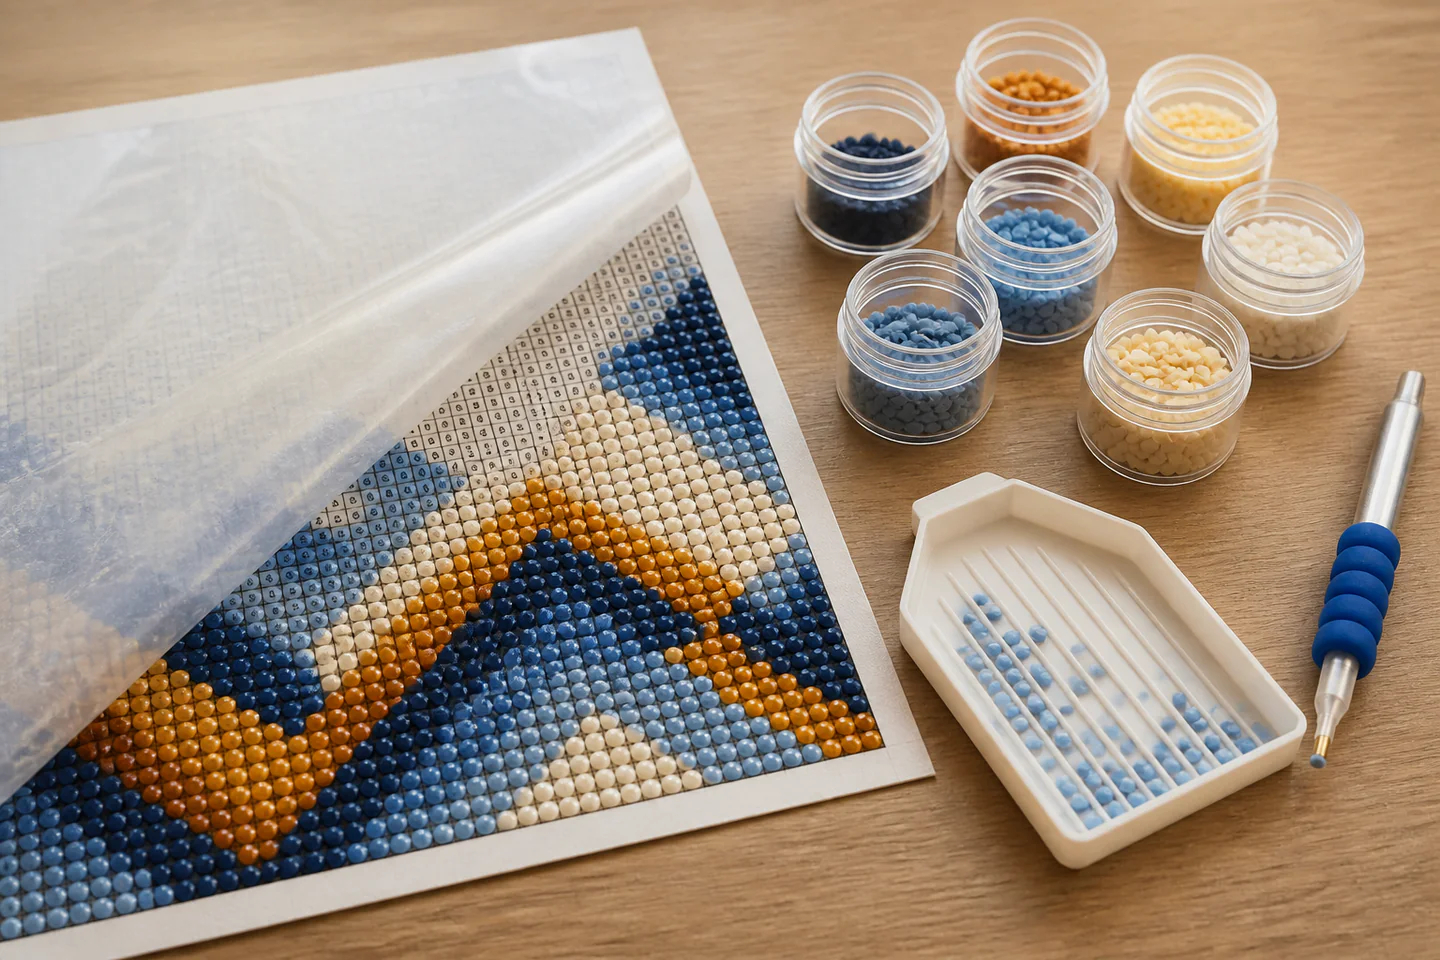
Open the kit on a clean table, compare every drill packet with the legend and label storage before pouring anything. Flatten the canvas under books without crushing it, peel back only a palm-sized section of protective film and begin with one frequent colour. Shake a small number of drills in the tray, load the stylus with wax and place each piece lightly on its symbol. Finish and inspect the section before revealing more adhesive, then store the canvas flat and covered between sessions.
- 01
A larger canvas can show more detail, but it also takes longer and exposes more adhesive. A small image with distinct colour regions is a better first commitment.
- 02
Round drills are usually easier to place and more forgiving of alignment gaps than square drills. Square pieces can wait until straight rows are enjoyable.
- 03
The printed legend is the authority for that kit. Similar symbols and colours need labelled containers and deliberate checking.
- 04
Protective film keeps dust, hair and skin oils off the adhesive. Reveal only the area being worked and never replace it upside down if one side is non-stick.
- 05
A stylus and tray supplied with the kit are enough. A light pad helps only when symbols are genuinely hard to distinguish.
What to expect
The relaxing rhythm depends on setup
Most frustration comes from lost labels, mixed drills, exposed adhesive or an image whose detail was too fine for its size. Ten minutes of organisation protects hours of placement.
Canvas
Poured-glue canvases often flatten more easily than double-sided adhesive, but the exact listing should state what is supplied.
Drills
Round pieces leave tiny gaps; square pieces form a mosaic but reveal every alignment error. Both can produce good work.
Symbols
Dark-on-dark or similar characters create mistakes. A light pad, magnifier or printed legend copy can reduce strain.
Wax
Reload only when pickup weakens. Pressing hard can push wax onto the drill and dent the adhesive.
Rows
A single placer teaches spacing. Multi-placers increase speed only after straight lines are already repeatable.
Finish
Many completed canvases need no sealer. Framing under suitable protection can preserve the work without changing surface sparkle.
Core method
Protect the key, adhesive and unfinished work
Audit the complete kit
Check the canvas, legend, packet codes, drill colours, tray, stylus and wax before starting. Photograph the packet labels and legend. Contact the seller about missing material while the order remains traceable rather than borrowing a vaguely similar colour.
Create a labelled flow
Put each packet into a labelled pot or resealable bag one colour at a time. Keep only the active colour open, place a large tray beneath the work and use a shallow drill tray. Arrange the canvas so wrists can rest without touching exposed adhesive.
Work a small section
Cut or fold back a small area of protective cover without damaging the canvas. Start at an edge that suits the dominant hand. Place round drills in straight visual rows with a single placer and correct errors with tweezers before pressing anything firmly.
Close and inspect
Return unused drills to the correct labelled container, cover the adhesive and view the section from both working distance and across the room. Use a roller only gently and after checking misplaced pieces. Store flat or loosely rolled in the direction recommended by the supplier.
Useful products
Products with a clear job in the setup
The small Leisure Arts bookmark set is a finishable first route and includes the essential pen, tray and wax. The ARTDOT light pad is a genuine accessibility upgrade for low-contrast symbols, while the labelled 64-jar case solves drill mixing across larger projects. Neither accessory is necessary before a complete kit has been checked and one section placed.
Leisure Arts Sparkle Bookmarks Diamond Painting Kit
Clear boundaries and small surfaces teach pickup, symbol matching and storage while a result remains achievable.
ARTDOT A4 LED Light Pad for Diamond Painting
A4 fits under many small working sections and adjustable brightness can reduce guessing between similar symbols.
ARTDOT 64-Jar Diamond Art Storage Case
Individual jars reduce spills and make one active colour easier to control than dozens of open packets.
First project
Complete one bookmark from top to bottom
The narrow format teaches straight rows, colour changes and closure without leaving a large exposed canvas between sessions.
- 01
Inventory the kit
Match every packet to the legend and photograph the labels.
- 02
Label containers
Transfer one colour at a time and keep the original code visible.
- 03
Reveal a short band
Expose only the section that can be completed in the session.
- 04
Place with one tip
Use light pressure and correct alignment while adhesive remains open.
- 05
Return every drill
Pour leftovers back into the correct labelled container before changing colour.
- 06
Cover and inspect
Replace the protective film, check gaps and store the piece flat and clean.
What can wait
What can wait until the first result
Speed tools and enormous canvases are satisfying only when the basic organisation routine already feels effortless.
- 01
A 100 cm canvas
Time, storage and symbol repetition can turn a first relaxing project into months of obligation.
- 02
Square drills
Their edge alignment is rewarding but less forgiving than round drills for the first rows.
- 03
Multi-placers
They amplify spacing errors; a single placer establishes the grid first.
- 04
Sealer
Some formulas reduce sparkle, stiffen the canvas or are unnecessary under a frame.
- 05
Bulk mystery kits
Licensing, chart quality, drill quantity and adhesive can be difficult to assess from copied listing images.
Upgrade path
Upgrade the repeated limitation
Upgrade the friction that appears after several clean sections—not the number of accessories on a desk.
Small kit
About £10–£30Complete round-drill project
Learn symbols, wax and clean storage.Comfort setup
About £25–£65Light pad, better pen and jars
Reduce visual and hand strain.Large canvas
About £40–£120Mounted work surface and section covers
Preserve alignment over many sessions.Square-drill art
About £45–£150+Quality licensed kit and straightener
Create a dense mosaic finish.Safety & care
Tiny resin pieces need containment and sensible posture
Diamond painting is low-impact craft, but drills are choking hazards and hours of fixed close work can strain eyes, neck, hands and wrists.
- Keep drills, wax, blades and small accessories away from children and pets and account for spills immediately.
- Use scissors or a craft knife only on a protected surface and away from the canvas, body and cables.
- Work with balanced task lighting, avoid a bright light pad in a dark room and take regular distance-vision and posture breaks.
- Check adhesive, sealer and frame-product labels and ventilate where required; do not use craft sealers on objects intended for food contact.
- Respect artists and licensing: choose sellers who identify the artwork and avoid listings that appear to copy watermarked or recognisable art without permission.
Outside help
When outside help earns its place
A complete kit with pictorial instructions needs no class. Community groups become useful for comparing licensed suppliers, square-drill alignment, framing and accessible work setups.
Prefer demonstrations using the same drill shape and adhesive system.
Ask about lighting, storage, shared tools and whether a small project is provided.
Representative UK learning options checked 18 August 2026; local prices, access, materials and tutor support vary.
Sources
Where the guidance came from
Established kit makers define the intended workflow and component system. Experienced communities add evidence about image size, drill shapes, storage, ergonomics and supplier consistency.
-
01
Diamond Dotz · How it works
Manufacturer explanation of canvas, stylus, wax and drill placement.
Open source -
02
Diamond Dotz · Starter kit
Current beginner tool and material context.
Open source -
03
ARTDOT · Diamond painting guides
Specialist organisation, tools and technique articles.
Open source -
04
Reddit · r/diamondpainting beginner advice
Community discussion of manageable first kits and working methods.
Open source -
05
Reddit · r/diamondpainting
Ongoing evidence on kits, drills, storage, alignment and finishing.
Open source -
06
Amazon UK · Sparkle Bookmarks Diamond Painting Kit
Exact product catalogue page or ISBN used for the recommendation; current price, seller, specification and availability should be confirmed.
Open source -
07
Amazon UK · A4 LED Light Pad for Diamond Painting
Exact product catalogue page or ISBN used for the recommendation; current price, seller, specification and availability should be confirmed.
Open source -
08
Amazon UK · 64-Jar Diamond Art Storage Case
Exact product catalogue page or ISBN used for the recommendation; current price, seller, specification and availability should be confirmed.
Open source
Guide information and links checked 18 August 2026.