Beginner’s guide · Make & create
Build an image
one weft pass at a time.
A small frame loom, strong warp and a few yarn colours are enough to learn tapestry weaving. Begin with stripes, shapes and clean joins before planning a large wall hanging.
Quick answer
Warp a small frame and weave three shapes
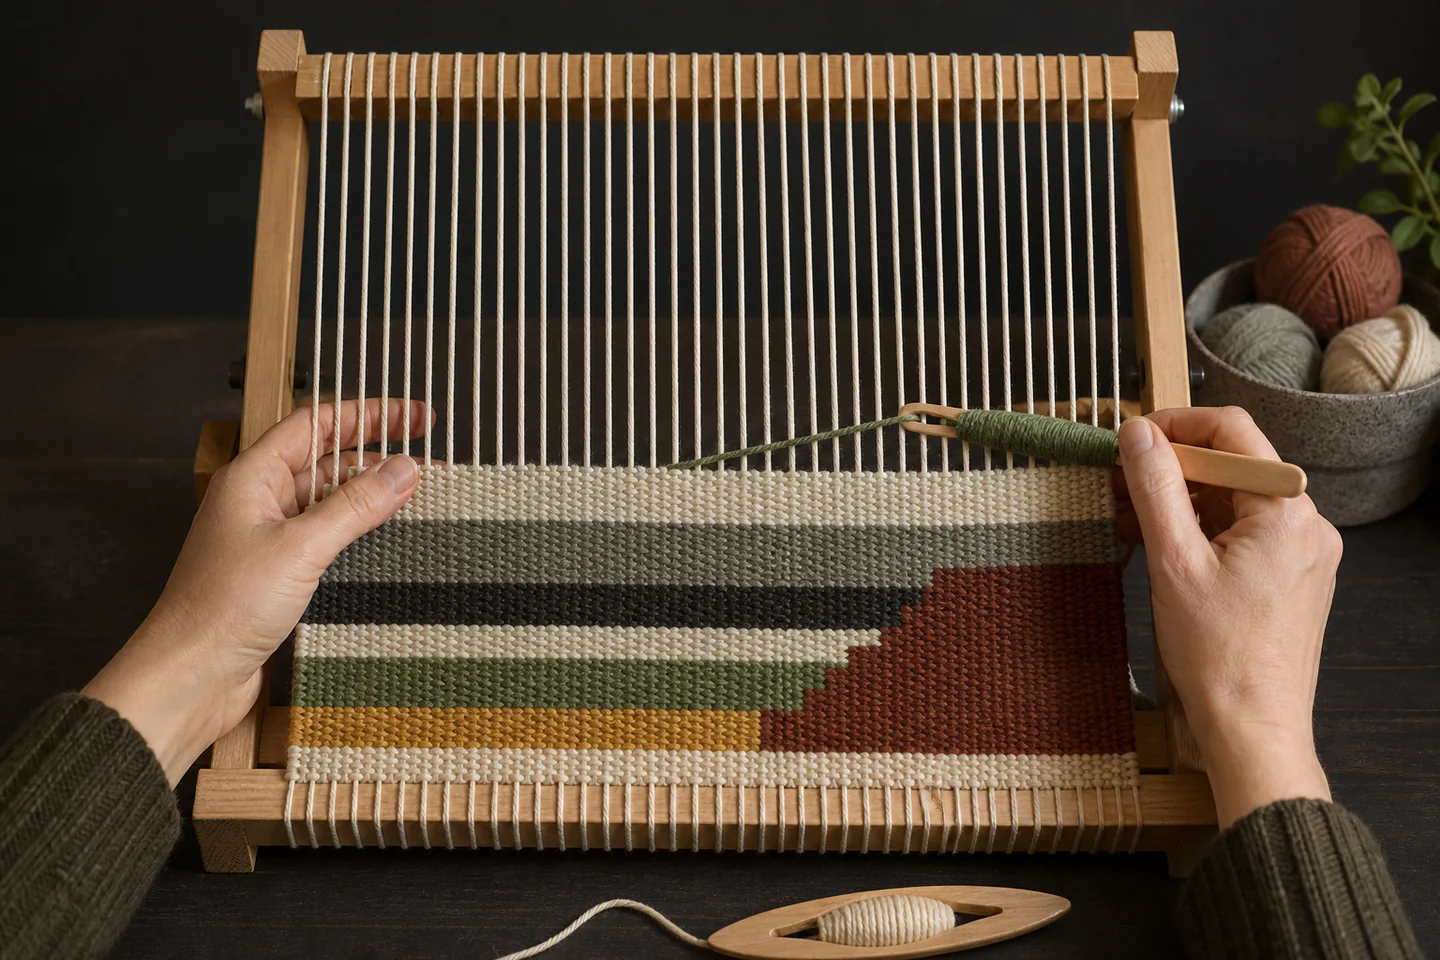
Use a rigid frame loom around 24 × 28 cm, a non-stretch cotton warp and medium yarn in three contrasting colours. Weave a header, plain bands and one stepped shape before attempting curves or pictorial detail.
- 01
Space warp threads evenly and tie them with similar tension before weaving begins. Note the material, setting or measurement used so the result can be repeated or changed for a reason.
- 02
Lay each weft pass in a gentle arc so it travels over and under without drawing the sides inward. Note the material, setting or measurement used so the result can be repeated or changed for a reason.
- 03
Beat little and often rather than crushing a loose row after several passes. Note the material, setting or measurement used so the result can be repeated or changed for a reason.
- 04
Choose one colour-join method and repeat it along a boundary before judging the result. Note the material, setting or measurement used so the result can be repeated or changed for a reason.
- 05
Measure the weaving width at intervals and correct draw-in while the area is still accessible. Note the material, setting or measurement used so the result can be repeated or changed for a reason.
What to expect
The loom is simple; the edges reveal everything
Tapestry weaving is approachable because the structure is visible, yet tension changes accumulate across every row.
Warp preparation
Uneven warp tension causes ridges and irregular spacing. Ten extra minutes at setup saves repeated correction later. For tapestry weaving, check this deliberately while the work is still easy to alter; correcting it after the next stage usually costs more time or materials.
Draw-in
Weft that travels straight across pulls the outer warps inward. Bubbling or arcing the weft supplies the necessary path length. For tapestry weaving, check this deliberately while the work is still easy to alter; correcting it after the next stage usually costs more time or materials.
Colour joins
Slits, interlocks and shared warps create different boundaries. The right choice depends on design and intended strength. For tapestry weaving, check this deliberately while the work is still easy to alter; correcting it after the next stage usually costs more time or materials.
Finishing
A panel must be secured before it leaves the loom. Header rows, knots or hem treatment are part of the structure, not decoration. For tapestry weaving, check this deliberately while the work is still easy to alter; correcting it after the next stage usually costs more time or materials.
Core method
Control warp, weft and boundary separately
Warp evenly
Follow the loom spacing, keep a consistent path around the frame and test that adjacent warps feel similarly firm rather than overtight. For tapestry weaving, check this deliberately while the work is still easy to alter; correcting it after the next stage usually costs more time or materials.
Create a stable header
Use waste yarn or a few rows of twining and plain weave to spread the warp and establish a straight baseline. For tapestry weaving, check this deliberately while the work is still easy to alter; correcting it after the next stage usually costs more time or materials.
Build colour blocks
Weave short sections with butterflies or small yarn bundles, beating each pass and checking the edge after every few rows. For tapestry weaving, check this deliberately while the work is still easy to alter; correcting it after the next stage usually costs more time or materials.
Finish in sequence
Secure the top, release tension gradually, then deal with warp ends according to the planned hanging or mounting method. For tapestry weaving, check this deliberately while the work is still easy to alter; correcting it after the next stage usually costs more time or materials.
Useful products
Products with a clear job in the setup
A small frame is enough for the first panel; the useful difference between these options is working size, not a promise of instant complexity.
Homewit 24 × 28 cm Wooden Weaving Loom Kit
The modest width keeps tension problems visible and the first panel finishable.
JMIATRY 40 × 30 cm Frame Loom Kit
It gives shapes space without moving immediately to a large floor or specialist tapestry loom.
Willowdale 64 × 49 cm Weaving Loom with Stand
The stand and size matter only after basic edges and finishing are understood.
First project
Weave a panel with stripes and one stepped block
A simple geometric sample exposes every foundational skill without requiring a detailed cartoon.
- 01
Plan the dimensions
Choose a narrow rectangle and mark the intended top and bottom on the warp so the project cannot expand indefinitely. For tapestry weaving, check this deliberately while the work is still easy to alter; correcting it after the next stage usually costs more time or materials.
- 02
Warp and header
Tension the frame evenly, insert a temporary spacer if directed and weave a stable header across the full width. For tapestry weaving, check this deliberately while the work is still easy to alter; correcting it after the next stage usually costs more time or materials.
- 03
Weave plain bands
Use two colours for horizontal stripes, arcing each pass and measuring the width to catch draw-in. For tapestry weaving, check this deliberately while the work is still easy to alter; correcting it after the next stage usually costs more time or materials.
- 04
Add a shape
Build a third-colour rectangle or triangle in stepped rows, using one chosen join where colours meet. For tapestry weaving, check this deliberately while the work is still easy to alter; correcting it after the next stage usually costs more time or materials.
- 05
Secure and release
Finish the final rows, secure ends and remove the panel gradually before trimming or mounting. For tapestry weaving, check this deliberately while the work is still easy to alter; correcting it after the next stage usually costs more time or materials.
What can wait
What can wait until the first result
The first panel needs consistent tension and a clear end point, not a giant yarn stash or complex loom.
- 01
Large floor loom
Tapestry can be learned on a frame; floor-loom mechanisms solve different production needs and require space. For tapestry weaving, check this deliberately while the work is still easy to alter; correcting it after the next stage usually costs more time or materials.
- 02
Expensive art yarn
Use predictable medium yarn while learning. Highly textured fibres make beat and coverage harder to read. For tapestry weaving, check this deliberately while the work is still easy to alter; correcting it after the next stage usually costs more time or materials.
- 03
Detailed portrait cartoon
Curves, blending and fine outlining become much easier after straight edges and colour joins work reliably. For tapestry weaving, check this deliberately while the work is still easy to alter; correcting it after the next stage usually costs more time or materials.
Upgrade path
Upgrade the repeated limitation
Choose the next tool only after identifying whether size, ergonomics or design detail is holding the work back.
Try it
£20–£55Small frame loom, cotton warp and three yarn colours
Warping, draw-in, beating and finishing become visible.Improve materials
£20–£60 extraKnown warp thread, tapestry bobbins and planned yarn palette
Edges and colour areas become more repeatable.Work larger
£60–£180+Sturdier frame, stand and better seating
Longer sessions and larger compositions are practical.Develop imagery
VariableCartoon planning, finer sett and specialist tuition
Curves, hatching, eccentric weft and detailed forms become deliberate.Safety & care
Respect posture and stored tension
Frame weaving is low risk, but awkward reach, sharp tools and tight warp can still cause trouble.
- Set the loom at a height that does not force rounded shoulders or sustained wrist extension. Follow the current instructions supplied with the exact material or tool.
- Store tapestry needles, scissors and bobbins securely between sessions. Follow the current instructions supplied with the exact material or tool.
- Release a tightly warped project gradually and keep fingers clear of stressed frame fittings. Follow the current instructions supplied with the exact material or tool.
- Choose washable, colourfast or archival materials appropriate to the final use and follow their care instructions. Follow the current instructions supplied with the exact material or tool.
Outside help
When outside help earns its place
A full frame-loom tutorial is enough for a first panel. A class earns its place when colour joins, curved forms or persistent edge draw-in need live correction.
Use one complete lesson that includes preparation, the working method, troubleshooting and finishing. Avoid combining measurements from several creators on the first attempt.
Ask whether materials, safe tool use, individual correction and a finished take-home result are included before booking.
Representative UK learning options checked 29 August 2026; local prices, access, materials and tutor support vary.
Sources
Where the guidance came from
The method is grounded in specialist and manufacturer guidance, then checked against recurring beginner problems and the exact products linked here.
-
01
American Tapestry Alliance · Education
Specialist tapestry-weaving education and terminology.
Open source -
02
The British Tapestry Group
UK tapestry community and contemporary practice context.
Open source -
03
Victoria and Albert Museum · Tapestries
Museum context for woven image structure and history.
Open source -
04
The Association of Guilds of Weavers, Spinners and Dyers
UK guild network and learning context for weaving.
Open source -
05
Schacht Spindle Company · Weaving resources
Manufacturer learning material for loom setup and weaving fundamentals.
Open source -
06
Amazon UK · 24 × 28 cm Wooden Weaving Loom Kit
Exact product catalogue page or ISBN used for the recommendation; current price, seller, specification and availability should be confirmed.
Open source -
07
Amazon UK · 40 × 30 cm Frame Loom Kit
Exact product catalogue page or ISBN used for the recommendation; current price, seller, specification and availability should be confirmed.
Open source -
08
Amazon UK · 64 × 49 cm Weaving Loom with Stand
Exact product catalogue page or ISBN used for the recommendation; current price, seller, specification and availability should be confirmed.
Open source
Guide information and links checked 29 August 2026.