Beginner's guide · Cook & bake
Measure the syrup.
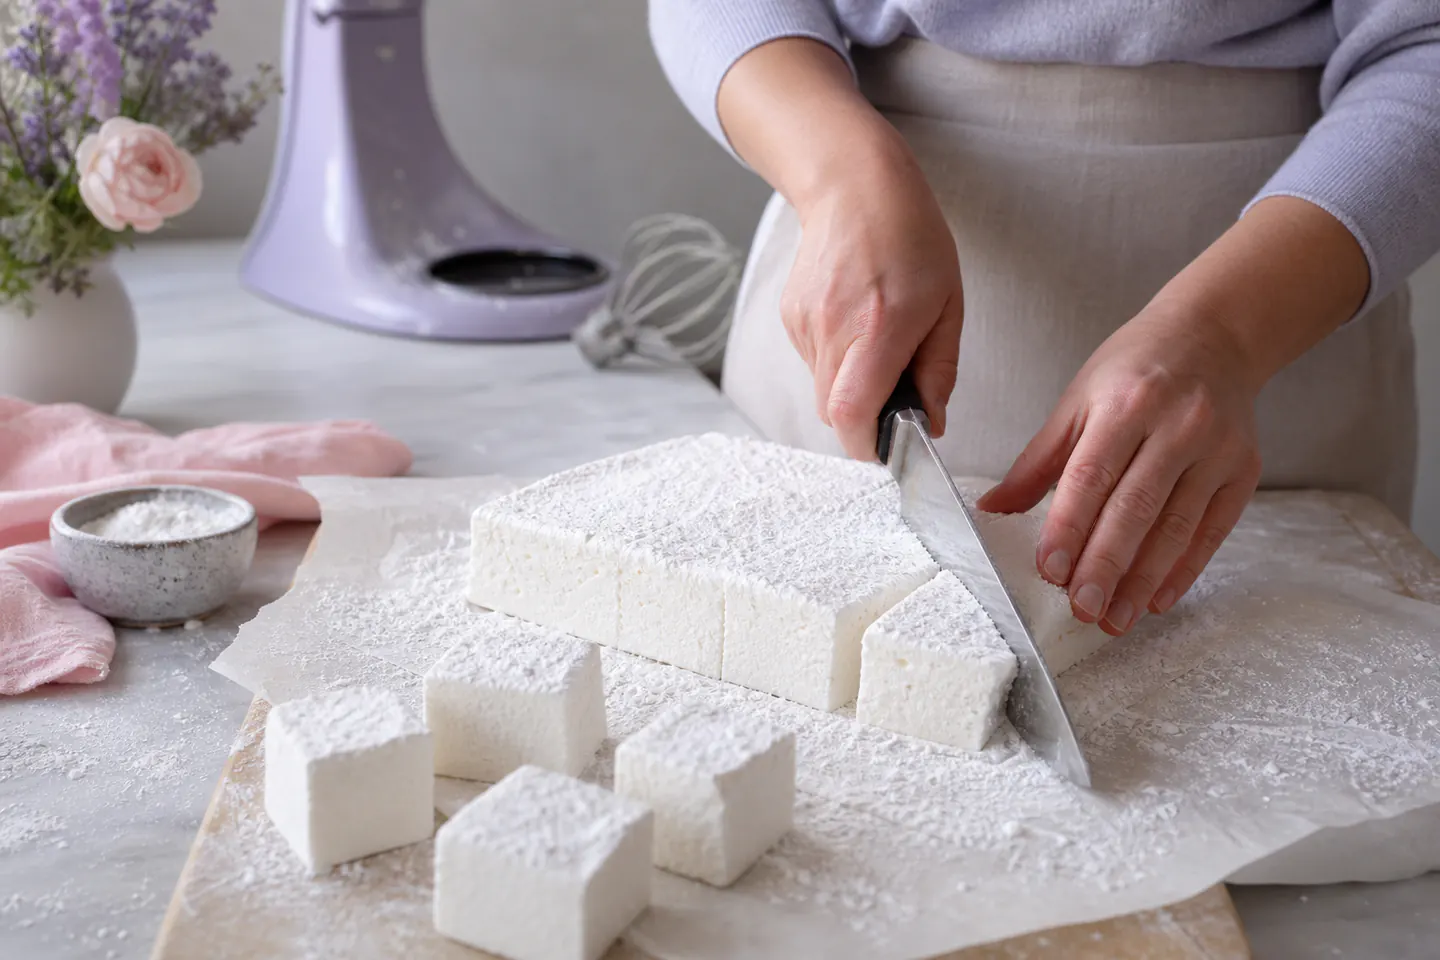
Dust every cut edge.
Start with a tested egg-free vanilla recipe, a reliable sugar thermometer and a mixer setup that leaves the hot pour controlled. Temperature creates the structure; patient whipping and generous dusting make it workable.
Quick answer
Measure the syrup.
Use a complete tested recipe, prepare the tin and every measured ingredient before heating, bloom or dissolve the specified gelatine exactly, then cook the syrup to the recipe's temperature with a clipped sugar thermometer. Pour in a controlled stream while mixing and leave the slab undisturbed to set.
- 01
The selected Good Food egg-free recipe uses gelatine, caster sugar, liquid glucose and vanilla, with syrup cooked to 127°C.
- 02
A tabletop mixer is the safest solo setup because it leaves both hands available for the pan or heatproof jug. A hand mixer needs a competent second adult for the hot pour.
- 03
Do not substitute agar, vegetarian gelling powder or a different gelatine strength one-for-one. Choose a tested recipe written for that setting agent.
- 04
Dust the lined tin, top, work surface, knife and every cut face with the recipe's icing-sugar and cornflour mixture to control sticking.
What to expect
What the first attempts really involve
The first project is useful because it exposes the decisions that shopping pages tend to hide.
Temperature
A few degrees change the remaining water in the syrup and therefore the set. Calibrate or check the thermometer before relying on it.
Timing
Once the syrup reaches temperature, the process moves quickly. An unlined tin or unopened vanilla bottle creates unsafe rushing.
Whipping
The mixture changes from translucent syrup to pale elastic foam. Mixer power, bowl shape and batch size affect the time more than the clock alone.
Sticking
Freshly cut marshmallow exposes tacky interior on every side. Dusting is part of the structure and handling, not only decoration.
Storage
Humidity softens the coating and makes pieces merge. Cool airtight storage with parchment separation preserves the texture better than the fridge.
Prepare the setup
Build a safe one-way workflow before heating sugar
Choose a recipe and mixer arrangement
Use one tested formula from start to finish. The egg-free Good Food method puts dissolved gelatine in a tabletop mixer bowl and brings the syrup to 127°C. If only a hand mixer is available, do not attempt to hold the running mixer and hot vessel alone; one competent adult mixes while another controls the slow pour.
Prepare the landing tin completely
Line or grease the exact tin, mix the dusting powder and coat every contact surface before the hob is lit. Place a heatproof jug, oven gloves, spatula and trivet in their working positions. Keep the cable and mixer controls away from the route of the hot syrup.
Check the thermometer
Confirm the thermometer responds correctly in boiling water, accounting for local boiling point where necessary, and position its sensing area in the syrup without touching the pan base. A handheld instant-read probe shows only moments; a clipped confectionery thermometer displays the approach continuously.
Starter products
Temperature first, setting agent second, mixer only if needed
The Tala thermometer is the most important reusable purchase. The Dr. Oetker leaves are a convenient exact gelatine product, but the leaf count must match a recipe written for that strength. The Kenwood hand mixer is a budget option only with a second adult managing the hot pour; a tabletop mixer already owned is preferable for solo work.
Tala Jam and Confectionery Thermometer
Marshmallow structure depends on the syrup endpoint, and a clipped scale shows the approach more safely than repeated handheld probing.
Dr. Oetker Platinum Grade Leaf Gelatine, 13 g
A named leaf product makes it possible to follow a compatible recipe and record exactly what created the successful texture.
First batch
Make plain egg-free vanilla squares
Follow the exact ingredient quantities and temperatures in the selected tested recipe. This project sequence is a workspace and safety companion, not a substitute formula.
- 01
Read the whole recipe
Confirm gelatine type, mixer requirement, syrup temperature, tin size, setting time and storage before opening ingredients.
- 02
Prepare the tin and dusting
Line or grease as directed, mix icing sugar with cornflour and coat the base and sides so the finished foam has somewhere ready to go.
- 03
Measure every ingredient
Use a scale and separate containers. Open the vanilla, ready the spatula and keep water away from the hot-syrup work area.
- 04
Prepare the gelatine
Soak or dissolve the exact leaves in the exact water and order stated by the recipe. Do not guess from another brand's bloom strength.
- 05
Cook the syrup
Clip the thermometer correctly and heat without leaning over the pan. Remove from heat immediately at the named temperature.
- 06
Transfer with two free hands
Use a tabletop mixer on the stated speed, or a competent second adult on the hand mixer, while the syrup is poured in a slow controlled stream.
- 07
Whip to the recipe's visual cue
Continue until glossy, thick and able to hold shape as described. Add vanilla only at the specified stage.
- 08
Scrape, set and leave alone
Move the foam into the prepared tin with a greased spatula, level it without prolonged handling and respect the full setting time.
- 09
Cut and coat
Turn onto a dusted surface, use a dusted or warmed clean knife as directed and coat all six faces of every square.
Troubleshooting
Texture problems usually trace back to temperature or ratios
A puddle may be undercooked or under-set
Check thermometer position and accuracy, exact syrup temperature, gelatine product and whipping cue. Give the slab the full recipe setting time before deciding it failed. Do not recook a partly set foam without a source-tested rescue method.
A rubbery or chalky slab may be overcooked
A thermometer touching the pan base can read misleadingly, while carry-over heat continues after the target. Record the highest observed temperature and remove the pan promptly next time. Changing both gelatine and temperature together makes the cause impossible to identify.
Wet, merging pieces point to humidity or incomplete coating
Coat every exposed face and store in an airtight container with parchment between layers. Refrigeration can introduce condensation. Make a plain successful batch before adding fruit puree, alcohol or chocolate that changes water and fat.
Skip for now
What can wait
Marshmallow rewards one controlled formula. Flavour experiments and expensive mixers should solve a clear limitation rather than distract from the syrup.
- 01
A new stand mixer
Borrow or use an existing tabletop mixer for the first batch. Buy only if confectionery and baking make hands-free mixing repeatedly valuable.
- 02
The hand mixer
It is a lower-cost option when a second competent adult can pour safely. It is not the recommended solo hot-syrup arrangement.
- 03
Fruit puree
Extra water and acidity alter the set. Use a recipe tested for the specific fruit rather than stirring puree into the vanilla formula.
- 04
Agar substitution
Agar gels and handles differently from gelatine. Choose a purpose-written vegetarian recipe instead of replacing the leaves by intuition.
- 05
Piped shapes and coated sweets
Piping changes working time and chocolate coating adds tempering and moisture control. Cut a clean slab before adding another confectionery system.
Upgrade path
What a better setup changes
A better setup creates hands-free control, repeatable temperature and a dry finishing station before it adds elaborate flavours.
Plain vanilla slab
About £10–£45Thermometer + tested ingredients + suitable mixer access
Learn hot-syrup control, whipping, setting and dusted cutting.Repeatable home batches
About £80–£250Tabletop mixer + accurate scale + stable thermometer
Leave both hands free and repeat the same foam structure more safely.Tested flavour variations
Ingredient dependentPurpose-written recipes + extracts, powders or purees
Add flavour without guessing how water, fat and acid affect the gel.Gift or sale production
Business dependentBatch records + allergen labels + food-safety system
Control consistency, shelf life, packaging and regulated customer information.Safety
Work safely from the first attempt
Hot sugar syrup clings and continues burning. The workflow must prevent children, pets, trailing cables and divided attention from entering the pour.
- Wear closed shoes and long sleeves, use dry oven gloves and keep the route from hob to mixer completely clear.
- Never touch or taste hot syrup and do not add unexpected water; splashes can cause severe burns.
- Use a stable mixer bowl and pour down the safe side named by the recipe, away from moving beaters that can throw syrup.
- A solo cook should use a tabletop mixer; with a hand mixer, a second competent adult controls either mixing or pouring.
- Declare gelatine source and every allergen when sharing. Vegetarian gelling products are not direct substitutes unless the recipe was developed for them.
- Cool equipment before washing, keep electrical parts dry and unplug the mixer before scraping beaters or clearing a jammed attachment.
Classes
When outside help is useful
A class is optional for a plain batch. It helps with live syrup stages, vegetarian formulas, flavour development or the food-safety requirements of selling confectionery.
Use a source that shows thermometer position, visual whipping cues and the hot-pour direction from beginning to end.
Look for practical thermometer calibration, sugar safety and take-home recipes rather than demonstration only.
Useful when shelf life, batch scaling, chocolate coating and regulated production are becoming real goals.
Representative UK confectionery-course ranges checked 27 July 2026; dedicated marshmallow-only sessions are uncommon.
Sources
Sources and checking notes
Good Food supplies a current egg-free measured route and explicit hot-sugar warnings. Confectionery communities reinforce thermometer checks, recipe fidelity and the effects of temperature and gelatine, while product manufacturers anchor the selected tools.
-
01
Good Food · Egg-free vanilla marshmallows
Complete egg-free recipe using gelatine, liquid glucose, a tabletop mixer and syrup at 127°C.
Open source -
02
Good Food · How to make marshmallows
Preparation sequence, thermometer use, controlled pouring and dusted cutting guidance.
Open source -
03
Good Food · Marshmallows
Alternative egg-white method with explicit warning that hot sugar can bubble and spit.
Open source -
04
King Arthur Baking · Homemade marshmallow technique
Thermometer placement, hot-syrup caution and flavour-variation technique.
Open source -
05
r/CandyMakers · Marshmallow troubleshooting
Practitioner discussion of thermometer checking, recipe sequence and failed texture.
Open source -
06
r/CandyMakers · Marshmallow structure
Current community explanation that syrup temperature and gelatine quantity control hold and flow.
Open source -
07
r/CandyMakers · Sticky homemade marshmallows
Troubleshooting discussion of syrup endpoint and mixing sequence.
Open source -
08
Dr. Oetker · Platinum Grade Leaf Gelatine
Manufacturer identification and use context for the exact setting product.
Open source -
09
Kenwood · Hand mixers
Manufacturer confirmation of the 450 W hand-mixer range and intended whisking use.
Open source -
10
Amazon UK · Tala jam thermometer
Exact clip-on confectionery thermometer selected for continuous syrup monitoring.
Open source -
11
Amazon UK · Kenwood HMP30 hand mixer
Exact five-speed 450 W hand mixer shown as a two-person lower-cost option.
Open source -
12
Amazon UK · Dr. Oetker Platinum Leaf Gelatine
Exact 13 g leaf-gelatine product for recipes written for this strength.
Open source
Guide information and links checked 27 July 2026.