Beginner’s guide · Make & create
Fold one shirt,
learn what the colour does.
Begin with a washable cotton item, a contained work area and two or three colours. The pattern comes from folds, pressure and patience more than from using every bottle.
Quick answer
Make one two-colour spiral before attempting a party batch
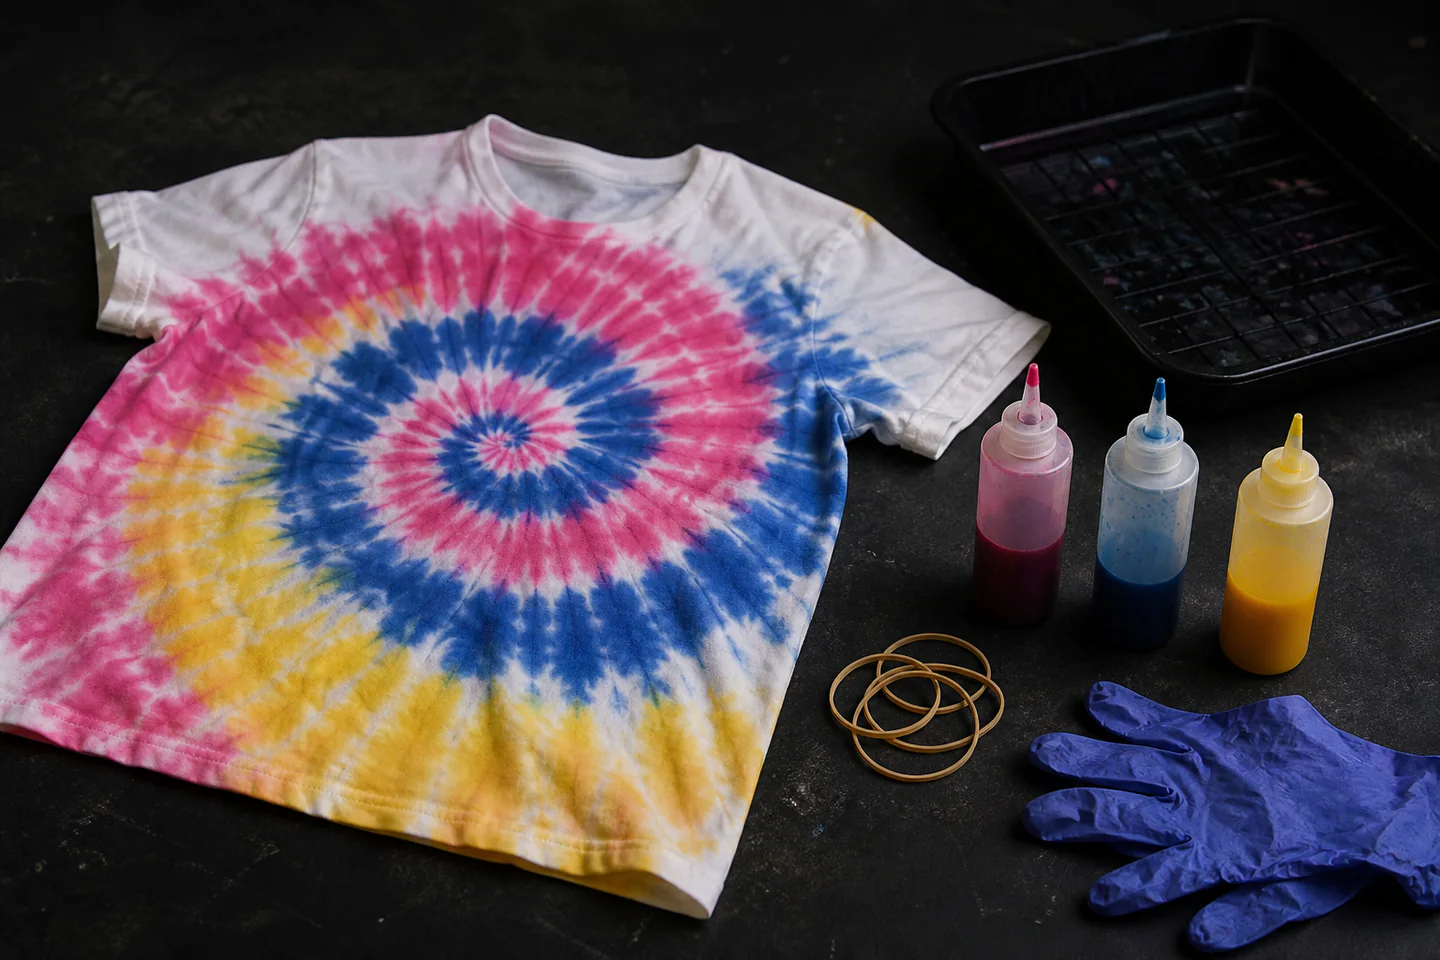
Pre-wash one white or pale 100% cotton shirt without fabric softener, protect the work area and read the exact dye instructions before adding water. Pinch the centre, twist the fabric into a flat disc and secure it with rubber bands. Apply two compatible colours in alternating wedges, turn the bundle over and repeat until damp rather than swimming. Bag it for the maker’s stated reaction time, then rinse cool until the water is much clearer before washing it separately. The first result teaches folding, saturation and washout without sacrificing a wardrobe full of clothes.
- 01
Natural fibres such as cotton usually take common fibre-reactive tie-dye more predictably than polyester blends; check both the garment label and dye instructions.
- 02
More colours do not create a better first design. Adjacent complementary colours can mix into brown where the liquid crosses a fold.
- 03
Mix only the dye that will be used within the manufacturer’s stated window. One-step bottles lose strength after water activates them.
- 04
A bundle needs damp, even penetration, not a puddle. Work over a rack or contained tray and turn the item to inspect the reverse.
- 05
Rinse and wash exactly as directed, separately from other laundry at first. Wear gloves and keep dyes, powders and tools away from food preparation.
What to expect
The reveal is only half the process
The dramatic moment is opening the bundle, but fibre choice, dye freshness and the first wash decide whether the pattern remains recognisable. Uneven pale areas are useful evidence rather than a failed shirt.
Fibre
A cotton-rich item absorbs suitable dye; high-polyester sports fabric may stay pale even when the liquid looks intense. Stitching can remain white because thread content differs.
Folding
Tight bands preserve more pale negative space. Loose folds allow more colour through and create a softer pattern. Neither is wrong, but they are different decisions.
Saturation
Dry cores produce white gaps while soaked bundles blur boundaries. Turn the piece and check every wedge instead of repeatedly flooding the top.
Colour
Red beside yellow can produce orange, while purple beside yellow often produces a dull neutral. A small colour map prevents accidental mixing.
Time
Opening early can reduce colour development. Leaving a wet bundle indefinitely can also create migration or drying, so use the product’s stated window.
Washout
Expect substantial loose colour during rinsing. The useful test is the dried, separately washed item, not the wet reveal under bathroom lighting.
Core method
Control fabric, fold, colour and washout separately
Choose a known fabric
Use a clean, pre-washed cotton item whose loss would not be upsetting. Avoid stain-resistant, waterproof or heavily finished fabric for the first attempt. Weigh or count items only if the dye instructions require it, and test an inside seam when material content is uncertain.
Contain the wet work
Cover the table, place a rack in a tray and plan a clear path to the rinse area before gloves become wet. Keep clean and contaminated tools separate. Read the safety data and instructions for powders, activators and additives; do not improvise concentrations or mix products from unrelated systems.
Fold with a colour plan
Smooth the damp shirt, choose one focal point and twist steadily so the disc stays flat. Secure it without cutting into the fabric. Mark two or three colour wedges mentally, leave deliberate gaps if pale lines are wanted and put likely muddy combinations on opposite sides.
React, rinse and record
Seal the damp bundle and label the time. After the specified wait, rinse cool while the bands remain on, then remove them and continue according to the product directions. Wash separately with suitable detergent, dry fully and photograph both sides. Notes on fibre, fold tightness and colour placement make the next shirt an experiment rather than a guess.
Useful products
Products with a clear job in the setup
The smaller Tulip kit is enough for a first shirt and several colour tests. The larger party tub makes sense only when several people or many garments are ready at the same time. Nitrile gloves provide a replaceable barrier for mixing, handling and washout; they do not make poor ventilation or careless cleanup safe. Plain cotton garments are deliberately left to fit and fabric choice rather than linked as one universal product.
Tulip One-Step Tie-Dye Kit, 18 Colours
Pre-filled bottles reduce measuring and the included pattern guide supports one repeatable first fold.
Tulip One-Step Tie-Dye Party Kit, 18 Pre-Filled Bottles
It is a recognised larger version of the same beginner-friendly system, so skills transfer without changing chemistry.
Unigloves Pearl Nitrile Examination Gloves
Correctly fitted nitrile gloves offer better dexterity than oversized kit gloves and are useful through rinse-out.
First project
Make a two-colour spiral test shirt
A limited palette makes every pale patch, muddy overlap and crisp resist line easy to connect to a physical choice.
- 01
Pre-wash and inspect
Confirm cotton content, remove finishes and note seams or synthetic thread that may dye differently.
- 02
Prepare the route
Cover the table, set a rack in a tray and clear the sink before opening dye.
- 03
Twist one flat disc
Pinch off-centre, rotate steadily and keep the folds low rather than making a tall knot.
- 04
Map the colours
Put two compatible colours in alternating wedges and reserve some pale space.
- 05
Apply from both sides
Work slowly until the inner folds are damp without leaving the bundle in a pool.
- 06
Wait, rinse and wash
Follow the kit timing, rinse as directed and wash the finished shirt separately before judging it.
What can wait
What can wait until the first result
The first repeatable fold is more useful than a cupboard of blanks, additives and specialist applicators.
- 01
Ten-colour rainbows
Every boundary becomes another mixing decision; two colours show the mechanics more clearly.
- 02
Expensive finished clothing
Sizing, coatings and fibre blends can resist dye, and the first washout remains unpredictable.
- 03
Large group sessions
One shirt teaches timing and cleanup before several activated bottles and people compete for space.
- 04
Ice dyeing and powdered layouts
They introduce airborne powder control, long migration and different colour splitting.
- 05
A heat press
Tie-dye does not need one, and printed vinyl or sublimation are separate processes.
Upgrade path
Upgrade the repeated limitation
Add range only after the same limitation appears in several washed and dried results.
First shirt
About £15–£40Small one-step kit + cotton blank
Learn folding, saturation and washout.Repeat patterns
About £30–£80More blanks, rack, trays and labelled bottles
Compare spirals, scrunches and stripes cleanly.Fibre-reactive control
About £60–£160Separate dyes, soda ash and measured mixing tools
Choose concentrations and palettes deliberately.Small production
About £150–£500+Dedicated wet area, storage and batch records
Repeat designs while controlling contamination and waste.Safety & care
Treat dye as a material, not coloured water
Products differ in chemistry and instructions. Work from the current label, prevent powder or spray exposure, protect skin and eyes and keep every dye tool out of the kitchen workflow.
- Read the kit instructions and safety information before mixing; do not combine activators, cleaners or dye systems unless the manufacturer explicitly allows it.
- Avoid breathing powders or creating aerosols. Mix gently in strong ventilation and wear any protection specified for the exact product.
- Protect skin and eyes, remove contaminated clothing promptly and know the label’s first-aid instructions before the session starts.
- Keep dyes, bottles, trays and measuring tools away from food and children, and never reuse craft containers for eating or drinking.
- Follow local wastewater guidance, contain spills and wash new items separately until excess colour has been removed.
Outside help
When outside help earns its place
A clear manufacturer pattern guide is enough for the first spiral. A workshop becomes worthwhile when a tutor demonstrates fibre-reactive mixing, colour splitting and repeatable advanced folds in a properly managed wet area.
Match the technique to the exact dye system and fibre recommendation.
Ask about dyes, protective equipment, fabric blanks, washout and take-home work.
Representative UK learning options checked 18 August 2026; local prices, access, materials and tutor support vary.
Sources
Where the guidance came from
Manufacturer instructions define fibre, activation and washout. Textile specialists and experienced makers add the practical evidence about saturation, colour placement and what remains after the first proper wash.
-
01
Tulip Color · Tie-dye kit instructions
Official preparation, pattern, reaction and washout guidance.
Open source -
02
Tulip Color · One-Step Tie-Dye
Current product-system context and intended materials.
Open source -
03
Dharma Trading · Tie-dye instructions
Specialist fibre-reactive workflow and troubleshooting context.
Open source -
04
Paula Burch · All About Hand Dyeing
Long-running technical resource on fibres, dyes and colourfast methods.
Open source -
05
Reddit · r/tiedye
Community evidence on folds, saturation, batching and washed results.
Open source -
06
Amazon UK · One-Step Tie-Dye Kit, 18 Colours
Exact product catalogue page or ISBN used for the recommendation; current price, seller, specification and availability should be confirmed.
Open source -
07
Amazon UK · One-Step Tie-Dye Party Kit, 18 Pre-Filled Bottles
Exact product catalogue page or ISBN used for the recommendation; current price, seller, specification and availability should be confirmed.
Open source -
08
Amazon UK · Pearl Nitrile Examination Gloves
Exact product catalogue page or ISBN used for the recommendation; current price, seller, specification and availability should be confirmed.
Open source
Guide information and links checked 18 August 2026.