Beginner’s guide · Grow & care
Grow one tray.
Harvest it cleanly.
Start with radish seed, a shallow draining tray and a clean growing medium. The first crop is about even sowing, restrained moisture, airflow and a safe harvest—not a rack of lights or a mixed tray that matures at five different speeds.
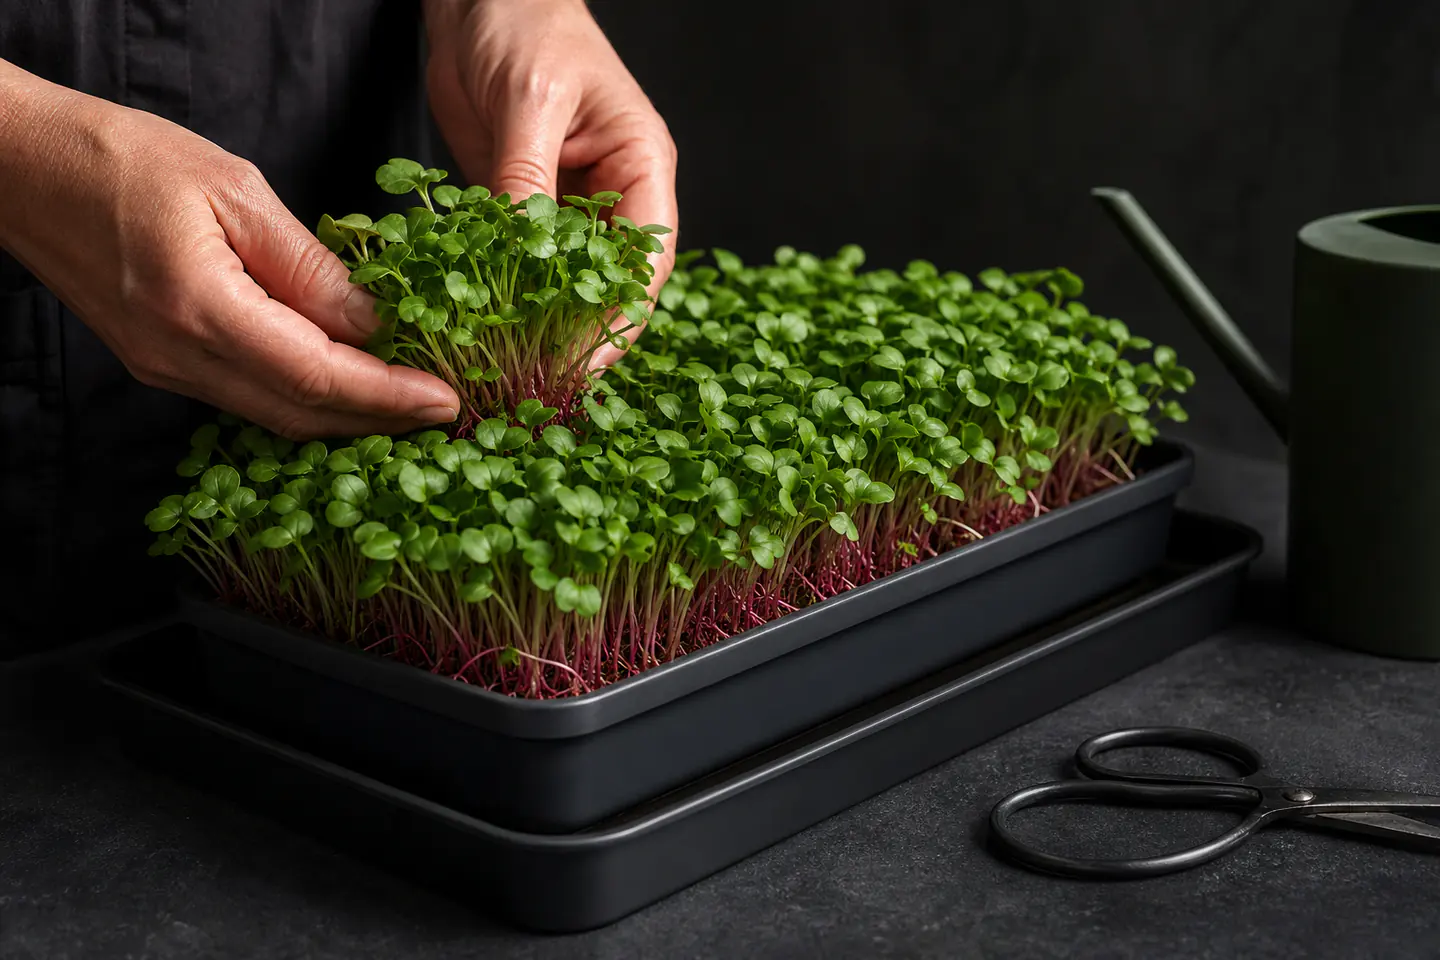
Quick answer
One crop, one shallow tray, one clear result
Sow radish seed sold for sprouting or microgreens evenly over a clean shallow medium. Keep it moist and covered for germination, then uncover into strong light and bottom-water through a draining inner tray until the first true leaves begin to appear.
- 01
Grow one species per tray. Radish, broccoli, pea and sunflower germinate and reach harvest on different schedules.
- 02
Use untreated seed intended for food growing, a clean food-suitable tray and drinking-quality water.
- 03
Moist is not waterlogged. Drainage, modest watering and air movement reduce the conditions that support mould.
- 04
Harvest above the medium with clean scissors, rinse in fresh drinking water before eating and refrigerate promptly.
What to expect
Fast growth makes mistakes visible quickly
A tray can change completely between morning and evening. That speed is appealing, but it also amplifies uneven seed, water, heat and light.
Germination
Radish can push up a cover within a few days. Larger crops such as peas may need soaking and a different seed density.
Root hairs
Fine white hairs radiating from individual roots are normal and collapse when misted. Web-like growth crossing seed and medium can be mould.
Moisture
Bottom watering keeps leaves drier, but it can still overwater. Empty standing water after the medium has absorbed what it needs.
Light
Weak or one-sided light produces pale, leaning stems. Rotate a windowsill tray or add a properly positioned light when the crop repeatedly stretches.
Density
Sparse sowing wastes space; a thick mat holds moisture and loses airflow. Record seed weight and tray area rather than guessing every batch.
Shelf life
Cut microgreens are delicate. Harvest dry when possible, chill quickly and wash just before use to avoid shortening storage.
Tray, seed & medium
Build a system you can wash and repeat
Pair a draining tray with a reservoir
The inner tray needs drainage so excess water leaves the root zone. A solid lower tray catches water and lets you irrigate from below. Food containers can be reused if they are clean, food-suitable and given safe drainage holes, but a matched pair is easier to lift without collapsing the crop.
The checked six-pack includes double-layer 34 × 25 cm trays and growing papers. That is more hardware than one first crop needs, but it provides matched drainage and reservoir pieces. Use one pair and keep the rest clean.
Start with a single fast seed
Radish is fast, forgiving and large enough to distribute by hand. The checked Nature’s Root mix is sold specifically for sprouting and microgreens in a resealable 125 g pack. Do not combine it with slower broccoli, pea or herb seed in the same first tray; mixed harvest times create avoidable compromise.
Medium affects water management
A clean seed-starting mix, peat-and-perlite blend, coco coir or purpose-made grow mat can work. Follow the crop and tray guidance. The included papers offer a low-mess first route; pre-washed coco coir is a later refill or comparison, not an ingredient to heap on top of the papers. Whatever the medium, begin evenly moist, provide drainage and discard used organic material rather than attempting to regrow a cut crop.
Starter pair
One tray pair and one seed are enough
The tray set includes growing papers, so pair it with the radish seed for the first crop. Open only the parts you need. The coir and grow light appear later as alternative medium and light upgrades.
King Do Way Six Double-Layer Growing Trays with 24 Papers
The draining inner layer, solid lower layer and supplied papers cover germination and bottom watering without improvised containers.
Nature’s Root Organic Radish Mix Microgreen Seeds, 125 g
Radish germinates quickly, is large enough to spread and avoids the mixed-rate problem of assorted seed packs.
First tray
Grow one measured radish tray
Use the seed supplier’s density and the tray instructions when supplied. Record the amounts so the second tray is a controlled improvement.
- 01
Wash the equipment
Clean the inner and reservoir trays, cover or weight, measuring tools and scissors. Rinse well and begin with a fresh growing paper or clean medium.
- 02
Measure tray and seed
Record the growing area and the supplier-recommended radish seed amount. Use one crop only and remove visibly damaged material.
- 03
Moisten and sow evenly
Wet the paper or medium evenly and let excess water drain. Scatter seed edge to edge without deep piles, then mist only enough to settle it.
- 04
Cover for germination
Use the tray system’s cover or a clean inverted tray and follow the seed guidance for darkness and weight. Check daily without repeatedly flooding the surface.
- 05
Uncover into light
When seedlings have lifted the cover and germinated evenly, move them into strong indirect daylight or a suitable grow light. Begin bottom watering as roots establish.
- 06
Harvest cleanly
When the crop reaches its recommended stage, cut above the medium with clean scissors. Keep seed hulls and roots out of the harvest, chill promptly and wash in drinking water just before eating.
Light & mould
Fix the environment before treating the tray
Window light may be enough for one tray
A bright unobstructed window can grow a useful first crop. Rotate the tray if stems lean strongly. If successive crops become long, pale or uneven, a full-spectrum white grow light placed at the maker’s recommended distance creates repeatable hours and intensity. More hours cannot compensate for a weak light placed too far away.
Root hairs are attached to roots
Radish often develops a fine white halo on new roots. A light mist makes these hairs collapse. Mould tends to bridge seeds and medium in webby patches, may have an off smell and does not simply vanish when wet. Community photographs show why beginners confuse them; do not use a single visual trick as a food-safety guarantee.
Prevent rather than rescue
Clean trays, appropriate seed density, drainage, modest watering and air movement are the dependable controls. A fan should move room air gently, not dry or blow debris across the crop. If growth is clearly mouldy, slimy or foul-smelling, discard it and clean the system. Home chemical sprays are not a reason to eat a crop you otherwise judge unsafe.
Skip for now
What can wait
The window-and-paper route can prove the hobby before another growing system takes over a shelf.
- 01
Coco coir blocks
The checked four-litre pack is a peat-free medium refill or comparison after the included papers are used. Hydrate only what the tray needs and store the rest dry.
- 02
A dedicated grow light
The checked adjustable desk light becomes useful when repeated crops lean or pale in the available window. One good crop does not need an electronics upgrade.
- 03
A mixed seed blend
Different species can germinate and mature at different rates. Learn each crop separately before combining compatible varieties.
- 04
A full rack and fan system
Shelves, timers, lights and circulation make sense for regular multi-tray production, not for deciding whether you enjoy one harvest.
- 05
Sunflower and pea as the first crop
Their larger seed, soaking, weight and hull issues add useful skills later. Radish gives faster feedback with fewer preparation steps.
Upgrade path
Scale only after the crop is repeatable
More trays multiply both yield and hygiene work. Keep records before multiplying the setup.
One window tray
About £20–£30Draining tray pair + paper or medium + radish seed
Learn seed density, germination, moisture, root hairs and a clean harvest.Repeatable medium
About £8–£20Measured coir or seed-starting mix + seed scale
Control water capacity and cost per tray after disposable papers run out.Controlled light
About £20–£60White full-spectrum light + timer
Reduce leaning and seasonal variation when window light is the proven limit.Small production shelf
£100–£400+Multiple tray pairs + shelving + lights + airflow + sanitation log
Harvest regularly, while electricity, cleaning, food safety and crop scheduling become part of the hobby.Food safety
Grow it as food, not just as a houseplant
Microgreens are eaten young and often raw, so clean inputs and handling matter from seed to fridge.
- Use seed sold for sprouting or microgreens, not seed treated with pesticides or dressings.
- Use drinking-quality water, clean food-suitable trays and a clean growing medium.
- Wash hands before sowing and harvesting; keep pets, dirty tools and potting debris away from the tray.
- Do not grow microgreens from tomato, potato, aubergine or pepper seed; nightshade foliage is not an edible microgreen crop.
- Discard trays with clear mould, slime, pests or foul odour rather than relying on a rinse or home spray.
- Cut with clean scissors above the medium, refrigerate promptly and wash in fresh drinking water before eating.
Classes
When outside help is useful
A class is rarely necessary for one home tray. Good horticultural extension guides provide enough structure, while a local session is most useful if it includes hands-on food-safety, density and lighting checks.
Use crop tables and step-by-step material guidance to plan the first tray and compare results.
Check that it teaches microgreens rather than jar sprouts, and that trays, seed, light and hygiene are covered explicitly.
Free specialist resources checked 27 July 2026; local class availability and pricing are highly regional.
Sources
Where the guidance came from
Growing and food-safety recommendations use university extension sources. Community discussions were used to represent the recurring root-hair-versus-mould confusion.
-
01
Penn State Extension · Step-by-step guide for growing microgreens at home
Clean food-suitable trays, drainage, bottom watering, medium, harvest and refrigeration guidance.
Open source -
02
Penn State Extension · Growing microgreens
Current recommendation to grow one type per tray because germination and harvest rates differ.
Open source -
03
Penn State Extension · Ensuring food safety in microgreens production
Water and growing medium as potential contamination sources and the need for clean production.
Open source -
04
Utah State University Extension · Grow your own microgreens
Crop-specific seed density, soak, germination and harvest ranges, including radish at roughly 8–12 days.
Open source -
05
University of Minnesota Extension · Mini greens, mega benefits
Small-space home setup and representative 7–14 day harvest expectation.
Open source -
06
University of Minnesota Extension · Lighting for indoor plants and seeds
Signs of insufficient light and suitable blue or mixed light for seedlings and leafy greens.
Open source -
07
r/microgreens · First tray: mould or root hairs?
Recurring visual distinction and beginner anxiety around normal radish root hairs.
Open source -
08
r/microgreens · One crop per tray and bottom watering
Practitioner experience that radish matures faster than mixed crops and that established trays are watered from below.
Open source -
09
Amazon UK · Six double-layer sprouting trays
Exact 34 × 25 cm six-pack with 24 growing papers, £19.99 observed price and in-stock status.
Open source -
10
Amazon UK · Nature’s Root radish mix, 125 g
Exact microgreen and sprouting seed pack, £9.99 observed price and in-stock status.
Open source -
11
Amazon UK · Elixir Gardens coir blocks, four litres
Exact pre-washed peat-free coir refill, £7.75 observed price and in-stock status.
Open source -
12
Amazon UK · Wiaxulay adjustable grow light
Exact full-spectrum adjustable desk light, £19.99 observed price and in-stock status.
Open source
Guide information and links checked 27 July 2026.