Beginner's guide · Make & create
Finish one tabletop miniature.
Thin layers beat tiny brushes.
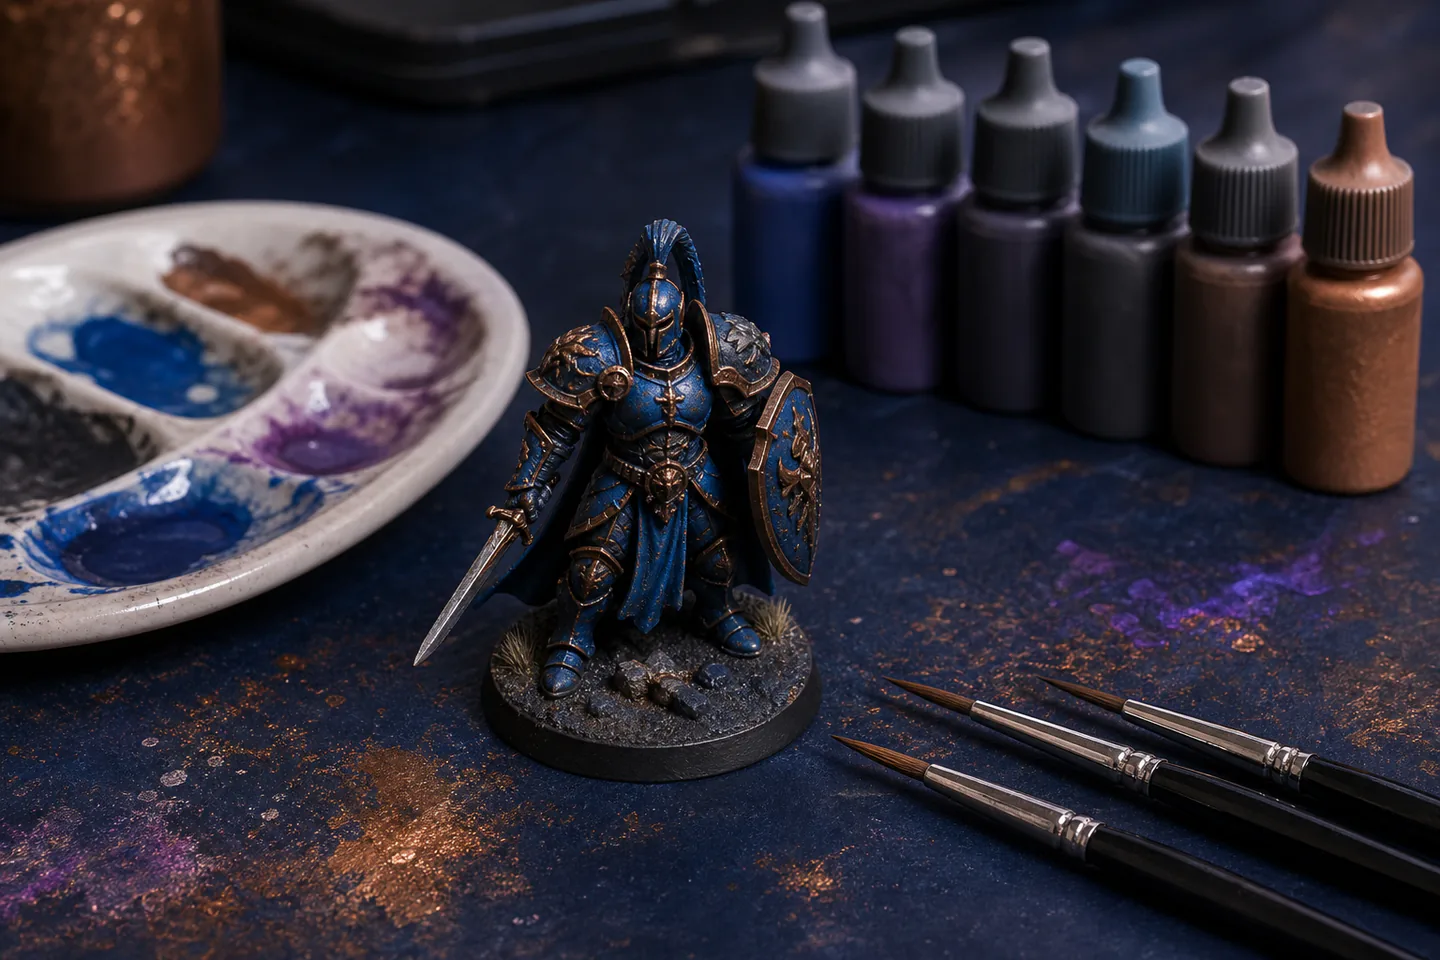
Start with one primed figure, a compact set of reliable acrylic colours and two or three synthetic brushes. The first goal is readable colour, a controlled wash and a complete model—not perfect eyes, an airbrush or a cabinet of paint.
Quick answer
Finish one tabletop miniature.
Use a clean assembled miniature and a brush-on primer or safely applied model primer, then block in the largest colours with a size 1–3 brush. Apply two thin coats rather than one thick coat, add a controlled wash to recesses and finish the base before judging the result.
- 01
The Army Painter Fanatic starter set contains a brush-on primer, core acrylics, metallics, a wash, a brush and a practice miniature, so the first route is coherent.
- 02
Most of the model can be painted with a pointed medium brush. An extremely tiny brush holds little paint and often dries before it reaches the miniature.
- 03
A homemade damp palette is enough for a first session; the commercial wet palette is an upgrade for longer sessions and repeated colour mixing.
- 04
Finish the model even when an early layer is uneven. Later coats, the wash and the base change how the whole figure reads.
What to expect
What the first attempts really involve
The first project is useful because it exposes the decisions that shopping pages tend to hide.
Preparation
Mould lines and greasy release residue remain visible under paint. Clean only as recommended for the material and remove seams before priming.
Primer
Primer provides adhesion; a brush-on coat does not need to look like a perfectly opaque final colour, but it must be thin and fully dry.
Consistency
Model acrylics vary. Thin and test each colour on the palette rather than repeating a slogan or fixed water ratio.
Brush control
Loading only the tip, removing excess and keeping paint out of the ferrule matter more than owning an expensive sable brush.
Reading distance
Tabletop contrast can look exaggerated up close but clear at arm's length. Judge the finished model from both distances.
Fundamentals
Build the first attempt on reliable fundamentals
Prepare the miniature without damaging it
Confirm whether the figure is plastic, resin or metal and follow its maker's assembly guidance. Clip and scrape mould lines with suitable tools only if needed. Wash material only when recommended, let it dry completely and attach the model to a handle or temporary cork so fingers do not polish the surfaces being painted.
Prime for adhesion
Brush-on primer avoids aerosol weather and ventilation problems for a first indoor project. Apply a thin continuous coat, move pooled primer out of recesses and allow the full cure time. If aerosol primer is used later, work outdoors or in a properly controlled space and follow every label warning.
Work large to small
Choose a limited colour plan and paint skin, cloth, armour and equipment as broad zones. Use the side of a pointed brush where possible. Let each thin coat dry before the next, correct the largest overlaps, then use a wash sparingly in recesses instead of flooding the entire figure repeatedly.
Starter products
A coherent paint set, three useful brushes and a later wet palette
The Fanatic starter set is the complete first route. The three-brush set is a sensible addition if the included brush is not enough; the wet palette is shown as an upgrade, not another compulsory item on day one.
The Army Painter Warpaints Fanatic Starter Set
It prevents incompatible random purchases and includes the brush-on primer that allows a controlled indoor start without treating an aerosol as compulsory.
The Army Painter Hobby Starter Brush Set
Each brush has a distinct job, making it easier to learn loading and care than with a case of unnamed near-duplicates.
First miniature
Paint the included 28 mm fantasy figure
Use the starter set's current instructions for the included miniature and paint names. The sequence below explains the decisions that make the lesson transferable.
- 01
Inspect and prepare
Remove only obvious mould lines, check joints and give the model a clean dry surface appropriate to its material.
- 02
Mount a handle
Fix the base to a cork, empty paint pot or commercial holder with removable putty so the miniature can turn without being touched.
- 03
Brush-prime thinly
Use the included primer, move it out of face and armour detail and let it dry for the full stated time.
- 04
Choose five main colours
Plan skin, cloth, leather, metal and one spot colour. Ignore advanced colour recipes until these zones are readable.
- 05
Basecoat large areas
Thin on the palette, unload excess and apply one smooth layer. Let it dry, then add a second only where coverage needs it.
- 06
Neaten the boundaries
Return with the neighbouring base colour and repair the largest overlaps before shading.
- 07
Apply a controlled wash
Place the included wash into folds and joins, wick away pools and leave it completely alone until dry.
- 08
Restore one highlight
Use the original base colour on the raised area the wash darkened, leaving the recess shaded.
- 09
Finish the base
Paint the base rim cleanly and add a simple texture or single neutral colour. Photograph at arm's length before deciding what to improve next.
Troubleshooting
Read the result before buying another tool
Chalky or lumpy coats are usually too thick
Do not scrub a half-dry layer smooth. Let it cure, remove only a severe physical lump if safe, then rebuild with thinner paint and fewer passes.
A wash tide mark means too much liquid
Work in smaller sections and keep a clean damp brush ready to wick excess from flat areas. A wash is shading material, not a bath.
A brush that splits may be overloaded
Rinse before acrylic dries near the ferrule, reshape the point and rotate between two workhorse synthetics. Replace a damaged brush before blaming every line on hand control.
Skip for now
What can wait
The first miniature teaches paint behaviour better than a large shopping list.
- 01
An airbrush
It adds compressor, ventilation, cleaning and paint-thinning systems. Brush priming and basecoating are enough to learn the model.
- 02
A hundred-colour set
Too many near-identical paints hide colour-mixing and planning lessons. Add a colour when a specific scheme repeatedly needs it.
- 03
Premium sable brushes
A beginner can learn brush care with decent synthetics and avoid damaging an expensive natural point with metallics, washes or drybrushing.
- 04
Magnification before good light
A bright neutral desk light and comfortable posture solve more problems first. Magnification becomes useful when eyesight or fine display work demands it.
Upgrade path
What a better setup changes
The useful upgrade path improves paint working time, light and repeatable preparation before it chases specialist techniques.
First complete figure
About £30–£50Starter paint set + two or three synthetics
Covers primer, basecoats, wash, metallics and a finished base.Longer controlled sessions
Add £20–£30Wet palette + neutral desk light
Extends acrylic working time and makes consistency and colour easier to judge.Display techniques
VariableSelected colours + better brush + magnification if needed
Supports glazing, controlled highlights and smoother blends after brush care is routine.Safety
Work safely from the first attempt
Water-based model acrylics are approachable, but tools, aerosol products and sanding dust need clear boundaries.
- Do not lick brushes or put paint water near a drinking cup; model paints are not food.
- Use cutters and files away from fingers, wear eye protection where clipped parts can fly and keep sharp tools stored.
- Follow aerosol primer and varnish ventilation, temperature and ignition warnings exactly; do not spray casually indoors.
- Wet-sand resin only when the manufacturer allows it and avoid inhaling resin or plastic dust.
- Keep paints, small miniatures and detachable parts away from children and pets.
Classes
When outside help is useful
A short class helps when paint consistency and brush loading are hard to judge from video, but it is not required to finish the first figure.
Local game shops and beginner evenings can demonstrate priming, thinning, basecoating and a wash on one model.
Specialist workshops are worthwhile for coached brush control, light placement and feedback on a completed piece.
Representative UK shop and event formats checked 30 July 2026; materials and tuition vary widely.
Sources
Sources and checking notes
The Army Painter supplies the coherent first method, community discussions add real-world brush and primer cautions and live Amazon pages verify the exact products.
-
01
The Army Painter · How to paint a miniature
Basecoat preparation, consistency and thin-layer guidance.
Open source -
02
The Army Painter · Starter set beginner test
A beginner works through the exact starter-set route.
Open source -
03
r/minipainting · Beginner supplies
Current community discussion recommending a coherent starter set and practice.
Open source -
04
r/minipainting · Brush recommendations
Current discussion of synthetic brushes, care and ferrule protection.
Open source -
05
Amazon UK · Fanatic starter set
Exact paint, primer, brush and miniature set checked for current UK availability.
Open source -
06
Amazon UK · Hobby starter brushes
Exact three-brush Army Painter set checked for current UK availability.
Open source -
07
Amazon UK · Army Painter wet palette
Exact wet-palette upgrade checked for current UK availability.
Open source -
08
Elite Gaming Lounge · Miniature workshops
Representative UK practical miniature-painting workshop format.
Open source
Guide information and links checked 30 July 2026.