Beginner’s guide · Make & create
Make one loop with a single needle,
then learn exactly where the next loop passes.
Nalbinding builds fabric from short lengths of yarn and a blunt needle. Start with one large, named stitch and a flat wrist-warmer sample.
Quick answer
Complete one a narrow wrist-warmer practice band before expanding the setup
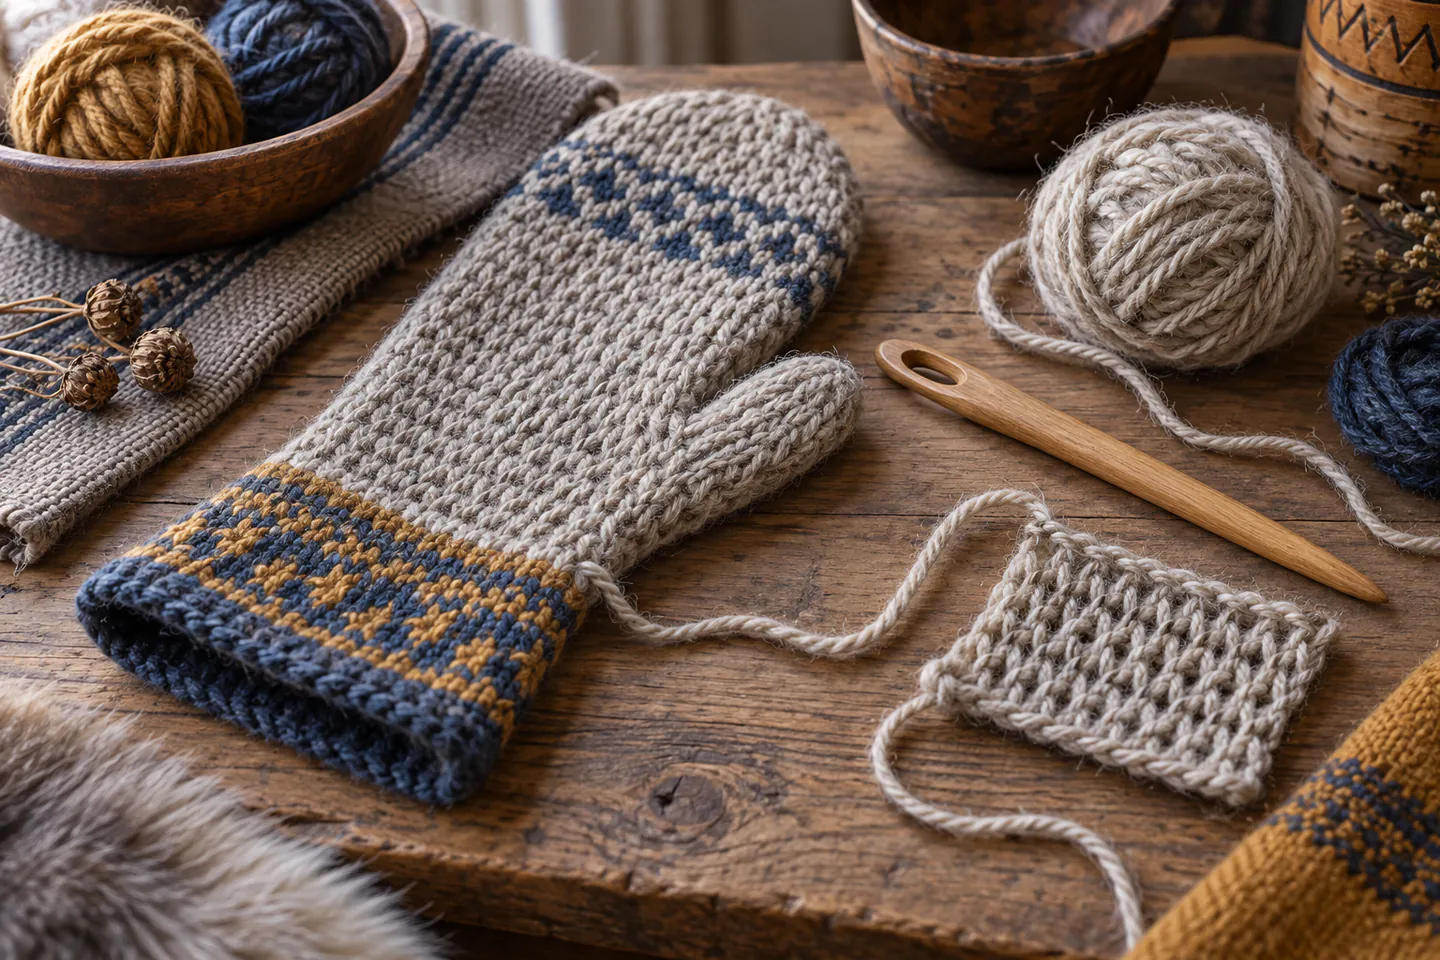
Choose a broad blunt nalbinding needle, smooth wool and one tutorial that names its notation. Form the starting loops slowly around the thumb, complete ten repeatable stitches, compare front and edge, then join new yarn by the same tested method. Work a flat band before shaping a mitten so every connection remains visible.
- 01
Nalbinding uses finite yarn lengths and sewn loops; it does not unravel like ordinary knitting. For a first nalbinding attempt, keep the materials, measurements and sequence written beside the work. Photograph or measure the result before correcting it, because a visible record separates a technique problem from a material or setup problem.
- 02
Stitch names alone are incomplete unless the connection around previous loops is shown clearly. For a first nalbinding attempt, keep the materials, measurements and sequence written beside the work. Photograph or measure the result before correcting it, because a visible record separates a technique problem from a material or setup problem.
- 03
A large needle and pale wool make the working loop, thumb loop and pickup points visible. For a first nalbinding attempt, keep the materials, measurements and sequence written beside the work. Photograph or measure the result before correcting it, because a visible record separates a technique problem from a material or setup problem.
- 04
Joining yarn is part of the normal process, so practise it before a shaped project. For a first nalbinding attempt, keep the materials, measurements and sequence written beside the work. Photograph or measure the result before correcting it, because a visible record separates a technique problem from a material or setup problem.
What to expect
What nalbinding is really like at the start
The useful beginner controls are setup, repeatable movement and a finished sample. Reading thumb loops and consistent connection points is the main skill to observe before adding scale or decoration.
Structure
A small change in which loop is picked up creates a different fabric even when the hand motion looks similar. For a first nalbinding attempt, keep the materials, measurements and sequence written beside the work. Photograph or measure the result before correcting it, because a visible record separates a technique problem from a material or setup problem.
Tension
Thumb size and the angle of the working loop influence every new stitch. For a first nalbinding attempt, keep the materials, measurements and sequence written beside the work. Photograph or measure the result before correcting it, because a visible record separates a technique problem from a material or setup problem.
Yarn
Feltable wool can splice neatly, while superwash or synthetic yarn usually needs another join. For a first nalbinding attempt, keep the materials, measurements and sequence written beside the work. Photograph or measure the result before correcting it, because a visible record separates a technique problem from a material or setup problem.
Notation
Different teachers may describe the same route with names, diagrams or Hansen notation. For a first nalbinding attempt, keep the materials, measurements and sequence written beside the work. Photograph or measure the result before correcting it, because a visible record separates a technique problem from a material or setup problem.
Core method
The core nalbinding method
Establish one named stitch
Follow one specialist source from the first loop until the repeat is visible; do not alternate videos mid-row. For a first nalbinding attempt, keep the materials, measurements and sequence written beside the work. Photograph or measure the result before correcting it, because a visible record separates a technique problem from a material or setup problem.
Control the thumb loop
Keep the loop large enough for the needle and compare each new stitch against its neighbour. For a first nalbinding attempt, keep the materials, measurements and sequence written beside the work. Photograph or measure the result before correcting it, because a visible record separates a technique problem from a material or setup problem.
Join deliberately
Test a felted splice on suitable wool or leave tails long enough for the method being taught. For a first nalbinding attempt, keep the materials, measurements and sequence written beside the work. Photograph or measure the result before correcting it, because a visible record separates a technique problem from a material or setup problem.
Finish a flat band
Work enough length to reveal drift, then close or edge it only after counting and inspecting the structure. For a first nalbinding attempt, keep the materials, measurements and sequence written beside the work. Photograph or measure the result before correcting it, because a visible record separates a technique problem from a material or setup problem.
Useful products
Products with a clear job in the route
These two products cover distinct jobs in the beginner route; they are not a requirement to buy a bundle. Use materials already owned when they meet the same specification, and confirm every live listing before ordering.
Stylecraft Special DK Acrylic Yarn, 100 g
It is easier to undo and inspect than dark, fluffy or highly variable yarn.
Pllieay Embroidery Starter Kit with Hoops and 100 Threads
The hoops, needles and stranded cotton support several specialist embroidery samples.
First project
Make a narrow wrist-warmer practice band
Keep the project small enough to finish, inspect and repeat. The first result is evidence about material compatibility, sequence and control rather than a performance test.
- 01
Prepare the workspace and materials
Follow one specialist source from the first loop until the repeat is visible; do not alternate videos mid-row. For a first nalbinding attempt, keep the materials, measurements and sequence written beside the work. Photograph or measure the result before correcting it, because a visible record separates a technique problem from a material or setup problem.
- 02
Make the first controlled pass
Keep the loop large enough for the needle and compare each new stitch against its neighbour. For a first nalbinding attempt, keep the materials, measurements and sequence written beside the work. Photograph or measure the result before correcting it, because a visible record separates a technique problem from a material or setup problem.
- 03
Check the central technique
Test a felted splice on suitable wool or leave tails long enough for the method being taught. For a first nalbinding attempt, keep the materials, measurements and sequence written beside the work. Photograph or measure the result before correcting it, because a visible record separates a technique problem from a material or setup problem.
- 04
Complete the structure
Work enough length to reveal drift, then close or edge it only after counting and inspecting the structure. For a first nalbinding attempt, keep the materials, measurements and sequence written beside the work. Photograph or measure the result before correcting it, because a visible record separates a technique problem from a material or setup problem.
- 05
Finish, measure and record
Let the work settle or dry by the relevant material instructions, then measure, photograph and label the result. Record the one change that would make the next nalbinding attempt more controlled. For a first nalbinding attempt, keep the materials, measurements and sequence written beside the work. Photograph or measure the result before correcting it, because a visible record separates a technique problem from a material or setup problem.
What can wait
What can wait until the first result
Delay anything that adds cost, risk or another variable before the basic workflow has produced something you can review.
- 01
A fitted mitten
Thumb openings and shaping hide structural mistakes. For a first nalbinding attempt, keep the materials, measurements and sequence written beside the work. Photograph or measure the result before correcting it, because a visible record separates a technique problem from a material or setup problem.
- 02
Several stitch families
One consistent stitch creates a readable baseline. For a first nalbinding attempt, keep the materials, measurements and sequence written beside the work. Photograph or measure the result before correcting it, because a visible record separates a technique problem from a material or setup problem.
- 03
Very fine yarn
Small loops make pickup paths harder to see. For a first nalbinding attempt, keep the materials, measurements and sequence written beside the work. Photograph or measure the result before correcting it, because a visible record separates a technique problem from a material or setup problem.
- 04
Historical reconstruction claims
Material, stitch and provenance need evidence before an object is described as authentic. For a first nalbinding attempt, keep the materials, measurements and sequence written beside the work. Photograph or measure the result before correcting it, because a visible record separates a technique problem from a material or setup problem.
Upgrade path
Add the capability you can now name
Each stage should remove a demonstrated limitation rather than make the setup look more advanced.
Single-stitch band
Use owned tools where possibleOne small sample and written notes
Learn the central movement and material behaviour.Joined wrist warmer
About £20–£80A repeatable complete starter setup
Repeat the result with cleaner finish and fewer corrections.Shaped hat or mitten
About £50–£180A selected tool or structured class
Add one technique, size or design capability.Documented reconstruction
Cost varies widelyA documented specialist workflow
Develop original work with provenance, testing and appropriate safety.Safety & care
Safety, care and respectful practice in nalbinding
The practical risks are manageable when tools, materials and cultural claims remain specific and proportionate.
- Use a blunt needle and store it securely rather than leaving it hidden in yarn. For a first nalbinding attempt, keep the materials, measurements and sequence written beside the work. Photograph or measure the result before correcting it, because a visible record separates a technique problem from a material or setup problem.
- Take hand and shoulder breaks before repetitive grip becomes painful. For a first nalbinding attempt, keep the materials, measurements and sequence written beside the work. Photograph or measure the result before correcting it, because a visible record separates a technique problem from a material or setup problem.
- Keep long yarn loops away from children and pets. For a first nalbinding attempt, keep the materials, measurements and sequence written beside the work. Photograph or measure the result before correcting it, because a visible record separates a technique problem from a material or setup problem.
- Check fibre sensitivities and wash wool by its care instructions. For a first nalbinding attempt, keep the materials, measurements and sequence written beside the work. Photograph or measure the result before correcting it, because a visible record separates a technique problem from a material or setup problem.
- Label reconstructions honestly when material or stitch evidence is uncertain. For a first nalbinding attempt, keep the materials, measurements and sequence written beside the work. Photograph or measure the result before correcting it, because a visible record separates a technique problem from a material or setup problem.
Outside help
When outside help earns its place
A guided session is useful when equipment setup, live hand correction, heat, sharp tools or a specialist press blocks safe progress. A clear source is enough for the smallest nalbinding sample.
Choose one coherent lesson that covers preparation, the central nalbinding technique, finishing and common mistakes.
Ask which tools and materials are included, whether the project can be finished in the session and what safety induction is provided.
Representative UK learning and access routes checked 20 September 2026; local prices, equipment and tutor support vary.
Sources
Where the guidance came from
Authoritative and specialist guidance supports the method, terminology and safety boundaries; community discussion contributes recurring beginner problems rather than unsupported claims.
-
01
Victoria and Albert Museum · Textiles
Museum material and historical context for textile construction.
Open source -
02
Heritage Crafts · Craft inventory
Current UK craft-status and practitioner context.
Open source -
03
Guild of Weavers, Spinners and Dyers
UK guild learning, terminology and local-group routes.
Open source -
04
Textile Research Centre · Encyclopaedia
Specialist textile structures and historical terminology.
Open source -
05
The Textile Society
Textile research, conservation and maker context.
Open source -
06
Reddit · r/weaving
Recurring practitioner evidence on tension, tools and finishing.
Open source -
07
Amazon UK · Special DK Acrylic Yarn, 100 g
Exact Amazon UK catalogue page or ISBN used for the recommendation; confirm current price, seller, specification and availability.
Open source -
08
Amazon UK · Embroidery Starter Kit with Hoops and 100 Threads
Exact Amazon UK catalogue page or ISBN used for the recommendation; confirm current price, seller, specification and availability.
Open source
Guide information and links checked 20 September 2026.