Beginner’s guide · Make & create
Choose one moment,
build only what frames it.
A strong diorama is a small scene with a clear scale, viewpoint and story. Begin on an A5 foam base with one subject and restrained terrain.
Quick answer
Design the viewpoint before adding scenic materials
Choose one model or object as the scale reference, sketch a single viewing angle and cut a compact rigid or foam base. Arrange the main subject and terrain shapes dry, then glue only after the composition reads clearly. Build ground in thin layers, paint from broad tones to details and add vegetation sparingly. Finish the base edge and protect the scene from dust.
- 01
Choose one scale reference and compact stable base for the first result and resist substituting several unfamiliar materials at once. Record what you used on the first attempt so the result can be repeated or changed for a reason.
- 02
Make composition, footprint and restrained terrain layers visible with a small test before committing the full project. Record what you used on the first attempt so the result can be repeated or changed for a reason.
- 03
Change one variable between attempts and keep the preparation otherwise consistent. Record what you used on the first attempt so the result can be repeated or changed for a reason.
- 04
Inspect the work at each reversible stage instead of waiting until finished edges and protected display. Record what you used on the first attempt so the result can be repeated or changed for a reason.
- 05
Finish one modest result and note the actual time, material use and recurring difficulty. Record what you used on the first attempt so the result can be repeated or changed for a reason.
What to expect
The base is a composition, not a materials sampler
Realistic individual products do not create a believable scene when scale, direction, colour and the viewer’s eye have not been planned.
Scale
Sand grains, leaves, boards and footprints all signal size. Compare every texture with the main subject. In diorama making, this is worth checking deliberately rather than trying to correct it after the next stage.
Story
One action or place gives a reason for the arrangement. Unrelated details become clutter. In diorama making, this is worth checking deliberately rather than trying to correct it after the next stage.
Terrain
Thick wet layers shrink, crack and take longer to cure. Build height with suitable dry structure. In diorama making, this is worth checking deliberately rather than trying to correct it after the next stage.
Colour
Separate products often arrive too bright. A shared base tone and restrained highlights unify them. In diorama making, this is worth checking deliberately rather than trying to correct it after the next stage.
Dust
Loose fibres and scenic scatter need capture and a protected final display. In diorama making, this is worth checking deliberately rather than trying to correct it after the next stage.
Core method
Lock scale and composition before texture
Set the boundary
Choose a scale, A5 footprint, viewing angle and one-sentence scene idea. In diorama making, this is worth checking deliberately rather than trying to correct it after the next stage.
Block the terrain
Use compatible foam or board, keep edges square and dry-place every major object. In diorama making, this is worth checking deliberately rather than trying to correct it after the next stage.
Texture in thin layers
Apply ground product and scatter over controlled adhesive without burying attachment points. In diorama making, this is worth checking deliberately rather than trying to correct it after the next stage.
Unify and finish
Paint shared shadows, attach the subject, clean the base edge and add a cover if possible. In diorama making, this is worth checking deliberately rather than trying to correct it after the next stage.
Useful products
Products with a clear job in the setup
The foam slab forms a lightweight terrain base, Vallejo earth texture supplies controlled ground, and Revell Contacta is for compatible polystyrene model parts—not foam or every scenic material.
Generic High-Density Craft Foam Slab
Foam can be cut and layered for a small first footprint.
Vallejo Earth Texture Acrylic Ground 200 ml
A named product avoids guessing household filler behaviour on a small base.
Revell Contacta Professional Model Cement
The fine applicator limits excess around a central kit subject.
First project
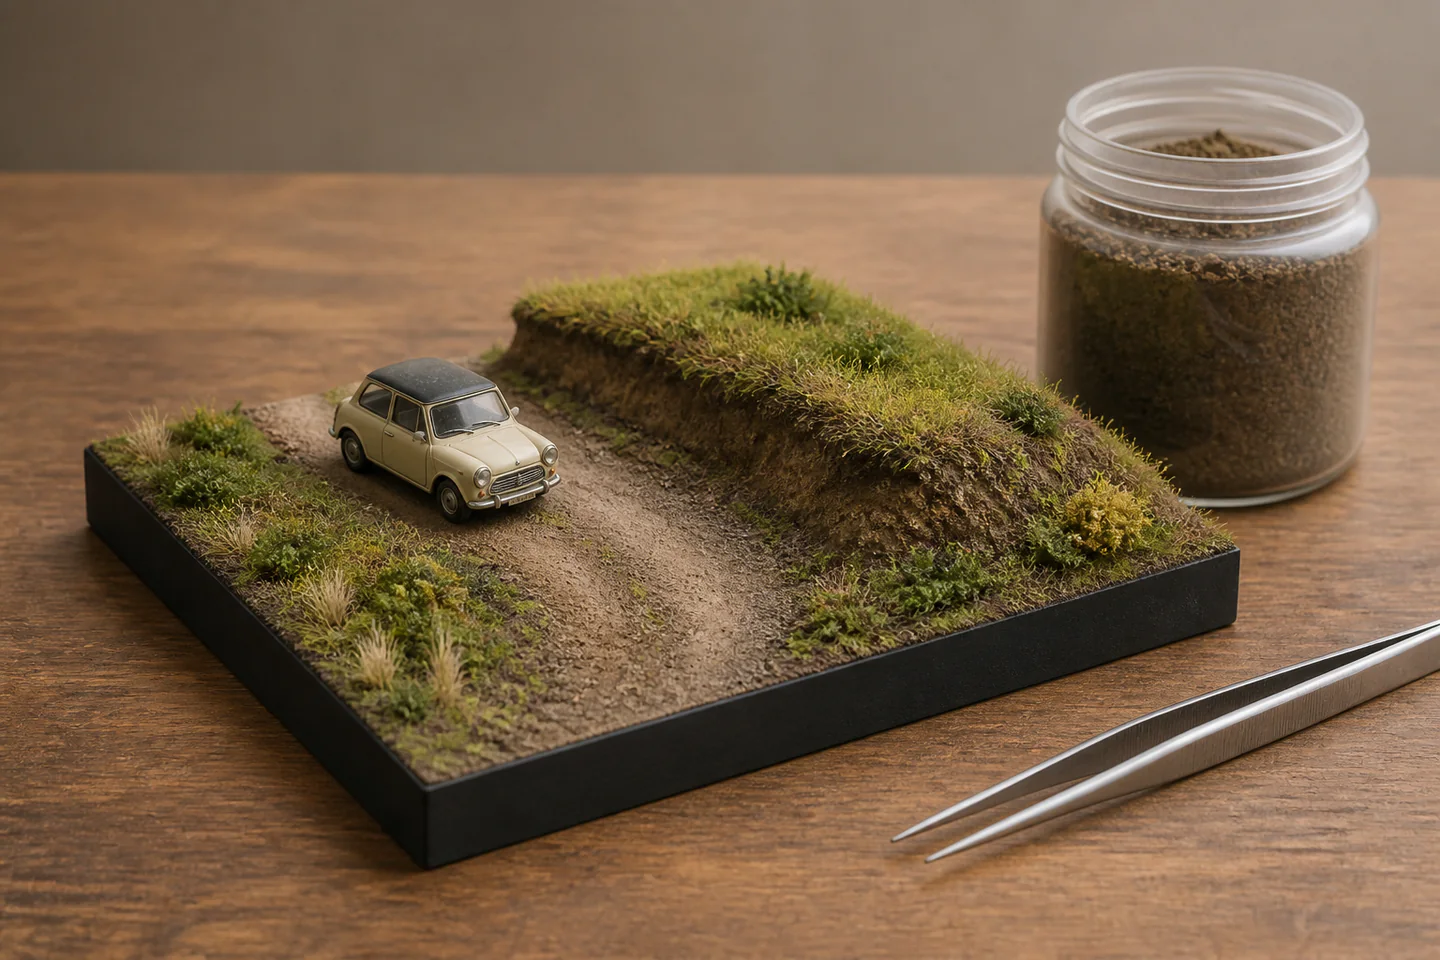
Build one abandoned-path scene
A path, low bank and single subject create foreground, direction and texture without needing buildings or water effects.
- 01
Choose the subject and scale
Measure it and write the scene idea before cutting the base. In diorama making, this is worth checking deliberately rather than trying to correct it after the next stage.
- 02
Sketch the path
Use a broad curve that leads toward the subject and leaves some quiet space. In diorama making, this is worth checking deliberately rather than trying to correct it after the next stage.
- 03
Shape dry terrain
Layer foam, bevel transitions and test the viewpoint. In diorama making, this is worth checking deliberately rather than trying to correct it after the next stage.
- 04
Seal and texture
Use compatible coatings and apply thin ground layers with full drying. In diorama making, this is worth checking deliberately rather than trying to correct it after the next stage.
- 05
Paint and add limited vegetation
Unify colours first, then place only a few scale-appropriate tufts. In diorama making, this is worth checking deliberately rather than trying to correct it after the next stage.
- 06
Attach and finish edges
Fix the subject with the correct adhesive and paint the outer base cleanly. In diorama making, this is worth checking deliberately rather than trying to correct it after the next stage.
What can wait
What can wait until the first result
Water, lights and large buildings are separate systems that can wait until one dry landscape is coherent.
- 01
Deep resin water
Mixing, heat, bubbles and leakage add significant material risk. In diorama making, this is worth checking deliberately rather than trying to correct it after the next stage.
- 02
Large building ruin
Architecture magnifies scale and squareness errors. In diorama making, this is worth checking deliberately rather than trying to correct it after the next stage.
- 03
Powered lighting
Wires, access and battery safety need planning before terrain closes. In diorama making, this is worth checking deliberately rather than trying to correct it after the next stage.
- 04
Every scatter colour
A limited palette looks more convincing and is easier to control. In diorama making, this is worth checking deliberately rather than trying to correct it after the next stage.
- 05
Room-sized base
Large surfaces consume material without improving the first composition lesson. In diorama making, this is worth checking deliberately rather than trying to correct it after the next stage.
Upgrade path
Upgrade the repeated limitation
Add complexity because the scene requires it, not because another scenic product exists.
A5 dry scene
About £20–£60Foam, texture and one subject
Learn scale and composition.Covered display
About £40–£100Better base edge and case
Protect the finish.Building vignette
About £70–£200Measured structures and interior detail
Control architecture.Lit or water scene
About £120–£500+Electrical or casting system
Integrate specialist effects.Safety & care
Control blades, dust, solvents and loose fibres
Dioramas combine products from several crafts. Compatibility and safety must be checked for each layer rather than assumed for the finished scene.
- Cut foam and board on a mat with a suitable tool and keep hands outside the cut path. Follow the current instructions supplied with the exact material, tool or living specimen.
- Do not hot-wire cut foam without equipment and ventilation designed for the exact material. Follow the current instructions supplied with the exact material, tool or living specimen.
- Use solvent cements and spray products only with their stated ventilation and fire controls. Follow the current instructions supplied with the exact material, tool or living specimen.
- Capture sanding dust and loose static fibres; avoid blowing them around the room. Follow the current instructions supplied with the exact material, tool or living specimen.
- Keep small scenic parts, magnets and batteries away from children and pets. Follow the current instructions supplied with the exact material, tool or living specimen.
Outside help
When outside help earns its place
A complete beginner tutorial is enough for the first controlled attempt. A class becomes useful when resin water, powered lighting or scratch-built structures becomes the goal.
Follow one method using one scale reference and compact stable base, including preparation and finishing rather than only the photogenic middle stage.
Check whether materials, troubleshooting, finished edges and protected display and a finished take-home result are included.
Representative UK learning options checked 28 August 2026; local prices, access, materials and tutor support vary.
Sources
Where the guidance came from
The method is grounded in specialist and public guidance, then checked against recurring beginner questions and the exact products linked here.
-
01
Health and Safety Executive · adhesives
UK control guidance for adhesives, paints and dust.
Open source -
02
Health and Safety Executive · hand tools
General safe hand-tool principles.
Open source -
03
Warhammer Community · painting basics
Model-making and painting tutorials.
Open source -
04
FineScale Modeler · how to
Specialist construction, scenery and finishing methods.
Open source -
05
Reddit · r/dioramas
Community evidence on scale, materials and finishing.
Open source -
06
Amazon UK · High-Density Craft Foam Slab
Exact product catalogue page or ISBN used for the recommendation; current price, seller, specification and availability should be confirmed.
Open source -
07
Amazon UK · Earth Texture Acrylic Ground 200 ml
Exact product catalogue page or ISBN used for the recommendation; current price, seller, specification and availability should be confirmed.
Open source -
08
Amazon UK · Contacta Professional Model Cement
Exact product catalogue page or ISBN used for the recommendation; current price, seller, specification and availability should be confirmed.
Open source
Guide information and links checked 28 August 2026.