Beginner’s guide · Make & create
String one pattern,
finish it cleanly.
Begin with a stretch bracelet or simple wire loop using beads that are easy to see and handle. Good sizing and a secure finish matter more than a huge bead collection.
Quick answer
String one stretch bracelet with medium beads
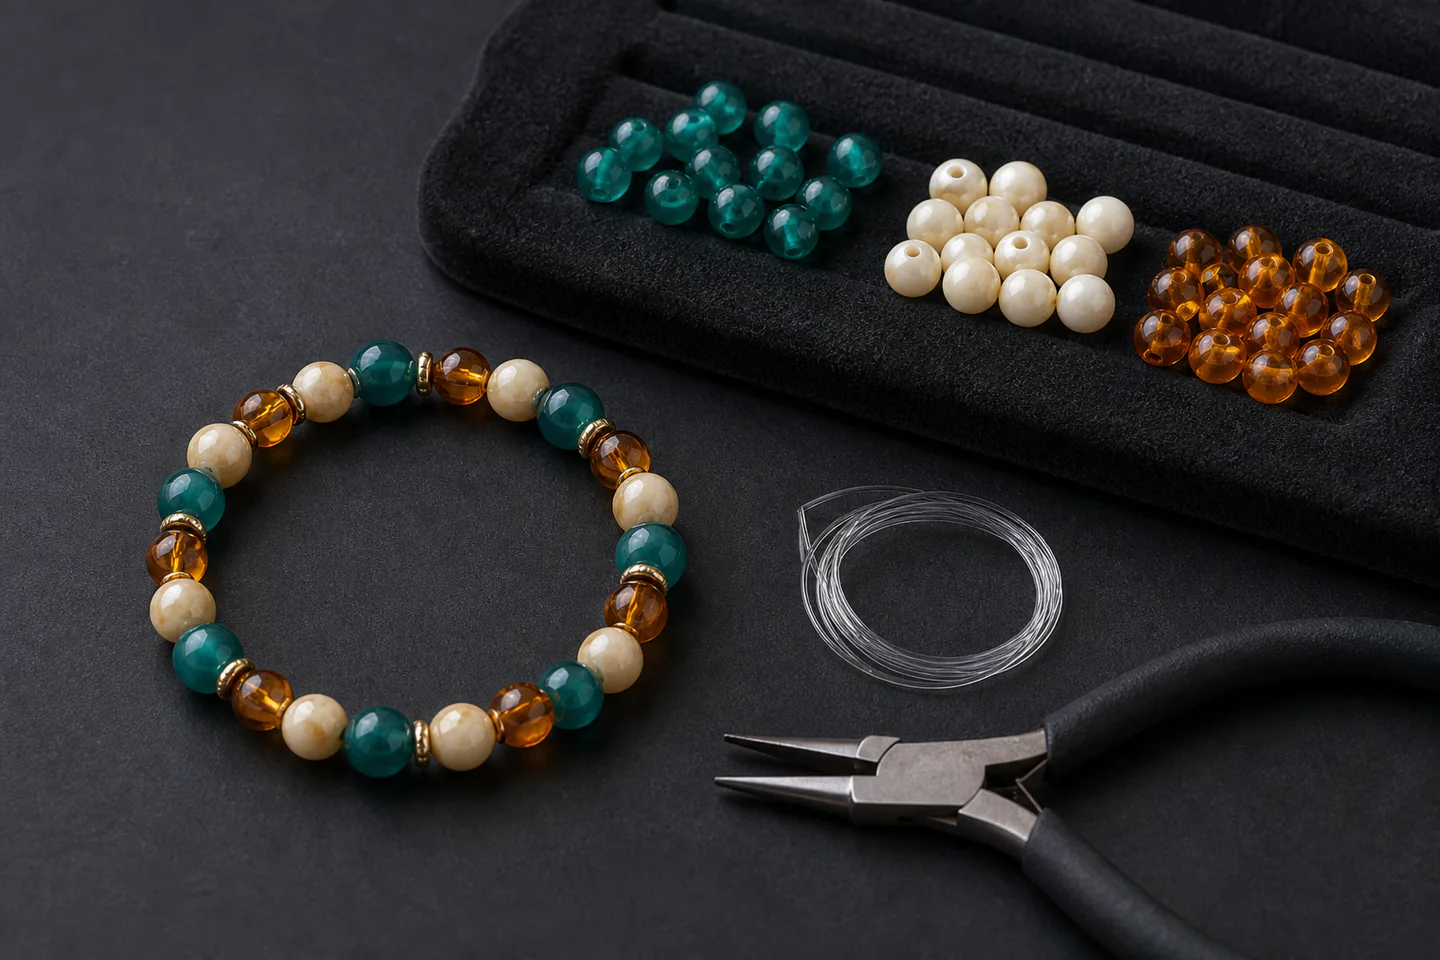
Measure the intended wrist without pulling the tape tight, add a small comfort allowance and lay out one short repeating pattern before cutting cord. Use medium beads with smooth holes, pre-stretch suitable elastic if its maker recommends it and string over a tray so a dropped end does not empty onto the floor. Test the unfinished loop around the wrist, tie the knot recommended for that cord, secure it only with a compatible adhesive if instructed and hide the cured knot inside a bead when possible.
- 01
Choose the stringing material first, then beads whose holes and weight suit it. A beautiful bead is not useful if the cord cannot pass through or support it.
- 02
Medium, consistent beads are easier to count, grip and inspect than tiny seed beads. Start with one repeated sequence rather than a random full box.
- 03
Size the wearer, not an online chart alone. Wrist measurement, bead diameter and preferred looseness all change the finished length.
- 04
Pliers do different jobs: chain-nose grips and bends; round-nose makes loops; flush cutters cut wire. Ordinary household pliers can mark findings.
- 05
Small beads, wire offcuts and needles are hazards for children and pets. Work over a contained surface and account for every sharp piece.
What to expect
A bracelet succeeds at its weakest connection
Beginners often focus on colour and discover later that the knot, crimp, clasp or sharp bead edge was the real engineering problem. Plan the finish before filling the strand.
Beads
Glass, stone, polymer and metal differ in weight and hole finish. Inspect for sharp edges before they abrade cord.
Scale
An 8 mm bead changes bracelet length much faster than a 3 mm seed bead and may need less added slack.
Pattern
Lay out one full repeat and count it. A bead mat prevents an unnoticed sequence error becoming permanent.
Cord
Elastic makes a friendly first bracelet; beading wire and thread need different findings and finishing methods.
Knot
The correct knot depends on cord construction. More adhesive cannot rescue a badly seated or incompatible knot.
Wear
Water, perfume, sweat and snagging affect finishes and fibres. Jewellery should be checked and restrung when wear appears.
Core method
Design backwards from the connection
Choose one construction
For a first wearable result, use quality stretch cord and smooth medium beads rather than mixing elastic, memory wire and clasps. Check the cord maker’s knot and adhesive guidance. If using beading wire, learn the exact crimp size and tool instead of flattening a random tube with pliers.
Lay out and measure
Work on a flocked mat, tray or towel with good task lighting. Measure the wrist, place beads along the intended length and include the space consumed by bead diameter. Photograph the pattern before stringing and keep each type in a labelled container.
String without damaging the material
Cut a manageable length with clean tools, use a bead stopper or temporary clip and pass each bead gently. Do not force a rough hole over elastic. Check the strand for twists, sharp edges and repeated colour errors while correction is still easy.
Finish, cure and test
Seat the recommended knot slowly, maintaining even tension but not stretching the bracelet tight. Apply only the compatible amount of adhesive if required, allow full cure, trim with the correct cutter and tuck the join away. Roll the bracelet over the hand rather than pulling one point hard, then inspect after the first wear.
Useful products
Products with a clear job in the setup
The mixed bead kit gives enough shapes and colours to test simple layouts, but its very large selection needs sorting before use. PAXCOO’s three-plier set is a sensible bridge to clasps and wire work, while Beadalon Artistic Wire is an upgrade material for wrapped links rather than a substitute for elastic in the first bracelet.
BTONGE 8,960-Piece Bead Jewellery Making Kit
It lets a beginner discover preferred bead sizes and styles before buying full tubes of one material.
PAXCOO Three-Piece Jewellery Pliers Set
The three distinct jaw shapes teach the core jobs without buying a large case of duplicate tools.
Beadalon Artistic Wire Bare Copper, 20 Gauge, 15 Yards
Twenty gauge is visible and substantial enough for learning neat loops and wraps with basic pliers.
First project
Make a three-colour stretch bracelet
One repeated unit exposes sizing and finishing errors without the complexity of clasps or tiny woven beadwork.
- 01
Sort the beads
Choose one size family, reject sharp holes and put the rest away from the work tray.
- 02
Measure the wrist
Record a comfortable measurement and lay beads to that length before cutting cord.
- 03
Build one repeat
Arrange a short three-colour sequence and photograph it as the reference.
- 04
String with a stop
Secure one end so the project cannot empty if tension is released.
- 05
Test before knotting
Curve the strand around the wrist and adjust for bead size and comfort.
- 06
Finish by the cord instructions
Tie, secure, cure and trim exactly as the chosen cord maker specifies.
What can wait
What can wait until the first result
A clear first connection is more valuable than thousands of unlabelled findings whose metal, size and purpose are unknown.
- 01
Tiny seed-bead weaving
It adds needle, thread path, tension and pattern reading before basic sizing is understood.
- 02
Large mixed finding boxes
Unknown alloys and mismatched crimps or clasps create more troubleshooting than value.
- 03
Precious gemstones
Practise measuring and secure finishing on inexpensive, consistent beads first.
- 04
A powered bead reamer
Reject rough beginner beads rather than creating glass or stone dust without proper controls.
- 05
Selling jewellery
Material disclosure, product safety, durability, sizing and returns require records beyond a successful personal bracelet.
Upgrade path
Upgrade the repeated limitation
Upgrade when the construction—not the colour choice—limits the design you want to wear.
Stretch bracelet
About £20–£55Medium beads + suitable elastic
Learn sequence, sizing and a clean knot.Clasped strand
About £35–£90Beading wire, matched crimps and clasp
Create adjustable, repairable closures.Linked jewellery
About £50–£140Pliers, copper wire and selected findings
Make consistent loops and components.Bead weaving
About £70–£250+Seed beads, needles, thread and task lighting
Build structured patterns with controlled tension.Safety & care
Contain small parts and identify the materials touching skin
Jewellery lives against the body and fails under movement. Sharp ends, unknown metal content and loose beads deserve the same attention as appearance.
- Keep beads, needles, wire and findings away from babies, children and pets; use a raised-edge tray and sweep the floor after each session.
- Wear eye protection when cutting wire, hold the waste end and collect every offcut immediately.
- Disclose or avoid unknown alloys for wearers with nickel or other metal sensitivities; coatings can wear and expose base metal.
- Do not place jewellery in the mouth and avoid designs that could snag, tighten dangerously or be mistaken for food.
- Inspect cord, clasps, loops and sharp edges regularly; retire or restring a piece at the first sign of abrasion or opening.
Outside help
When outside help earns its place
A stretch bracelet can be learned from reliable cord instructions. A practical class earns its place for crimping, wrapped loops or bead weaving because a tutor can inspect tension and connections before the piece fails.
Choose lessons that specify bead size, thread or wire and the exact finish.
Ask whether tools, findings, materials and take-home work are included.
Representative UK learning options checked 18 August 2026; local prices, access, materials and tutor support vary.
Sources
Where the guidance came from
Guilds and manufacturers define materials and construction. Specialist jewellers and active bead communities add the repeated evidence about sizing, thread paths, finishes and failure points.
-
01
The Beadworkers Guild
UK guild education, groups and beadwork context.
Open source -
02
Beadalon · Learning Center
Manufacturer guidance on wire, findings, tools and techniques.
Open source -
03
Ganoksin · Jewelry Making
Long-running professional jewellery reference and technique archive.
Open source -
04
Fire Mountain Gems · Jewellery-making instructions
Structured tutorials covering stringing and finishing systems.
Open source -
05
Reddit · r/Beading
Community experience of beginner materials, tension and troubleshooting.
Open source -
06
Amazon UK · 8,960-Piece Bead Jewellery Making Kit
Exact product catalogue page or ISBN used for the recommendation; current price, seller, specification and availability should be confirmed.
Open source -
07
Amazon UK · Three-Piece Jewellery Pliers Set
Exact product catalogue page or ISBN used for the recommendation; current price, seller, specification and availability should be confirmed.
Open source -
08
Amazon UK · Artistic Wire Bare Copper, 20 Gauge, 15 Yards
Exact product catalogue page or ISBN used for the recommendation; current price, seller, specification and availability should be confirmed.
Open source
Guide information and links checked 18 August 2026.