Beginner’s guide · Make & build
Build it straight
then add the history.
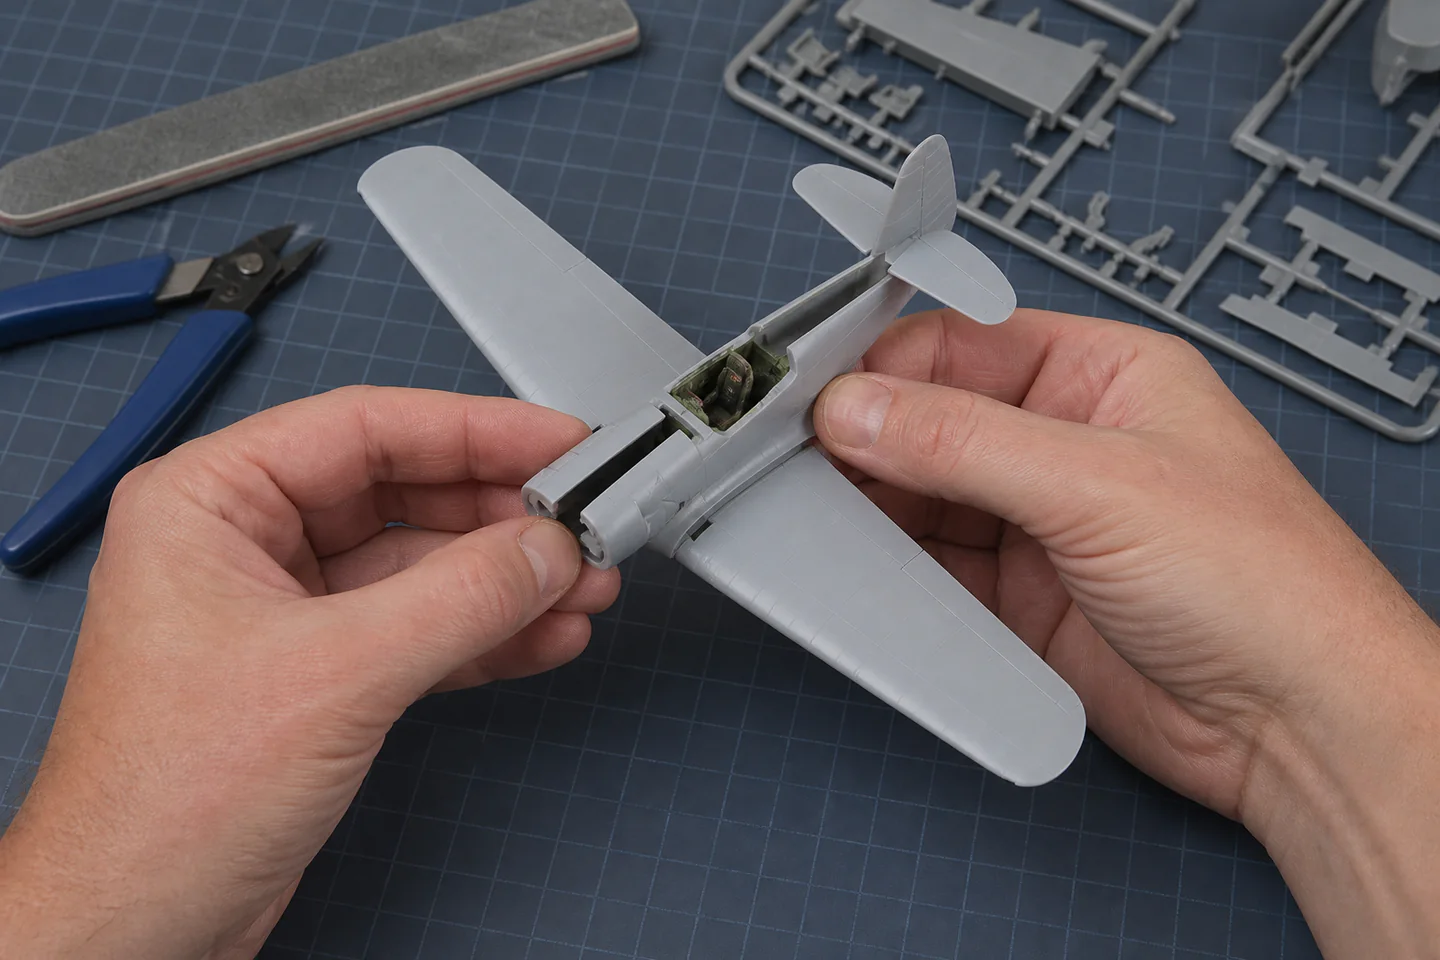
A small Airfix-style starter aircraft kit teaches sprue cleanup, wing alignment, canopy care, painting and decals. Choose a complete set and finish one clean model before adding aftermarket detail.
Quick answer
Use a complete 1:72 starter set
Choose a recent small aircraft starter set with paint, brush and cement included, then add proper cutters. Dry-fit fuselage and wing joints repeatedly and use the instructions to plan cockpit and canopy timing.
- 01
Check the instruction sequence and paint callouts before removing cockpit parts. Note the material, setting or measurement used so the result can be repeated or changed for a reason.
- 02
Cut sprue gates away from the part and trim the remaining nub under control. Note the material, setting or measurement used so the result can be repeated or changed for a reason.
- 03
Use alignment lines, a flat surface and repeated dry fitting before cementing wings or tailplanes. Note the material, setting or measurement used so the result can be repeated or changed for a reason.
- 04
Protect clear canopy parts from solvent cement, fingerprints and coarse sanding. Note the material, setting or measurement used so the result can be repeated or changed for a reason.
- 05
Apply decals to a smooth cured surface and leave aerials or landing gear until handling is nearly finished. Note the material, setting or measurement used so the result can be repeated or changed for a reason.
What to expect
A small aircraft concentrates several modelling skills
The part count may be low, but long seams, paired wings, fine undercarriage and transparent canopies expose rushed work.
Fuselage seams
Two halves need clean mating surfaces and staged pressure. Excess cement can soften detail along the joint. For model aircraft building, check this deliberately while the work is still easy to alter; correcting it after the next stage usually costs more time or materials.
Wing geometry
Dihedral and tailplane alignment affect the whole silhouette. Eyeballing from one angle is not enough. For model aircraft building, check this deliberately while the work is still easy to alter; correcting it after the next stage usually costs more time or materials.
Canopy clarity
Ordinary solvent glue can fog transparent plastic. Masking and compatible adhesive preserve the cockpit view. For model aircraft building, check this deliberately while the work is still easy to alter; correcting it after the next stage usually costs more time or materials.
Decals
Thin markings fold and silver over rough paint. Water, surface gloss and gentle handling matter more than speed. For model aircraft building, check this deliberately while the work is still easy to alter; correcting it after the next stage usually costs more time or materials.
Core method
Build around alignment checkpoints
Prepare subassemblies
Identify cockpit, fuselage, wings and landing gear, then paint only areas that become inaccessible after joining. For model aircraft building, check this deliberately while the work is still easy to alter; correcting it after the next stage usually costs more time or materials.
Close the fuselage carefully
Dry-fit around the cockpit, cement short sections and hold alignment without flooding the seam. For model aircraft building, check this deliberately while the work is still easy to alter; correcting it after the next stage usually costs more time or materials.
Set wing and tail geometry
Fit on a flat jig or improvised support, compare both sides from front and above and adjust before curing. For model aircraft building, check this deliberately while the work is still easy to alter; correcting it after the next stage usually costs more time or materials.
Finish from strong to fragile
Resolve seams, paint and decal while the model is robust, then add gear, propeller, canopy and aerials late. For model aircraft building, check this deliberately while the work is still easy to alter; correcting it after the next stage usually costs more time or materials.
Useful products
Products with a clear job in the setup
The first purchase should be a genuine complete starter set. Basic tools and controlled cement remain useful for later aircraft and other plastic kits.
Airfix Supermarine Spitfire Mk.Vc Starter Set
The size and included consumables keep attention on assembly and alignment.
Airfix AG9150 Four-Piece Model Tools Kit
Clean removal protects small aircraft parts better than twisting them loose.
Revell Contacta Professional Needle Applicator Model Cement
The metal needle can deliver tiny amounts along a seam.
First project
Complete one clean gear-down aircraft
A standard unweathered finish makes seam and alignment progress easy to see and is already a complete display model.
- 01
Read and sort
Study the sequence, identify alternate parts and keep each sprue protected until the relevant stage. For model aircraft building, check this deliberately while the work is still easy to alter; correcting it after the next stage usually costs more time or materials.
- 02
Build the cockpit
Use a limited palette, remove paint from glue points and test the cockpit between fuselage halves. For model aircraft building, check this deliberately while the work is still easy to alter; correcting it after the next stage usually costs more time or materials.
- 03
Join and align
Close the fuselage in stages, fit wings and tailplanes and inspect symmetry from several viewpoints. For model aircraft building, check this deliberately while the work is still easy to alter; correcting it after the next stage usually costs more time or materials.
- 04
Paint and mark
Prepare seams, apply thin paint, allow it to cure and place decals with the kit diagrams close by. For model aircraft building, check this deliberately while the work is still easy to alter; correcting it after the next stage usually costs more time or materials.
- 05
Add fragile parts
Attach landing gear, propeller and canopy only when heavy handling is finished, then display the model out of direct heat. For model aircraft building, check this deliberately while the work is still easy to alter; correcting it after the next stage usually costs more time or materials.
What can wait
What can wait until the first result
Aftermarket cockpits, airbrush camouflage and heavy weathering multiply work before the basic airframe is straight.
- 01
Large bomber kit
More fuselage seam, repeated engines and broad wings make storage and alignment harder. For model aircraft building, check this deliberately while the work is still easy to alter; correcting it after the next stage usually costs more time or materials.
- 02
Resin or photo-etch detail
Special adhesives, dust and delicate parts distract from learning the plastic kit. For model aircraft building, check this deliberately while the work is still easy to alter; correcting it after the next stage usually costs more time or materials.
- 03
Complex airbrush camouflage
Brush or carefully chosen spray finishes can complete a first model without a compressor and extraction setup. For model aircraft building, check this deliberately while the work is still easy to alter; correcting it after the next stage usually costs more time or materials.
Upgrade path
Upgrade the repeated limitation
Upgrade after inspecting the finished aircraft under good light and naming the most repeated weakness.
Try it
£25–£60Complete starter set and cutters
Sequence, alignment, brush paint and decals are learned.Improve seams
£15–£50 extraFiles, sanding grades, filler and task light
Fuselage joins and leading edges become cleaner.Improve paint
£100–£300+Airbrush, compressor, extraction and compatible paint system
Fine camouflage and consistent coats become repeatable.Add historical detail
VariableResearch, aftermarket parts and advanced techniques
A specific airframe can be represented beyond the kit’s default detail.Safety & care
Control blades, solvent and paint mist
The same safe modelling bench supports every later aircraft project.
- Cut on a mat away from fingers and collect trimmed wire, blade fragments and tiny parts. Follow the current instructions supplied with the exact material or tool.
- Ventilate solvent cement and paints according to the exact safety data and keep them away from ignition. Follow the current instructions supplied with the exact material or tool.
- Use suitable extraction and respiratory protection for spraying or sanding hazardous materials. Follow the current instructions supplied with the exact material or tool.
- Keep small parts, chemicals and finished models away from young children and pets. Follow the current instructions supplied with the exact material or tool.
Outside help
When outside help earns its place
A kit-specific video and instructions are enough for a starter aircraft. Club help is useful for seam repair, airbrushing and historically accurate finishes.
Use one complete lesson that includes preparation, the working method, troubleshooting and finishing. Avoid combining measurements from several creators on the first attempt.
Ask whether materials, safe tool use, individual correction and a finished take-home result are included before booking.
Representative UK learning options checked 29 August 2026; local prices, access, materials and tutor support vary.
Sources
Where the guidance came from
The method is grounded in specialist and manufacturer guidance, then checked against recurring beginner problems and the exact products linked here.
-
01
Airfix · Tutorials
Manufacturer tutorials for kit assembly and finishing.
Open source -
02
IPMS UK
UK plastic-modelling organisation and local club context.
Open source -
03
Revell · Model building tips
Manufacturer technique guidance for plastic models.
Open source -
04
RAF Museum · Research
Historical aircraft reference for later accurate builds.
Open source -
05
HSE · Solvents
UK guidance relevant to cement and paint vapour.
Open source -
06
Amazon UK · Supermarine Spitfire Mk.Vc Starter Set
Exact product catalogue page or ISBN used for the recommendation; current price, seller, specification and availability should be confirmed.
Open source -
07
Amazon UK · AG9150 Four-Piece Model Tools Kit
Exact product catalogue page or ISBN used for the recommendation; current price, seller, specification and availability should be confirmed.
Open source -
08
Amazon UK · Contacta Professional Needle Applicator Model Cement
Exact product catalogue page or ISBN used for the recommendation; current price, seller, specification and availability should be confirmed.
Open source
Guide information and links checked 29 August 2026.