Beginner’s guide · Grow & care
Build water and land,
add animals much later.
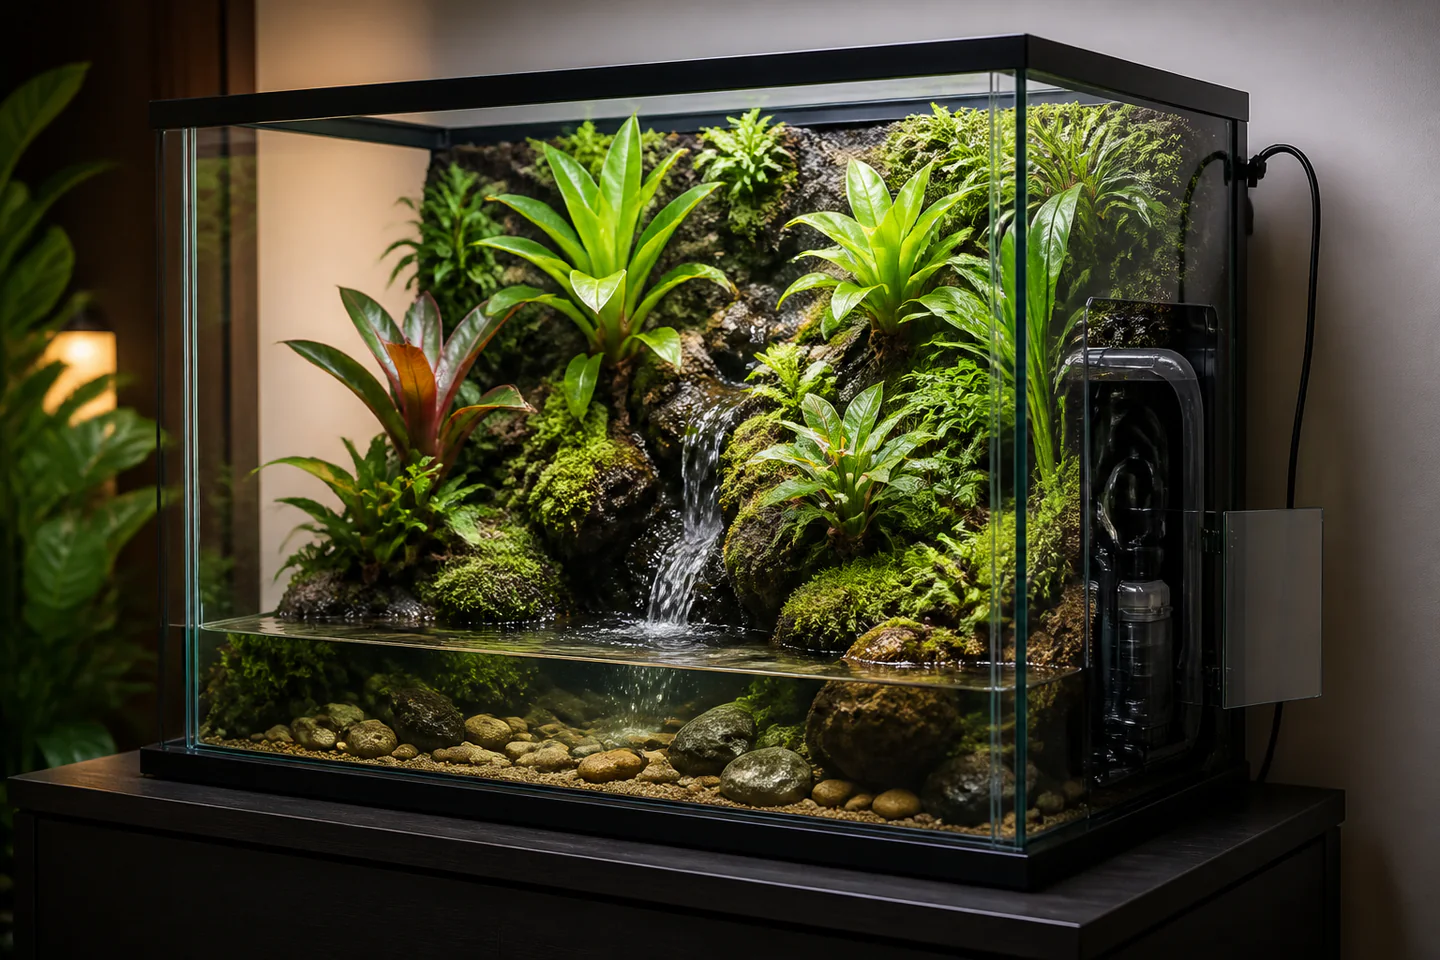
Begin with a planted, animal-free paludarium. Leak testing, accessible pumps and a stable water cycle matter before livestock or an elaborate waterfall.
Quick answer
Build and stabilise a planted paludarium before considering livestock
Choose a purpose-suitable glass enclosure whose manufacturer permits the intended water depth and place it on a level rated stand. Leak-test it empty of hardscape, then sketch the water line, drainage layer and a removable route to the pump. Build stable land above a barrier so substrate cannot fall into the water, fill with conditioned water and run circulation for several days. Add a small number of humidity-tolerant plants, monitor temperature, water and mould, and maintain the animal-free system for weeks before even researching a species.
- 01
Not every terrarium is designed to hold water to every depth. Follow the manufacturer’s paludarium limit and never assume silicone seams are aquarium-rated.
- 02
The pump will need cleaning or replacement. If rock and foam permanently trap it, the design has failed before the plants grow.
- 03
Keep soil out of the water with a structural drainage layer and barrier; decorative gravel alone does not prevent nutrient and sediment movement.
- 04
Electric equipment needs drip loops, dry connections and RCD protection appropriate to the installation. Waterfalls do not justify unsafe cables.
- 05
Livestock are a separate species-specific project involving enclosure dimensions, water cycle, temperature, humidity, escape security, welfare and veterinary access.
What to expect
The display is a maintenance route disguised as a landscape
Every hidden filter, pipe and drainage pocket eventually collects debris. A convincing miniature ecosystem remains successful only when hands can reach the parts that fail.
Tank
Front-opening terrariums have a limited lower water section; aquariums hold water well but provide different land access and ventilation.
Land
Unsupported foam, loose rock and saturated soil can slump. Build broad stable loads and protect the glass.
Water
Clear water is not proof of a mature nitrogen cycle. Test values and observe trends before adding life.
Pump
Flow drops as foam and intakes collect material. Design a removable cover rather than sealing equipment into scenery.
Plants
Roots may want humidity without waterlogging. Match each plant to height, airflow, light and whether its base stays wet.
Condensation
Some is normal, but permanently opaque glass can signal poor ventilation, excessive heat or inaccessible planting.
Core method
Make every wet component testable and removable
Choose enclosure and stand by load
Calculate water, glass, rock and substrate weight and use a level stand rated with margin. Confirm manufacturer water-depth guidance and inspect seals. Perform a documented leak test in a safe location before installing any background, and never move a filled enclosure.
Map drainage and access
Draw a cross-section showing waterline, false bottom, barrier, overflow path, pump intake, cable exit and removable service panel. Use inert aquarium-safe materials whose cure is complete. Stabilise rocks independently rather than relying on loose soil or expanding foam alone.
Run the wet system empty
Add conditioned water, prime the correct low-voltage or aquarium-rated pump and form drip loops. Run for several days while checking leaks, splashes, noise, heat and how easily the intake can be cleaned. Adjust the waterfall so it returns to the basin rather than wicking into substrate or onto furniture.
Plant and stabilise
Add a small plant palette after researching mature size and root conditions. Quarantine plants, remove unsuitable soil and keep crowns out of standing water where required. Light on a timer, trim gradually and log temperature, humidity, water tests and maintenance for several weeks.
Useful products
Products with a clear job in the setup
The Exo Terra 45 × 45 × 60 cm terrarium is a common planted-paludarium shell, but its permitted lower water depth and exact current model must be verified. Long terrarium tools improve access behind hardscape. The API liquid test kit becomes essential only if the water section will mature towards aquatic livestock; for a purely planted display it is an informative upgrade, not permission to add animals.
Exo Terra Glass Terrarium, 45 × 45 × 60 cm
The dimensions support a clear vertical land-and-water composition and the format is widely documented.
Esschert Design Terrarium Tools, Set of 2
Long handles reduce repeated arm contact with wet glass and delicate hardscape.
API Freshwater Master Test Kit
Liquid tests and written results show whether apparently clear water is chemically unstable.
First project
Run a planted paludarium for eight animal-free weeks
Two months exposes pump access, wicking, plant mismatch and water instability before welfare depends on the design.
- 01
Leak-test the bare enclosure
Follow the manufacturer’s allowed depth on a level supported stand.
- 02
Draw every hidden layer
Mark drainage, barrier, pump, cable and the removable service route.
- 03
Build stable hardscape
Protect glass and ensure no rock depends on loose soil for support.
- 04
Run water before planting
Check splash, wicking, flow, noise, heat and pump removal.
- 05
Plant a small palette
Match roots, height, humidity and light and quarantine material.
- 06
Log eight weeks
Record maintenance, water, temperature and plant response without livestock.
What can wait
What can wait until the first result
Animals, automatic mist and a complex waterfall multiply maintenance before the physical enclosure has proved itself.
- 01
Frogs, crabs or fish
Each species needs a separate welfare-led enclosure plan and mature conditions.
- 02
A sealed-in pump
Every pump clogs or fails; scenery must open without destroying the habitat.
- 03
Large water depth
The front sill and seams may not be rated for it; use the manufacturer’s limit.
- 04
Automatic fogging
It can hide poor plant matching and create constant saturation or electrical complications.
- 05
Expensive rare plants
Use robust species while moisture, airflow and light are still being adjusted.
Upgrade path
Upgrade the repeated limitation
Upgrade only after maintenance logs identify a stable system and a specific repeated limitation.
Planted test
About £120–£450Tank, accessible pump and robust plants
Prove drainage, flow and maintenance.Environmental control
About £180–£600Better light, fans and monitoring
Stabilise plant conditions.Species research phase
About £250–£900Welfare plan, cycle and specialist equipment
Prepare for one suitable species.Mature display
About £500–£2,000+Redundant systems and specialist support
Maintain long-term plant and animal welfare.Safety & care
Water, glass, electricity and animals multiply consequences
Treat the planted build as the complete first hobby. Livestock should arrive only after specialist research proves the enclosure—not the owner’s enthusiasm—meets every need.
- Use an enclosure and stand rated for the full water and hardscape load, leak-test first and never move a filled system.
- Use aquarium- or manufacturer-approved electrical equipment, dry connections, drip loops and suitable RCD protection and unplug before wet maintenance.
- Stabilise rock independently, protect glass from point loads and use only fully cured aquarium-safe adhesives and foams.
- Quarantine plants, wash hands, treat water-test reagents as chemicals and keep equipment away from children and pets.
- Research any animal as a separate welfare project covering legal source, mature enclosure size, water cycle, temperature, humidity, diet, compatibility and veterinary care.
Outside help
When outside help earns its place
Manufacturer manuals and an animal-free build are enough to begin. Specialist help becomes worthwhile before drilling glass, installing complex backgrounds or selecting any living animal.
Use the exact enclosure, pump and light documentation.
Ask whether drainage, water testing, electrics and animal welfare are covered.
Representative UK learning options checked 18 August 2026; local prices, access, materials and tutor support vary.
Sources
Where the guidance came from
Enclosure manufacturers define structural and electrical limits. Aquatic and reptile specialists add water-cycle, drainage, planting and welfare context, while experienced keepers expose recurring access failures.
-
01
Exo Terra · Paludariums
Manufacturer paludarium structure and habitat context.
Open source -
02
Exo Terra · Pro Paludarium manual
Installation, water and equipment guidance.
Open source -
03
UK Reptile Centre · Paludarium setup
Specialist UK build and maintenance overview.
Open source -
04
API · Freshwater Master Test Kit
Official parameters, instructions and reagent documents.
Open source -
05
Reddit · r/paludarium
Community evidence on pumps, drainage, tanks, plants and maintenance access.
Open source -
06
Amazon UK · Glass Terrarium, 45 × 45 × 60 cm
Exact product catalogue page or ISBN used for the recommendation; current price, seller, specification and availability should be confirmed.
Open source -
07
Amazon UK · Terrarium Tools, Set of 2
Exact product catalogue page or ISBN used for the recommendation; current price, seller, specification and availability should be confirmed.
Open source -
08
Amazon UK · Freshwater Master Test Kit
Exact product catalogue page or ISBN used for the recommendation; current price, seller, specification and availability should be confirmed.
Open source
Guide information and links checked 18 August 2026.