Beginner’s guide · Make & create
Try one complete kit.
Learn what makes it burn.
Use a documented all-in-one kit for the first make, then move to a matched container-candle recipe when you are ready to weigh, monitor, cure and burn-test every variable.
Quick answer
Choose the route before buying
For the fastest controlled first make, use one complete branded kit and follow its instructions without adding unrelated wax, wicks or fragrance. For the fuller hobby, move next to a matched container-candle recipe from a specialist supplier and record every weight, temperature and burn test.
- 01
A complete kit removes most compatibility decisions while you learn heating, wick placement, moulding and safe burning.
- 02
The researched House of Crafts kit makes moulded candles. It does not teach you to choose a container wick or prove that a random jar is candle-safe.
- 03
Use gram scales and a probe thermometer when a recipe asks you to weigh wax or fragrance and work at specified temperatures.
- 04
Cool and cure a poured candle before lighting it, then burn-test it. A smooth top and strong cold scent do not prove that it burns safely.
- 05
Keep dried flowers, herbs, crystals, glitter and other loose decorations away from the melt pool and flame.
What to expect
The pouring is the short part
Candle making looks like a quick melting craft, but reliable container candles come from measuring, waiting, recording and repeated burns. The attractive pour is only one stage.
Prepare
Protect the surface, secure the wick, warm or condition materials only as the supplier instructs, and clear a safe landing area for hot equipment.
Measure
Weigh wax and fragrance in grams. Volume spoons and an unmarked splash of fragrance make the result difficult to repeat.
Heat
Melt with controlled equipment and monitor the wax with a thermometer. There is no single correct melting, mixing or pouring temperature for every wax.
Wait
A poured candle needs undisturbed cooling and usually at least 48 hours of cure before the first useful burn test. Some wax and fragrance combinations improve over a longer cure.
Test
Observe flame height, soot, mushrooming, vessel temperature, wick stability and how the melt pool develops across repeated burns.
Clean
Scrape or wipe cooled wax into household waste as appropriate for the material. Do not pour wax down the sink or wash molten wax into drains.
Two routes
Choose a complete kit or a matched container system
Route 1: one complete moulded-candle kit
A documented kit is the shortest route to handling wax, placing a wick and finishing a candle without building a formula from separate marketplace components. The House of Crafts kit below includes wax pellets, three mould types, wicks, wick rods, dyes, fragrance, a pipette, mould sealer and instructions. Use only the supplied combinations on the first make.
This route teaches heating, mould preparation and careful wick placement. It does not teach container-wick selection, cure behaviour in soy wax or safe use of an improvised jar. Treat the instructions as the recipe and supervise every burn on a heat-resistant holder.
Route 2: a matched container-candle system
A useful specialist kit or recipe supplies a named wax, a specified wick, a candle-suitable vessel and a documented fragrance load. You still need gram scales, a thermometer and a suitable heating and pouring method. The benefit is that the starting combination has been chosen for you, so the first batch teaches process rather than forcing you to solve four compatibility problems at once.
Follow the supplier’s current recipe exactly for the first batch. Record wax and fragrance weights, temperatures, room conditions, pour time, cure time and burn-test observations. Repeat the same system before changing scent, wick or vessel.
Your own formulations come later
When you choose your own vessel, its internal diameter and shape affect the wick requirement. Wax type, dye and fragrance can also alter the burn. A wick guide gives a starting point, not a guarantee. Make small test batches, change one variable at a time and keep complete notes.
Wax, wick & vessel
Treat the candle as one system
Vessel
Use a container sold or documented as suitable for candles. Ordinary drinking glasses, thin decorative jars and reused containers may not be designed for repeated local heating. A suitable candle vessel still needs testing with the exact wick and fill level.
Wax
Container wax is formulated to remain in a vessel. Pillar and mould waxes are designed for different jobs. Supplier temperatures and cure guidance vary, so copy values from the technical information for the exact wax rather than from a generic social-media recipe.
Wick
The wick controls how fuel reaches the flame. Too little heat can leave a narrow tunnel or drowning wick. Too much can create an oversized flame, soot, rapid fuel use or excessive vessel heat. Fragrance and dye can move a previously workable wick out of balance.
Fragrance
Use fragrance supplied for candle making and keep within the supplier's stated limit. More fragrance does not automatically produce a stronger candle; excess oil can affect the wick and burn. Keep the safety data and classification information for the exact fragrance, especially if candles may be sold.
Testing
A pleasant first burn is not the full test. Let the candle cool, trim the wick as instructed and repeat until the candle reaches the end-of-life region. Watch what changes as the jar empties and heat is retained differently.
Starter products
One first kit and two tools that remain useful
The complete kit is the first route. The scale and thermometer are reusable tools for a later matched container recipe; they are not extra ingredients for the kit, and you do not need to buy them until the instructions or next project require measured weights and temperatures.
House of Crafts Creative Candle Making Kit
It keeps wax, moulds, wicks, colour, fragrance and instructions in one documented kit, which removes avoidable compatibility guesses.
Salter 1036 Digital Kitchen Scale
The tare function makes it practical to weigh wax and fragrance in grams when a matched recipe requires it.
ThermoPro TP02S Digital Probe Thermometer
The long probe can follow the exact melt, mixing and pour temperatures supplied for a later container recipe.
First kit candle
Make the first kit candle without improvising
Use one mould and the kit instructions for the first attempt. The goal is a centred wick, a clean release and a supervised test burn—not a personalised formula.
- 01
Read the whole method
Identify the heating method, supplied wax portion, mould sealer, wick rod and cooling time before anything becomes hot.
- 02
Prepare one mould
Fit the wick and seal the opening exactly as instructed. A loose seal can leak hot wax and a wandering wick changes the burn.
- 03
Melt only the supplied wax
Use the stated indirect-heating method, keep water away from the wax and never leave it unattended. Do not add household perfume, essential oil or spare crayon.
- 04
Use the supplied additions sparingly
Follow the kit quantity for dye and fragrance rather than assuming more gives a stronger or better candle.
- 05
Pour and cool undisturbed
Put the mould on a protected level surface, pour steadily and leave it until the instructions say it is ready to remove.
- 06
Inspect before lighting
Check wick position, cracks and stability. Trim as directed, use a heat-resistant holder and keep the first burn within sight.
First poured candle
Pour a first container candle
Allow roughly 60 to 90 minutes of active work, then the cooling and cure time specified by the wax supplier. This method assumes a matched container kit or documented recipe, not a mixture of unrelated materials.
- 01
Set up safely
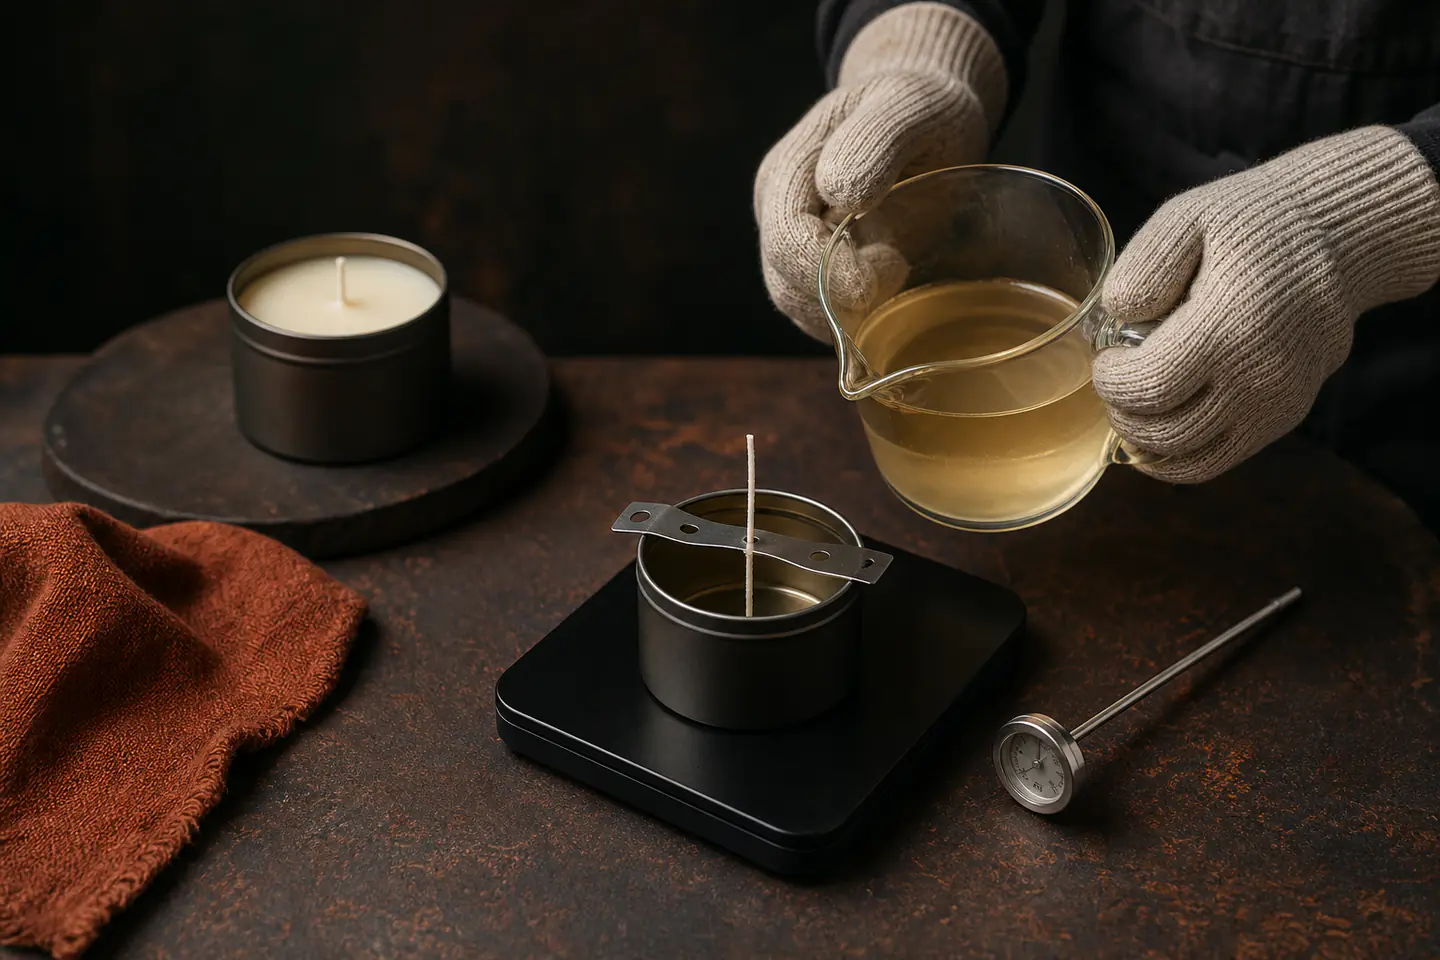
Cover the worktop, clear children and pets from the area, put the vessel on a stable scale or protected surface and prepare dry heat-resistant gloves and a safe place for the hot jug.
- 02
Secure the matched wick
Fix the specified wick tab to the clean candle vessel and hold it vertical with the supplied centring method. A leaning or loose wick changes the burn.
- 03
Weigh the documented recipe
Tare the container and weigh wax and fragrance separately in grams using the exact quantities or percentage supplied for that wax, wick and vessel combination.
- 04
Melt and monitor
Use the heating method allowed by the supplier. Stir slowly, monitor with a probe thermometer and stop heating at the recipe value. Never leave heating wax unattended.
- 05
Add fragrance correctly
Let the wax reach the supplier’s specified mixing temperature, add the measured candle fragrance and stir for the stated time without whipping in air.
- 06
Pour and leave it alone
Pour steadily into the prepared vessel, keep the wick centred and leave the candle on a level surface at a stable room temperature. Moving or chilling it can create cosmetic faults.
- 07
Cure before judging
Use the full cure time specified for the wax. Trim the wick only when the candle is fully set.
- 08
Burn-test and record
Burn on a heat-resistant surface away from draughts and flammables. Record flame, soot, melt-pool growth, wick behaviour and vessel heat, then repeat after complete cooling.
Troubleshooting
Separate cosmetic faults from burn faults
Rough top, frosting or pull-away
Plant and blended container waxes can cool with a textured top, pale crystal patterns or areas that pull slightly from the glass. These may be cosmetic. Check the supplier's room-temperature and pouring guidance before using heat to hide them. A polished top does not make an unsafe burn acceptable.
Sinkhole near the wick
Wax contracts as it cools and can leave a void around the wick. Follow the wax supplier's repair method, which may involve a controlled top-up or gentle surface remelt. Do not puncture or reheat a glass vessel aggressively.
Weak hot scent
First allow the stated cure time. Then check the exact fragrance percentage, mixing temperature and stir time. Adding more oil blindly can make the candle burn worse. A different fragrance may need a new wick test even in the same jar.
Tunnelling or a drowning wick
The wick may be too small, off-centre, obstructed or incompatible with the wax and fragrance. Burn duration also matters, but do not tell users to continue an unsafe burn just to reach the glass edge. Return to the supplier's wick starting point and test one change.
Large flame, smoke or mushrooming
Extinguish the candle if the flame is excessive, the vessel becomes alarmingly hot or visible smoke persists. Confirm the wick was trimmed, then test a smaller wick or lower fragrance load within the supplier's allowed range. Draughts and debris can also disturb the flame.
The jar becomes too hot
Stop the test and let it cool naturally. Check wick size, vessel suitability, remaining wax depth and whether the wick has moved towards the glass. Never cool a hot candle with water or place it on a cold wet surface.
Skip for now
What to skip at the beginning
These purchases and styles add variables, heat or fire risk before they add useful beginner skill.
- 01
Dried flowers, herbs and loose decorations
Material close to the wick or melt pool can become extra fuel. Keep the burning surface clear rather than copying decorative botanical candles.
- 02
Random household glass
A jar that holds food or drinks is not automatically a candle vessel. Use a documented candle container and test the finished combination.
- 03
A large fragrance collection
Learn one fragrance in one wax first. Different oils can change scent throw and wick behaviour, so ten scents create ten test programmes.
- 04
Wooden wicks, multi-wick jars and novelty moulds
They are valid later routes, but each adds sizing, spacing, release or finish problems. A single cotton wick in a straight container is easier to diagnose.
- 05
A large wax melter
A jug or small appliance is enough for trial batches. Bigger equipment saves time only when repeated batch size has become the real limit.
- 06
Selling the first attractive batch
Gifts and personal candles still deserve safe use, but selling adds formal testing, traceability, product labels, fragrance classification and records.
Upgrade path
What better equipment changes
Upgrade when a repeated limitation is clear. More wax and more scents do not make an untested system reliable.
Try the craft
About £26 when checkedOne documented moulded-candle kit and the ordinary tools named in its instructions
Produces several real candles while keeping wax, moulds, wick and instructions in one system.Learn the container process
Often £45–£90 including missing toolsMatched specialist recipe or kit, gram scales, probe thermometer and approved heating jug
Teaches weighing, temperature, fragrance mixing, pouring, curing and repeatable burn tests.Make small batches more cleanly
From roughly £20 for a dedicated jugDedicated pouring jug or small wax melter, plus an independent thermometer
Separates wax tools from food tools and speeds repeated batches. It does not choose the correct wick.Develop your own range
Often £100+ in test materialsOne vessel family, sample wax, wick sizes around the supplier recommendation, limited fragrances, labels and batch records
Builds a tested system you understand. Much of the spend becomes deliberately burned test stock.Sell candles
Variable, beyond ingredientsDocumented safety assessment, three-sample product testing, technical file, compliant labels, traceability and appropriate business insurance
Moves the activity from personal craft to product manufacture with continuing legal and record-keeping duties.Safety
Control heat, fuel and flame
Molten wax can burn skin, fragrance can change the fire behaviour of a blend, and the finished candle is an open flame. Work slowly and test the exact system you make.
- Use a stable heat-resistant surface, controlled heat and a thermometer. Keep a dry landing area ready for hot equipment and never leave heating wax unattended.
- Keep water away from hot wax and electrical melters. Do not immerse an appliance, pour cold water into a hot vessel or use water to extinguish a candle.
- Use only vessels intended or documented for candle use. Discard chipped, cracked or damaged containers and stop a test if the wick moves towards the glass or heat becomes excessive.
- Keep the melt pool clear. Dried botanicals, herbs, wood, paper, crystals and loose decorations can interfere with the wick or become extra fuel.
- Read the wax and fragrance supplier information. Stay within the stated fragrance limit and keep safety data for the exact materials.
- For burning, trim the wick to the maker's instruction, commonly about 6 mm, and place the candle upright away from draughts and anything flammable.
- Never leave a burning candle unattended. Keep making equipment and burning candles away from children and pets.
- If a flame becomes too large, smokes continuously or the vessel is alarmingly hot, extinguish it safely and stop the test. Do not move the candle while the wax is liquid.
- Allow equipment and wax to cool before cleaning. Remove solidified wax mechanically or with the supplier's method and keep wax out of household drains.
Before selling
Selling is a separate level of the hobby
A candle that looks and smells good is not ready for sale. UK guidance from Trading Standards and the British Candlemakers Federation expects makers to assess safety, test products and retain records. The cited advice pack states that three samples should be tested before a new product is released, followed by ongoing monitoring.
Unscented candles need the applicable fire-safety information. Scented candles also fall under chemical classification and labelling rules because of the fragrance mixture. Each formulation must be assessed separately, and the required wording or pictograms come from the safety data for that exact blend. Supplier identity, quantity, product identification and traceability also matter.
Keep a technical file containing recipes, supplier documents, batch records, risk assessment, burn-test reports, labels and any corrective actions. Check current guidance with your local Trading Standards service before selling, obtain appropriate product-liability insurance and repeat testing whenever a vessel, wick, wax, dye or fragrance changes.
Making for personal use is a good place to learn. It is not a shortcut around safe testing, but it lets you discover whether you enjoy the repetitive record-keeping before turning the hobby into a business.
Classes
Classes are useful for heat and feedback
A class is not required for the complete moulded kit or a well-documented container recipe. It becomes useful when you want supervised hot-wax handling, immediate feedback on technique or a realistic introduction to testing and selling requirements.
The House of Crafts kit is designed to be completed at home. Read the full method first and keep the supplied wax, moulds, wicks and additions together as one system.
Current UK examples cover weighing, scent choice and pouring one container candle. Check whether the session explains burn testing or only the making experience.
A longer class can cover waxes, wick selection, sourcing, testing and an introduction to selling requirements rather than only producing one scented jar.
Useful when home space, hot-wax handling or storage is the real barrier. Confirm which materials are supplied and whether finished candles must be collected after cooling.
Representative UK course prices and descriptions checked 27 July 2026; dates, availability, locations and inclusions change.
Sources
Sources and checks
Research checked 27 July 2026
Safety and selling duties were checked against Trading Standards, government and industry guidance. Technique and compatibility were cross-checked with specialist suppliers. Exact product identity, current UK prices and availability came from direct retailer pages, while recurring beginner advice was compared across several practitioner discussions.
-
01
British Candlemakers Federation and Cornwall Trading Standards · Advice Pack
Established applicable UK standards, candle-suitable vessel guidance, risk assessment, three-sample product testing, technical files, fire-safety labels and CLP duties for scented candles.
Open source -
02
National Candle Association · Candle safety tips
Cross-checked wick trimming, stable heat-resistant placement, draught avoidance, supervision and the warning not to use water on a burning candle.
Open source -
03
National Candle Association · Botanical candles report
Established the fire risk created when dried flowers, leaves, herbs or wood can enter the melt pool and become fuel near the flame.
Open source -
04
Pembrokeshire Trading Standards · Candles, diffusers and oil heaters
Checked that home-based sellers retain product-safety, UK REACH, GB CLP, labelling and traceability duties, with each scented formulation classified separately.
Open source -
05
Health and Safety Executive for Northern Ireland · Candles and CLP
Cross-checked that a candle is treated as a chemical mixture on a carrier and that fragrance or colour additives can trigger classification and label information.
Open source -
06
Candle Shack · Making a first candle
Supported the sequence of weighing, vessel preparation, temperature-controlled mixing, pouring, stable cooling, at least 48 hours of cure and later burn testing.
Open source -
07
Candle Shack · Hints and tips
Confirmed that melting, fragrance, pouring and cure values differ by wax and vessel recipe, supporting the instruction to use exact supplier guidance rather than one universal temperature.
Open source -
08
Candle Shack · New to candle making
Supported the matched-kit route and the recurring need to test wax, wick, vessel and fragrance as a combined system.
Open source -
09
r/candlemaking · Testing processes
One of several practitioner discussions supporting structured tests around a supplier wick recommendation and changing one variable at a time.
Open source -
10
r/candlemaking · Beginner cheat-sheet discussion
Cross-checked recurring practitioner advice that there is no universal wax, wick, fragrance and vessel formula and that testing is unavoidable.
Open source -
11
r/candlemaking · Fragrance load is important
Supported the repeated warning that a higher fragrance percentage does not automatically improve scent and can impair wick performance.
Open source -
12
r/candlemaking · UK beginner journey
Added recent UK beginner experience favouring specialist supplier materials and straightforward jars or tins over low-information marketplace components and novelty shapes.
Open source -
13
ClassBento · Candle-making classes in London
Provided a current 2026 workshop-market cross-check, with many London beginner experiences in roughly the £35 to £55 range.
Open source -
14
Clever Hands · Beginner soy-wax candle workshop
Verified a current two-hour beginner workshop example at £30 covering wax types, fragrance, pouring, wick basics and one 270 ml candle.
Open source -
15
Earl of East · Candle-making workshops
Verified a current central-London beginner workshop example at £55, focused on fragrance blending, natural soy wax and pouring a candle.
Open source -
16
Old Bexley Soap and Candle Co. · Beginners course
Verified a longer £150 course example covering waxes, wick choice, sourcing, burn testing and an introduction to candle-selling compliance.
Open source -
17
Pexels · Person pouring hot wax in jar
Licensed source photograph used for the text-free hero image, cropped and colour-graded to the required 1600 by 1000 format.
Open source -
18
House of Crafts · Creative Candle Making
Manufacturer kit range and contents cross-check for the selected moulded-candle kit.
Open source -
19
Amazon UK · House of Crafts Creative Candle Making
Exact UK-made kit page, listed contents, £26.45 observed price and current availability.
Open source -
20
Amazon UK · Salter 1036 digital kitchen scale
Exact 5 kg scale with tare function and 1 g increments, £15 observed search price and current listing.
Open source -
21
Amazon UK · ThermoPro TP02S probe thermometer
Exact probe thermometer page, £7.99 observed price, ThermoPro UK seller and in-stock status.
Open source
Guide information and links checked 27 July 2026.