Beginner’s guide · Make & build
Build the car
before perfecting the paint.
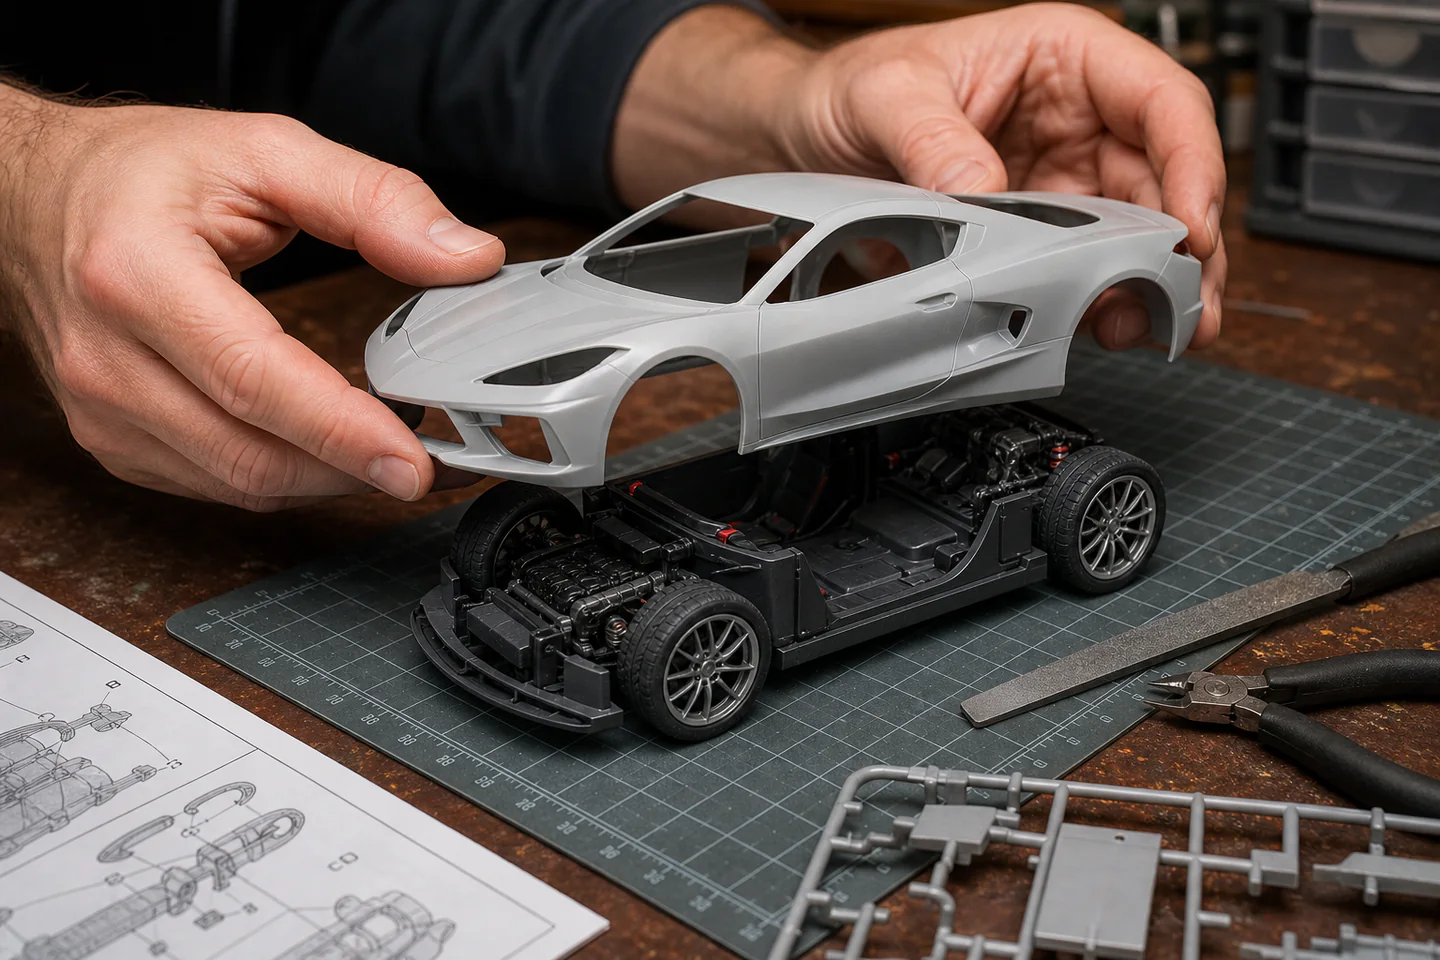
A modern 1:24 plastic car kit, basic cutters, model cement and a few brush colours make a proper first scale build. Dry-fit every assembly and accept a clean shelf model before chasing showroom gloss.
Quick answer
Choose one well-tooled 1:24 road car
Start with a mainstream injection-moulded kit with clear instructions and modest part count. Build the chassis and interior first, dry-fit the body repeatedly and use brush paints or hobby-safe spray methods within a controlled workspace.
- 01
Read the full instruction sequence before removing parts because paint and assembly order interact. Note the material, setting or measurement used so the result can be repeated or changed for a reason.
- 02
Cut parts from the sprue with nippers and trim the remaining gate; never twist delicate parts free. Note the material, setting or measurement used so the result can be repeated or changed for a reason.
- 03
Dry-fit every joint and body panel before applying model cement. Note the material, setting or measurement used so the result can be repeated or changed for a reason.
- 04
Keep clear parts bagged until needed and attach them only with an adhesive safe for glazing. Note the material, setting or measurement used so the result can be repeated or changed for a reason.
- 05
Use thin paint coats and allow full cure instead of handling a glossy body too soon. Note the material, setting or measurement used so the result can be repeated or changed for a reason.
What to expect
Cars make surface flaws and alignment easy to see
The kit supplies the shapes, but seam cleanup, wheel stance, glazing and body paint create the finished realism.
Body finish
Large smooth panels reveal scratches, dust and thick paint. Preparation and patience matter more than owning every colour. For scale-model car building, check this deliberately while the work is still easy to alter; correcting it after the next stage usually costs more time or materials.
Alignment
Four wheels must touch and sit square under the arches. Chassis parts should be checked on a flat surface before cement sets. For scale-model car building, check this deliberately while the work is still easy to alter; correcting it after the next stage usually costs more time or materials.
Interior order
Seats, dashboard, glass and body can trap one another. Following the kit sequence avoids sealing out a needed part. For scale-model car building, check this deliberately while the work is still easy to alter; correcting it after the next stage usually costs more time or materials.
Decals
Small badges and number plates need a smooth surface, water control and gentle positioning before clear finishing. For scale-model car building, check this deliberately while the work is still easy to alter; correcting it after the next stage usually costs more time or materials.
Core method
Treat every assembly as a fit problem first
Study and wash if directed
Inspect sprues and instructions, identify paint callouts and clean mould residue only by the kit or paint maker’s recommended method. For scale-model car building, check this deliberately while the work is still easy to alter; correcting it after the next stage usually costs more time or materials.
Remove parts cleanly
Cut away from the part, trim the gate with a knife or file and keep paired components in labelled trays. For scale-model car building, check this deliberately while the work is still easy to alter; correcting it after the next stage usually costs more time or materials.
Build square subassemblies
Dry-fit chassis, suspension and interior, cement small contact points and check wheel alignment on a flat surface. For scale-model car building, check this deliberately while the work is still easy to alter; correcting it after the next stage usually costs more time or materials.
Protect the body
Prepare seams under raking light, paint in controlled thin coats and install clear parts with a non-fogging adhesive. For scale-model car building, check this deliberately while the work is still easy to alter; correcting it after the next stage usually costs more time or materials.
Useful products
Products with a clear job in the setup
One respected car kit, a compact modelling tool set and purpose-made cement cover the actual build. Paint choice should follow the kit and the ventilation available.
Tamiya NISMO Nissan Skyline GT-R R34 Z-Tune, 1:24 Plastic Model Kit
Tamiya tooling is widely used and the subject has clear shapes without requiring a full race-car rigging project.
Airfix AG9150 Four-Piece Model Tools Kit
A small named set avoids buying a large low-quality bundle before knowing which tools need upgrading.
Revell Contacta Professional Needle Applicator Model Cement
The needle reaches small seams more cleanly than squeezing broad household glue.
First project
Build a clean body, interior and rolling chassis
A neatly aligned unweathered car is a complete success and a better base for future paint skills than an overloaded first build.
- 01
Map the sequence
Mark body-colour, interior-colour and unpainted glue points in the instructions before cutting anything. For scale-model car building, check this deliberately while the work is still easy to alter; correcting it after the next stage usually costs more time or materials.
- 02
Build the chassis
Clean and dry-fit major pieces, keep axles square and test all four wheel positions on a flat surface. For scale-model car building, check this deliberately while the work is still easy to alter; correcting it after the next stage usually costs more time or materials.
- 03
Complete the interior
Use a limited colour palette, let paint cure and confirm the tub fits beneath the body and glass. For scale-model car building, check this deliberately while the work is still easy to alter; correcting it after the next stage usually costs more time or materials.
- 04
Prepare and paint the shell
Remove mould seams progressively, clean the surface as directed and apply several thin coats in safe conditions. For scale-model car building, check this deliberately while the work is still easy to alter; correcting it after the next stage usually costs more time or materials.
- 05
Add glass and decals
Use a clear-part-safe adhesive, position decals on a smooth finish and leave fragile mirrors or aerials until last. For scale-model car building, check this deliberately while the work is still easy to alter; correcting it after the next stage usually costs more time or materials.
What can wait
What can wait until the first result
Airbrushes, polishing systems and aftermarket detail sets improve a sound build; they do not rescue poor fit or rushed curing.
- 01
Airbrush setup
Brush paint and suitable hobby spray can finish a first car; an airbrush adds ventilation, thinning and cleaning systems. For scale-model car building, check this deliberately while the work is still easy to alter; correcting it after the next stage usually costs more time or materials.
- 02
Photo-etched details
Thin metal adds realism but also sharp edges, special glue and difficult folds. For scale-model car building, check this deliberately while the work is still easy to alter; correcting it after the next stage usually costs more time or materials.
- 03
Mirror gloss polishing
Wet sanding and compounds can cut through paint. Establish dust-free cured coats before polishing. For scale-model car building, check this deliberately while the work is still easy to alter; correcting it after the next stage usually costs more time or materials.
Upgrade path
Upgrade the repeated limitation
Upgrade the repeated flaw visible on finished models: cuts, paint, alignment or fine detail.
Try it
£35–£801:24 kit, cutters, file, cement and basic paint
Part cleanup, assembly order and stance are learned.Improve surfaces
£25–£80 extraPrimer, sanding grades and safer spray arrangement
Body seams and colour coats become smoother.Airbrush
£100–£300+Compressor, airbrush, booth or extraction and PPE
Paint thickness, colour choice and repeatability improve.Add detail
VariableAftermarket parts, masking and polishing system
Engine bays, trim and showroom finishes become feasible.Safety & care
Ventilate paint and solvent work
Sharp tools, solvent cement and paint aerosols are the practical hazards at a model bench.
- Cut on a stable mat away from hands and store blades, drills and nippers securely. Follow the current instructions supplied with the exact material or tool.
- Use solvent cement and paints only with the ventilation and respiratory protection their labels require. Follow the current instructions supplied with the exact material or tool.
- Never spray flammable paint near ignition sources and use a booth appropriate to the exact paint chemistry. Follow the current instructions supplied with the exact material or tool.
- Keep small parts, liquids and sanding dust away from children, pets and food areas. Follow the current instructions supplied with the exact material or tool.
Outside help
When outside help earns its place
A kit-specific build log is enough for a first road car. Club help is useful for paint diagnosis, airbrushing and polishing before buying a full spray setup.
Use one complete lesson that includes preparation, the working method, troubleshooting and finishing. Avoid combining measurements from several creators on the first attempt.
Ask whether materials, safe tool use, individual correction and a finished take-home result are included before booking.
Representative UK learning options checked 29 August 2026; local prices, access, materials and tutor support vary.
Sources
Where the guidance came from
The method is grounded in specialist and manufacturer guidance, then checked against recurring beginner problems and the exact products linked here.
-
01
Tamiya · Models
Manufacturer kit range and product context.
Open source -
02
IPMS UK
UK scale-modelling community and club learning context.
Open source -
03
Airfix · Quick tips
Manufacturer modelling tutorials and tool guidance.
Open source -
04
Revell · Model building tips
Manufacturer advice for plastic-kit assembly and finishing.
Open source -
05
HSE · Solvents
UK safety guidance for solvent exposure and ventilation.
Open source -
06
Amazon UK · NISMO Nissan Skyline GT-R R34 Z-Tune, 1:24 Plastic Model Kit
Exact product catalogue page or ISBN used for the recommendation; current price, seller, specification and availability should be confirmed.
Open source -
07
Amazon UK · AG9150 Four-Piece Model Tools Kit
Exact product catalogue page or ISBN used for the recommendation; current price, seller, specification and availability should be confirmed.
Open source -
08
Amazon UK · Contacta Professional Needle Applicator Model Cement
Exact product catalogue page or ISBN used for the recommendation; current price, seller, specification and availability should be confirmed.
Open source
Guide information and links checked 29 August 2026.